> ## Documentation Index
> Fetch the complete documentation index at: https://docs.goguardian.com/llms.txt
> Use this file to discover all available pages before exploring further.
# Configure a Beacon 24/7 Escalation List
> Create and manage a Beacon 24/7 escalation list, schedule shifts with responders, switch between lists, and set up a second list for breaks or holidays.
Only Super Users and Super Counselors can configure a 24/7 escalation list.
The 24/7 escalation list is how administrators and counselors in GoGuardian Beacon set up phone-call escalation for Active Planning alerts. A list contains a Weekday Schedule and a Weekend Schedule, each made up of shifts with assigned responders. Only one list can be enabled for a deployment at a time.
When an alert triggers a 24/7 escalation, a Beacon Safety Support Specialist calls the first responder in the active shift and leaves a voicemail if there is no answer. After one minute, the Safety Support Specialist calls again, then moves to the next responder on the list. This continues until a responder is reached or every responder, including the Last Responder, has been called. If no one answers, all responders receive a voicemail and an email directing them to review the alert.
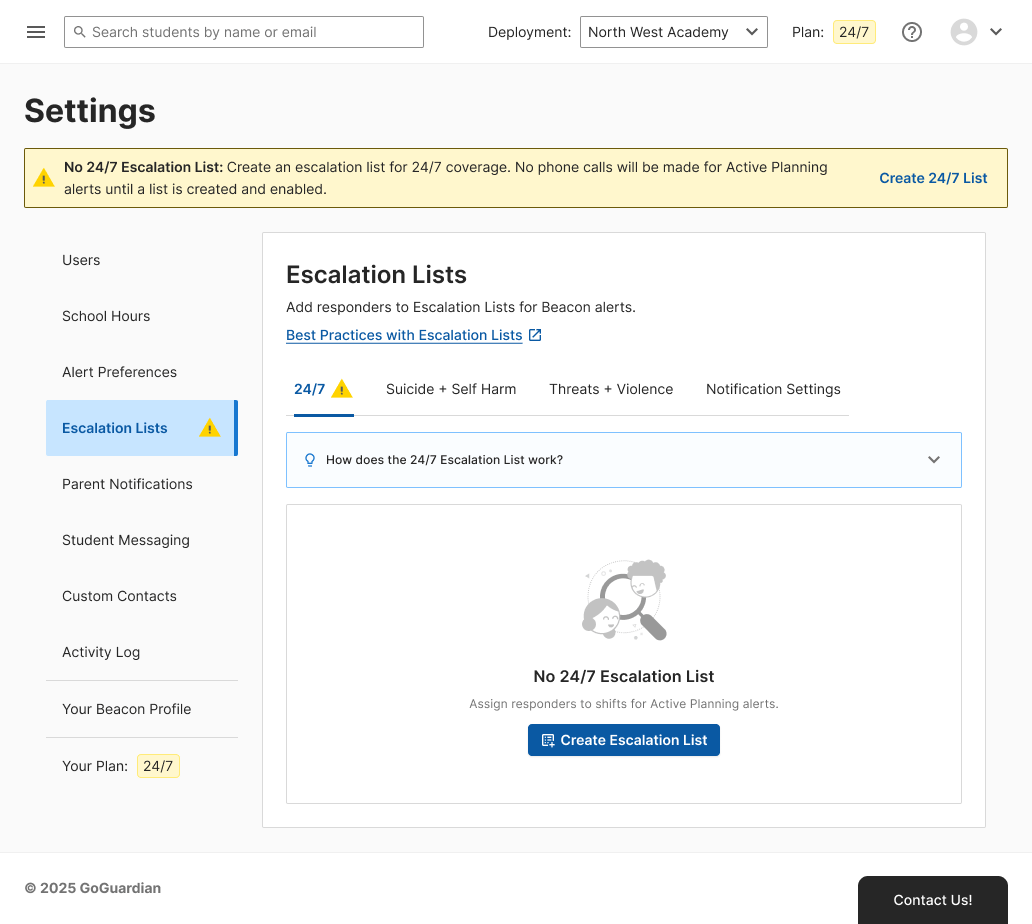 ## Create 24/7 Escalation List
1. Go to [beacon.goguardian.com](https://beacon.goguardian.com) and sign in.
2. Click **Settings** in the navigation menu.
3. Select **Escalation Lists**, then select **24/7**.
4. Click **Create Escalation List**.
5. Optionally enter a name in the **List Nickname** field. Use a recognizable name, such as `School Year` or `Summer Schedule`.
## Schedule Shifts and Assign Responders
Build coverage separately for weekday and weekend hours. Each shift needs at least one responder.
### Add Shifts
1. On the **Weekday** tab, click **Add Shift**.
2. Select the **Start Time** and **End Time** for the shift.
To schedule an overnight shift, set a start time later than the end time. For example, a start time of `8:00 PM` and an end time of `8:00 AM` covers overnight hours.
## Create 24/7 Escalation List
1. Go to [beacon.goguardian.com](https://beacon.goguardian.com) and sign in.
2. Click **Settings** in the navigation menu.
3. Select **Escalation Lists**, then select **24/7**.
4. Click **Create Escalation List**.
5. Optionally enter a name in the **List Nickname** field. Use a recognizable name, such as `School Year` or `Summer Schedule`.
## Schedule Shifts and Assign Responders
Build coverage separately for weekday and weekend hours. Each shift needs at least one responder.
### Add Shifts
1. On the **Weekday** tab, click **Add Shift**.
2. Select the **Start Time** and **End Time** for the shift.
To schedule an overnight shift, set a start time later than the end time. For example, a start time of `8:00 PM` and an end time of `8:00 AM` covers overnight hours.
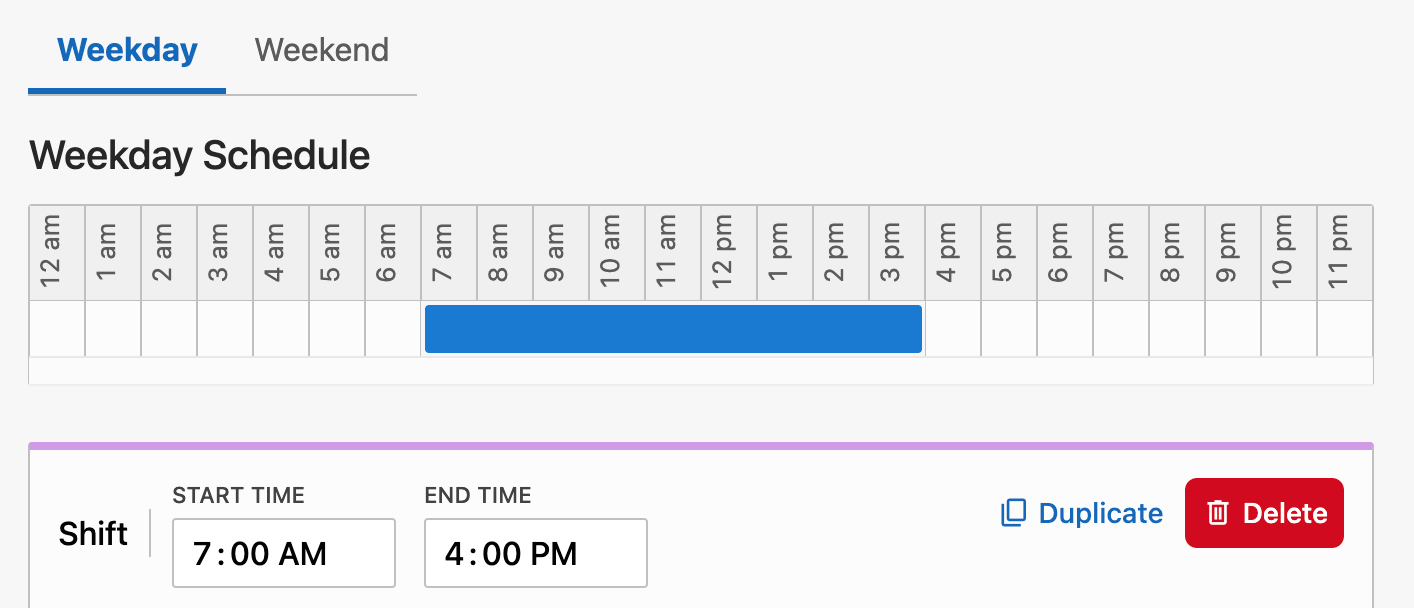 3. Click **Add Responder** and select a responder from the **Select Responder** list. The responder must be an existing user in your Beacon deployment. If the responder is not in your deployment, add them in [Product Settings](https://manage.goguardian.com/products/beacon) first.
4. Repeat step 3 to add every responder for this shift.
5. Click the priority number next to a responder to change the call order, then click the checkmark to confirm.
Responders with the same priority number are called in random order.
6. Click **Add Shift** again to add another weekday shift.
7. Verify the result: the coverage timeline above the shifts fills in for each covered time period.
3. Click **Add Responder** and select a responder from the **Select Responder** list. The responder must be an existing user in your Beacon deployment. If the responder is not in your deployment, add them in [Product Settings](https://manage.goguardian.com/products/beacon) first.
4. Repeat step 3 to add every responder for this shift.
5. Click the priority number next to a responder to change the call order, then click the checkmark to confirm.
Responders with the same priority number are called in random order.
6. Click **Add Shift** again to add another weekday shift.
7. Verify the result: the coverage timeline above the shifts fills in for each covered time period.
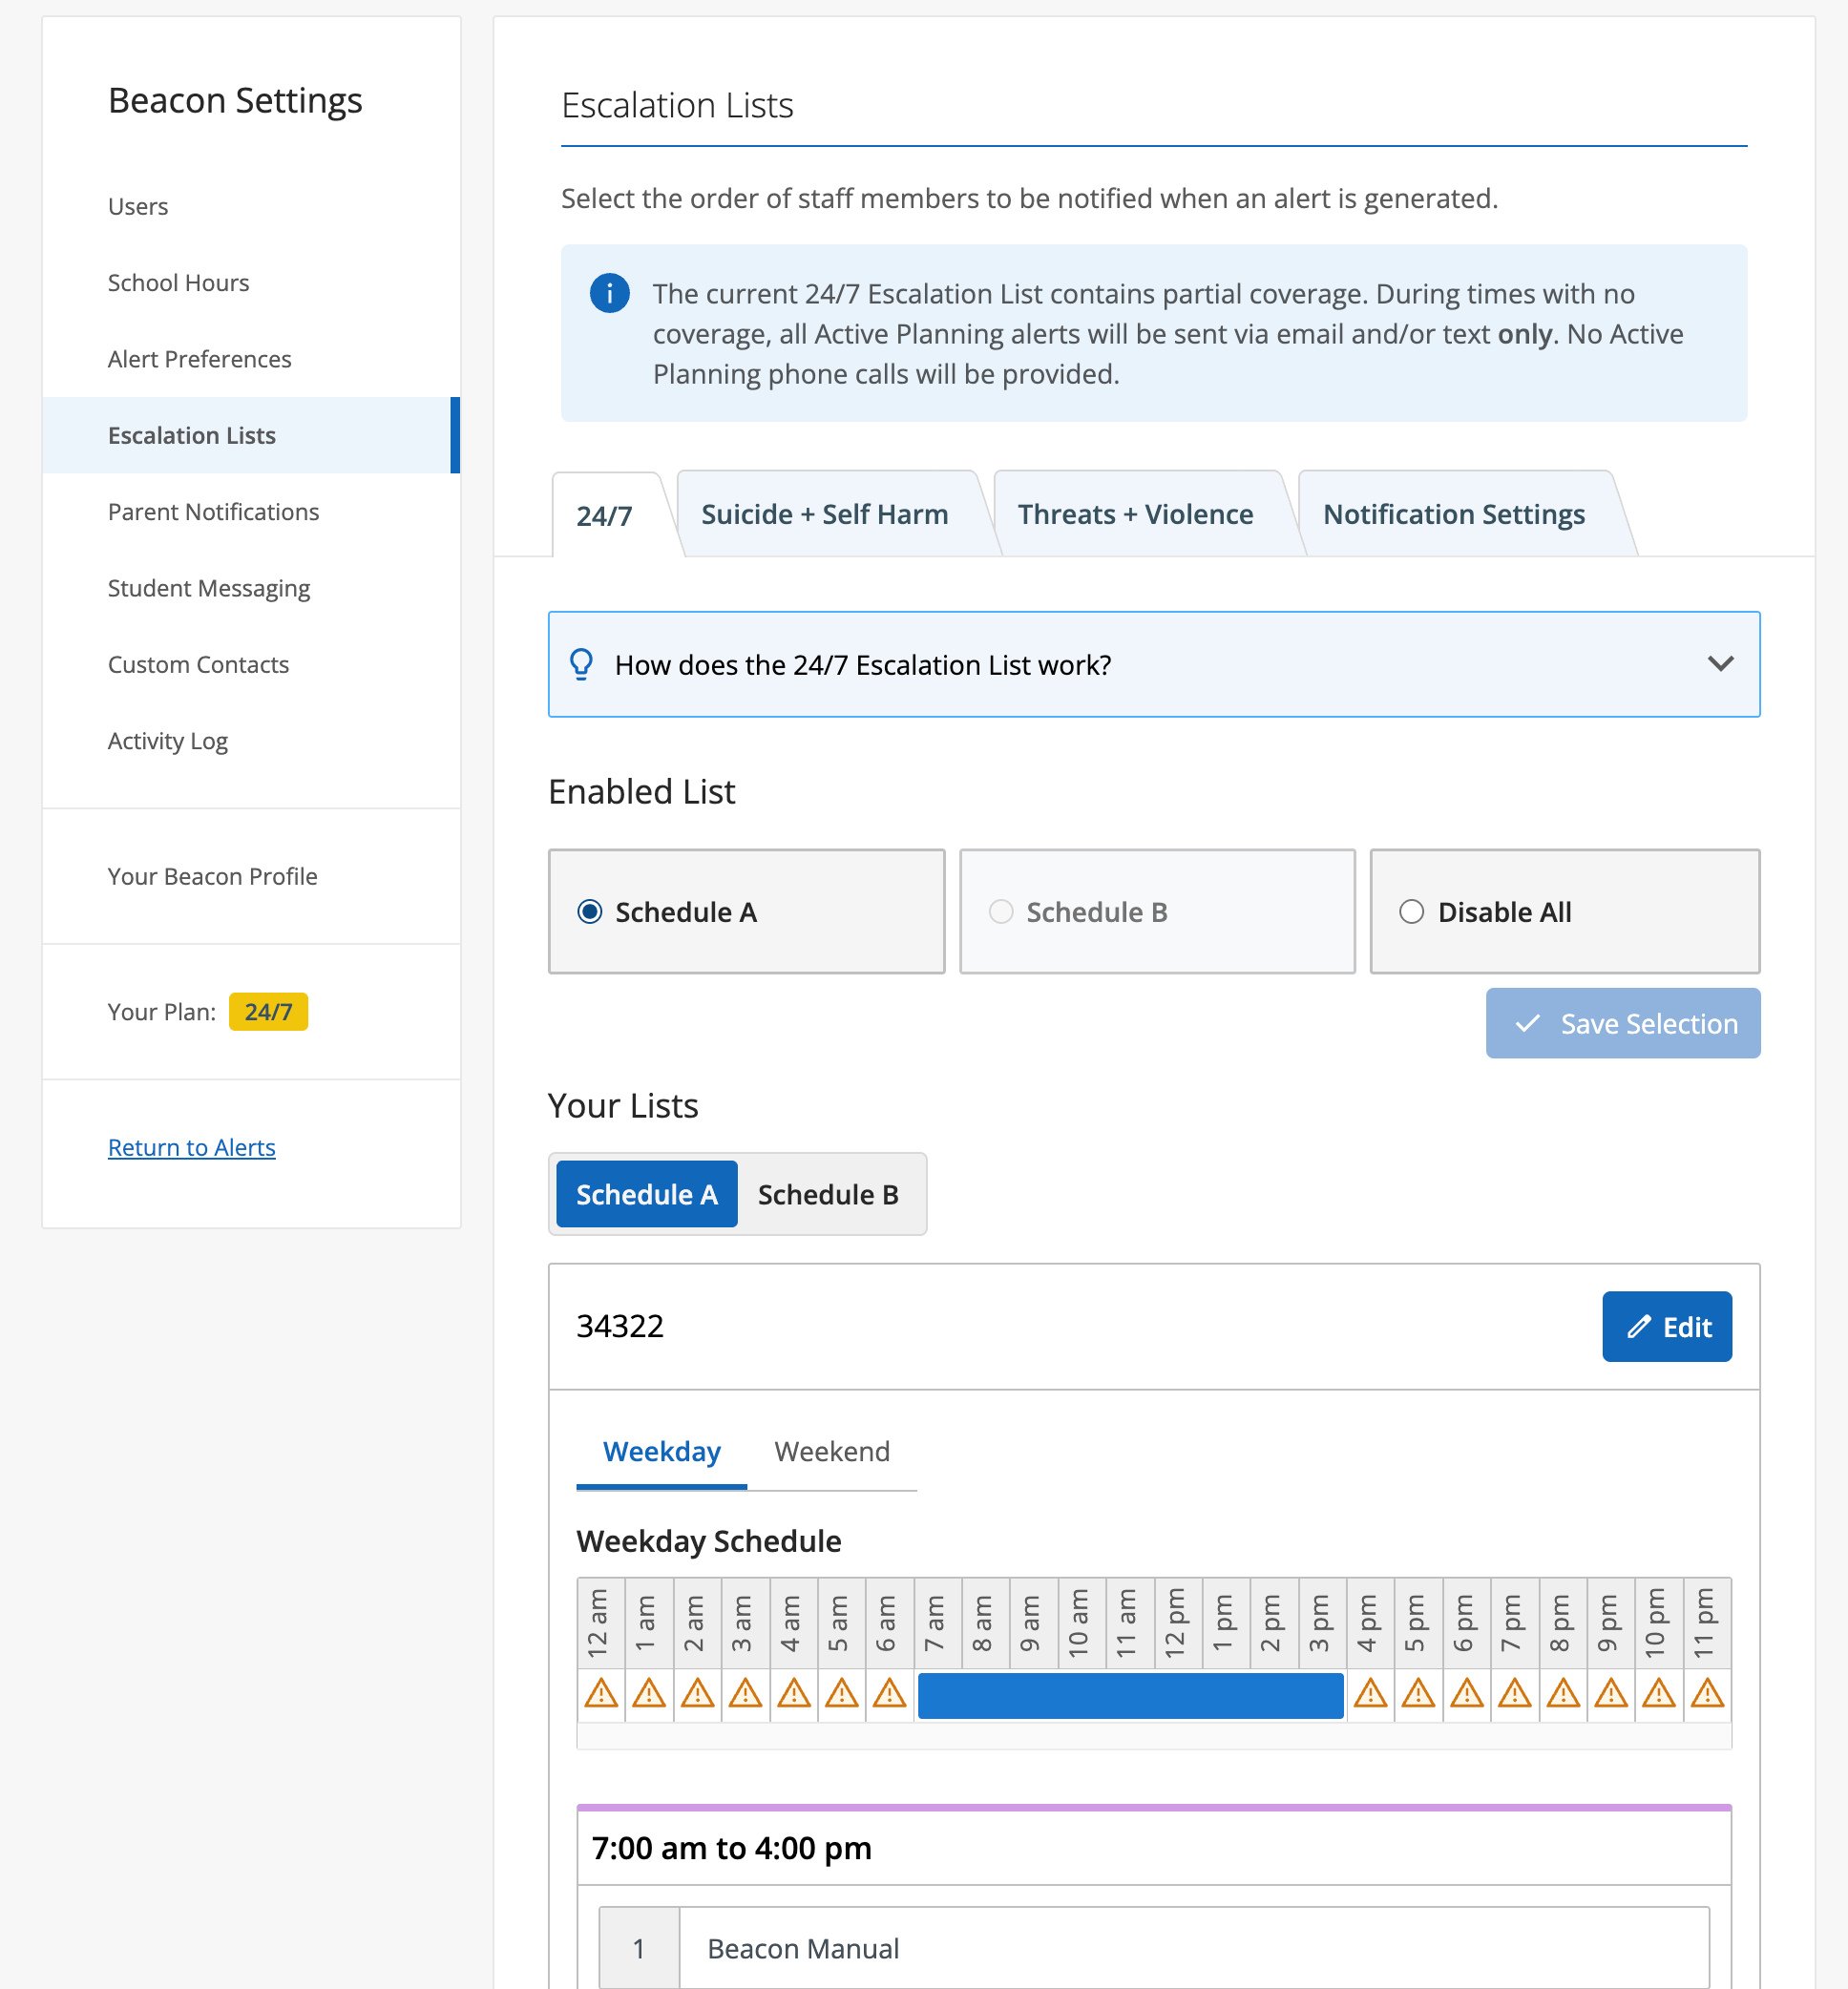 8. Below the shift list, click **Add Last Responder**. The Last Responder must be available at all times and days, since they are called when no other responder on the shift answers. A Last Responder does not need a shift, a priority, or a schedule.
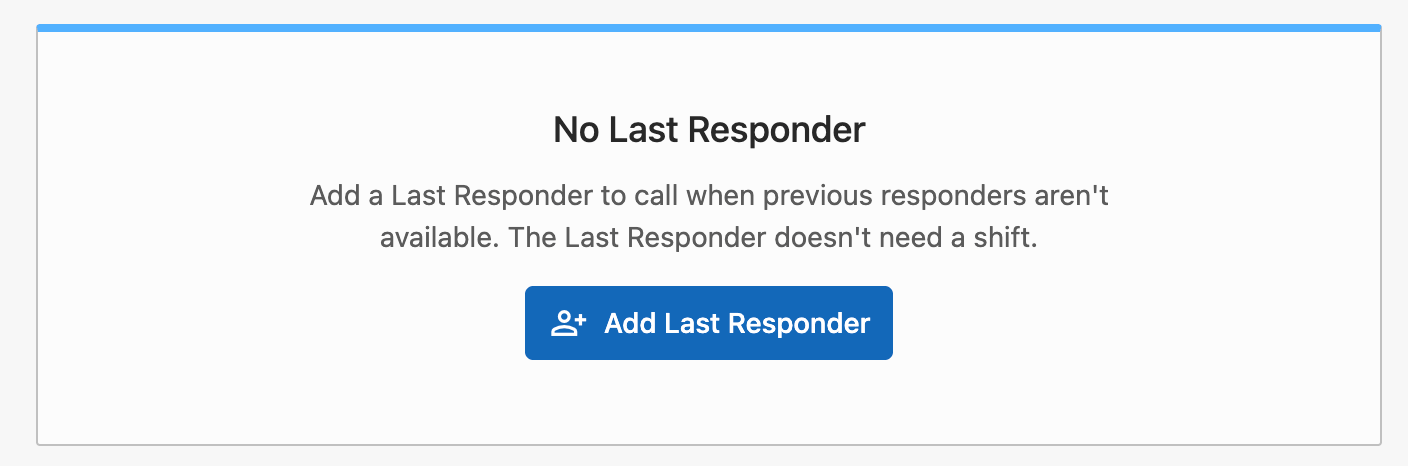 9. Select a responder from the **Select Responder** list.
10. Verify the result: the **Last Responder** section displays the selected responder.
A schedule needs at least one shift with a responder, a Last Responder, or both. Beacon does not save a schedule with no coverage.
11. Click **Save List**.
If the weekday or weekend schedule has a coverage gap, Beacon displays a **Missing Coverage for 24/7 Escalation List** warning. During a coverage gap, Active Planning alerts are sent by email and text only. No phone call is placed. Click **Add Coverage** to return to the schedule, or click **Not Now** to save the list with the gap.
9. Select a responder from the **Select Responder** list.
10. Verify the result: the **Last Responder** section displays the selected responder.
A schedule needs at least one shift with a responder, a Last Responder, or both. Beacon does not save a schedule with no coverage.
11. Click **Save List**.
If the weekday or weekend schedule has a coverage gap, Beacon displays a **Missing Coverage for 24/7 Escalation List** warning. During a coverage gap, Active Planning alerts are sent by email and text only. No phone call is placed. Click **Add Coverage** to return to the schedule, or click **Not Now** to save the list with the gap.
 12. Repeat the steps in **Add Shifts** for the **Weekend** shifts.
## Switch or Disable an Enabled List
Only one escalation list can be active at a time.
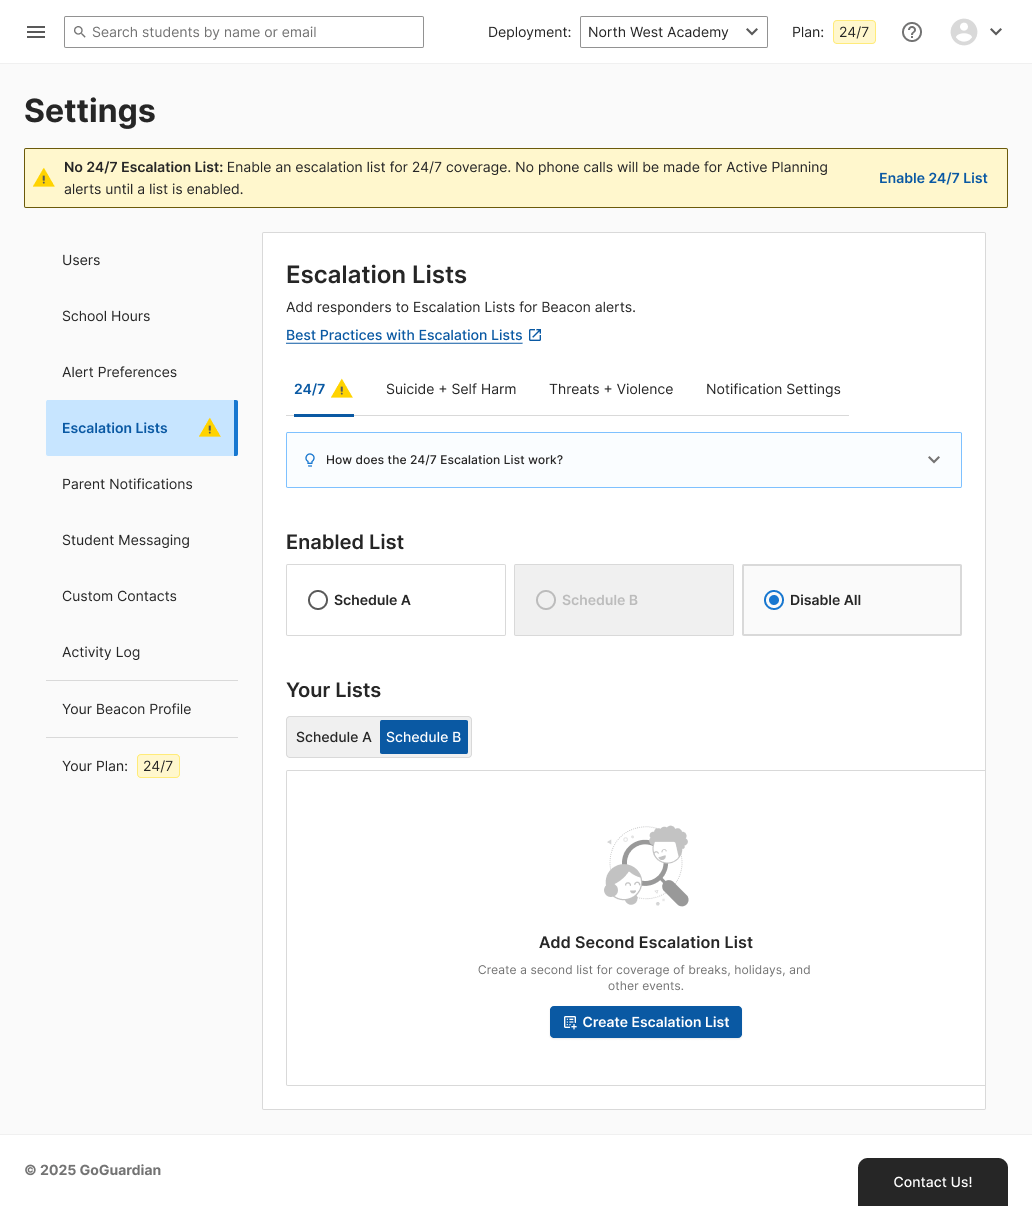
1. Go to **Settings**, then select **Escalation Lists**, then select the **24/7** tab.
2. Under **Enabled List**, select **Schedule A**, **Schedule B**, or **Disable All**.
Email notifications are sent only when **Disable All** is selected. All phone calls for 24/7 Active Planning alerts stop until a list is enabled.
3. Click **Save Selection**.
## Create a Second Escalation List
Create a second list to cover breaks, holidays, or other events that need a different schedule.
1. Go to **Settings**, then select **Escalation Lists**, then select the **24/7** tab.
2. Under **Your Lists**, select the **Schedule B** tab, then click **Create Escalation List**.
3. Follow the steps in **Create 24/7 Escalation List** and **Schedule Shifts and Assign Responders** to build the second schedule.
4. Verify the result: both schedules appear under **Your Lists**, and you can switch between them from **Enabled List**.
12. Repeat the steps in **Add Shifts** for the **Weekend** shifts.
## Switch or Disable an Enabled List
Only one escalation list can be active at a time.
1. Go to **Settings**, then select **Escalation Lists**, then select the **24/7** tab.
2. Under **Enabled List**, select **Schedule A**, **Schedule B**, or **Disable All**.
Email notifications are sent only when **Disable All** is selected. All phone calls for 24/7 Active Planning alerts stop until a list is enabled.
3. Click **Save Selection**.
## Create a Second Escalation List
Create a second list to cover breaks, holidays, or other events that need a different schedule.
1. Go to **Settings**, then select **Escalation Lists**, then select the **24/7** tab.
2. Under **Your Lists**, select the **Schedule B** tab, then click **Create Escalation List**.
3. Follow the steps in **Create 24/7 Escalation List** and **Schedule Shifts and Assign Responders** to build the second schedule.
4. Verify the result: both schedules appear under **Your Lists**, and you can switch between them from **Enabled List**.
 ## Resources
Configure tier-based escalation lists for email and text notifications.
Review which roles can manage escalation lists.
Add users to a deployment before adding them to an escalation list.
## Resources
Configure tier-based escalation lists for email and text notifications.
Review which roles can manage escalation lists.
Add users to a deployment before adding them to an escalation list.