> ## Documentation Index
> Fetch the complete documentation index at: https://docs.goguardian.com/llms.txt
> Use this file to discover all available pages before exploring further.
# Create a Deployment
> Create a GoGuardian Beacon deployment to assign Beacon to one or more Organizational Units and begin receiving alerts for students in those OUs.
A Beacon deployment connects Beacon to a set of Organizational Units (OUs) in your Google domain. Each deployment has its own Escalation List, settings, and alert history. Create deployments based on which staff should be notified for each set of OUs.
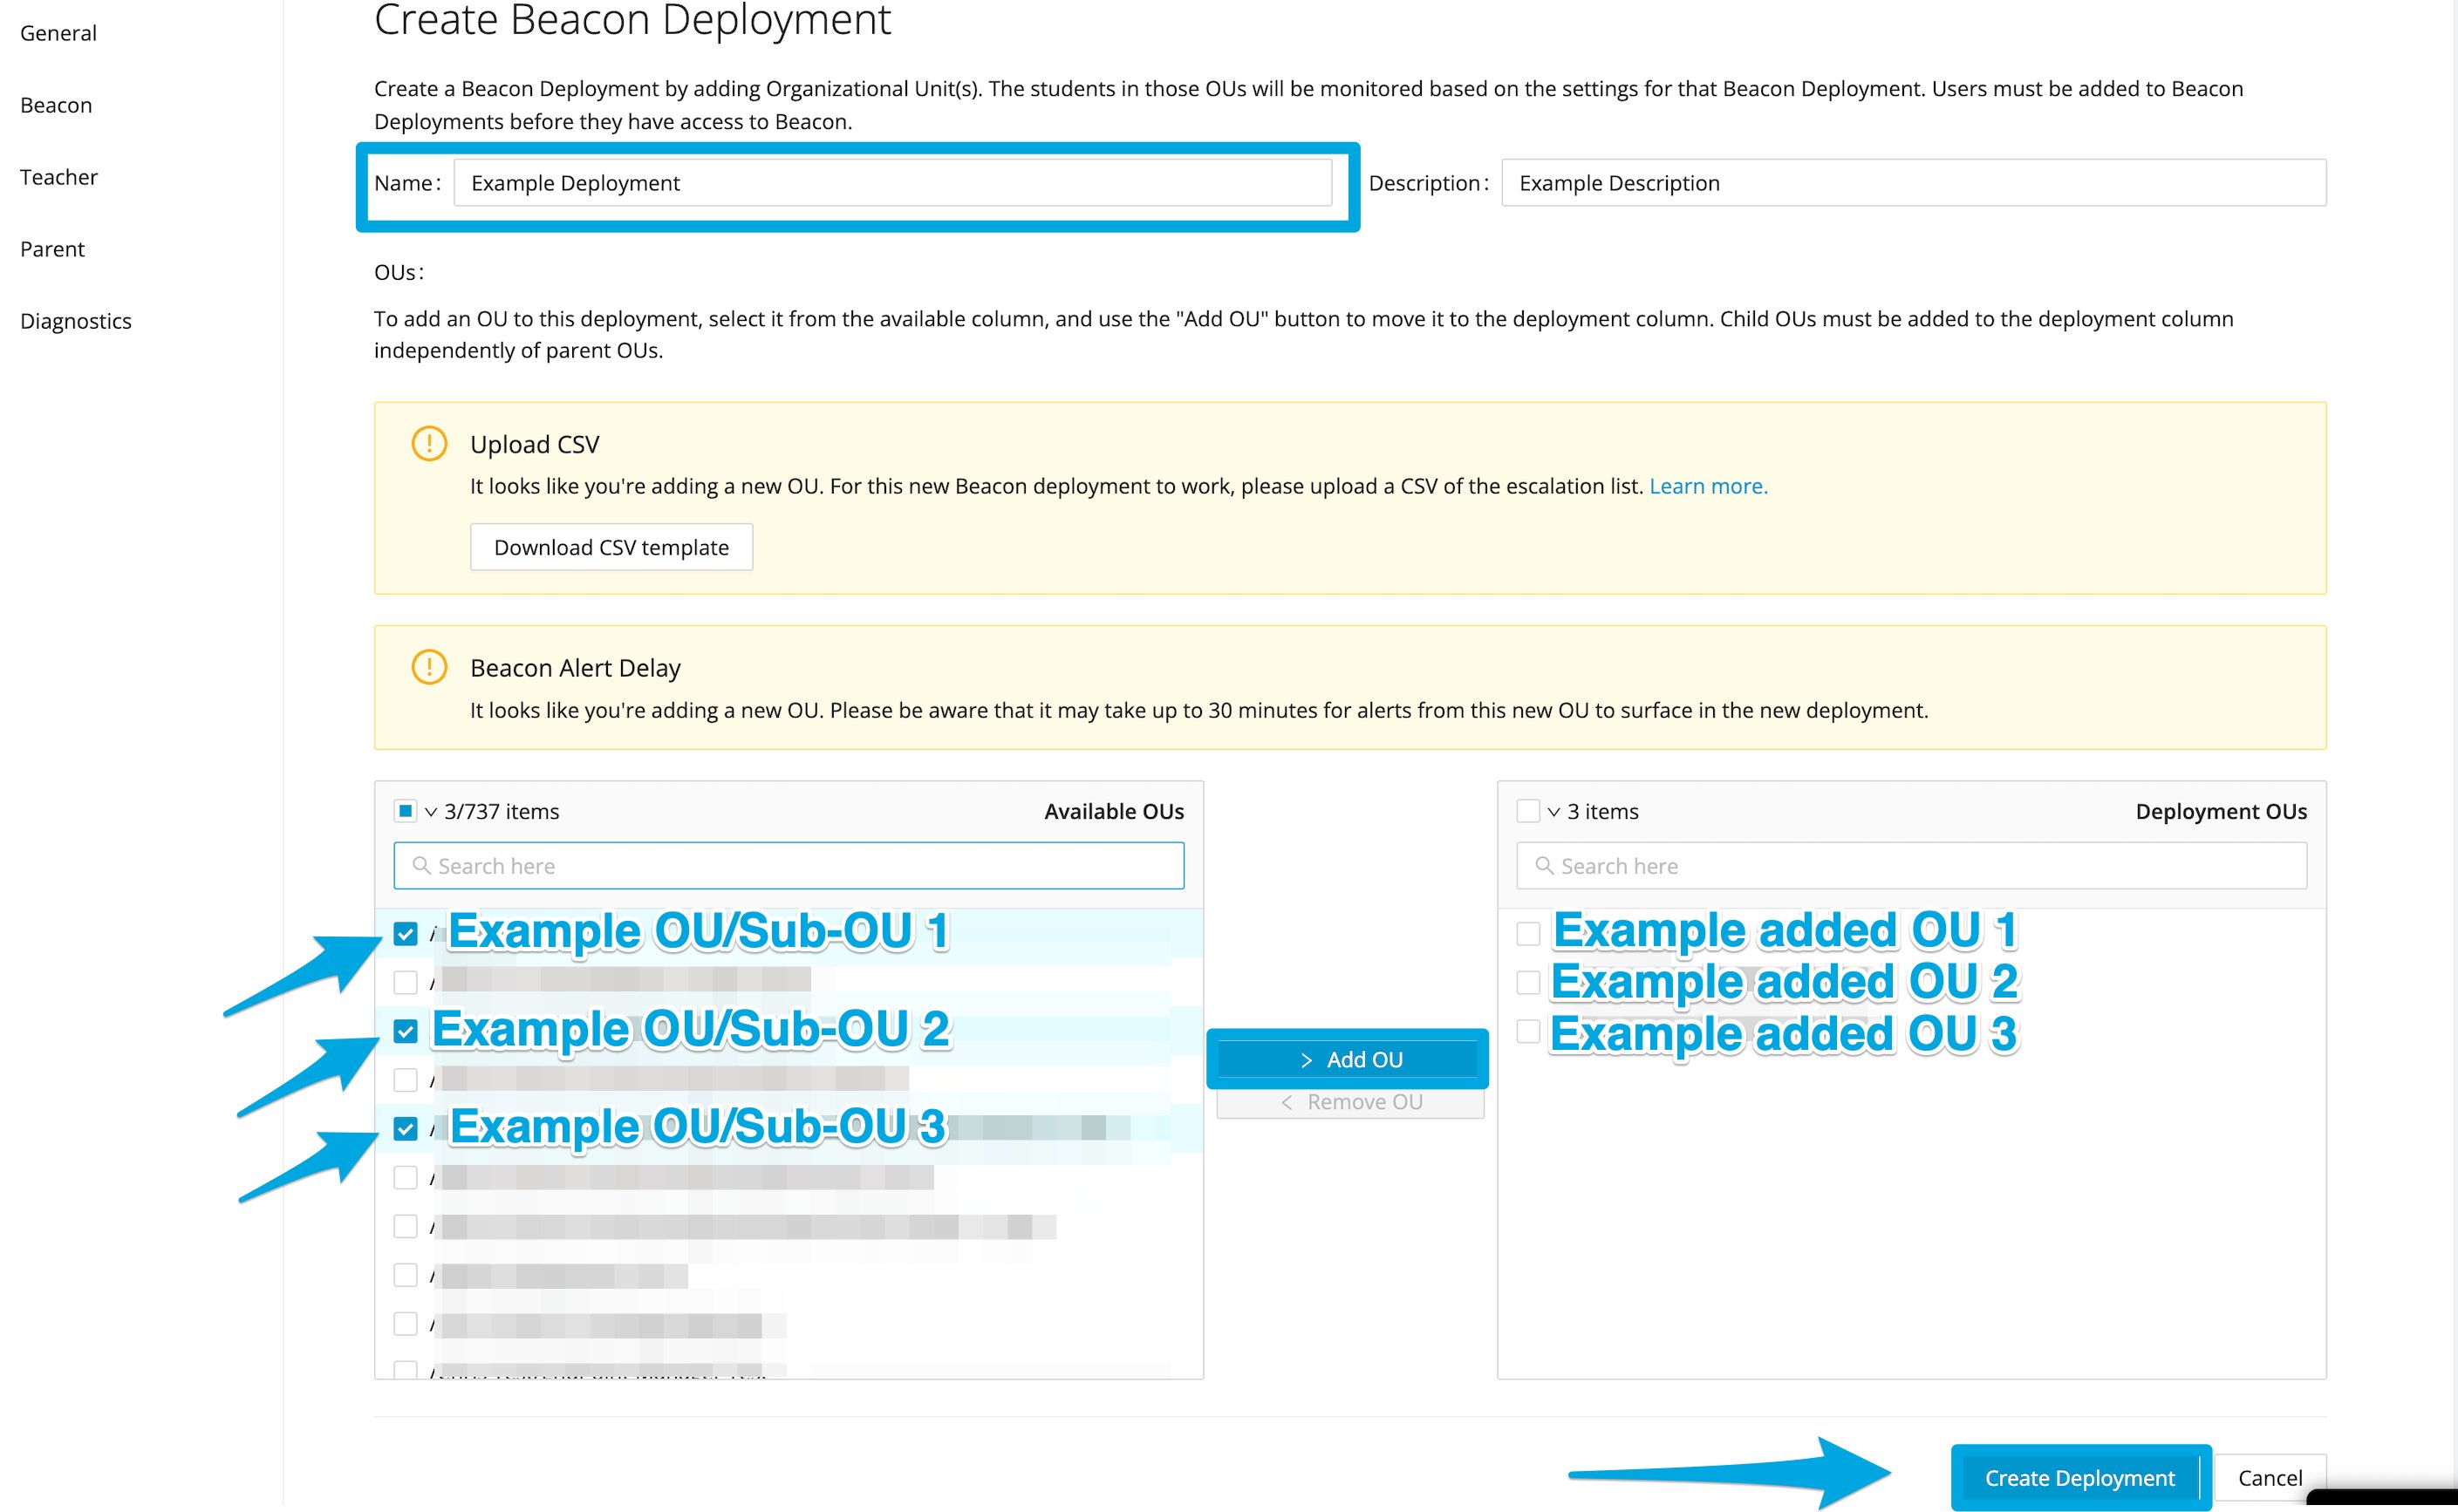
Beacon does not automatically include child sub-OUs of a parent OU. Each sub-OU you want Beacon to cover must be selected individually.
Each OU can be part of only one deployment. There is no limit to the number of OUs in a single deployment. Update deployment configurations any time your OU structure changes.
## Create a Deployment
Before creating a deployment, sync your OUs using the sync icon in the top-right corner of Org Management.
1. As a SuperUser, go to [manage.goguardian.com](https://manage.goguardian.com/).
2. Click **Products** in the main navigation.
3. Select **Beacon** from the left sidebar.
4. Click **Create Deployment**.
5. Enter a name (required) and an optional description for the deployment.
6. Click the OUs search field in the **Available OUs** tile. Filter and select the OUs you want to include in this deployment.
7. Click **Add OU** to move each selected OU into the **Deployment OUs** tile. Repeat for all OUs you want to include.
8. Click **Create Deployment**. Newly added OUs may take up to 30 minutes to surface alerts.
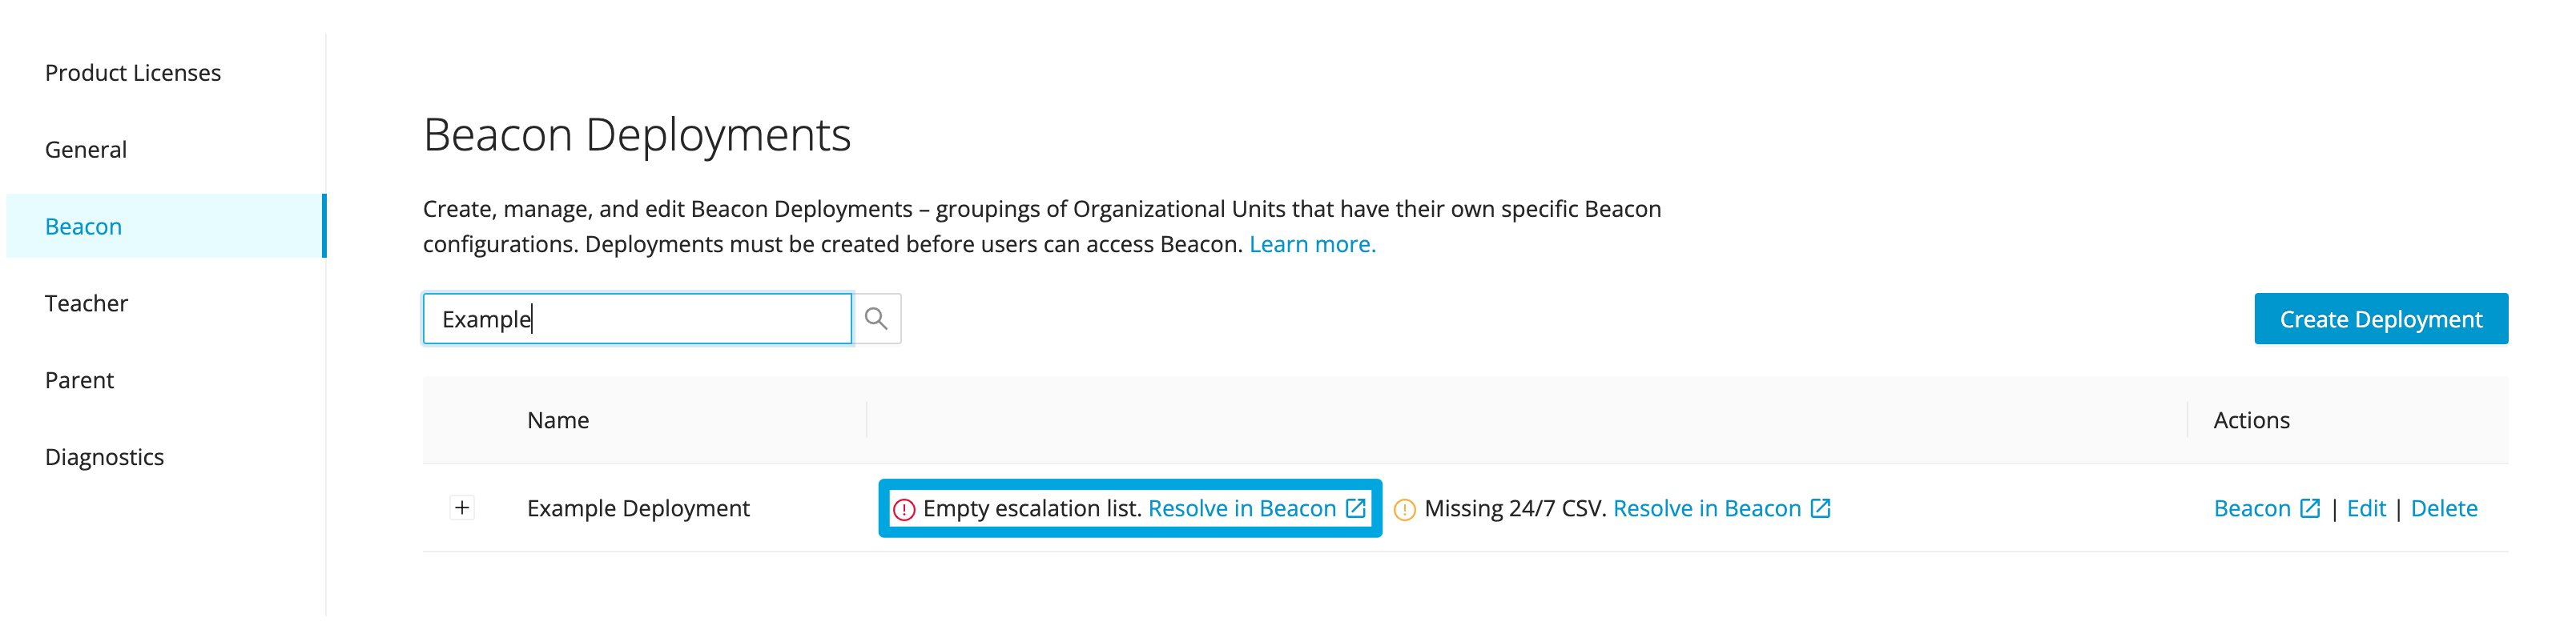
 9. After creation, an empty escalation list notification will appear. Click the **Resolve in Beacon** link to go to the Deployment settings page and configure the Escalation List.
A deployment is not active until at least one user is added to the Escalation List. Alerts will not be sent until the Escalation List is configured.
9. After creation, an empty escalation list notification will appear. Click the **Resolve in Beacon** link to go to the Deployment settings page and configure the Escalation List.
A deployment is not active until at least one user is added to the Escalation List. Alerts will not be sent until the Escalation List is configured.
 ## Resources
Complete the full Beacon Starter setup in the recommended order.
Definitions for deployments, escalation lists, roles, and alert phases.
Install the GoGuardian Extensions before creating your first deployment.
Overview of Beacon and how it supports student safety programs.
## Resources
Complete the full Beacon Starter setup in the recommended order.
Definitions for deployments, escalation lists, roles, and alert phases.
Install the GoGuardian Extensions before creating your first deployment.
Overview of Beacon and how it supports student safety programs.