> ## Documentation Index
> Fetch the complete documentation index at: https://docs.goguardian.com/llms.txt
> Use this file to discover all available pages before exploring further.
# Sync with Google Admin Console
> How GoGuardian Fleet syncs automatically with Google Admin Console, how to trigger a manual sync, and how to verify device counts after syncing.
GoGuardian Fleet syncs automatically with Google Admin Console each night. For immediate updates, use Force Sync. Fleet imports provisioned devices only — unpublished or deprovisioned devices do not appear.
## Understand How Sync Works
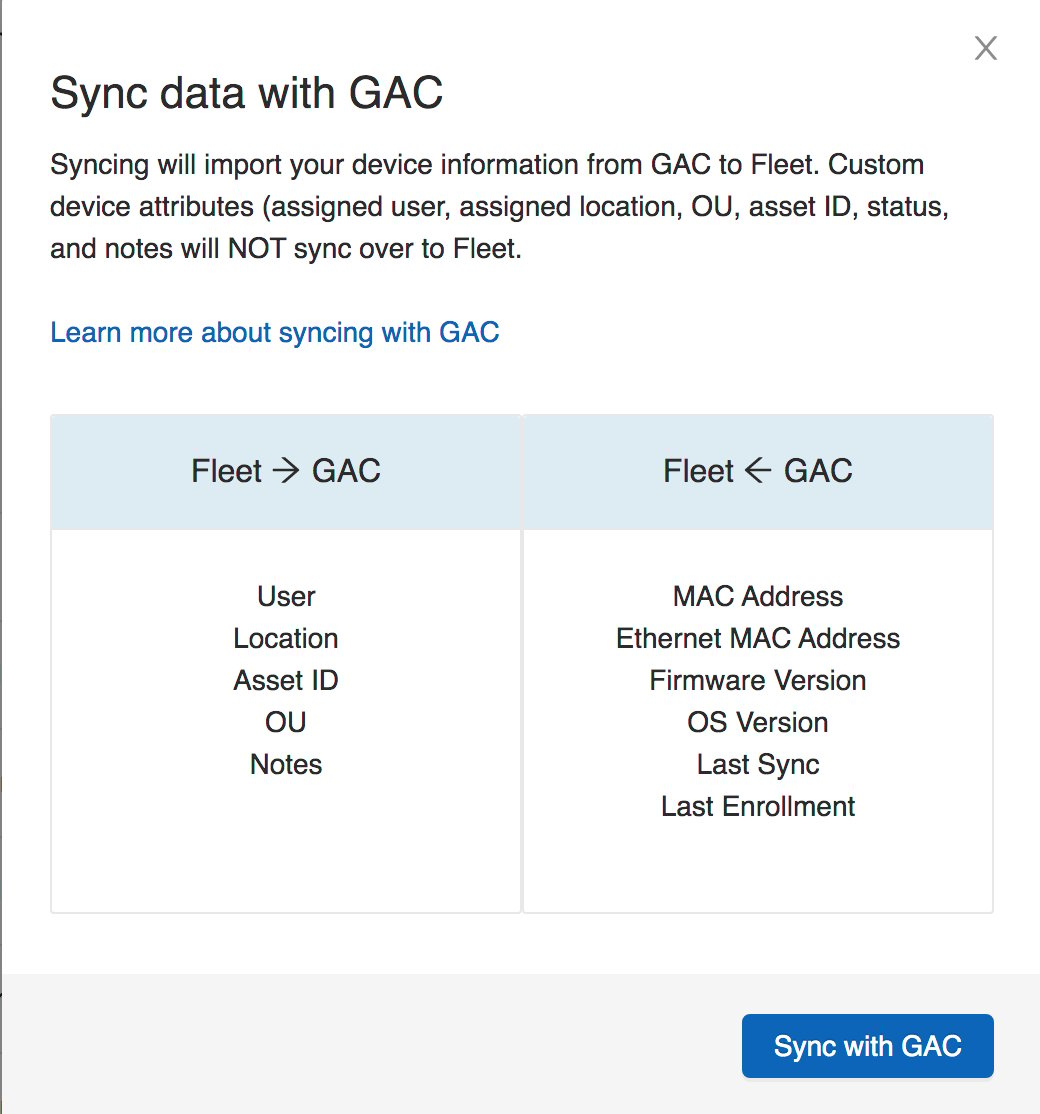
Force Sync ensures Fleet and Google Admin Console are in parity. Both directions update when you sync:
* **Google Admin Console → Fleet:** Last sync date, OS version, firmware version, MAC address, model, and other device metadata from Google Admin Console update Fleet.
* **Fleet → Google Admin Console:** User, Location, Asset ID, Status, and Notes in Fleet update Google Admin Console.
User, Location, Asset ID, Status, and Notes are only pulled from Google Admin Console during the initial sync. After the initial sync, Fleet is the source of truth for these fields. If Google Admin Console has newer values for these fields, use a CSV import to push the correct values — see [Import Devices](/products/fleet/import-devices).
Force Sync is unavailable if Fleet and Google Admin Console are already syncing.
## Run Force Sync
1. Go to [fleet.goguardian.com](https://fleet.goguardian.com) and select the **Devices** tab.
2. Hover over the sync icon at the top of the page and click **Sync with GAC**.
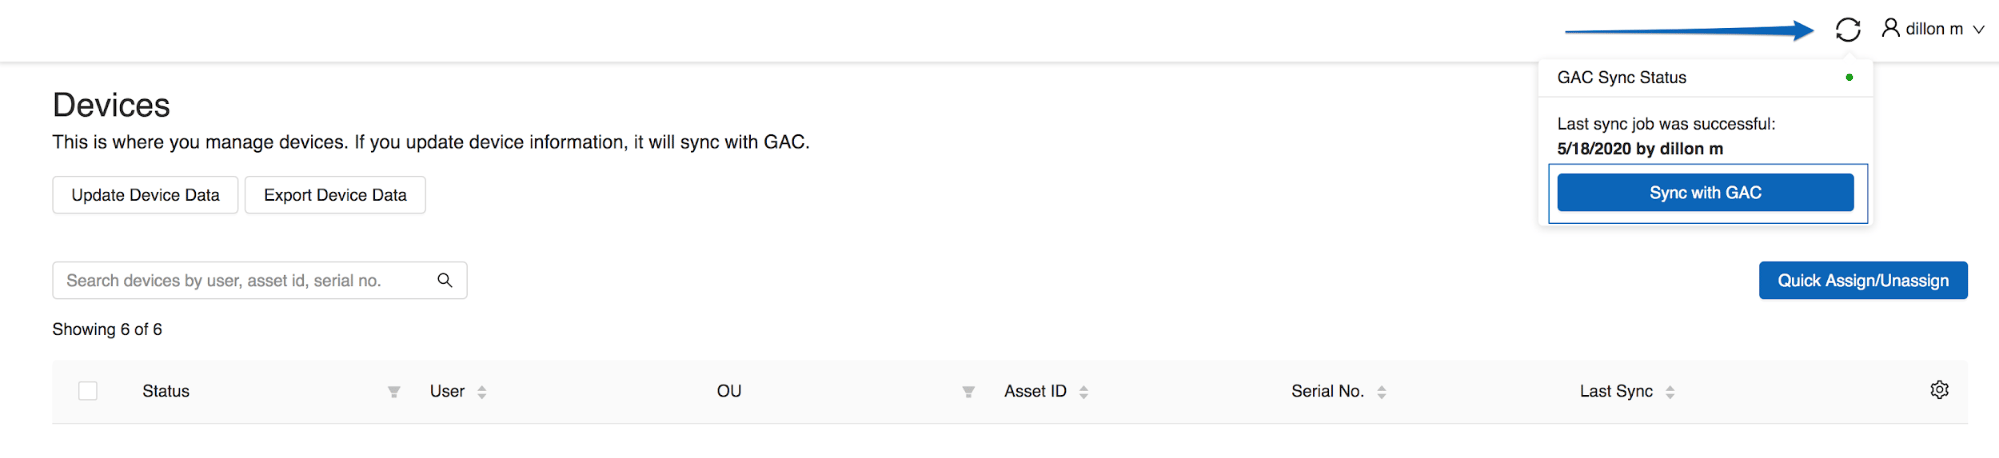 3\. In the confirmation window, click **Sync with GAC**.
4\. Verify the result: Fleet updates with the latest device data from Google Admin Console. Large syncs can take several minutes to several hours.
If Force Sync fails, re-authorize your Google account at [fleet.goguardian.com/connect](https://fleet.goguardian.com/connect) and try again.
3\. In the confirmation window, click **Sync with GAC**.
4\. Verify the result: Fleet updates with the latest device data from Google Admin Console. Large syncs can take several minutes to several hours.
If Force Sync fails, re-authorize your Google account at [fleet.goguardian.com/connect](https://fleet.goguardian.com/connect) and try again.
 ## Verify Device Count After Sync
After syncing, confirm the device count in Fleet matches Google Admin Console.
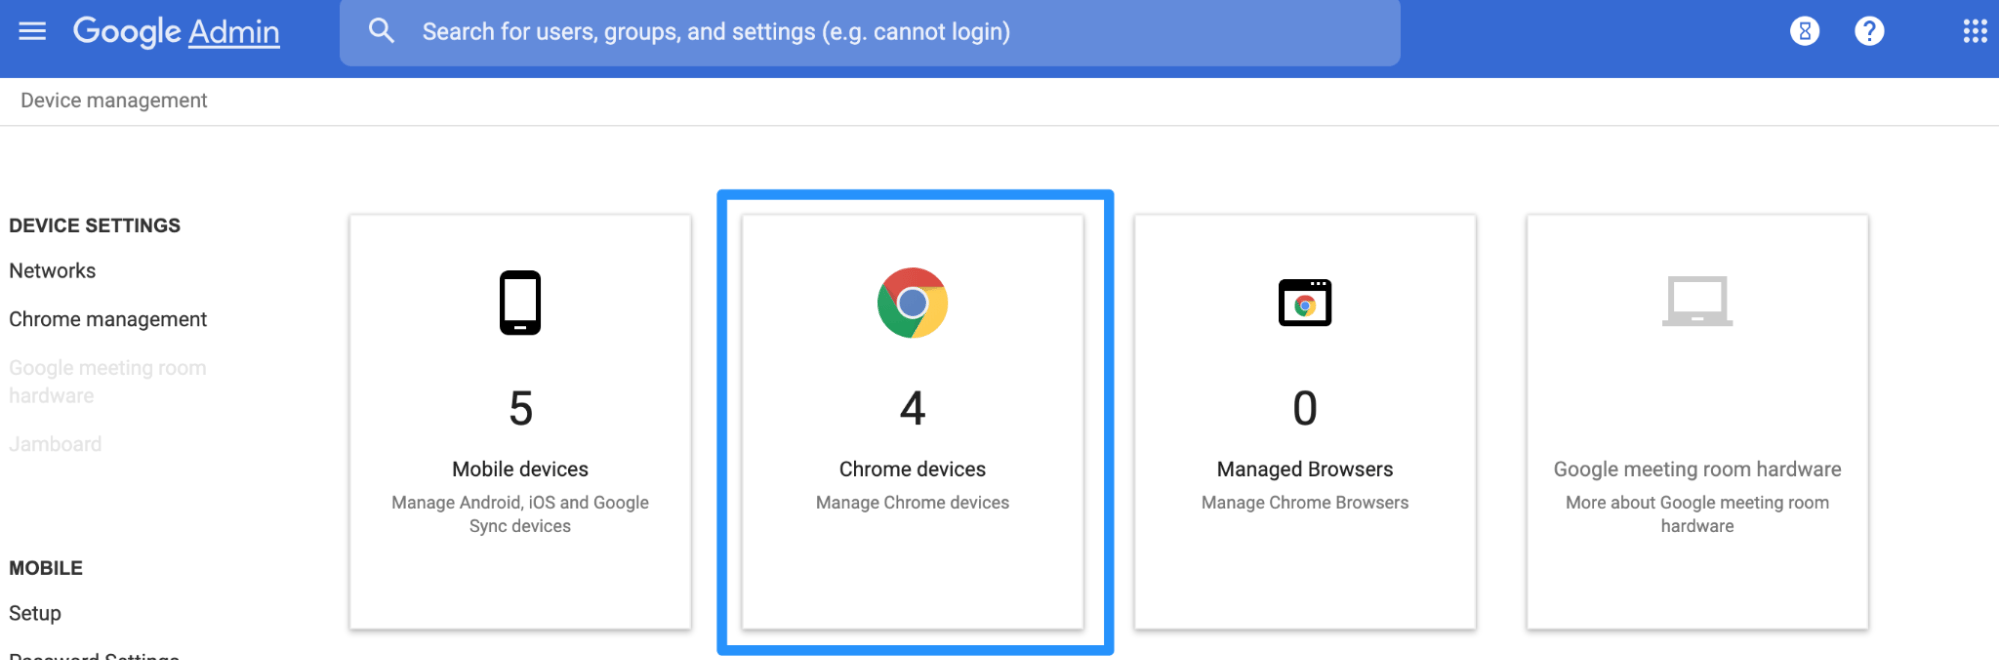
1. In Google Admin Console (`admin.google.com`), go to **Devices** → **Chrome Devices**.
2. Click the **Status** dropdown and select **Provisioned**.
3. Note the total number of provisioned devices.
4. In Fleet, select the **Devices** tab.
5. Verify the result: The device count shown above the Devices table matches the provisioned count in Google Admin Console.
If the counts do not match, the sync may still be in progress. Wait a few minutes and recheck. If the discrepancy persists, confirm all devices are enrolled in Google Admin Console before re-syncing.
## Verify Device Count After Sync
After syncing, confirm the device count in Fleet matches Google Admin Console.
1. In Google Admin Console (`admin.google.com`), go to **Devices** → **Chrome Devices**.
2. Click the **Status** dropdown and select **Provisioned**.
3. Note the total number of provisioned devices.
4. In Fleet, select the **Devices** tab.
5. Verify the result: The device count shown above the Devices table matches the provisioned count in Google Admin Console.
If the counts do not match, the sync may still be in progress. Wait a few minutes and recheck. If the discrepancy persists, confirm all devices are enrolled in Google Admin Console before re-syncing.


 ## Reconcile Google Admin Console Values with Fleet
If fields such as OU, Asset ID, user email, or location have been updated in Google Admin Console but not yet in Fleet, use this process to sync them.
1. Export your devices from Google Admin Console: go to **Devices** → **Chrome devices**, check the box to select all OUs, then click the export icon and open the CSV in a spreadsheet editor.
2. Delete all columns except: Serial Number, `orgunitpath`, `annotatedAssetId`, `annotatedUser`, `annotatedLocation`. Add a `Loaner` column and rearrange to match Fleet's CSV template order: Serial Number, Asset ID, OU, Location, Student (email), Loaner.
3. Make two copies of this file.
4. In one copy, zero out the fields you want to reset (e.g. set all OUs to `/` or Asset IDs to `0`). Upload this file to Fleet — this pushes the zeroed values to Fleet and back to Google Admin Console.
5. Upload the original file (with the correct GAC values). This overwrites the zeroed values in Fleet and Google Admin Console with the correct data.
## Resources
* [Import Devices](/products/fleet/import-devices)
* [Understand GoGuardian Fleet](/products/fleet/understand-goguardian-fleet)
## Reconcile Google Admin Console Values with Fleet
If fields such as OU, Asset ID, user email, or location have been updated in Google Admin Console but not yet in Fleet, use this process to sync them.
1. Export your devices from Google Admin Console: go to **Devices** → **Chrome devices**, check the box to select all OUs, then click the export icon and open the CSV in a spreadsheet editor.
2. Delete all columns except: Serial Number, `orgunitpath`, `annotatedAssetId`, `annotatedUser`, `annotatedLocation`. Add a `Loaner` column and rearrange to match Fleet's CSV template order: Serial Number, Asset ID, OU, Location, Student (email), Loaner.
3. Make two copies of this file.
4. In one copy, zero out the fields you want to reset (e.g. set all OUs to `/` or Asset IDs to `0`). Upload this file to Fleet — this pushes the zeroed values to Fleet and back to Google Admin Console.
5. Upload the original file (with the correct GAC values). This overwrites the zeroed values in Fleet and Google Admin Console with the correct data.
## Resources
* [Import Devices](/products/fleet/import-devices)
* [Understand GoGuardian Fleet](/products/fleet/understand-goguardian-fleet)