> ## Documentation Index
> Fetch the complete documentation index at: https://docs.goguardian.com/llms.txt
> Use this file to discover all available pages before exploring further.
# Present a Session
> Launch a Pear Deck session, help students join, and control slides from the Projector View
Once you have created your slides, you can launch a Pear Deck session to share them with students. When a session starts, students join using a Join Code or Join Link and respond to interactive questions in real time. This article covers every step, from configuring sign-in settings through ending the session.
## Determine Session Sign-In Settings
You can require students to join your sessions with a Google or Microsoft Office 365 account, or allow them to join anonymously.
* **Joining with email sign-in:** To see exactly which students joined and view their names next to their responses (for example, in the [Teacher Dashboard](/products/pear-deck/teacher-dashboard) or when using [Takeaways](/products/pear-deck/use-takeaways)), turn on email sign-in before presenting.
* **Joining anonymously:** If you do not want to see participants' names, turn off email sign-in. Students will enter the session with an animal avatar and nickname. The sign-in setting is available in the Pear Deck sidebar menu and in your Settings page. Settings are saved and apply to all future sessions.

 ## Connect to a Projector (Optional)
Presenting a Pear Deck lesson is similar to presenting a PowerPoint or Google Slides presentation.
* If presenting in a classroom, connect your computer to a projector so you can display the Projector View to the entire class.
* If presenting via a remote call, share your screen to the Projector View using the **Share screen** or **Present** button in your web-conferencing software.
* Alternatively, activate Student-Paced Mode to let students work independently at their own pace without following a projected screen.
When you display the Projector View (whether in person or on a conference call), you can show all responses so students can see what their peers are thinking, reflect on other points of view, and spark class discussion. Responses are anonymous by default on the Projector View.
## Present a Session
Launch your presentation and choose a lesson mode. Choose **Instructor-Paced** to open the Projector View or **Student-Paced** to open the Dashboard.
1. Start your presentation from one of three places:
## Connect to a Projector (Optional)
Presenting a Pear Deck lesson is similar to presenting a PowerPoint or Google Slides presentation.
* If presenting in a classroom, connect your computer to a projector so you can display the Projector View to the entire class.
* If presenting via a remote call, share your screen to the Projector View using the **Share screen** or **Present** button in your web-conferencing software.
* Alternatively, activate Student-Paced Mode to let students work independently at their own pace without following a projected screen.
When you display the Projector View (whether in person or on a conference call), you can show all responses so students can see what their peers are thinking, reflect on other points of view, and spark class discussion. Responses are anonymous by default on the Projector View.
## Present a Session
Launch your presentation and choose a lesson mode. Choose **Instructor-Paced** to open the Projector View or **Student-Paced** to open the Dashboard.
1. Start your presentation from one of three places:
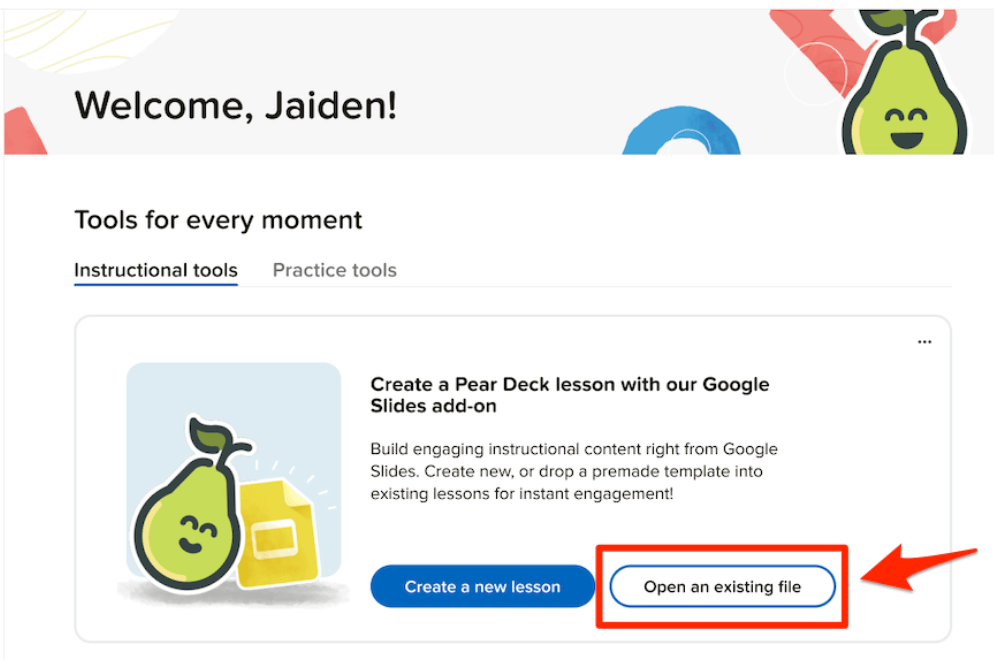 * **Pear Deck Home:** Click **Open an existing file** to locate the file you want to present.
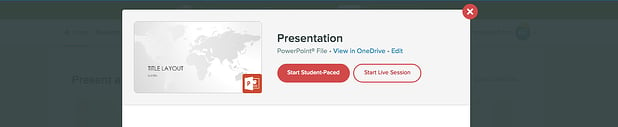
Click the file you want to present. When the Deck modal window opens, click **Start Student-Paced** or **Start Live Session**.
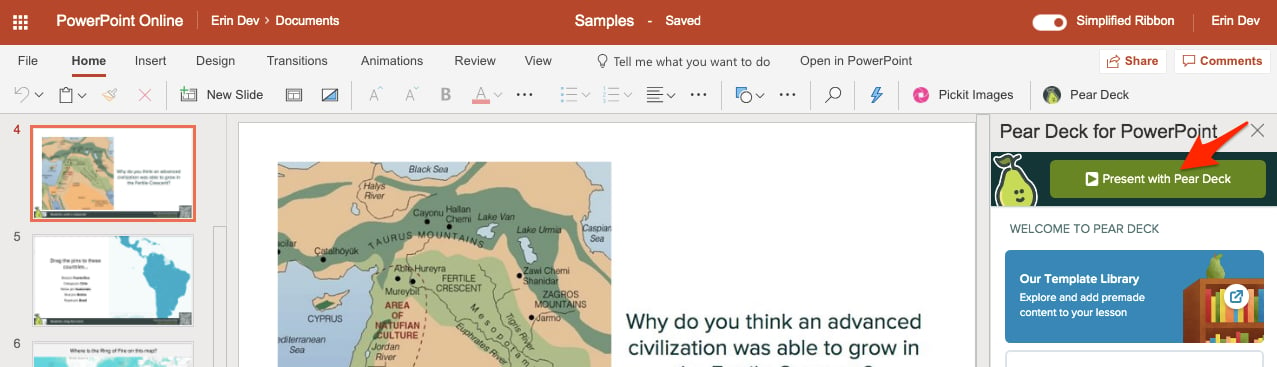
* **Pear Deck for [PowerPoint Online](/products/pear-deck/get-pear-deck-for-powerpoint-online) sidebar:** Click **Present with Pear Deck**.
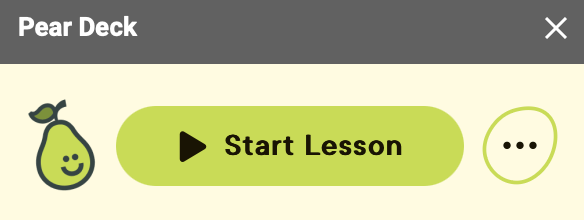
* **Pear Deck for Google Slides sidebar:** Click **Start Lesson**.
2. When prompted, choose a session mode:
* **Pear Deck Home:** Click **Open an existing file** to locate the file you want to present.
Click the file you want to present. When the Deck modal window opens, click **Start Student-Paced** or **Start Live Session**.
* **Pear Deck for [PowerPoint Online](/products/pear-deck/get-pear-deck-for-powerpoint-online) sidebar:** Click **Present with Pear Deck**.
* **Pear Deck for Google Slides sidebar:** Click **Start Lesson**.
2. When prompted, choose a session mode:
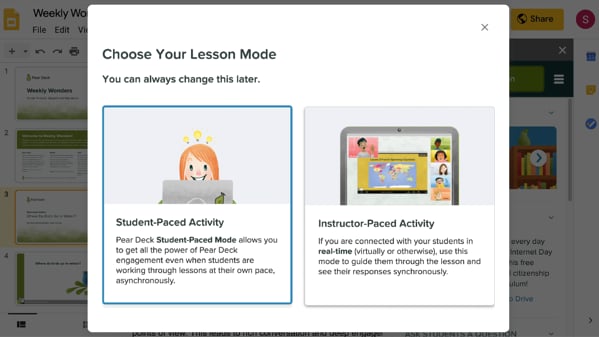 * **Instructor-Paced** is synchronous. Students' slides sync with your slides on the Projector View. When you advance to the next slide, the Student View moves with it. This mode works best for classroom presentations or when leading students through a conference call in Zoom, Skype, Google Meet, or a similar tool.
* **Student-Paced** is asynchronous. Students have navigation arrows on their Student View and can move through slides and respond to interactive questions at their own pace without you being present. [Learn more about Student-Paced lessons](/products/pear-deck/student-paced-lessons).
With Premium access, when you choose Student-Paced, the private [Teacher Dashboard](/products/pear-deck/teacher-dashboard) opens automatically. In the Dashboard, you can see students' names next to their responses and see which slide each student is on.
3. The Projector View (in Instructor-Paced mode) or Dashboard View (in Student-Paced mode) opens. Use it to help students join the session, control slides, and see responses in real time.
* **Instructor-Paced** is synchronous. Students' slides sync with your slides on the Projector View. When you advance to the next slide, the Student View moves with it. This mode works best for classroom presentations or when leading students through a conference call in Zoom, Skype, Google Meet, or a similar tool.
* **Student-Paced** is asynchronous. Students have navigation arrows on their Student View and can move through slides and respond to interactive questions at their own pace without you being present. [Learn more about Student-Paced lessons](/products/pear-deck/student-paced-lessons).
With Premium access, when you choose Student-Paced, the private [Teacher Dashboard](/products/pear-deck/teacher-dashboard) opens automatically. In the Dashboard, you can see students' names next to their responses and see which slide each student is on.
3. The Projector View (in Instructor-Paced mode) or Dashboard View (in Student-Paced mode) opens. Use it to help students join the session, control slides, and see responses in real time.
 ## Help Students Join a Session
1. Share the Join Instructions:
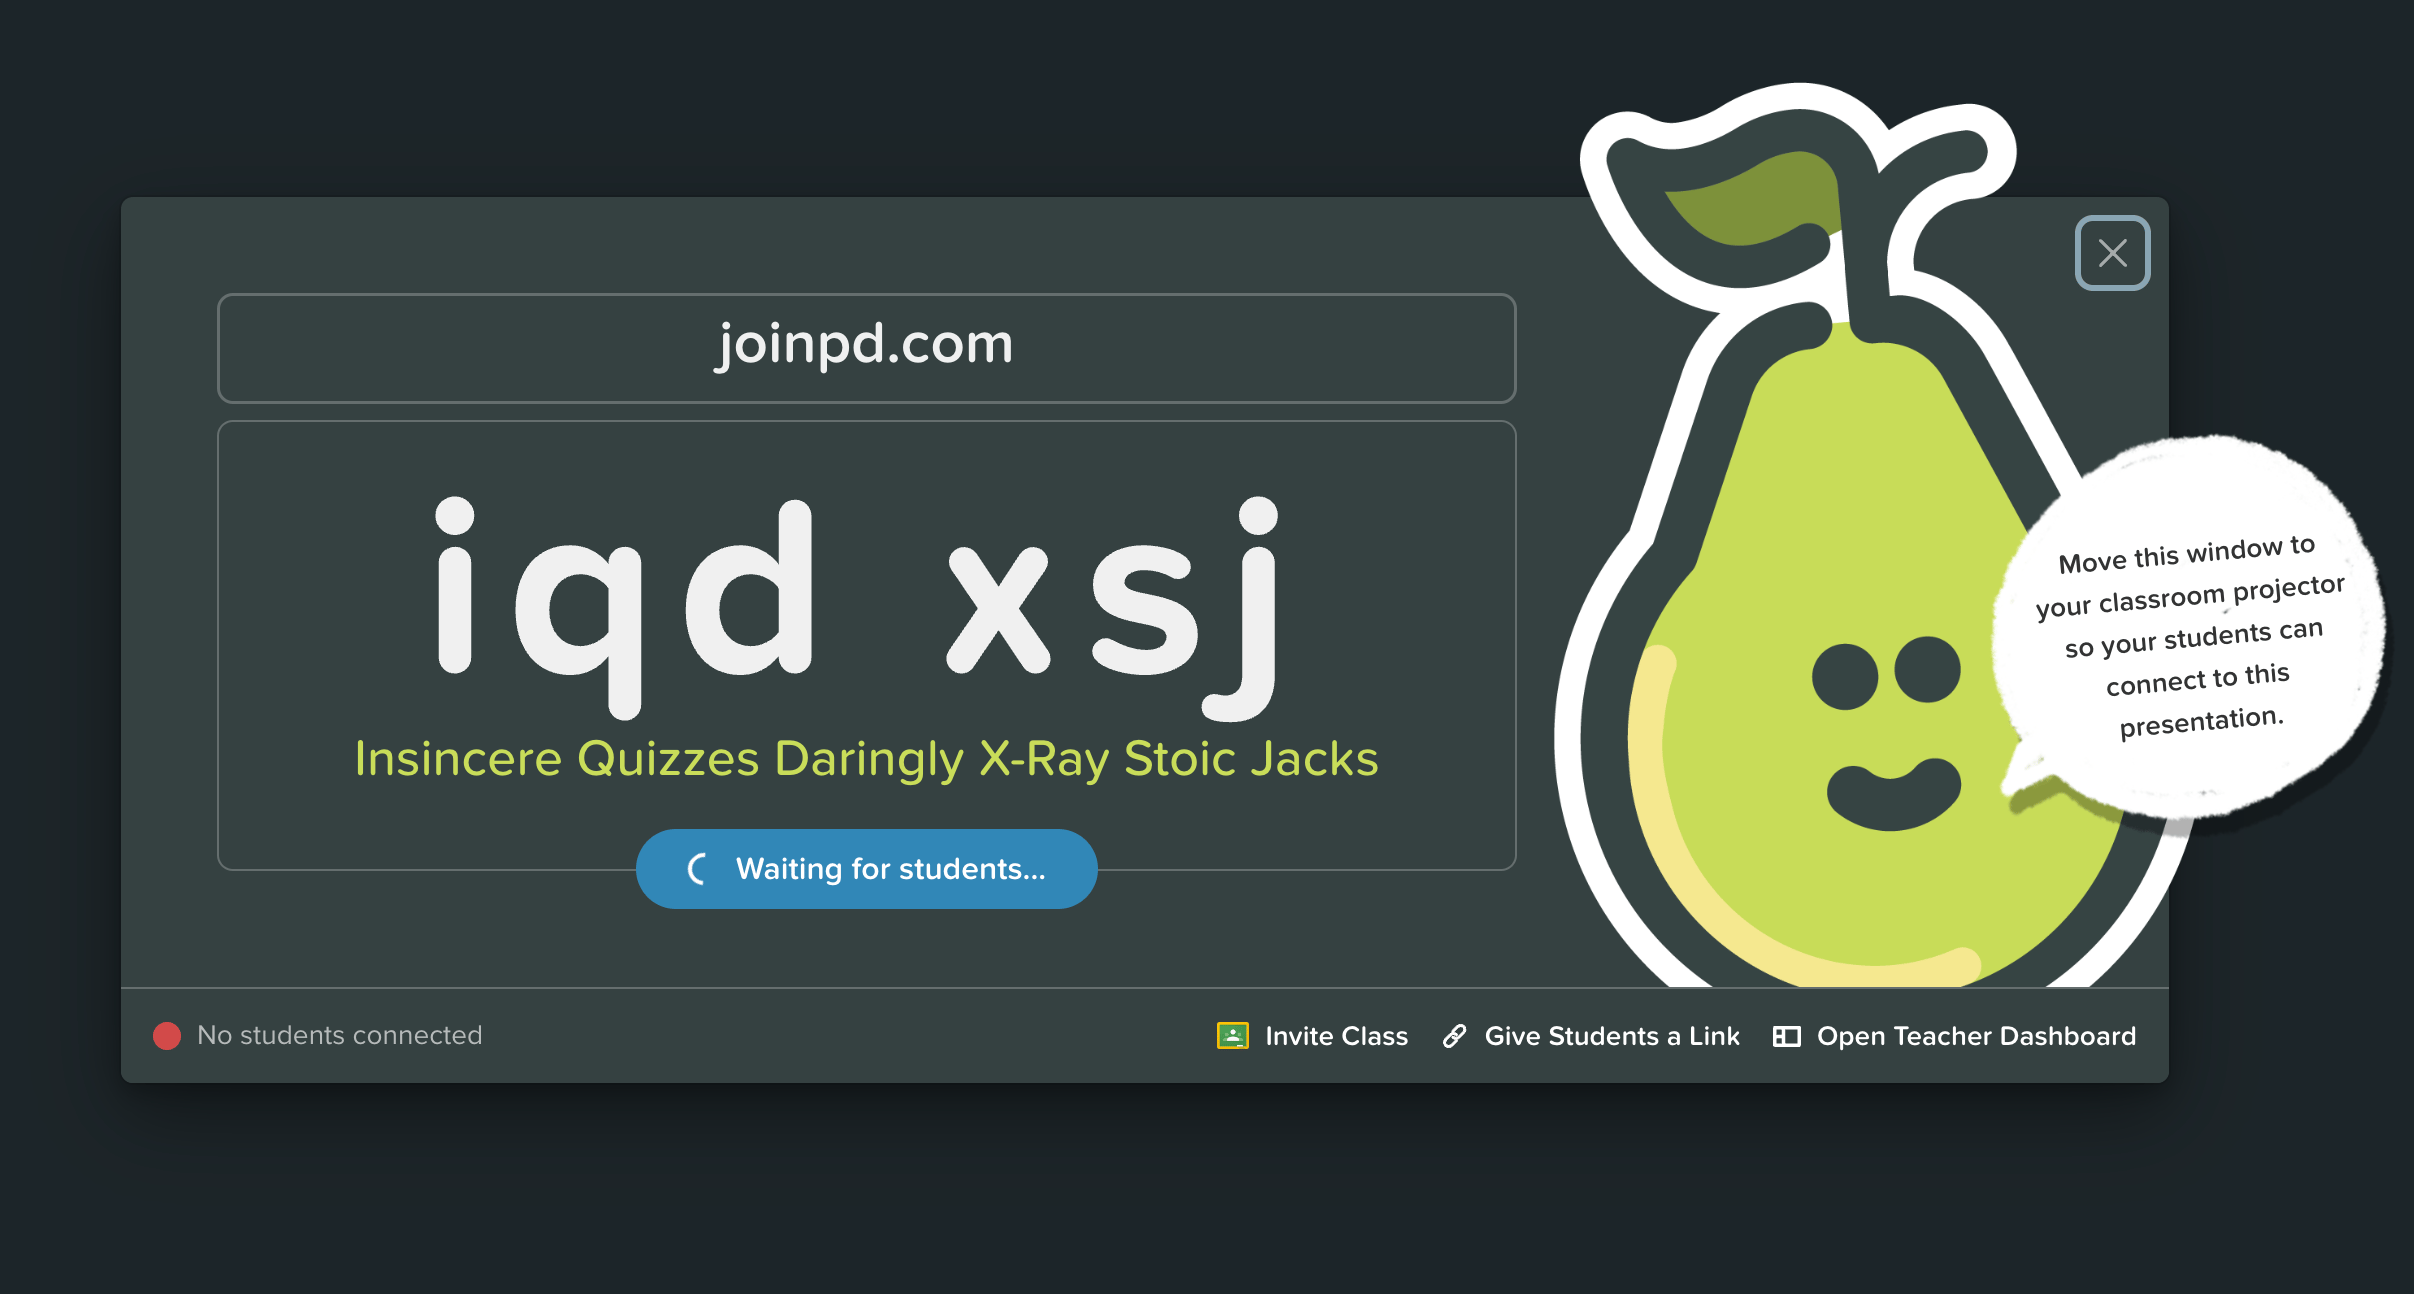
* **Instructor-Paced:** The Projector View opens and displays the Join Instructions automatically for the class to see.
* **Student-Paced (Premium):** The Dashboard View opens. Click the Join Code in the upper-right corner of the screen to open the Join Instructions in the Projector View at any time.
2. Direct students to join the session:
* Go to [joinpd.com](http://joinpd.com/).
* Enter the six-letter Join Code displayed in your session.
You can also post or email the session link by clicking **Give Students a Link**. Students click the link to join without entering a code. Join Codes expire after one week, but the session link is permanent. If a session runs longer than a week, have students use the Join Link instead.
* Students enter the session anonymously with an assigned avatar, or with a Google or Microsoft Office 365 account, depending on your [sign-in settings](/products/pear-deck/how-students-join-a-session).
## Help Students Join a Session
1. Share the Join Instructions:
* **Instructor-Paced:** The Projector View opens and displays the Join Instructions automatically for the class to see.
* **Student-Paced (Premium):** The Dashboard View opens. Click the Join Code in the upper-right corner of the screen to open the Join Instructions in the Projector View at any time.
2. Direct students to join the session:
* Go to [joinpd.com](http://joinpd.com/).
* Enter the six-letter Join Code displayed in your session.
You can also post or email the session link by clicking **Give Students a Link**. Students click the link to join without entering a code. Join Codes expire after one week, but the session link is permanent. If a session runs longer than a week, have students use the Join Link instead.
* Students enter the session anonymously with an assigned avatar, or with a Google or Microsoft Office 365 account, depending on your [sign-in settings](/products/pear-deck/how-students-join-a-session).

 ## Run a Session in the Projector View
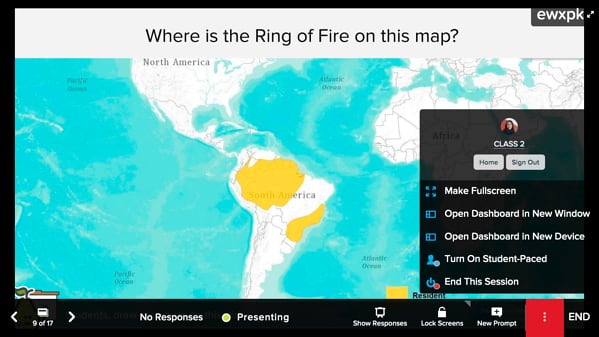
When you run an Instructor-Paced session, use the Navigation Bar at the bottom of the Projector View to control slide pace, see response counts in real time, display responses to the class, and more.
To open the Navigation Bar, hover over the bottom of any slide in the Projector View.
* Use the arrows on the left to navigate through slides.
* Click the **Slide Drawer** between the arrows to jump to slides out of sequence.
* Click [Lock Screens](/products/pear-deck/use-timer-and-lock-screens) to freeze students' screens when you want them to stop answering a question.
* Click and hold **Lock Screens** to start a [countdown timer](/products/pear-deck/use-timer-and-lock-screens).
* Click **Notes** to view [speaker notes](/products/pear-deck/view-speaker-notes) (available for Google Slides only).
* Click **Show Responses** to display all responses on the Projector View. Responses are anonymous by default. Click **Hide Responses** to return to the original slide.
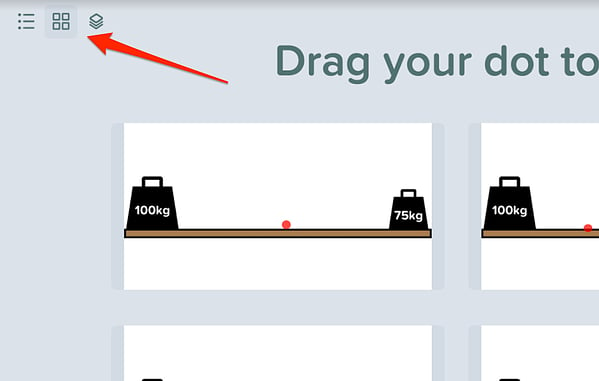
* When showing responses, use the Layout Controls in the upper-left corner to choose **Grid view**, **List view**, or the **Overlaid Layout**.
* Select **New Prompt** to repeat a question and gather fresh responses, or to drop in an unplanned question and make use of a teachable moment.
## Run a Session in the Projector View
When you run an Instructor-Paced session, use the Navigation Bar at the bottom of the Projector View to control slide pace, see response counts in real time, display responses to the class, and more.
To open the Navigation Bar, hover over the bottom of any slide in the Projector View.
* Use the arrows on the left to navigate through slides.
* Click the **Slide Drawer** between the arrows to jump to slides out of sequence.
* Click [Lock Screens](/products/pear-deck/use-timer-and-lock-screens) to freeze students' screens when you want them to stop answering a question.
* Click and hold **Lock Screens** to start a [countdown timer](/products/pear-deck/use-timer-and-lock-screens).
* Click **Notes** to view [speaker notes](/products/pear-deck/view-speaker-notes) (available for Google Slides only).
* Click **Show Responses** to display all responses on the Projector View. Responses are anonymous by default. Click **Hide Responses** to return to the original slide.
* When showing responses, use the Layout Controls in the upper-left corner to choose **Grid view**, **List view**, or the **Overlaid Layout**.
* Select **New Prompt** to repeat a question and gather fresh responses, or to drop in an unplanned question and make use of a teachable moment.


 ## End Your Session
When you are ready to close a session, end it to prevent students from submitting additional responses. You can reopen any session from your Sessions menu and present the same deck again to start a new session for a different group of students.
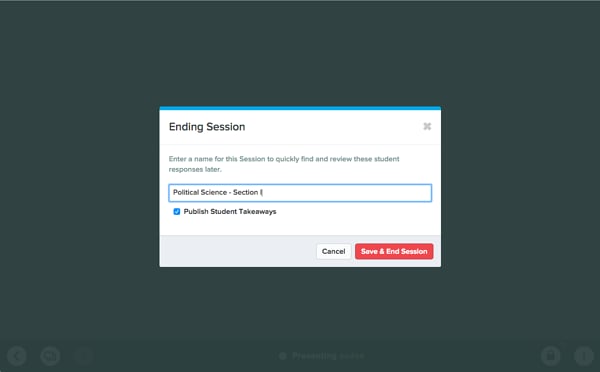
1. Click **End** on the navigation bar.
2. In the window that appears, type a name for the session. If you plan to use the same deck across multiple class periods, naming the session helps you identify each one later. The session is automatically dated and time-stamped in your Sessions menu.
3. Click **Save & End Session**. If you do not need to review or reopen the session, you can skip naming it. The session saves automatically.
## End Your Session
When you are ready to close a session, end it to prevent students from submitting additional responses. You can reopen any session from your Sessions menu and present the same deck again to start a new session for a different group of students.
1. Click **End** on the navigation bar.
2. In the window that appears, type a name for the session. If you plan to use the same deck across multiple class periods, naming the session helps you identify each one later. The session is automatically dated and time-stamped in your Sessions menu.
3. Click **Save & End Session**. If you do not need to review or reopen the session, you can skip naming it. The session saves automatically.

 ## Helpful Presenting Tools
Once you are comfortable with the basic presenter tools, you can enhance your lessons with the following features:
* **Zoom:** To zoom in or out on a slide, use a touchpad or screen, or use keyboard shortcuts. On Mac: **Command** + **+** / **-**. On Windows: **Ctrl** + **+** / **-**.
* **Teacher Dashboard:** Click the **More Actions** (three-dot) button to open the private [Teacher Dashboard](/products/pear-deck/teacher-dashboard) (requires Premium). View students' names, get individual insight into their progress, and even use the Dashboard as a remote control from a separate tablet.
* **Switch session modes:** In the same **More Actions** menu, turn on **Student-Paced** to switch between Instructor-Paced and Student-Paced modes during any session.
* **Additional settings:** Review your Settings page to explore other available tools, including [Immersive Reader](/products/pear-deck/immersive-reader-integration) and [Classroom Climate](/products/pear-deck/use-classroom-climate).
## Helpful Presenting Tools
Once you are comfortable with the basic presenter tools, you can enhance your lessons with the following features:
* **Zoom:** To zoom in or out on a slide, use a touchpad or screen, or use keyboard shortcuts. On Mac: **Command** + **+** / **-**. On Windows: **Ctrl** + **+** / **-**.
* **Teacher Dashboard:** Click the **More Actions** (three-dot) button to open the private [Teacher Dashboard](/products/pear-deck/teacher-dashboard) (requires Premium). View students' names, get individual insight into their progress, and even use the Dashboard as a remote control from a separate tablet.
* **Switch session modes:** In the same **More Actions** menu, turn on **Student-Paced** to switch between Instructor-Paced and Student-Paced modes during any session.
* **Additional settings:** Review your Settings page to explore other available tools, including [Immersive Reader](/products/pear-deck/immersive-reader-integration) and [Classroom Climate](/products/pear-deck/use-classroom-climate).
 ## Resources
Monitor student responses and progress in real time using the private Teacher Dashboard during a session.
Let students move through slides and respond to questions at their own pace without a live presenter.
## Resources
Monitor student responses and progress in real time using the private Teacher Dashboard during a session.
Let students move through slides and respond to questions at their own pace without a live presenter.