> ## Documentation Index
> Fetch the complete documentation index at: https://docs.goguardian.com/llms.txt
> Use this file to discover all available pages before exploring further.
# Use Lecture and Presentation Mode
> How to set up and run Lecture and Presentation Mode in GoGuardian Teacher, including screen sharing, camera and microphone options, recording, and helpful tips.
Lecture and Presentation Mode requires GoGuardian App 26.2.0 or later, or the GoGuardian extensions. This mode is not supported on iPadOS.
Lecture and Presentation Mode lets you present your screen to students in an active classroom session. This article explains how each part of the feature works.
## Set Up a Presentation
1. Go to the **Call Students** tab during an active classroom session.
If your organization does not have Video Conferencing, you'll see a **Present to Class** tab instead. Select that tab to set up your presentation.
2. Select **Start Lecture** on the far right.
 Lecture and Presentation Mode sessions are limited to 8 hours.
## Presentation Toggle Options
### Enable Camera
1. Turn on the toggle next to **Enable Camera**.
2. If this is your first time using the feature, a popup will ask if GoGuardian can access your camera. Select **Allow**.
3. Check the preview box on the right to confirm you can see your webcam. If you have a cover over your webcam, remove it before proceeding.
### Enable Microphone
1. Turn on the toggle next to **Enable Microphone**.
2. If this is your first time using the feature, a popup will ask if GoGuardian can access your microphone. Select **Allow**.
3. If more than 1 microphone is available, select the one you want to use from the dropdown.
Presentation audio captures sound from the device's microphone only. Browser or system audio on the device is not captured.
### Present Your Screen
**Present Your Screen** lets you show what's on your desktop to students on their devices.
#### Lock Students to Presentation
Turning on **Lock Students to Presentation** prevents students from navigating away from the tab you're presenting.
Lecture and Presentation Mode sessions are limited to 8 hours.
## Presentation Toggle Options
### Enable Camera
1. Turn on the toggle next to **Enable Camera**.
2. If this is your first time using the feature, a popup will ask if GoGuardian can access your camera. Select **Allow**.
3. Check the preview box on the right to confirm you can see your webcam. If you have a cover over your webcam, remove it before proceeding.
### Enable Microphone
1. Turn on the toggle next to **Enable Microphone**.
2. If this is your first time using the feature, a popup will ask if GoGuardian can access your microphone. Select **Allow**.
3. If more than 1 microphone is available, select the one you want to use from the dropdown.
Presentation audio captures sound from the device's microphone only. Browser or system audio on the device is not captured.
### Present Your Screen
**Present Your Screen** lets you show what's on your desktop to students on their devices.
#### Lock Students to Presentation
Turning on **Lock Students to Presentation** prevents students from navigating away from the tab you're presenting.
 ## Select Students to Present To
1. Select **Select students to present to** at the bottom of the screen. A popup will open.
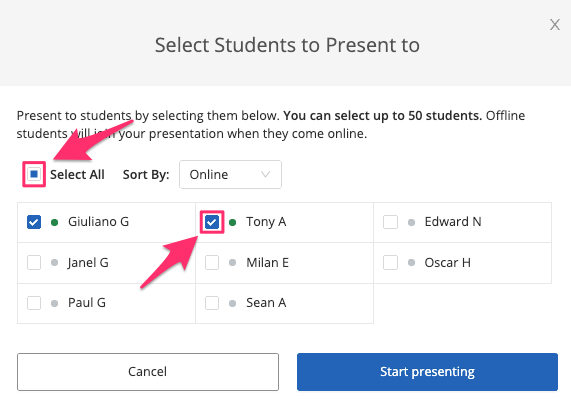
2. In the popup, select the checkbox to the left of each student you want to present to. To present to the whole class, select the checkbox next to **Select All**.
A maximum of 50 students can be selected per presentation. Co-teachers cannot join presentations at this time.
3. If you're not sharing your screen, select **Start Presenting** to begin presenting your video and audio to students.
4. If you selected **Present Your Screen**, select **Choose What to Present** to choose which part of your screen to share with your class.
## Select Students to Present To
1. Select **Select students to present to** at the bottom of the screen. A popup will open.
2. In the popup, select the checkbox to the left of each student you want to present to. To present to the whole class, select the checkbox next to **Select All**.
A maximum of 50 students can be selected per presentation. Co-teachers cannot join presentations at this time.
3. If you're not sharing your screen, select **Start Presenting** to begin presenting your video and audio to students.
4. If you selected **Present Your Screen**, select **Choose What to Present** to choose which part of your screen to share with your class.
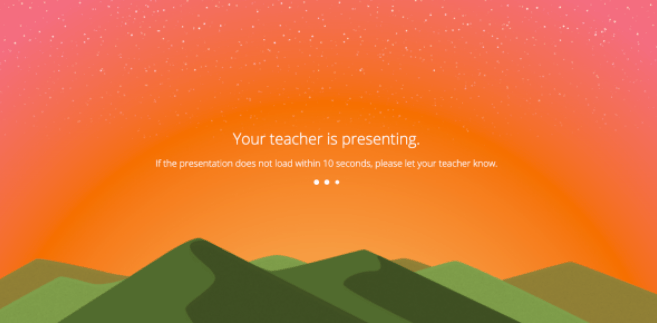
 After selecting **Share**, a new tab will open on students' devices. It will briefly display a message before your screen share begins.
 ## Screen-Sharing Options
### Entire Screen
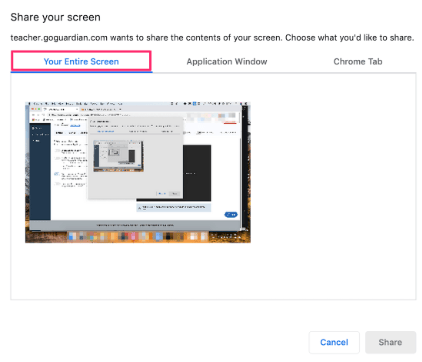
Select **Your Entire Screen** to share your full computer screen with the selected students.
### Specific Windows
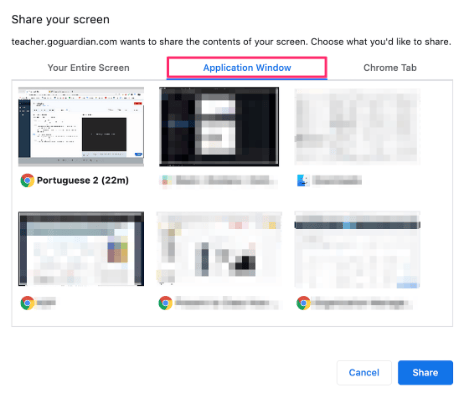
Select **Application Window** to share a single application window. You can have multiple apps open — including multiple Chrome windows — and share just 1 window.
### Specific Chrome Tab
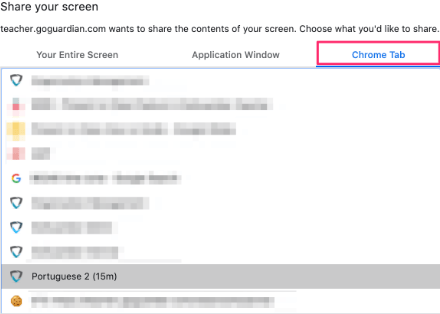
Select **Chrome Tab** to share a specific tab from your currently open browser.
## Screen-Sharing Options
### Entire Screen
Select **Your Entire Screen** to share your full computer screen with the selected students.
### Specific Windows
Select **Application Window** to share a single application window. You can have multiple apps open — including multiple Chrome windows — and share just 1 window.
### Specific Chrome Tab
Select **Chrome Tab** to share a specific tab from your currently open browser.

 ## Record a Presentation
The recording feature is only available for organizations with the Video Conferencing add-on.
1. To stop recording during a presentation, select **Stop Recording** where the **Start Recording** button previously appeared.
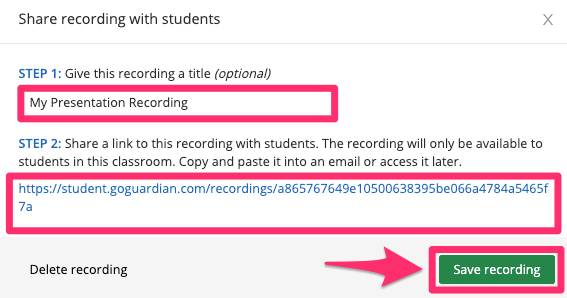
2. When the recording stops, you'll be prompted to give the recording a title and then save it. You can also delete the recording at this point.
3. A link will appear in the popup. Copy and paste this link to share the recording with students so they can access it later.
## Access Presentation Recordings
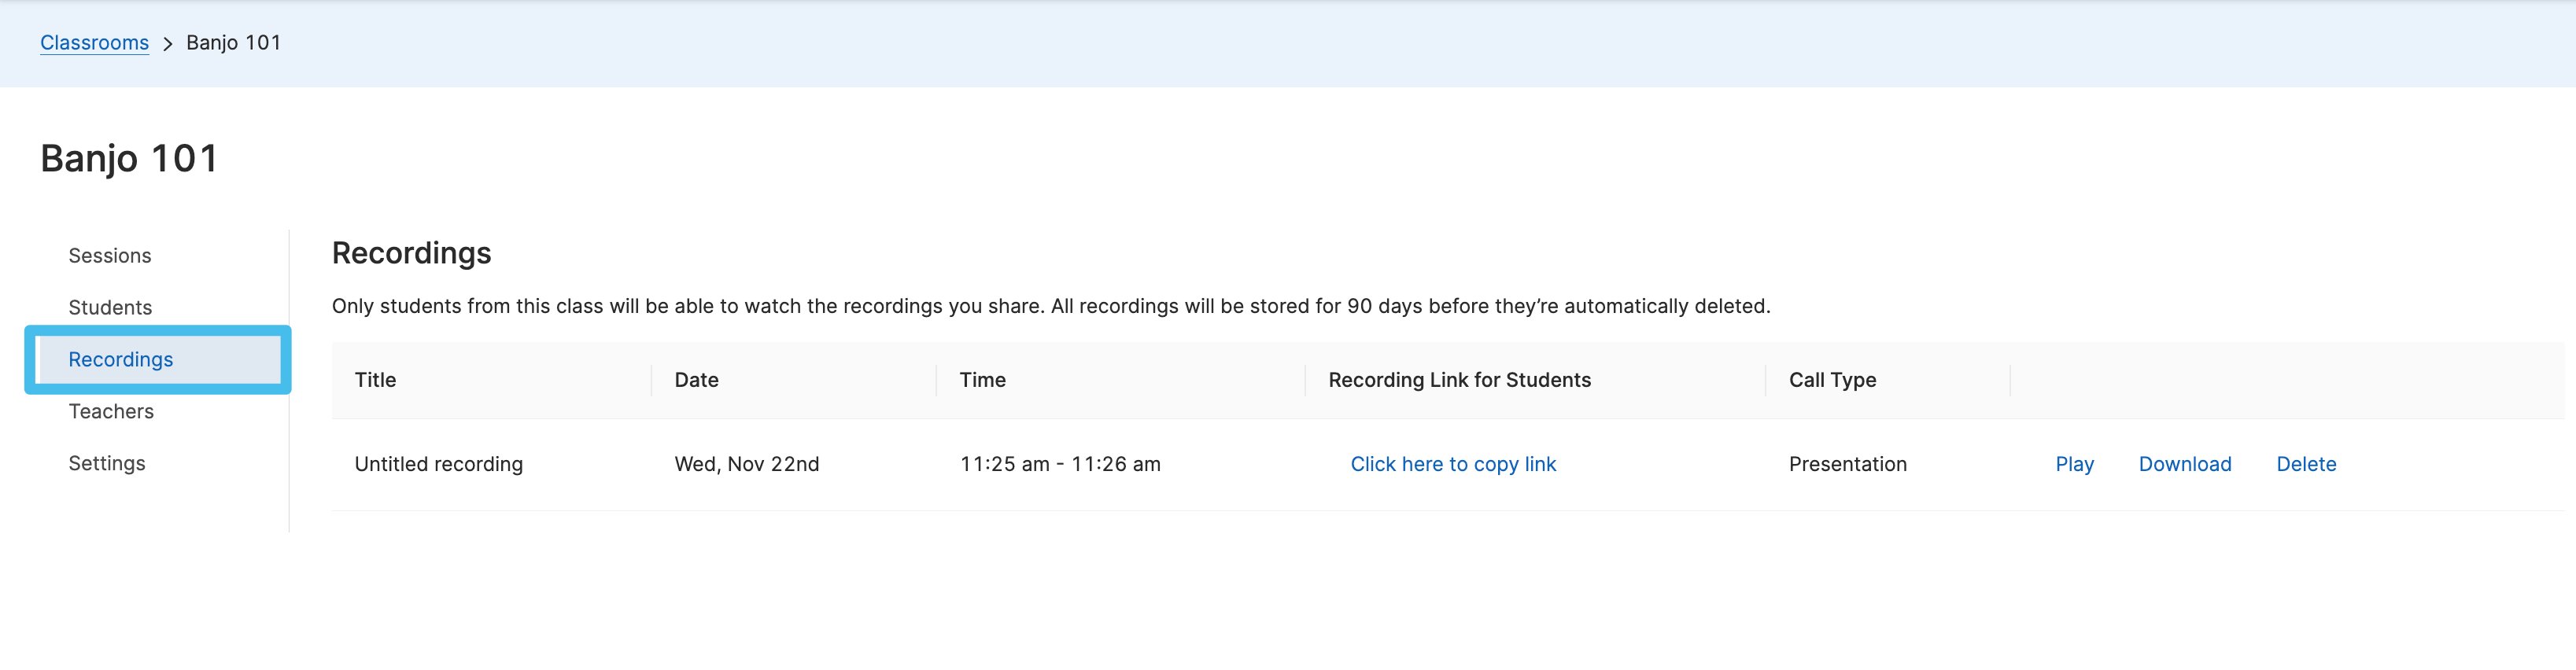
Go to the **Recordings** tab of the classroom to find recorded calls. From there you can copy links to share recordings, as well as play, download, or delete them.
## Record a Presentation
The recording feature is only available for organizations with the Video Conferencing add-on.
1. To stop recording during a presentation, select **Stop Recording** where the **Start Recording** button previously appeared.
2. When the recording stops, you'll be prompted to give the recording a title and then save it. You can also delete the recording at this point.
3. A link will appear in the popup. Copy and paste this link to share the recording with students so they can access it later.
## Access Presentation Recordings
Go to the **Recordings** tab of the classroom to find recorded calls. From there you can copy links to share recordings, as well as play, download, or delete them.
 ## Helpful Tips
### Allow Camera and Microphone After Selecting Block
If you accidentally selected **Block** when the permissions popup appeared, use the steps for your browser to change the setting to **Allow**:
1. **Google Chrome**: Select the lock icon in the upper-left portion of your browser (next to the Refresh button). Change the setting from **Block** to **Allow**.
2. **Safari**: Select the **Safari** tab in the top-left banner, then select **Settings for this website**. Change the permissions from **Block** to **Allow**.
3. **Microsoft Edge**: Select the lock icon in the upper-left portion of your browser, then select **Site Permissions**. Change the camera and microphone settings from **Block** to **Allow**.
4. **Firefox**: Select the icon in the upper-left corner, then select the **X** next to **Blocked** to clear those settings. The prompt will reappear the next time you turn on the camera or microphone toggles.
### Confirm You're Ready to Start Presenting
Select the **Share** button in the bottom blue banner before returning to the students' screens. Once screen sharing is active, the banner turns red and shows details about what's being shared.
### Stop Presenting
To end the presentation, select **Stop Presenting** in the red banner at the bottom of the page. This turns off your camera, microphone, and any other settings you had turned on.
### Roster Maximums
Classrooms with more than 50 students cannot use Lecture and Presentation Mode. Keep classroom sizes at 50 or fewer to share your screen with students. For larger classrooms, you can split students into 2 separate sessions running at the same time and share your screen in both.
## Resources
Set up the Video Conferencing add-on for your organization.
Start and manage a video call with students in an active session.
Open a session and bring students into a classroom.
Lock students to a specific screen or prevent navigation during class.
## Helpful Tips
### Allow Camera and Microphone After Selecting Block
If you accidentally selected **Block** when the permissions popup appeared, use the steps for your browser to change the setting to **Allow**:
1. **Google Chrome**: Select the lock icon in the upper-left portion of your browser (next to the Refresh button). Change the setting from **Block** to **Allow**.
2. **Safari**: Select the **Safari** tab in the top-left banner, then select **Settings for this website**. Change the permissions from **Block** to **Allow**.
3. **Microsoft Edge**: Select the lock icon in the upper-left portion of your browser, then select **Site Permissions**. Change the camera and microphone settings from **Block** to **Allow**.
4. **Firefox**: Select the icon in the upper-left corner, then select the **X** next to **Blocked** to clear those settings. The prompt will reappear the next time you turn on the camera or microphone toggles.
### Confirm You're Ready to Start Presenting
Select the **Share** button in the bottom blue banner before returning to the students' screens. Once screen sharing is active, the banner turns red and shows details about what's being shared.
### Stop Presenting
To end the presentation, select **Stop Presenting** in the red banner at the bottom of the page. This turns off your camera, microphone, and any other settings you had turned on.
### Roster Maximums
Classrooms with more than 50 students cannot use Lecture and Presentation Mode. Keep classroom sizes at 50 or fewer to share your screen with students. For larger classrooms, you can split students into 2 separate sessions running at the same time and share your screen in both.
## Resources
Set up the Video Conferencing add-on for your organization.
Start and manage a video call with students in an active session.
Open a session and bring students into a classroom.
Lock students to a specific screen or prevent navigation during class.