> ## Documentation Index
> Fetch the complete documentation index at: https://docs.goguardian.com/llms.txt
> Use this file to discover all available pages before exploring further.
# Remove Students From a Classroom
> How to remove a student from a GoGuardian Teacher class roster, depending on whether the class was created manually, imported from Google Classroom, or synced from Clever or ClassLink.
The steps to remove a student from a class roster vary depending on how the class was originally created. Use the section below that matches your class type.
## Manually Created Classes
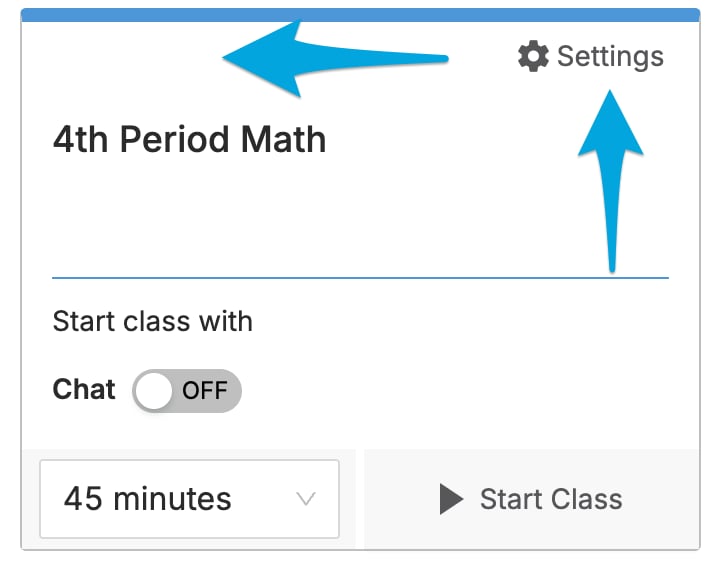
Classes created directly in GoGuardian Teacher have no integration symbol in the upper-left corner of the class tile.
1. Click the class tile, or click the **Settings** cogwheel and select **Edit Class**.
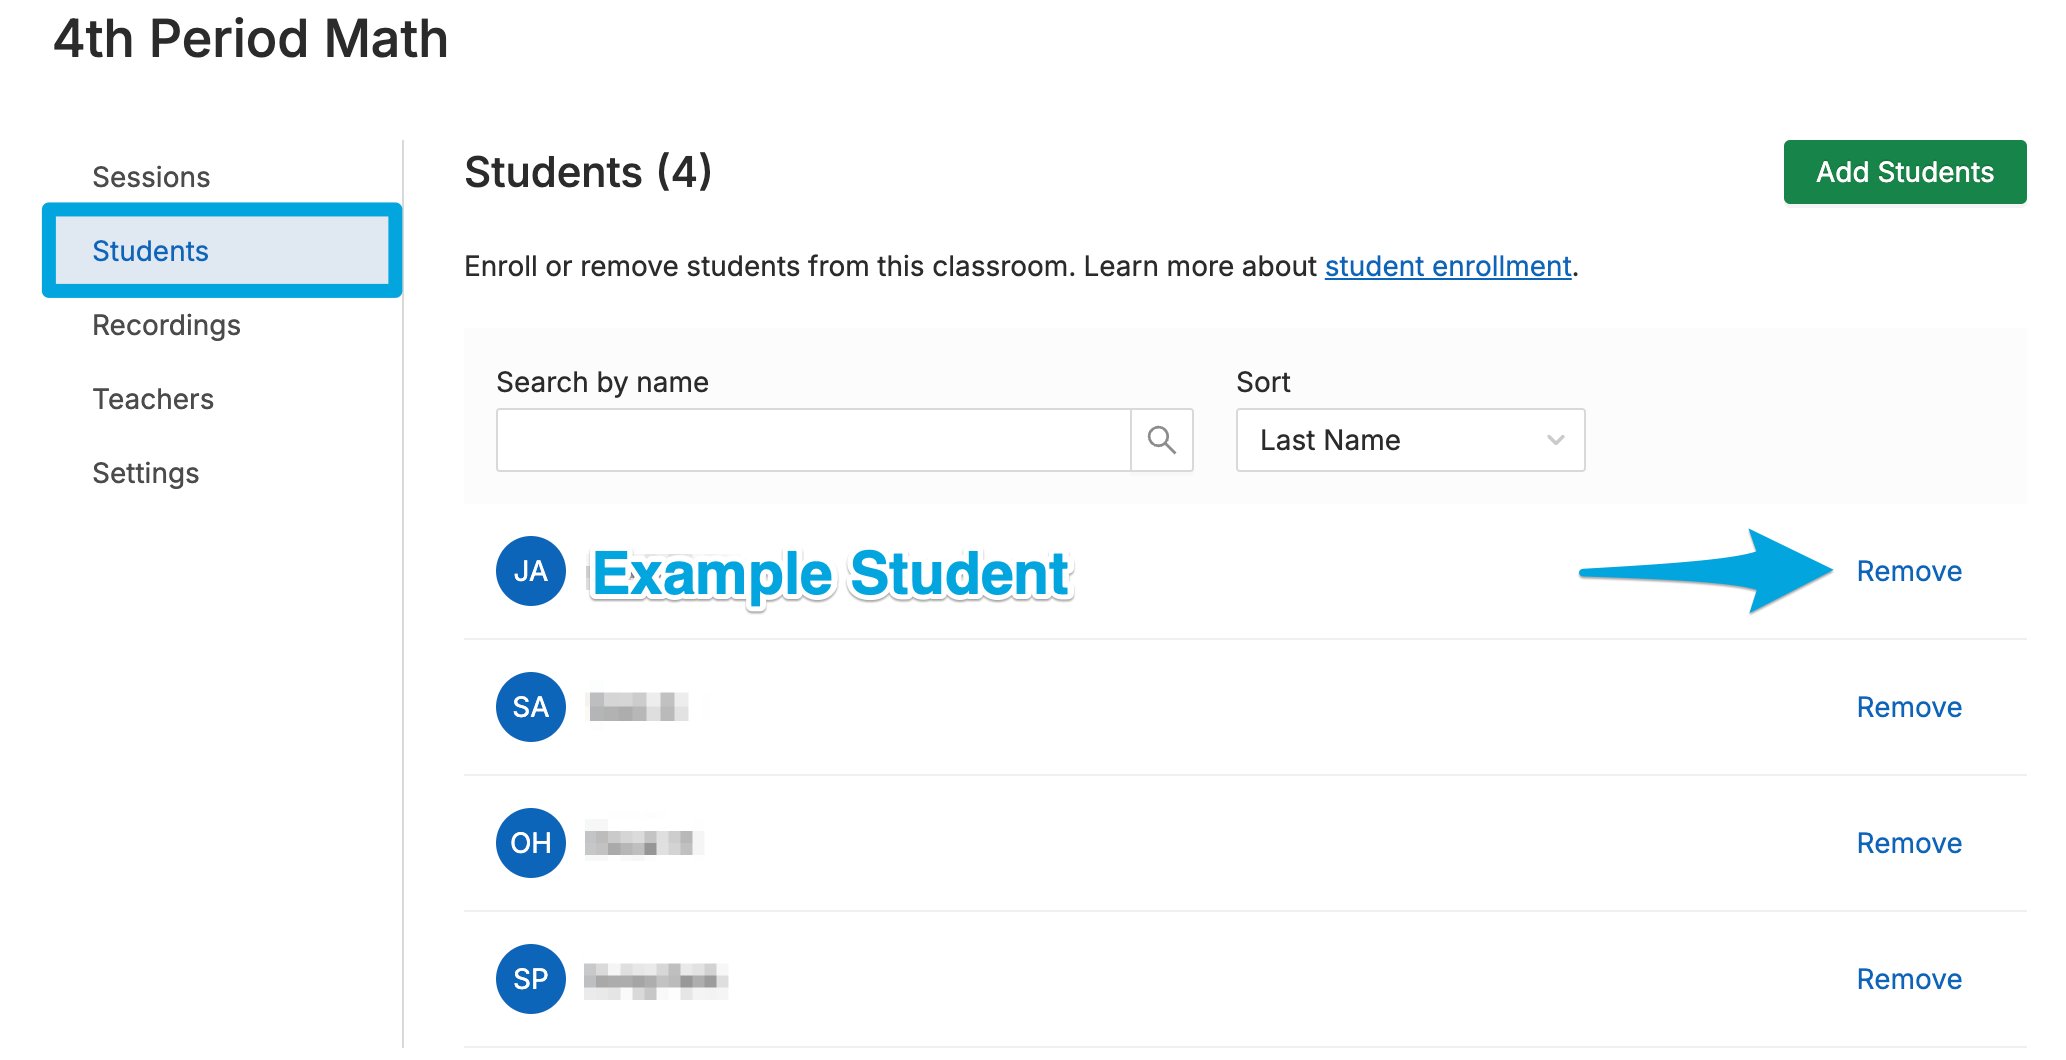
2. Select the **Students** tab.
3. Click **Remove** next to the student's name.
4. Select **Remove Student** in the confirmation pop-up to apply the change.
 ## Google Classroom Classes
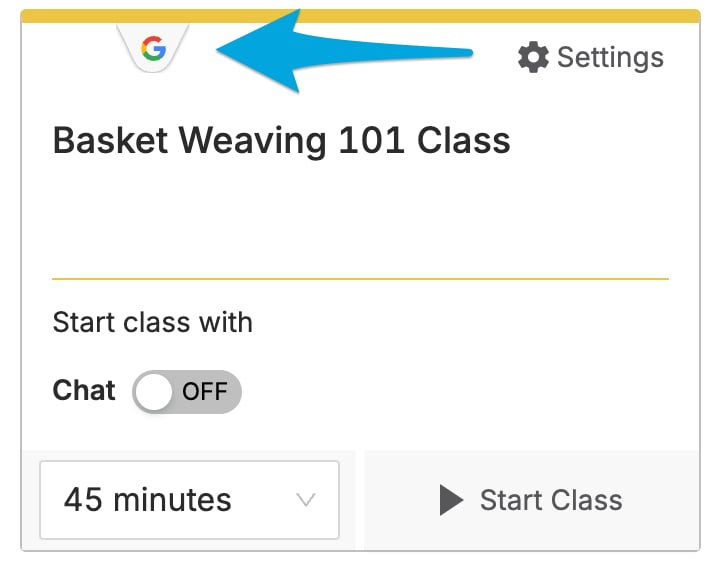
Classes imported from Google Classroom are identified by the Google **G** symbol in the upper-left corner of the class tile. Roster changes must be made in Google Classroom, not in GoGuardian Teacher.
## Google Classroom Classes
Classes imported from Google Classroom are identified by the Google **G** symbol in the upper-left corner of the class tile. Roster changes must be made in Google Classroom, not in GoGuardian Teacher.
 1. Go to [classroom.google.com](https://classroom.google.com).
2. Click the class you want to edit.
3. Select the **People** tab.
4. Under the **Students** section, click the 3-dot menu next to the student's name, then click **Remove** and confirm by clicking **Remove** again.
GoGuardian syncs with Google Classroom every 2 hours. Roster changes apply automatically after each sync. To apply changes immediately, complete the manual sync steps below.
### Manually Sync Google Classroom
1. Go back to GoGuardian Teacher.
2. Click the Google Classroom class you edited.
3. Select the **Students** tab.
4. Click **Sync Students From Google** to apply roster changes immediately.
1. Go to [classroom.google.com](https://classroom.google.com).
2. Click the class you want to edit.
3. Select the **People** tab.
4. Under the **Students** section, click the 3-dot menu next to the student's name, then click **Remove** and confirm by clicking **Remove** again.
GoGuardian syncs with Google Classroom every 2 hours. Roster changes apply automatically after each sync. To apply changes immediately, complete the manual sync steps below.
### Manually Sync Google Classroom
1. Go back to GoGuardian Teacher.
2. Click the Google Classroom class you edited.
3. Select the **Students** tab.
4. Click **Sync Students From Google** to apply roster changes immediately.
 ## Clever and ClassLink Classes
Classes synced from Clever or ClassLink are identified by the Clever or ClassLink integration symbol in the upper-left corner of the class tile. Teachers cannot edit these rosters directly in GoGuardian Teacher.
Roster changes must be made in Clever or ClassLink. Updates sync back to GoGuardian Teacher after the next scheduled sync.
If you don't have access to Clever or ClassLink, contact your IT department or GoGuardian administrator for help with roster changes.
## Clever and ClassLink Classes
Classes synced from Clever or ClassLink are identified by the Clever or ClassLink integration symbol in the upper-left corner of the class tile. Teachers cannot edit these rosters directly in GoGuardian Teacher.
Roster changes must be made in Clever or ClassLink. Updates sync back to GoGuardian Teacher after the next scheduled sync.
If you don't have access to Clever or ClassLink, contact your IT department or GoGuardian administrator for help with roster changes.
 ## Resources
Add students to a manually created class roster.
Manage classrooms you no longer need.
Begin a session with your updated roster.
Admin-level controls for teacher and student accounts.
## Resources
Add students to a manually created class roster.
Manage classrooms you no longer need.
Begin a session with your updated roster.
Admin-level controls for teacher and student accounts.