> ## Documentation Index
> Fetch the complete documentation index at: https://docs.goguardian.com/llms.txt
> Use this file to discover all available pages before exploring further.
# Set Up and Use Student Groups
> Learn how to create, edit, and use student groups to organize students and issue commands during GoGuardian Teacher sessions.
Student groups let you visually organize students and push tabs to, initiate calls with, or exclude groups of students during GoGuardian Teacher sessions. You can customize the arrangement and ordering of students' screens.
This article covers:
* Creating custom and random groups
* Using commands with student groups
* Editing existing groups
* Reordering groups
* Deleting groups
## Set Up Student Groups
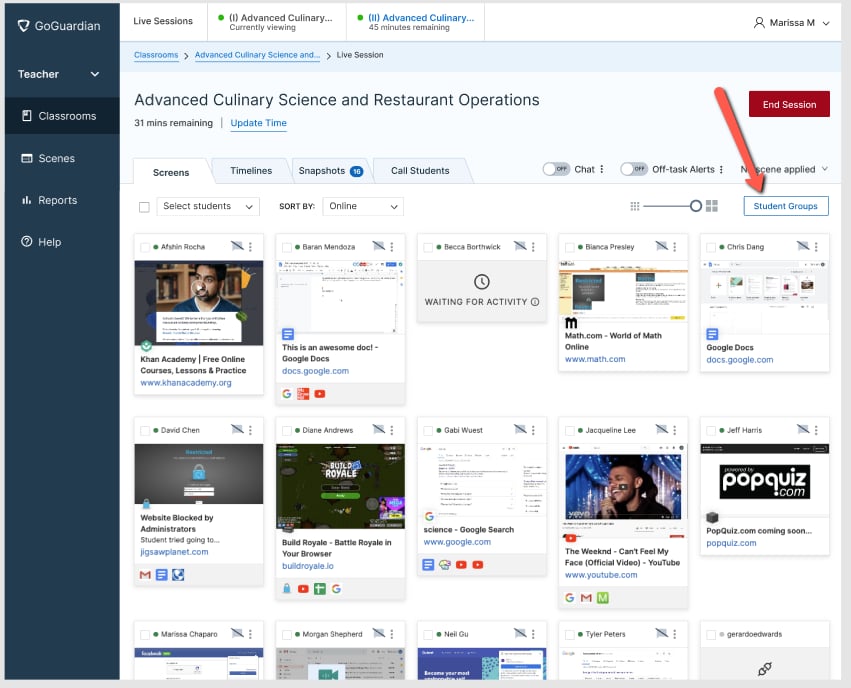
From the Screens view of an active classroom session, select the **Student Groups** button in the top-right corner to open the group setup modal.
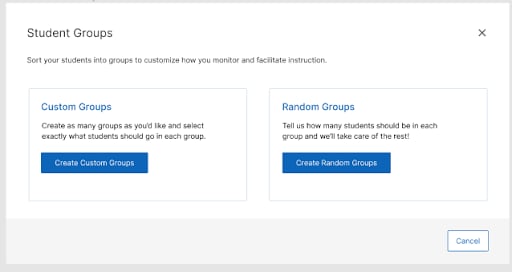
There are 2 options for creating groups:
* **Custom Groups** — Select which students belong in each group.
* **Random Groups** — Students are assigned to groups randomly. You choose the number of students per group.
## Create Custom Groups
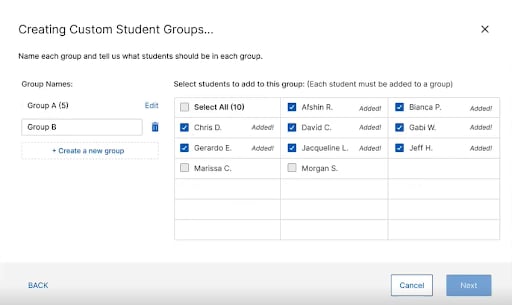
1. Select the checkbox to the left of each student's name to add them to a group. An "Added!" confirmation appears to the right of the student's name when they've been added.
2. Select **Create a new group** on the left side of the modal to continue building your groups.
The **Next** button becomes available only after every student in the session has been added to a group.
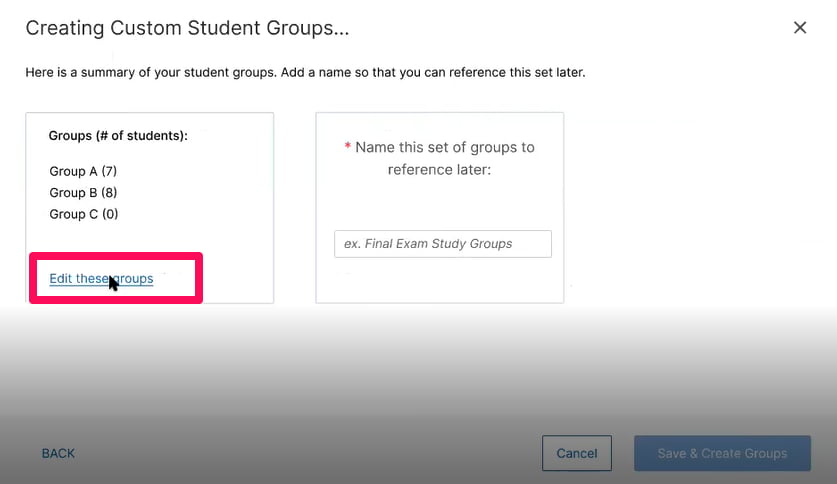
3. On the summary page, select **Edit these groups** to go back and rearrange students or edit group names before finalizing.
 ## Create Random Groups
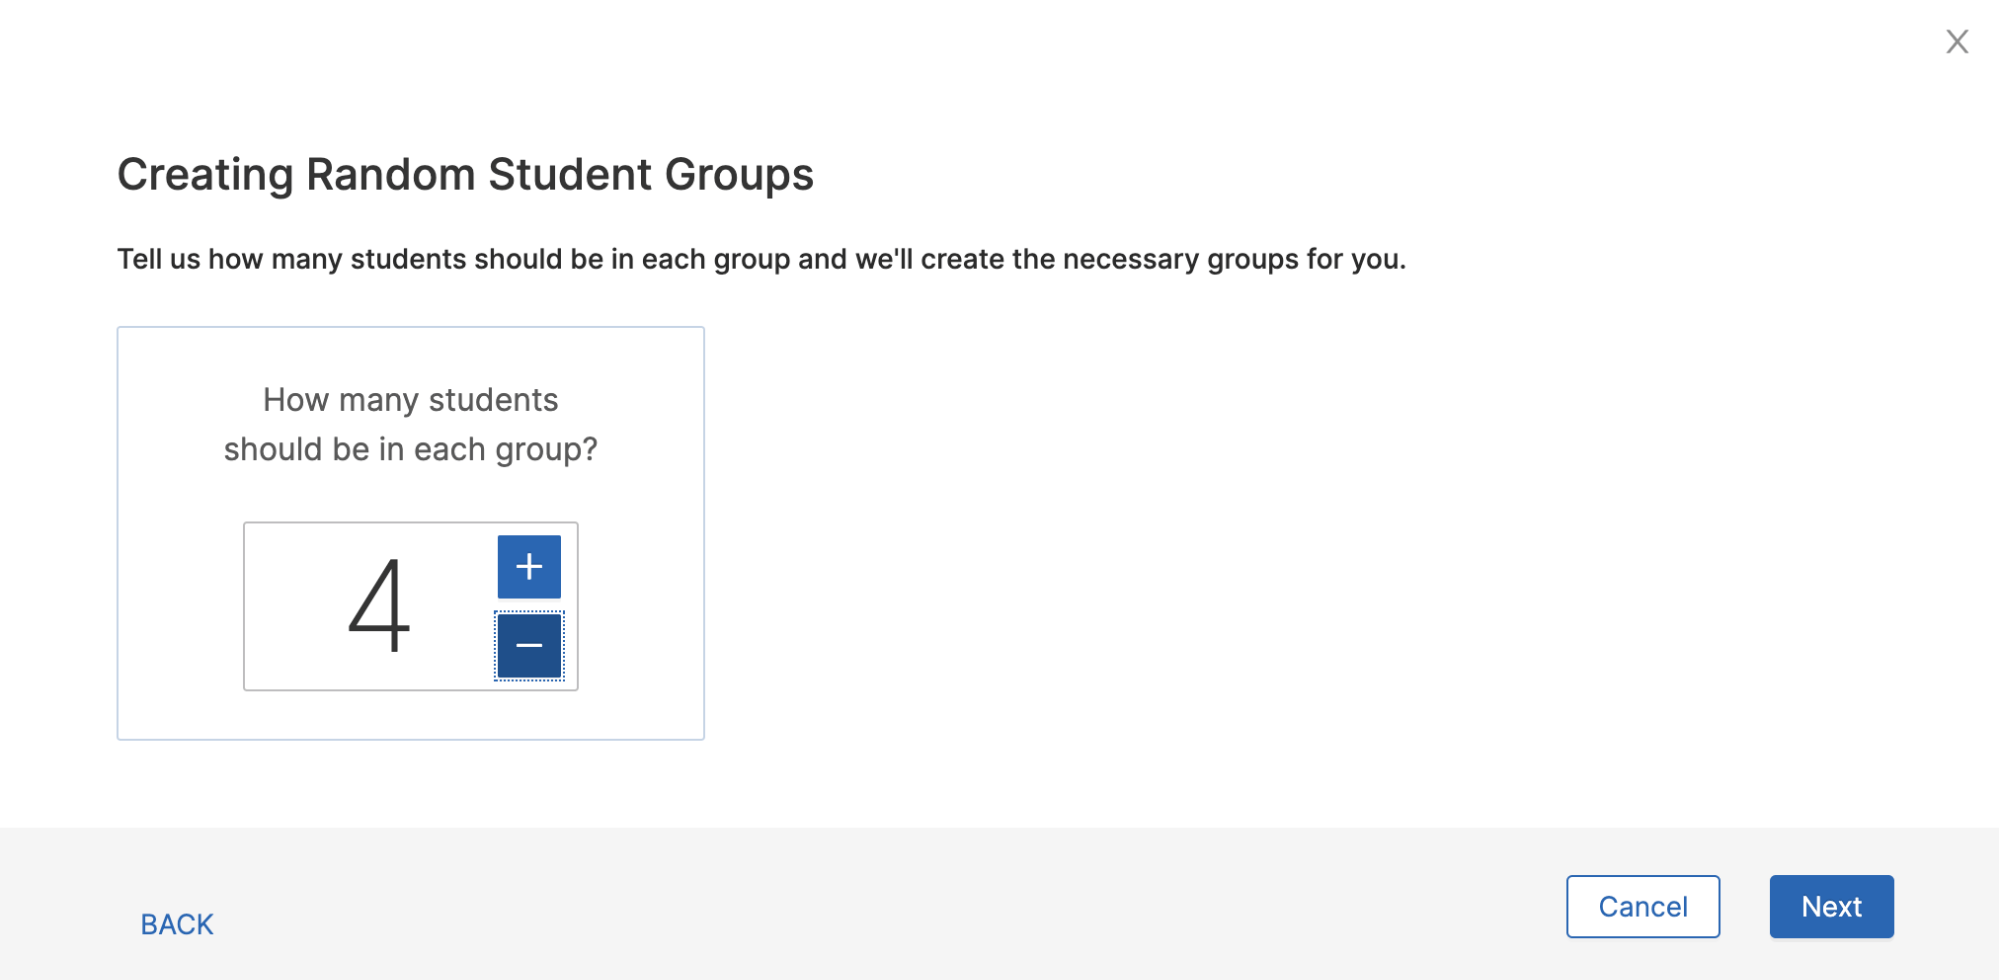
1. After selecting the random groups option, enter the number of students you'd like per group. Students are distributed into separate group sections.
If any students are left over after distribution, they'll be added to existing groups, so some groups may be slightly larger than the number you entered.
2. Enter a name for the set of random groups, then select **Save & Create Groups** in the bottom-right corner of the modal.
## Create Random Groups
1. After selecting the random groups option, enter the number of students you'd like per group. Students are distributed into separate group sections.
If any students are left over after distribution, they'll be added to existing groups, so some groups may be slightly larger than the number you entered.
2. Enter a name for the set of random groups, then select **Save & Create Groups** in the bottom-right corner of the modal.
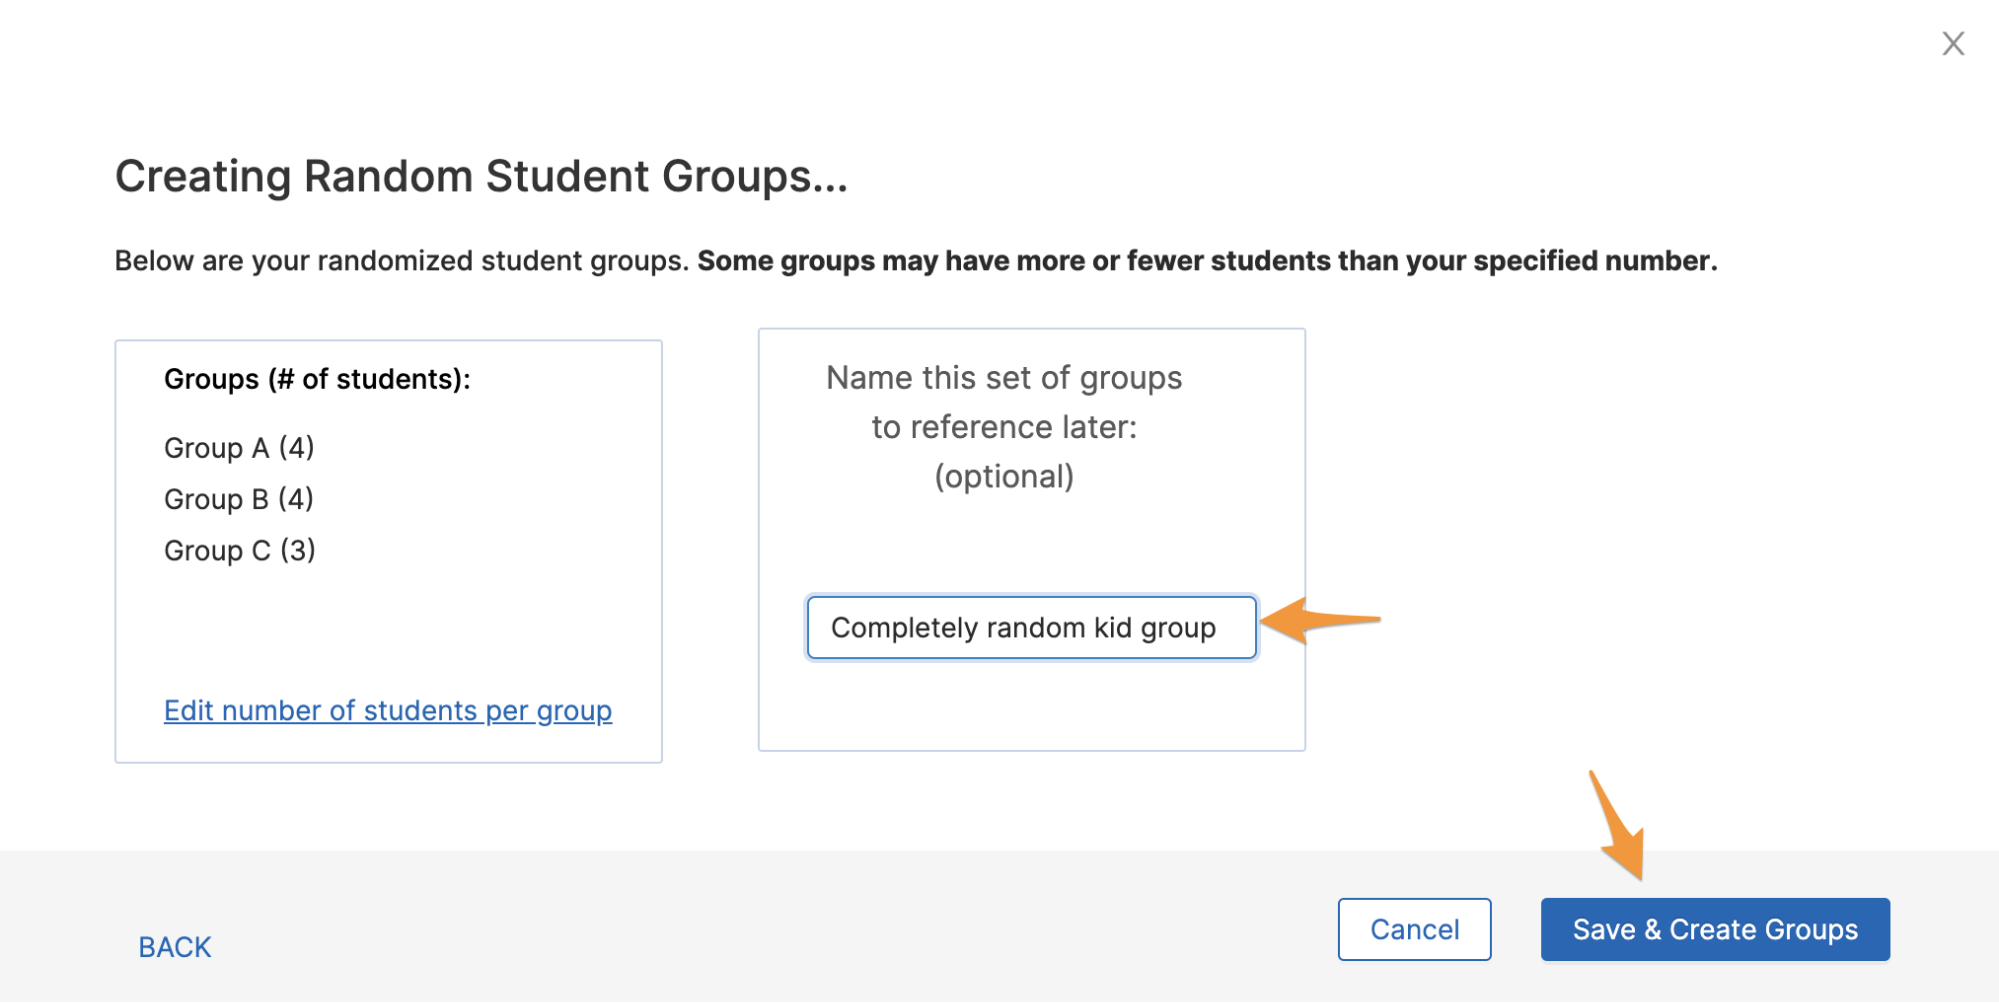 Saving is not available until every student has been assigned to a group. If you close the modal mid-workflow, a confirmation prompt appears. Exiting without saving discards the group. If no name is entered, the group defaults to the creation date (for example, 12/10/20 Random Group).
3. Once saved, the random groups are automatically available for future sessions under **Student Groups** > **Enable Existing Groups**.
Saving is not available until every student has been assigned to a group. If you close the modal mid-workflow, a confirmation prompt appears. Exiting without saving discards the group. If no name is entered, the group defaults to the creation date (for example, 12/10/20 Random Group).
3. Once saved, the random groups are automatically available for future sessions under **Student Groups** > **Enable Existing Groups**.
 ## Use Commands With Student Groups
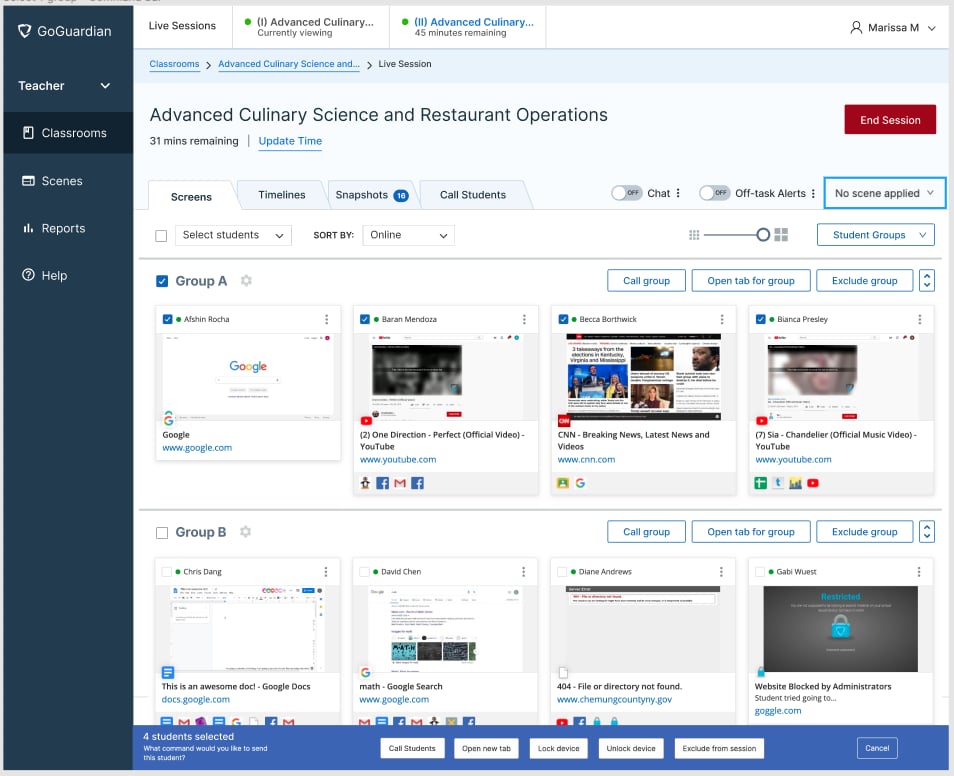
After groups are created, command options appear in the top-right corner of each group section. Available commands for each group are:
* **Call group**
* **Open tab for group**
* **Exclude group**
The call feature requires a video conferencing add-on subscription. Contact your account representative for details.
To open the **Commands** menu bar for a specific group, select the checkbox next to the group's name.
When more than 1 group is selected, commands can only be issued from the commands bar at the bottom of the page.
## Use Commands With Student Groups
After groups are created, command options appear in the top-right corner of each group section. Available commands for each group are:
* **Call group**
* **Open tab for group**
* **Exclude group**
The call feature requires a video conferencing add-on subscription. Contact your account representative for details.
To open the **Commands** menu bar for a specific group, select the checkbox next to the group's name.
When more than 1 group is selected, commands can only be issued from the commands bar at the bottom of the page.

 ## Edit Existing Student Groups
### Edit All Groups at Once
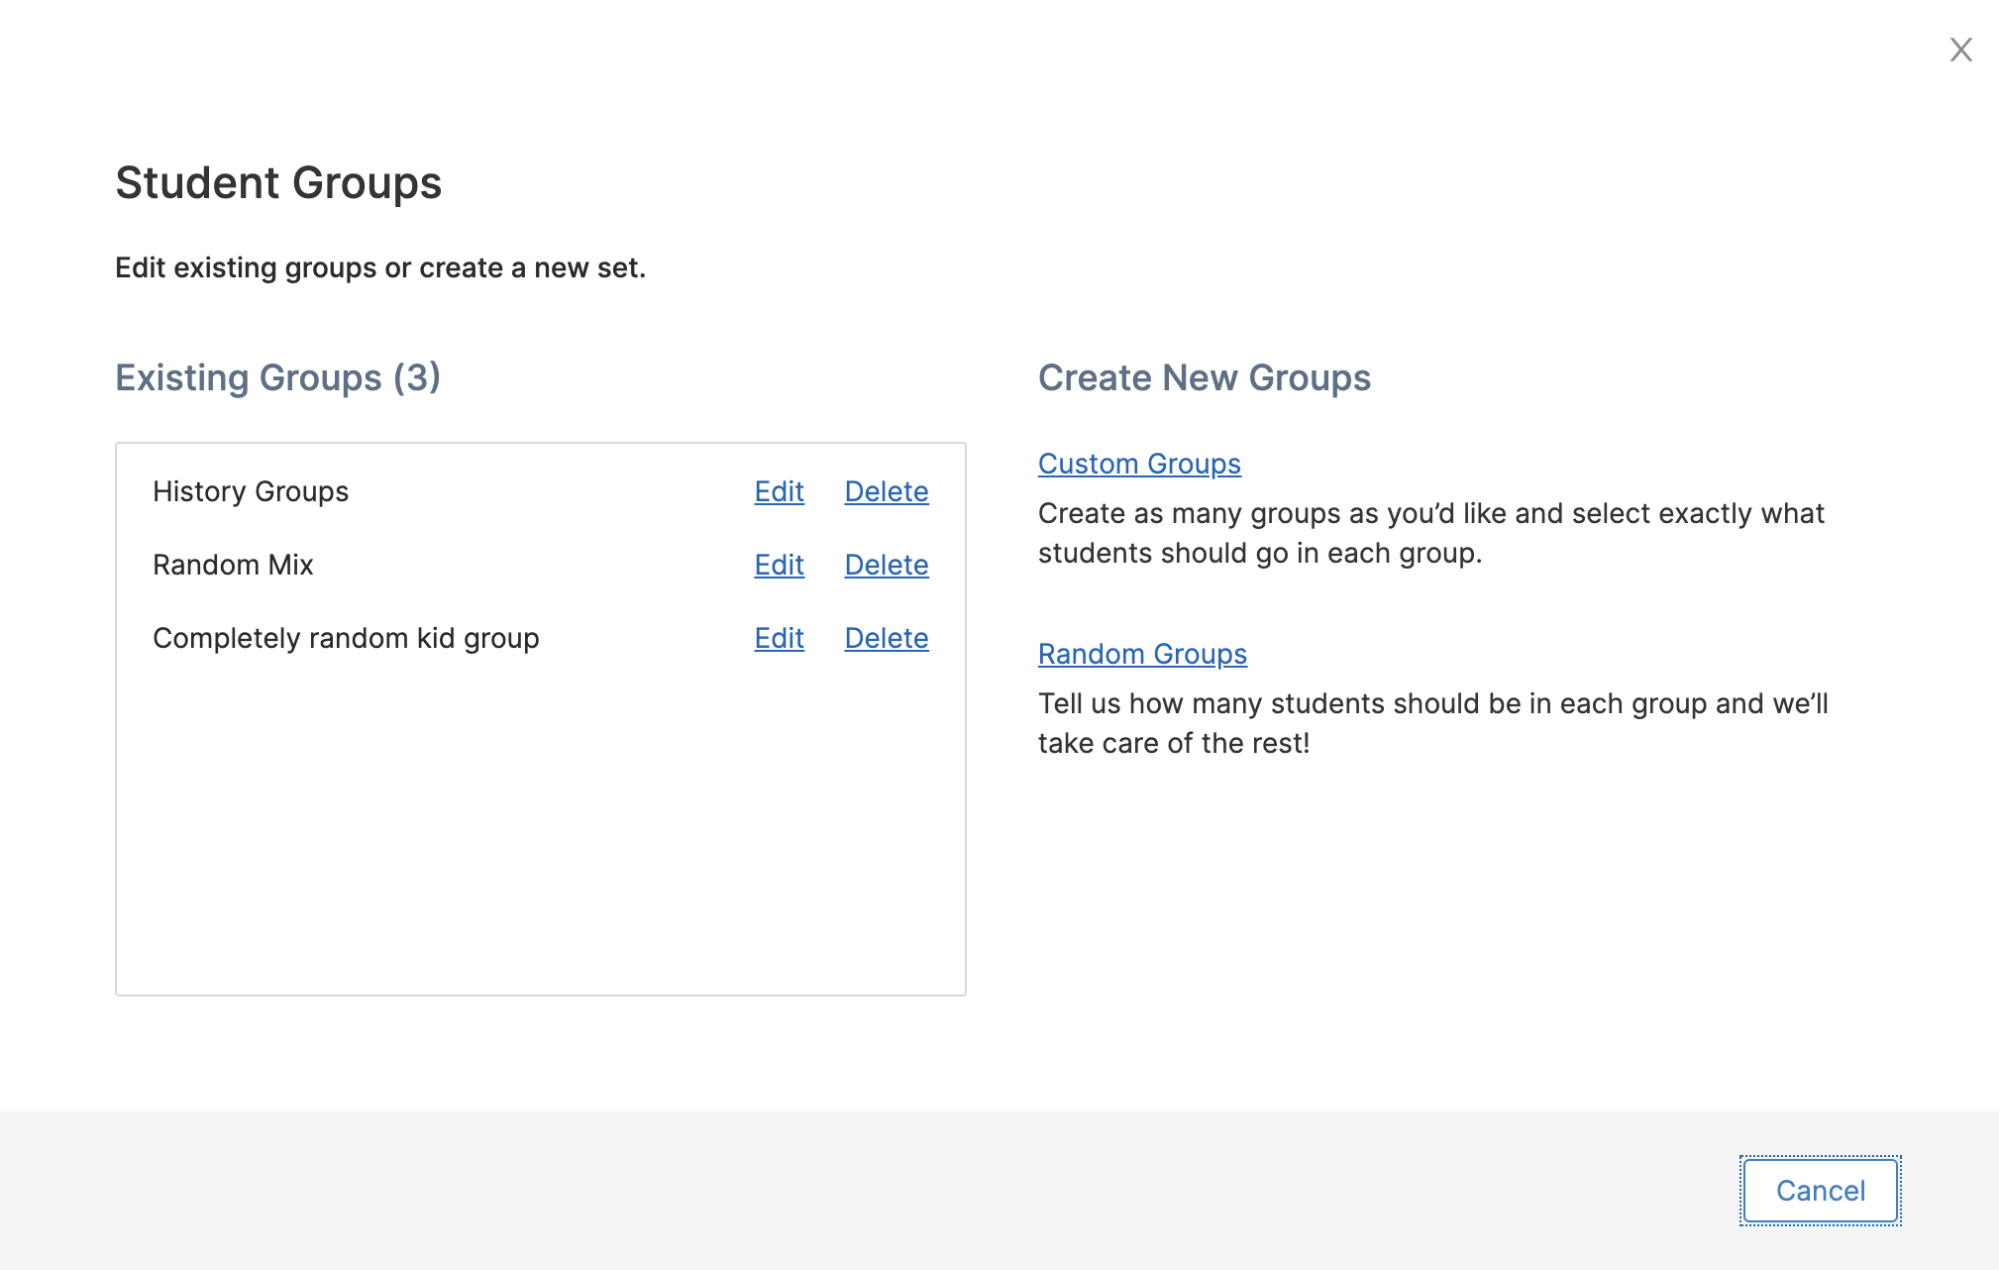
1. Go to **Student Groups** > **Edit Existing Groups**. All current groups appear, along with the option to create additional custom or random groups.
2. Edit group names, delete groups, or move students between groups.
### Edit a Single Group
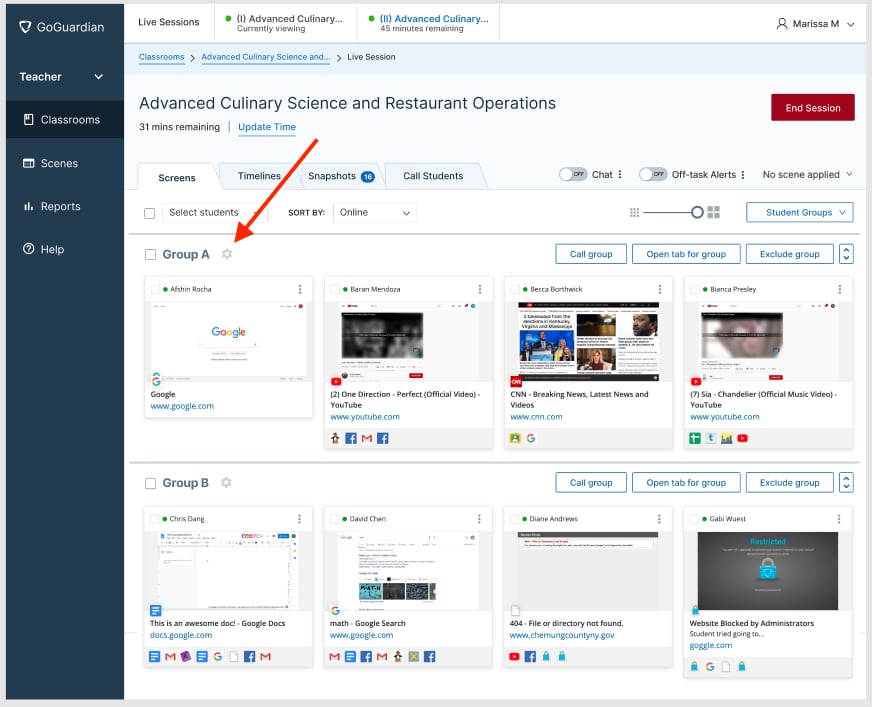
Select the settings button (cog icon) to the right of the group label on the dashboard.
You can organize groups to display alphabetically or by online/offline status within each group.
### Move a Student to a Different Group
1. Go to **Student Groups** > **Edit Existing Groups** > **Edit** for the target group, or select the cog icon next to the group on the dashboard.
2. Deselect the checkbox next to the student's name.
A student can only belong to 1 group and must belong to at least 1 group when groups are enabled.
3. Open or create the destination group and select the checkbox next to the student's name to add them.
## Edit Existing Student Groups
### Edit All Groups at Once
1. Go to **Student Groups** > **Edit Existing Groups**. All current groups appear, along with the option to create additional custom or random groups.
2. Edit group names, delete groups, or move students between groups.
### Edit a Single Group
Select the settings button (cog icon) to the right of the group label on the dashboard.
You can organize groups to display alphabetically or by online/offline status within each group.
### Move a Student to a Different Group
1. Go to **Student Groups** > **Edit Existing Groups** > **Edit** for the target group, or select the cog icon next to the group on the dashboard.
2. Deselect the checkbox next to the student's name.
A student can only belong to 1 group and must belong to at least 1 group when groups are enabled.
3. Open or create the destination group and select the checkbox next to the student's name to add them.

 ## Reorder Student Groups
From the Screens view of an active session, select the up/down arrows button in the top-right corner of a group to see the following options:
* **Collapse Group**
* **Move Up**
* **Move to Top**
* **Move Down**
* **Move to Bottom**
## Reorder Student Groups
From the Screens view of an active session, select the up/down arrows button in the top-right corner of a group to see the following options:
* **Collapse Group**
* **Move Up**
* **Move to Top**
* **Move Down**
* **Move to Bottom**
 ## Delete a Student Group
1. Go to **Student Groups** > **Existing Groups**, then select **Delete** next to the group you want to remove.
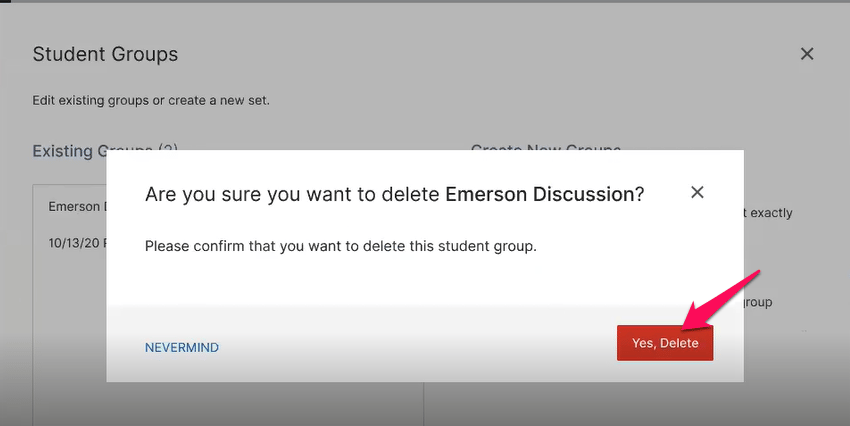
2. Select **Yes, Delete** in the confirmation prompt to complete the deletion.
## Resources
Learn about all available commands you can issue during a classroom session.
Understand the layout and features of the Screens view during an active session.
Steps for launching a GoGuardian Teacher classroom session.
Details on using video conferencing features with your class.
## Delete a Student Group
1. Go to **Student Groups** > **Existing Groups**, then select **Delete** next to the group you want to remove.
2. Select **Yes, Delete** in the confirmation prompt to complete the deletion.
## Resources
Learn about all available commands you can issue during a classroom session.
Understand the layout and features of the Screens view during an active session.
Steps for launching a GoGuardian Teacher classroom session.
Details on using video conferencing features with your class.