

Check the Requirements
Before you begin, make sure you have:- A district- or school-wide Pear Deck subscription
- Schoology administrator access to install and configure the app
- For LTI 1.3, LTI learning management system (LMS) integration access assigned to your Pear Deck account through the Pear Deck Admin Portal, plus Schoology access to create a developer app
- For LTI 1.1, access to the Pear Deck Subscription Manager account to generate the Key and Secret
Choose Your LTI Version
Choose the setup method you want to use, then follow only that version’s instructions. The credentials and configuration steps are different.Install Pear Deck With LTI 1.3
Complete the following steps as an administrator. The teacher launch steps come after administrator setup.Create the Integration in Pear Deck
- Sign in to Pear Deck with an account that has LTI LMS Integration access.
- Go to Accounts > LTI/LMS Integration Settings.
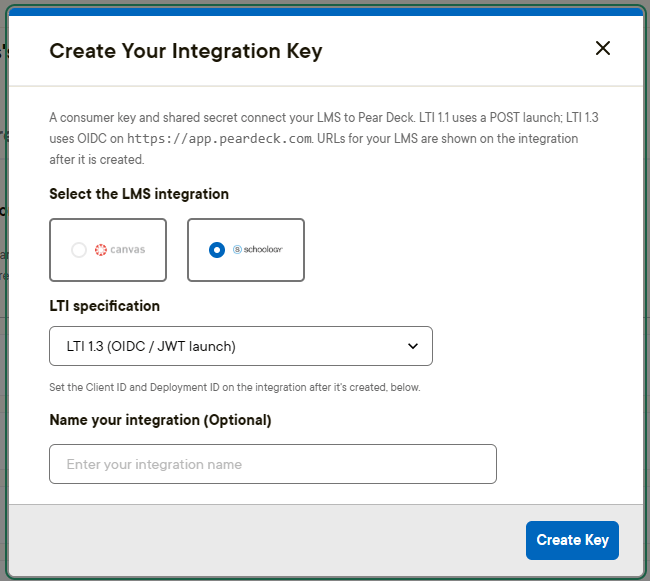
- Click + Add New Integration.
- Configure the following settings:
- LMS integration: Schoology
- LTI specification: LTI 1.3
- Click Create Key.
Configure the App in Schoology
- Sign in to Schoology as an administrator.
- Open the App Center, then go to My Developer Apps.
- Click Add App.
- Complete the app details using the following settings:
- Copy the generated values from your Pear Deck integration into the corresponding Schoology fields:
- Click Submit to publish the app in Schoology.
Important: Copy the registration values from your own Pear Deck integration. Do not use example URLs or values shown in screenshots.
Install the App in Schoology
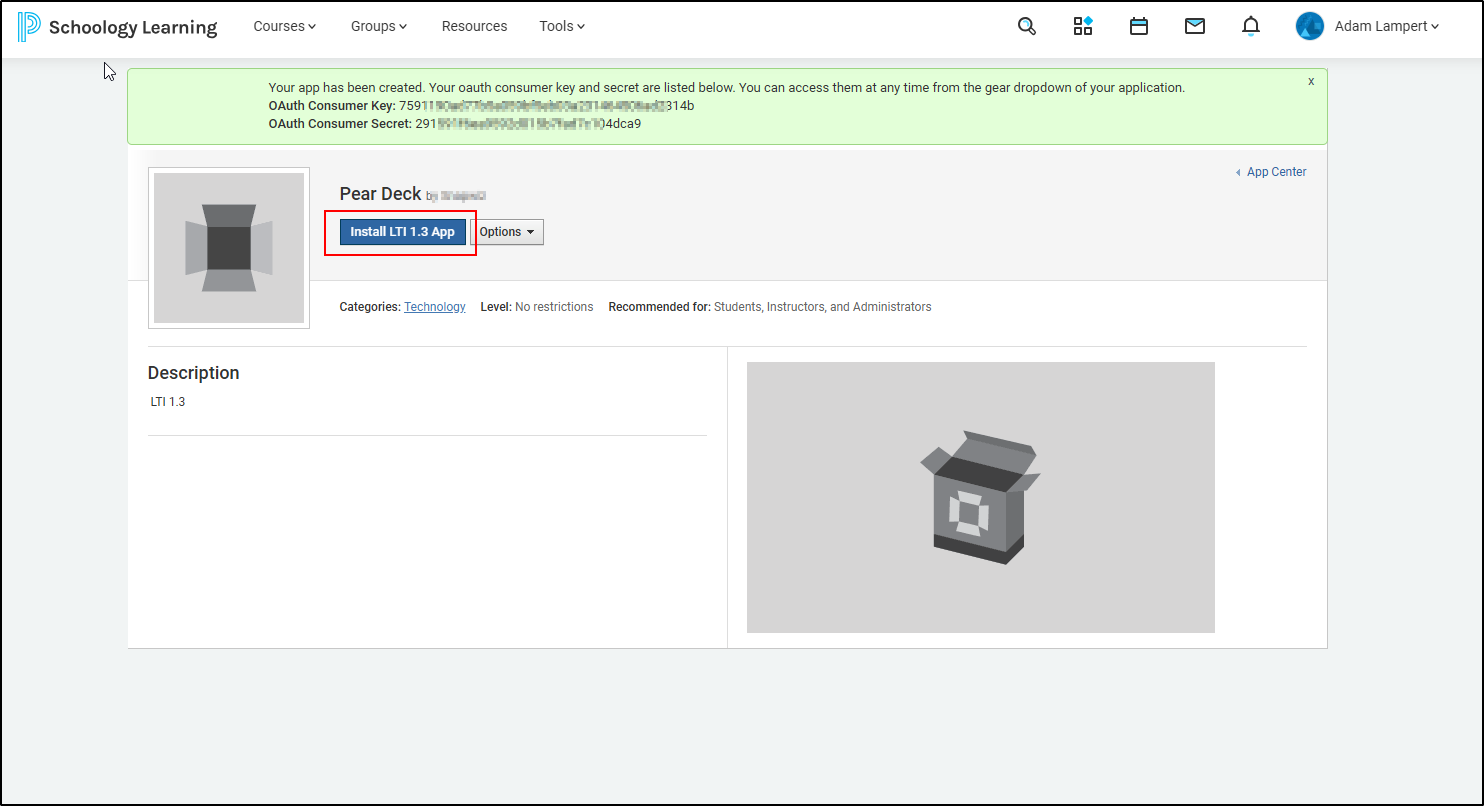
- Open the app you created.
- Click Install LTI 1.3 App.
- Review and agree to the terms.
- Select Add to Organization or Add to School, depending on the option shown in your Schoology account.
Connect the Schoology Client ID to Pear Deck
- Return to App Center > My Developer Apps in Schoology.
- Open the Pear Deck app’s details.
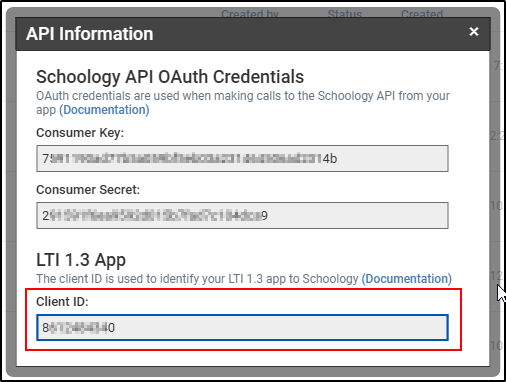
- Select Options > API Info.
- Copy the Client ID from the LTI 1.3 App section.
- Return to the integration’s configuration page in Pear Deck.
- Enter the Schoology Client ID in the Client ID (from your LMS) field. Use Edit if needed, then save your changes.
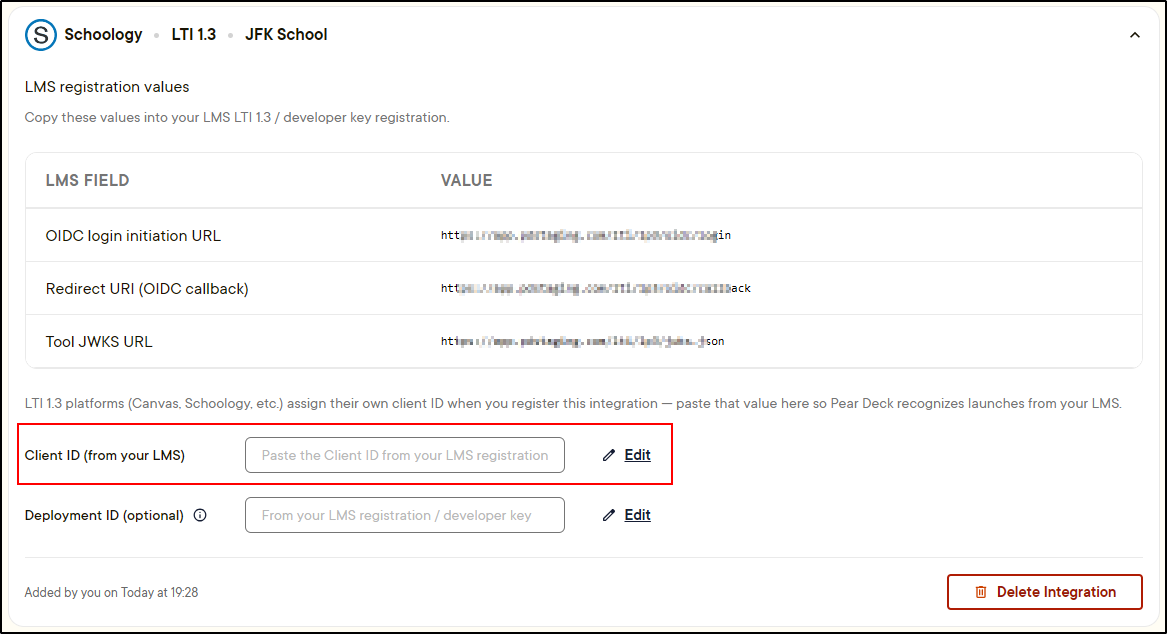
Use the LTI 1.3 Client ID. The Schoology API Information window also displays OAuth credentials. The value needed for this step is the Client ID under LTI 1.3 App, not the OAuth Consumer Key or Consumer Secret.
Add the Schoology Deployment ID
- Return to Schoology and go to App Center > Organization Apps.
- Locate the Pear Deck app.
- Click Configure.
- Copy the Deployment ID from the configuration page.
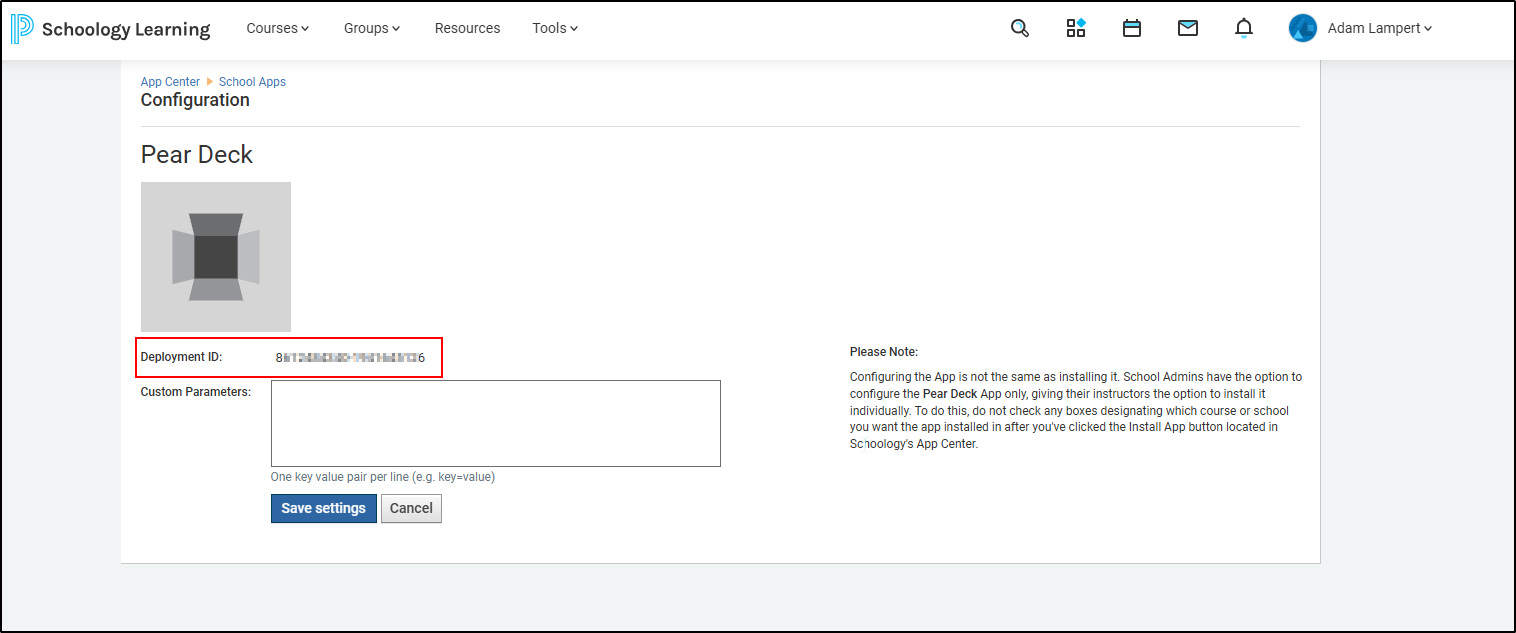
- Return to the integration’s configuration page in Pear Deck.
- Enter the copied value in the Deployment ID field, then save your changes.
Launch a Lesson to Verify the Integration
After an administrator completes setup, teachers can launch a lesson:- Open a course in Schoology.
- Go to Add Materials > Add Assignment, or select the External Tool option.
- Choose the installed Pear Deck LTI 1.3 tool.
- Access Google Drive through the tool and select your slide deck.
- Choose a session mode, such as Student-Paced or Instructor-Paced, then launch the lesson.
Review the LTI 1.3 Setup Checklist
If you cannot complete LTI 1.3 setup, confirm that:- Your Pear Deck account has LTI LMS Integration access.
- You are using a Schoology administrator account.
- The app’s tool type is LTI 1.3 External Tool.
- External Tool is selected under Courses in the app’s installation settings.
- The login and redirect URLs match the values generated by your Pear Deck integration.
- The LTI 1.3 Client ID from Schoology has been entered in Pear Deck.
- The Deployment ID from the Schoology app’s configuration has been entered in Pear Deck.
Install Pear Deck With LTI 1.1
Generate Your Integration Key and Secret
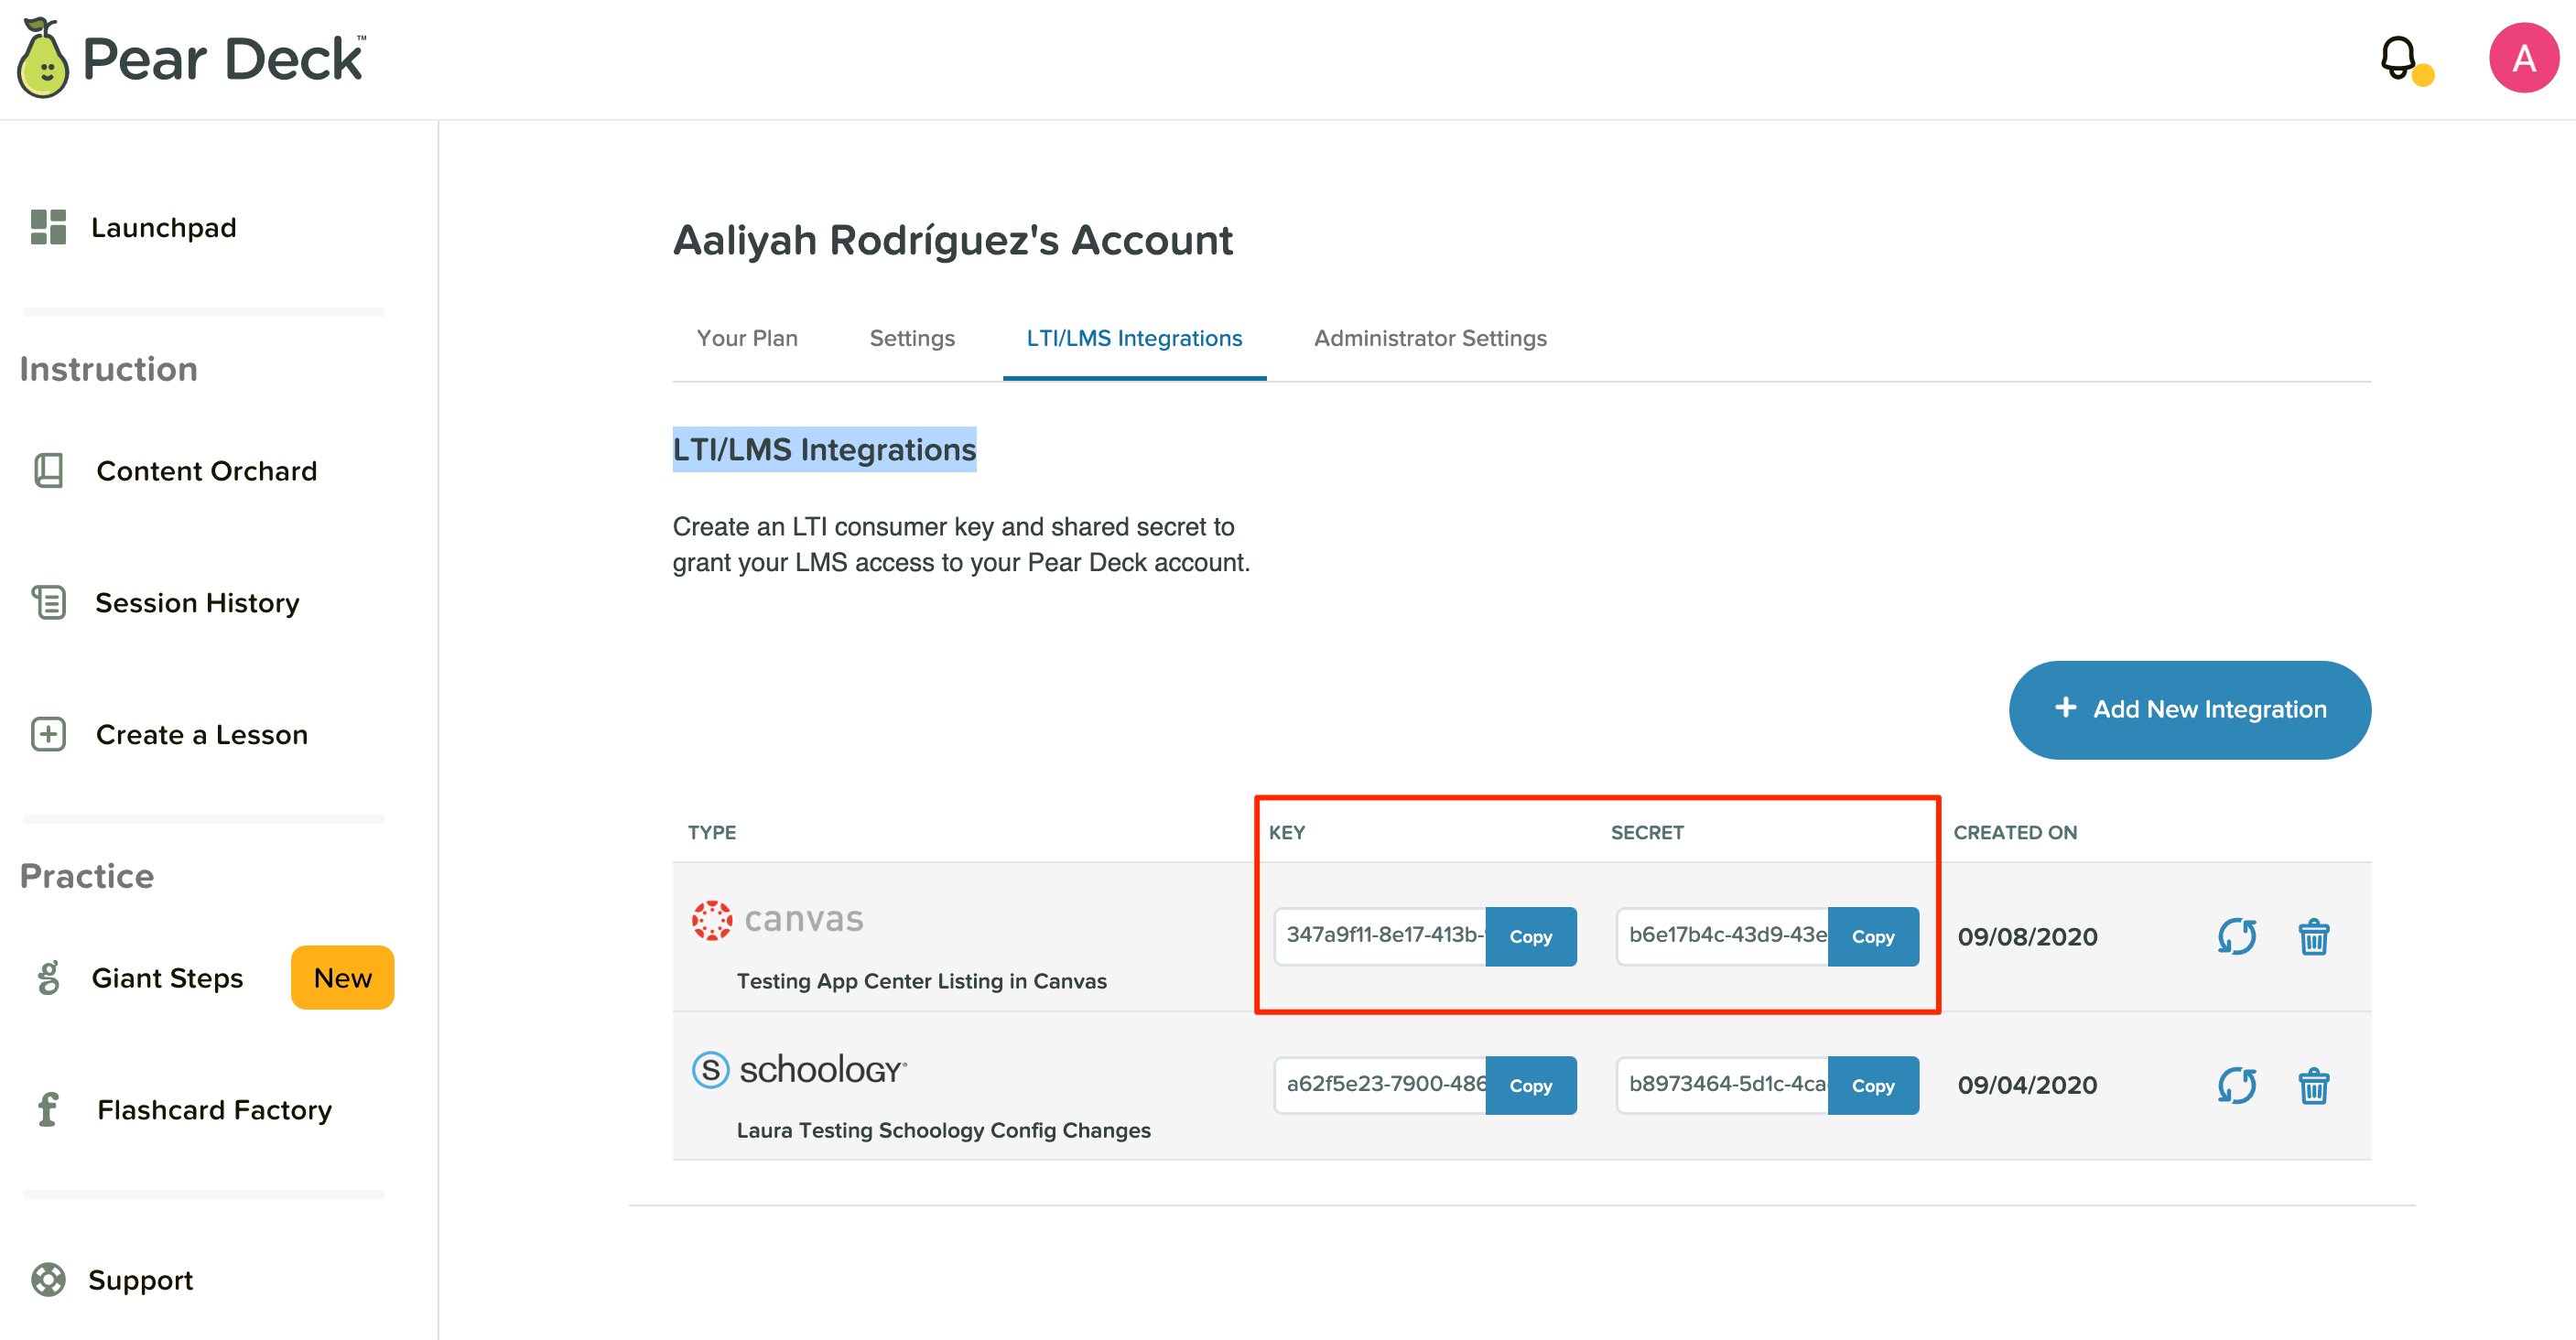
- As the Subscription Manager of your Pear Deck school or district subscription, go to your Pear Deck My Account page and click + Add New Integration.

- Select Schoology.

- Keep the generated Key and Secret available. You need these values in a later step.
Install the LTI App in Schoology
- Open Schoology.
- Go to the App Center.
- Click Type > LTI App.

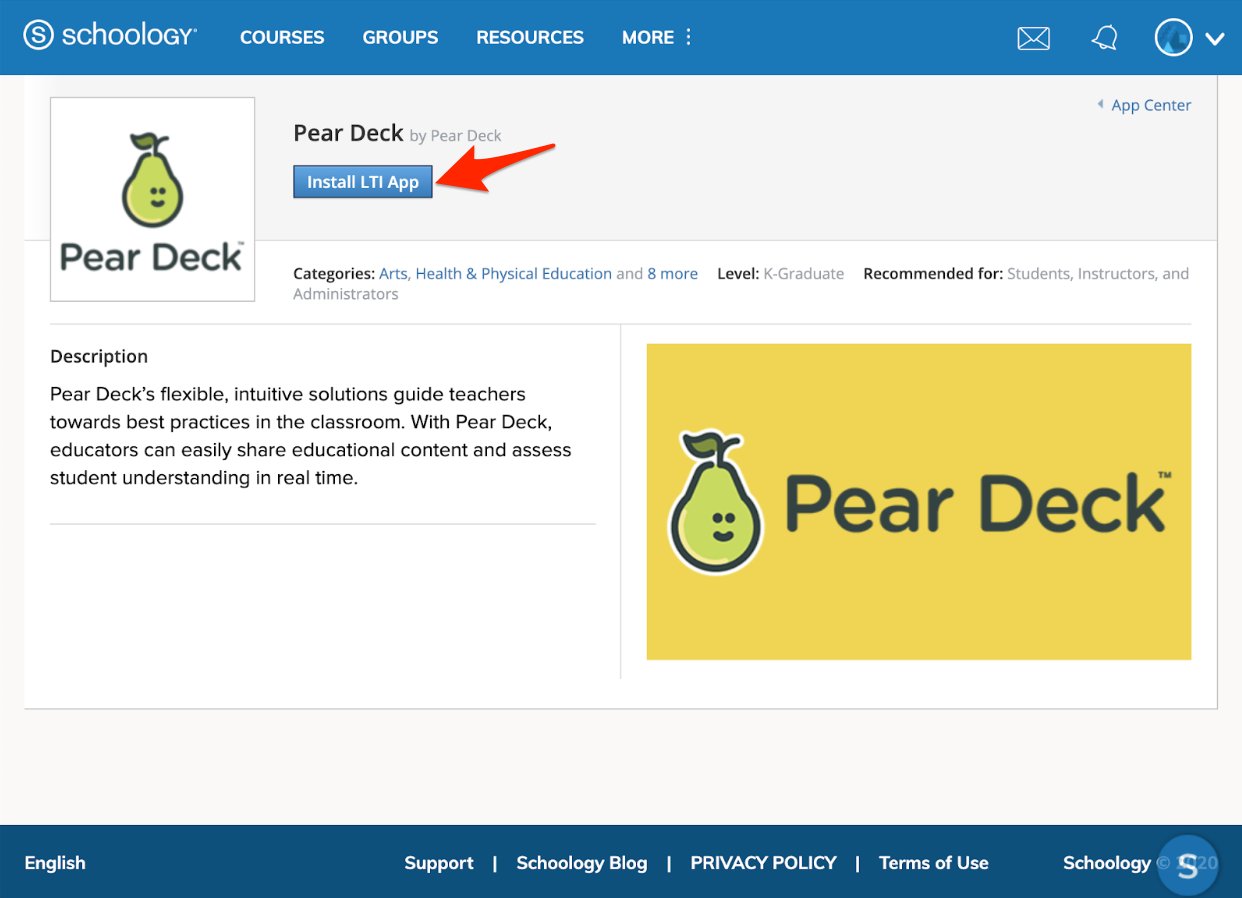
- Find Pear Deck in the results.
- Open the Pear Deck detail page.
- Click Install LTI App.
- On the Consent screen, select I agree.
- When prompted, select Add to Organization.
- Review the Organization Apps page that opens.
- Find Pear Deck in the list of apps, select it, and click Configure.
- On the Configuration page, paste the Key and Secret from your app.peardeck.com/home/integrations page into the Consumer Key and Shared Secret fields.
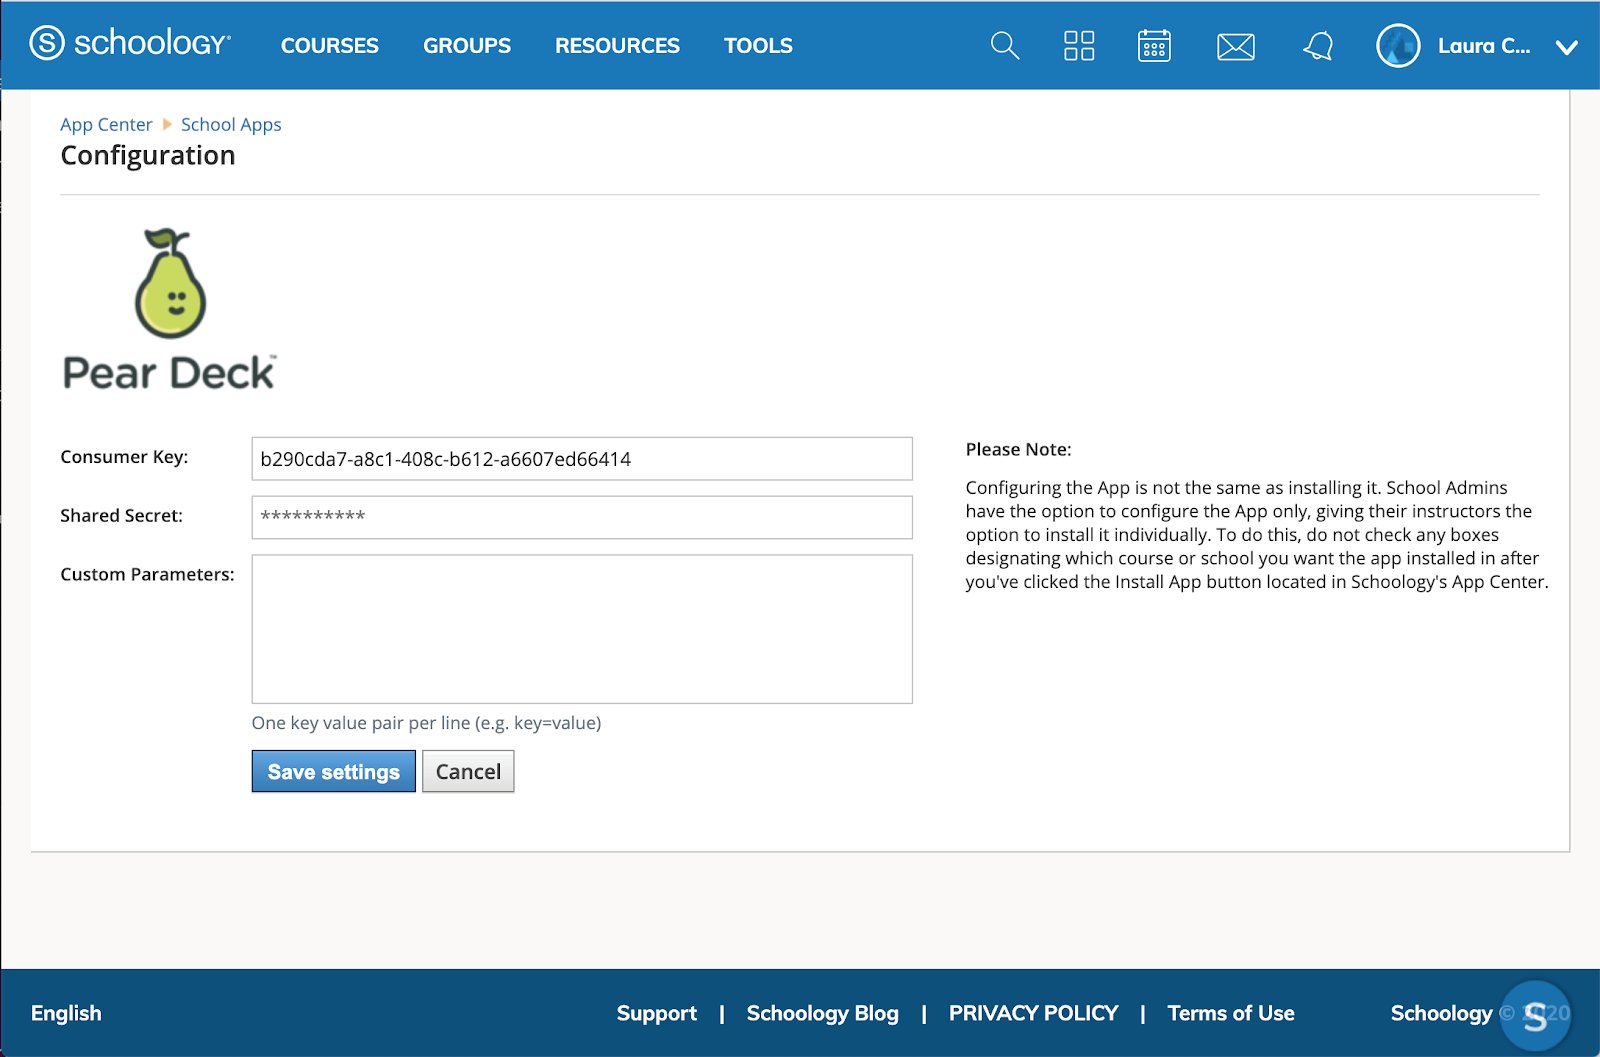
- Click Save settings.
Assign Access to Users
-
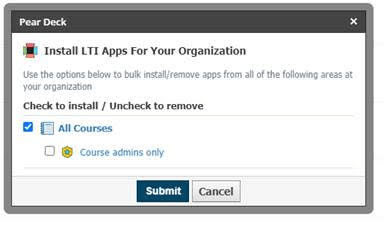
Go to App Center > Organization Apps and find Pear Deck. Click the blue Install/Remove button to grant access to the appropriate users in your organization.
Both teachers and students require access to Pear Deck for the integration to work correctly.

Verify the LTI 1.1 Integration
After you grant access to both teachers and students, have a teacher follow Schoology Integration for Teachers and Students to create and start an assignment. Confirm that the teacher can present and students can join the session within Schoology. If users cannot access Pear Deck, return to App Center > Organization Apps and confirm that both teachers and students have access through Install/Remove. For further help installing apps in Schoology, see Schoology’s App Center help page or contact help@peardeck.com.Resources
Get Started with Pear Deck
Learn the basics of setting up and running your first Pear Deck Session.
Install Pear Deck in Canvas
Choose an LTI version and install Pear Deck in Canvas.