

Only Super Users and Super Counselors can configure escalation lists.
The ability to set separate escalation lists for during and after school hours requires a Beacon Core or Beacon 24/7 license.
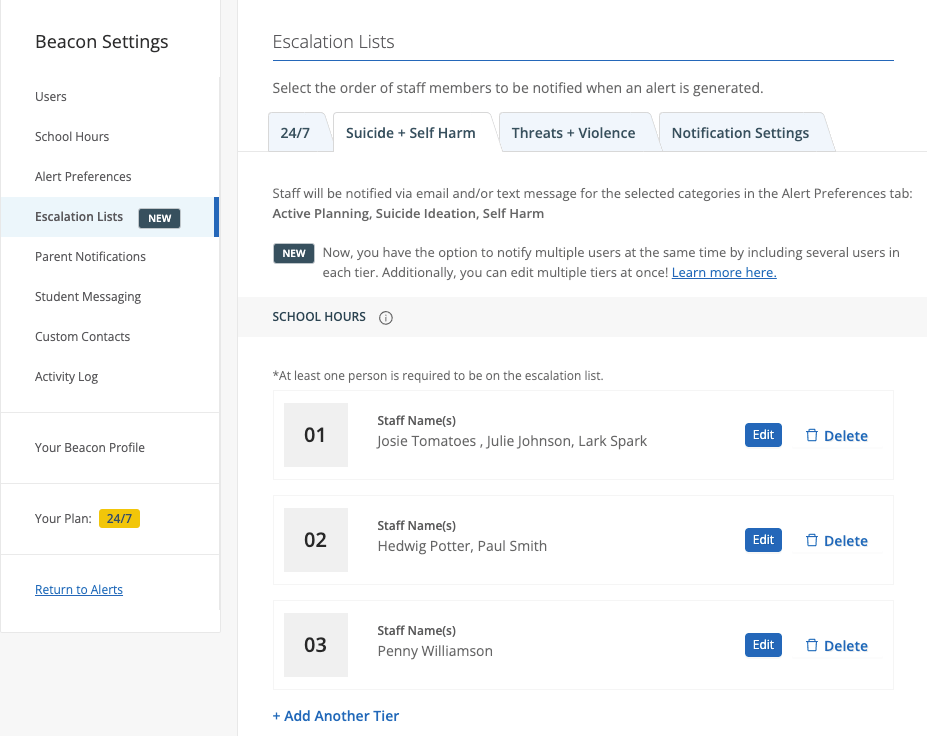
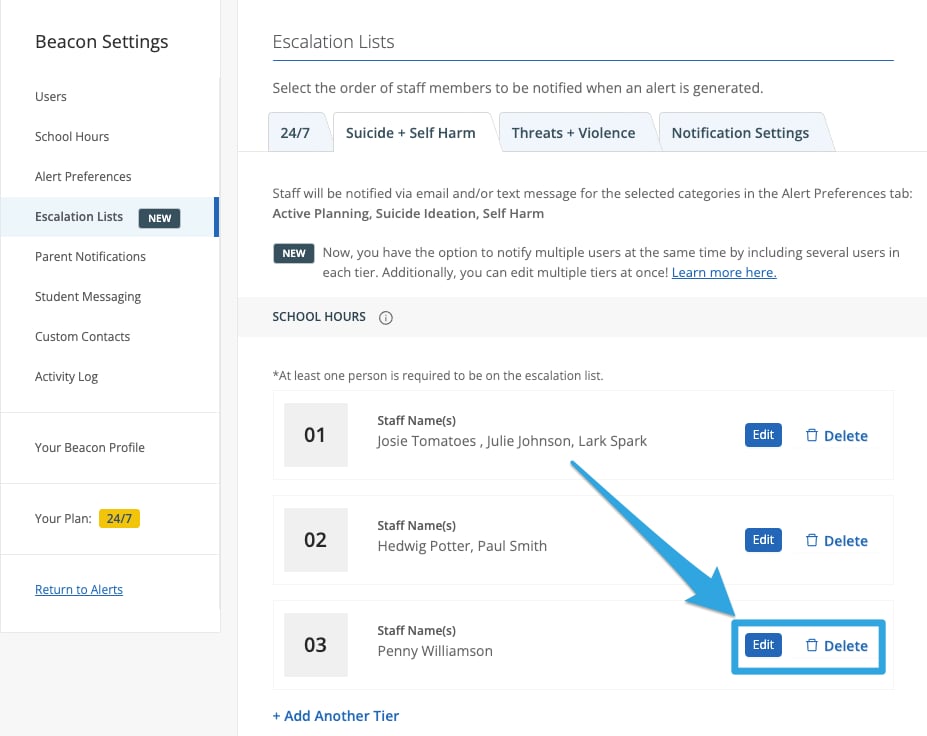
Set Up the Suicide and Self-Harm Escalation List
- Go to beacon.goguardian.com and sign in.
- Click Settings from the navigation menu.
- Select Escalation Lists.
- Click the Suicide + Self Harm tab.
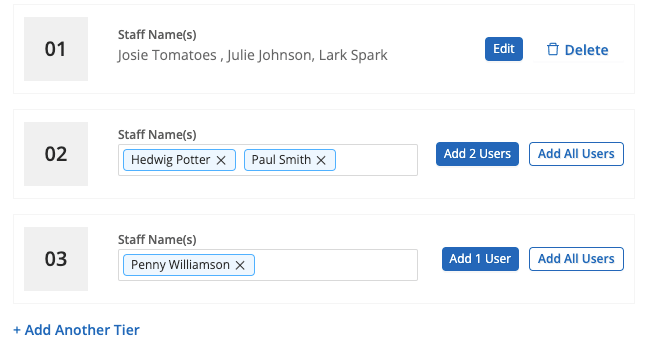
- Type a name or email address to search for a user. Select the user when their name appears. Add as many users to a tier as needed. To add all current Beacon users to a tier at once, click Add All Users.
- Click Save Changes at the bottom of the screen.
Any user with any Beacon permission level can be added to an escalation list.
With Beacon Starter, only the first position may be filled — with either one individual user or all users. Selecting all users notifies everyone in the deployment at the same time.
Configure After-School Hours Notifications
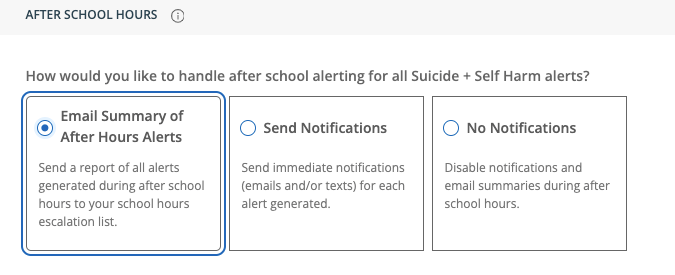
After-school notification behavior is set independently from school-hours notifications. Three options are available.Send an email summary at the start of the next school day
Send an email summary at the start of the next school day
- Select Email Summary of After Hours Alerts.
- Click Save Changes at the bottom of the page.
Send notifications for each after-hours alert
Send notifications for each after-hours alert
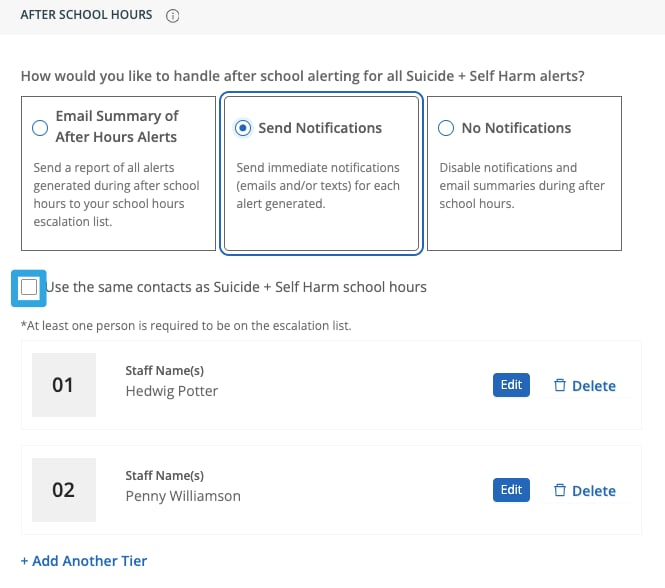
- Select Send Notifications.
-
- To use the same escalation list as school hours, select Use the same contacts as Suicide + Self Harm school hours.
- To define a separate list for after-hours, clear Use the same contacts as Suicide + Self Harm school hours and configure the after-hours list.
- Click Save Changes at the bottom of the page.
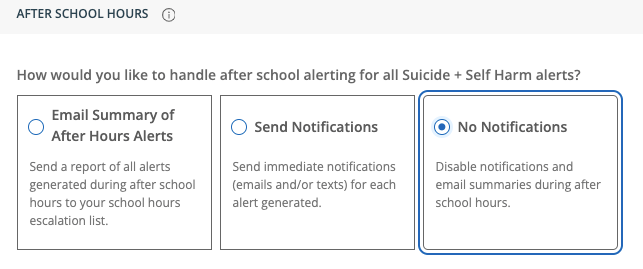
Turn off all after-hours notifications
Turn off all after-hours notifications
- Select No Notifications.
- Click Save Changes at the bottom of the page.
For Beacon 24/7 deployments, this setting does not affect your 24/7 phone call escalation list schedule.
Set the Interval Time
Interval time sets how long Beacon waits for a user to respond to an alert before notifying the next tier. In Beacon Starter, if no action is taken on the alert card within the interval time, a reminder email is sent to the user on the escalation list. This process repeats up to 5 times. Configure the interval time under the Interval Time section of the Escalation Lists settings page.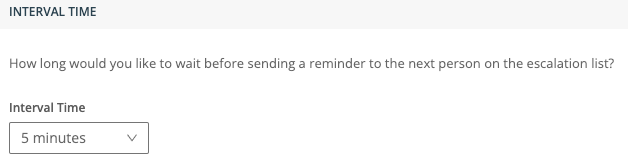
Remove a User from an Escalation List
- Go to Settings, then select Escalation Lists.
- Click Edit next to the tier that contains the user.
- Click the X next to the user’s name to remove them from the tier.
- Click Save at the bottom of the page.
At least one user must remain on the escalation list at all times. The final user on the list cannot be removed.
Update the Escalation List in Beacon Starter
In Beacon Starter, change the current escalation list user by replacing them directly.- Go to beacon.goguardian.com and sign in.
- Click Settings from the navigation menu.
- Select Staff Notifications.
- Click Edit next to the current user.
- Click the X next to their name to remove them.
- Type the name of the new user and click Add 1 User, or click Add All Users to add all current users in the deployment.
- Click Save Changes at the bottom of the page.
Resources
Configure a Beacon 24/7 Escalation List
Build a shift-based phone call escalation schedule for Beacon 24/7.
Beacon User Roles and Permissions
Review which roles can manage escalation lists.
Add and Manage Beacon Users
Add users to a deployment before adding them to an escalation list.
Include Student Names in Notifications
Enable student names in all Beacon email alert notifications.