

Confirm Hall Pass Is Enabled
- Go to manage.goguardian.com and sign in with your district administrator account.
- Open the GoGuardian product switcher and confirm Hall Pass appears.
- If Hall Pass does not appear, contact GoGuardian Support to confirm your organization’s license.
- Verify the result: You can open Hall Pass without an access error.
Create Site for Each School or Building
Each school or building that uses Hall Pass needs a site in Org Management.-
In Org Management, go to Product Settings → Hall Pass → Sites.
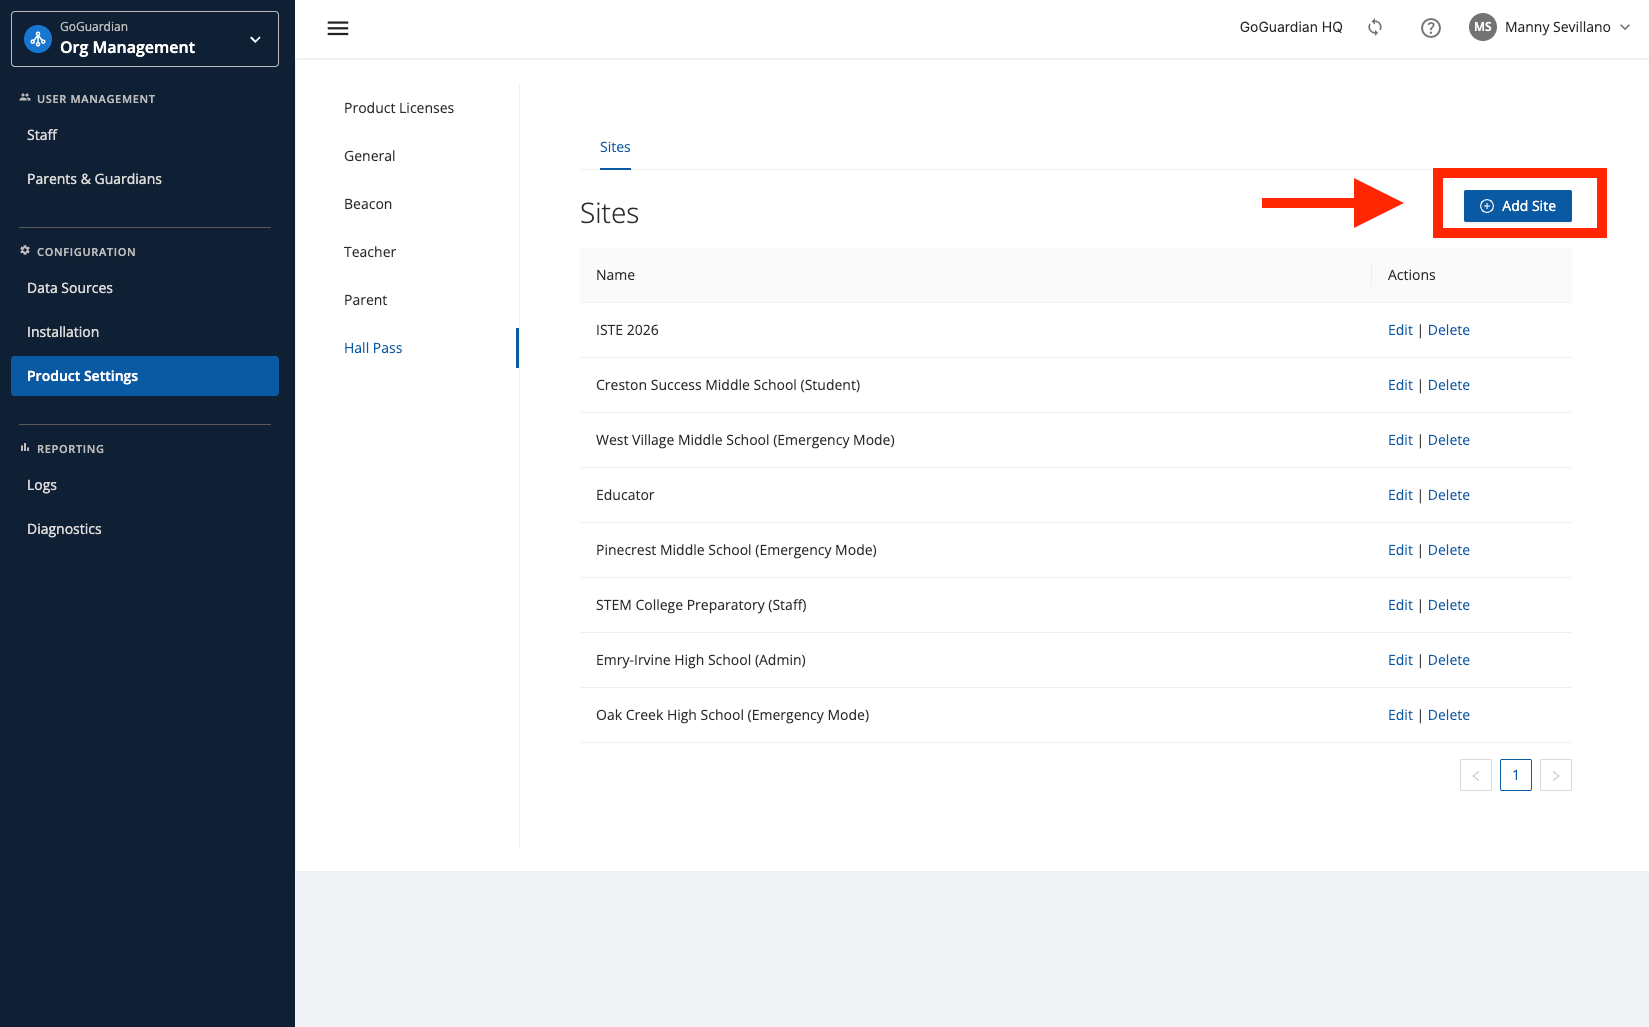
- Click Add Site.
- Enter a name that helps users identify the school or building.
- Save the site.
- Repeat these steps for each additional school or building.
- Verify the result: Each school or building appears in the Sites list.
Assign Site Admins
The Admins tab assigns the Site Admin role in Hall Pass. Use this role for people who configure Hall Pass for the site.- Go to Product Settings → Hall Pass → Sites.
- Click Edit for the site.
-
Select the Admins tab.
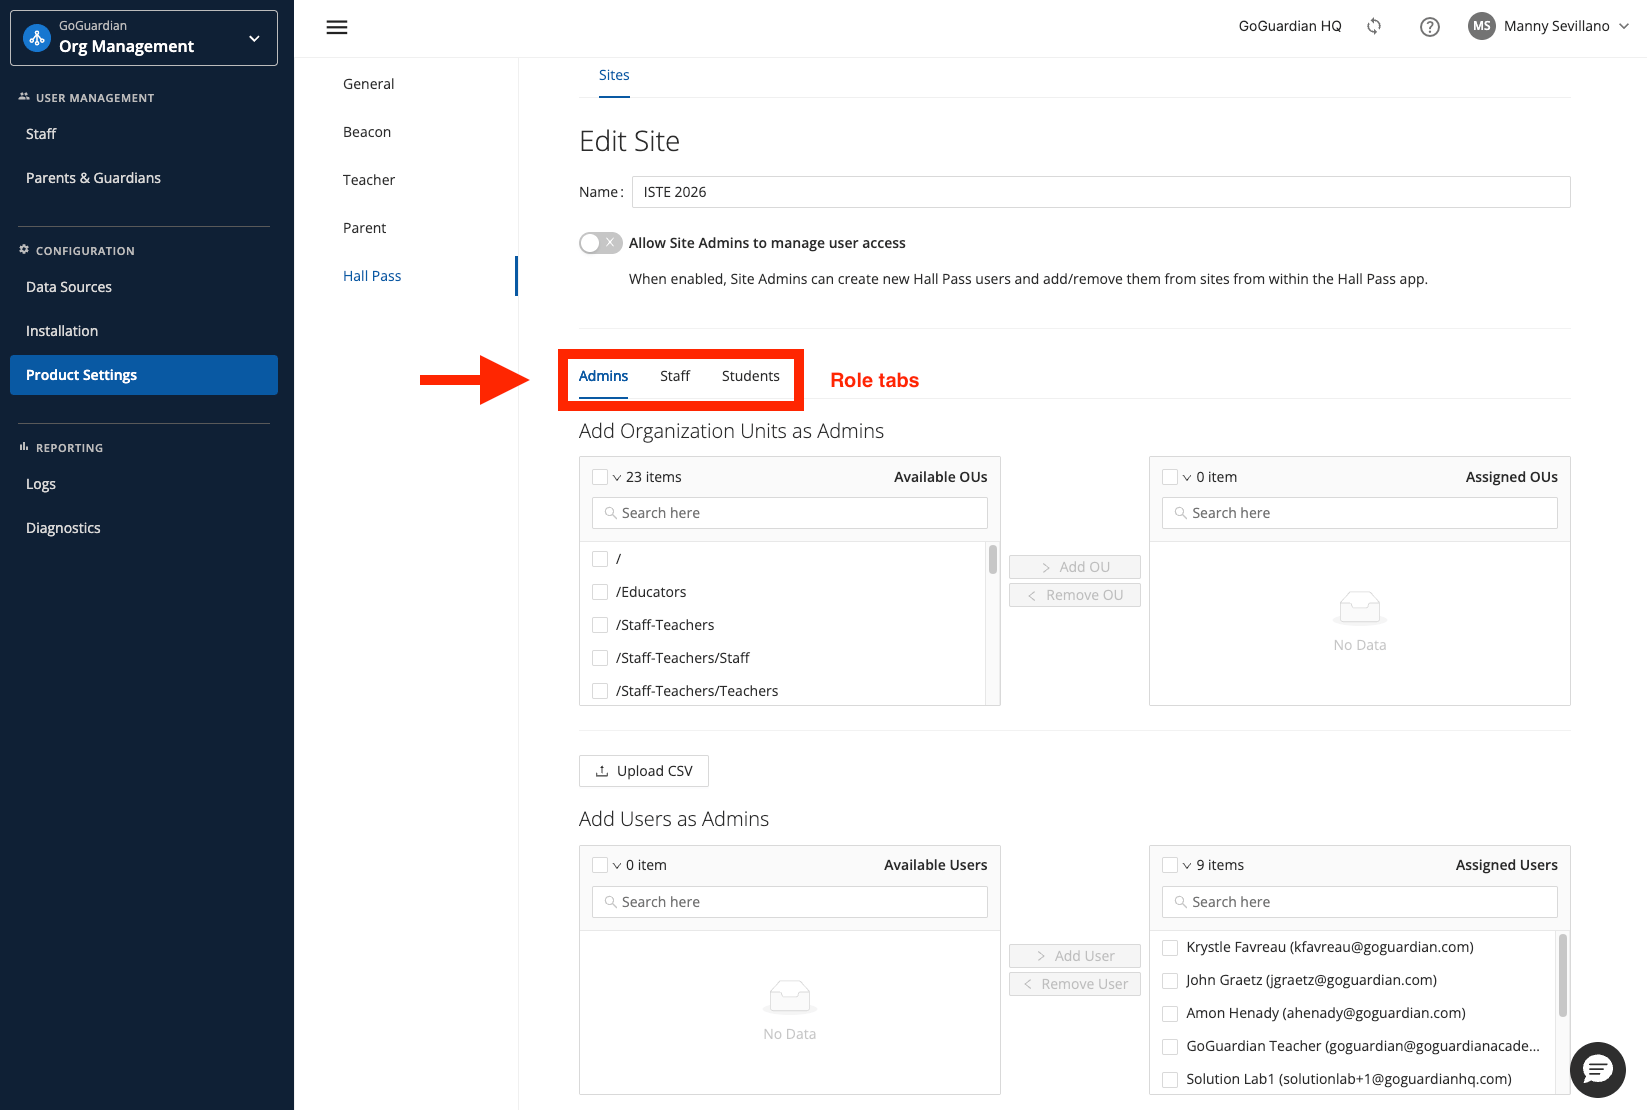
- Assign an OU or individual user by following Assign Organizational Units or Assign Individual Users.
- Click Save Site.
- Verify the result: The assigned user can open the site with the Site Admin role.
Assign Staff and Students
Use the Staff tab for teachers and other staff who manage passes. Use the Students tab for students who request passes.- Go to Product Settings → Hall Pass → Sites.
- Click Edit for the site.
- Select Staff or Students.
- Assign an OU or individual user by following the applicable method below.
- Click Save Site.
- Verify the result: The assigned users can open the correct site with the selected role.
Assign Organizational Units
Use an organizational unit (OU) assignment when everyone in an applicable directory path needs the same role at a site.- Open the site with Edit, then select Admins, Staff, or Students.
- In Available OUs, find the applicable OU path and select its checkbox.
-
Click Add OU. The OU moves to Assigned OUs.
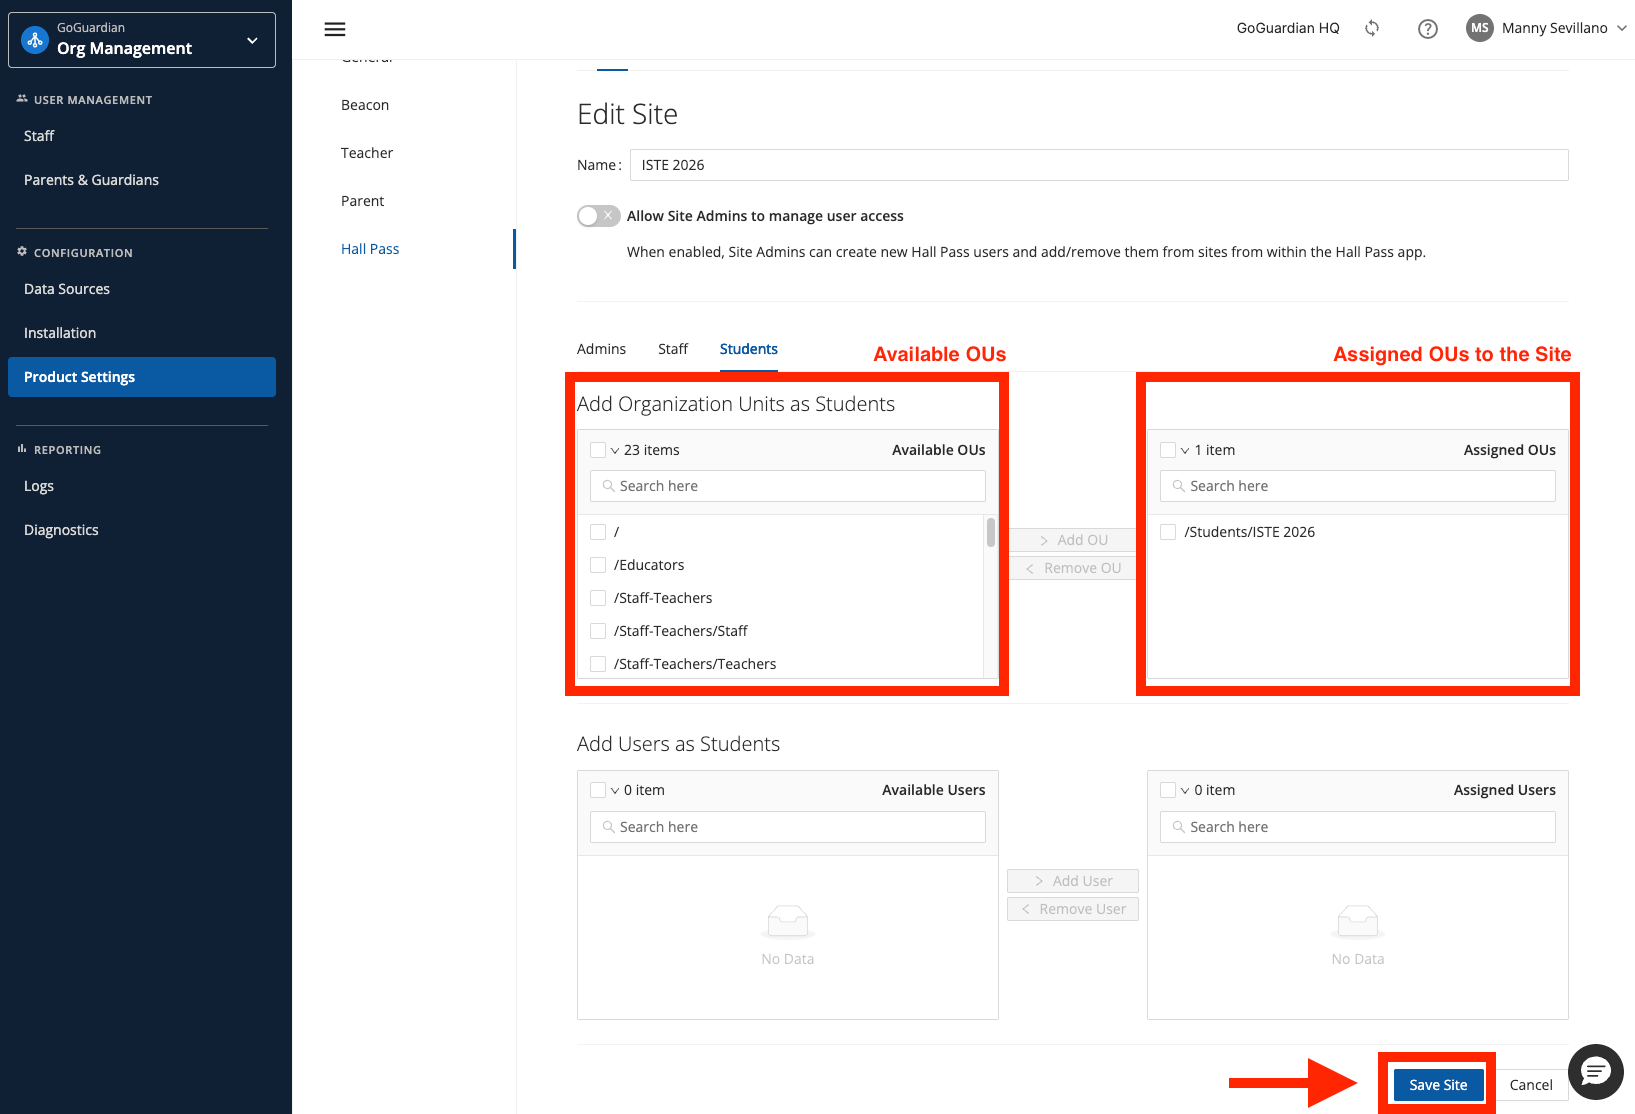
- Click Save Site.
- Verify the result: Users in the assigned OU can access the site with the selected role.
Assign Individual Users
Use an individual assignment for an exception, such as a staff member who works at multiple sites or an administrator who needs a different role from their OU assignment.- Open the site with Edit, then select Admins, Staff, or Students.
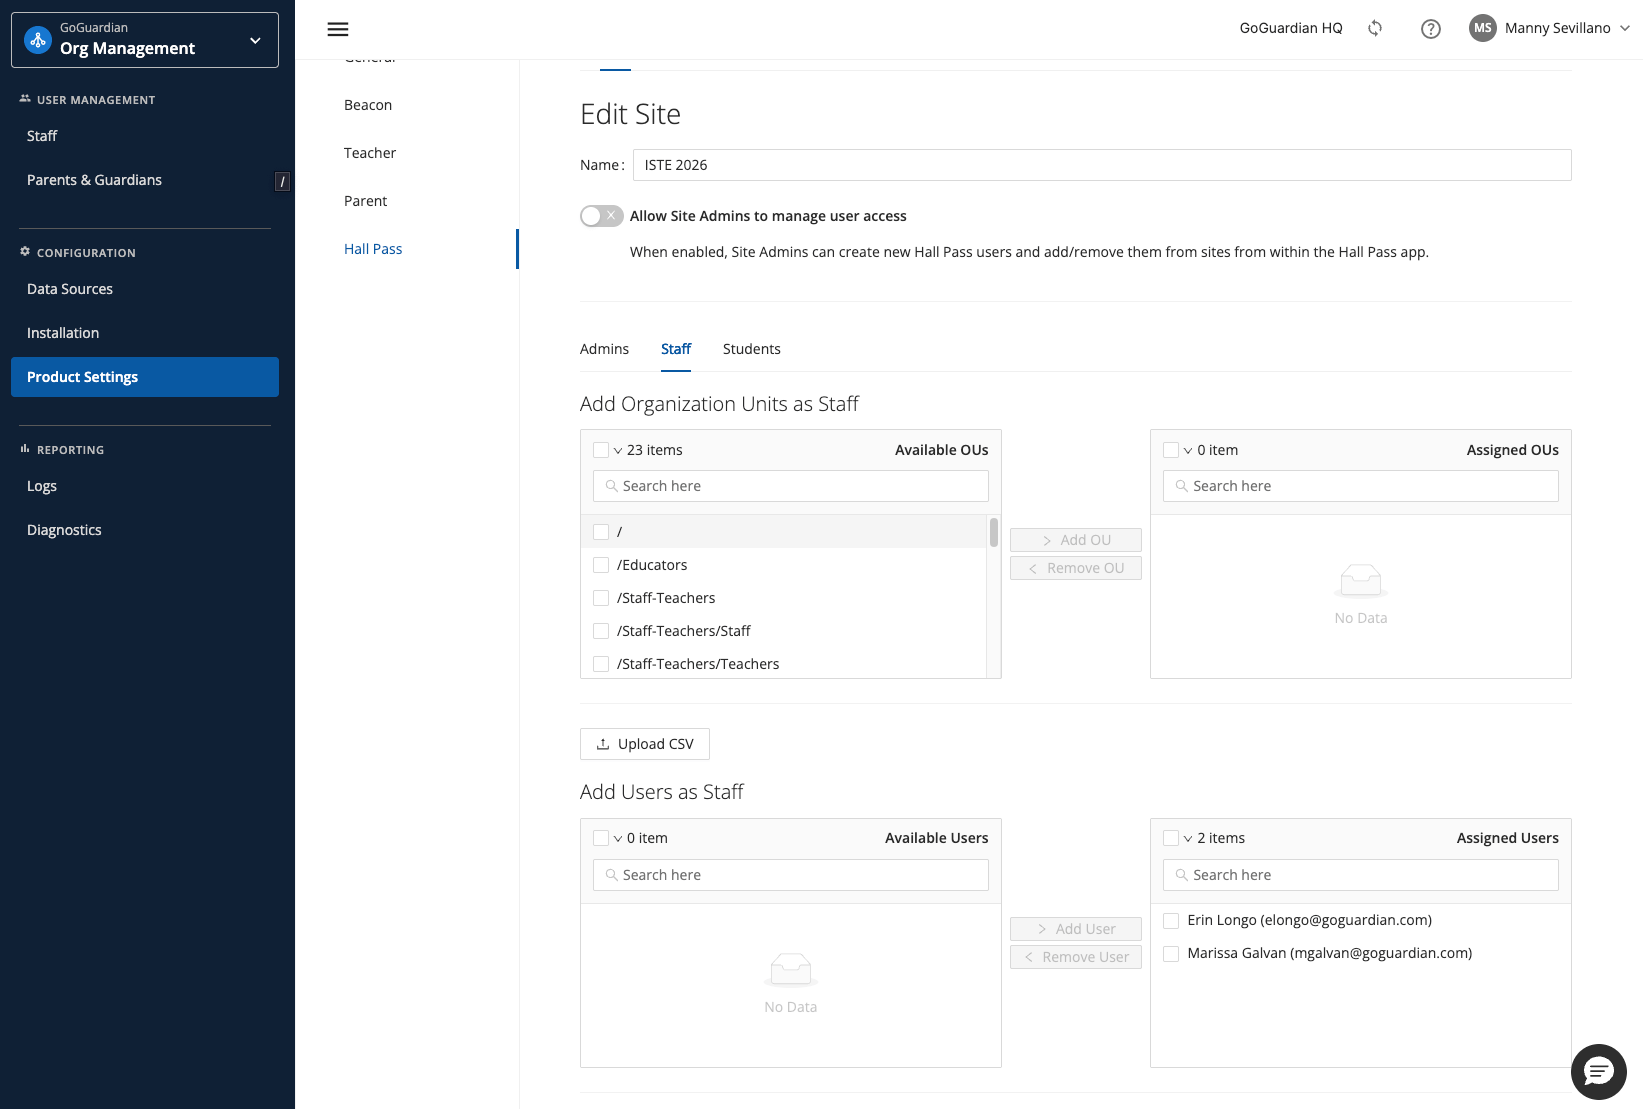
- In Available Users, find the user and select their checkbox.
-
Click Add User. The user moves to Assigned Users.
-
Review the user under Assigned Users.
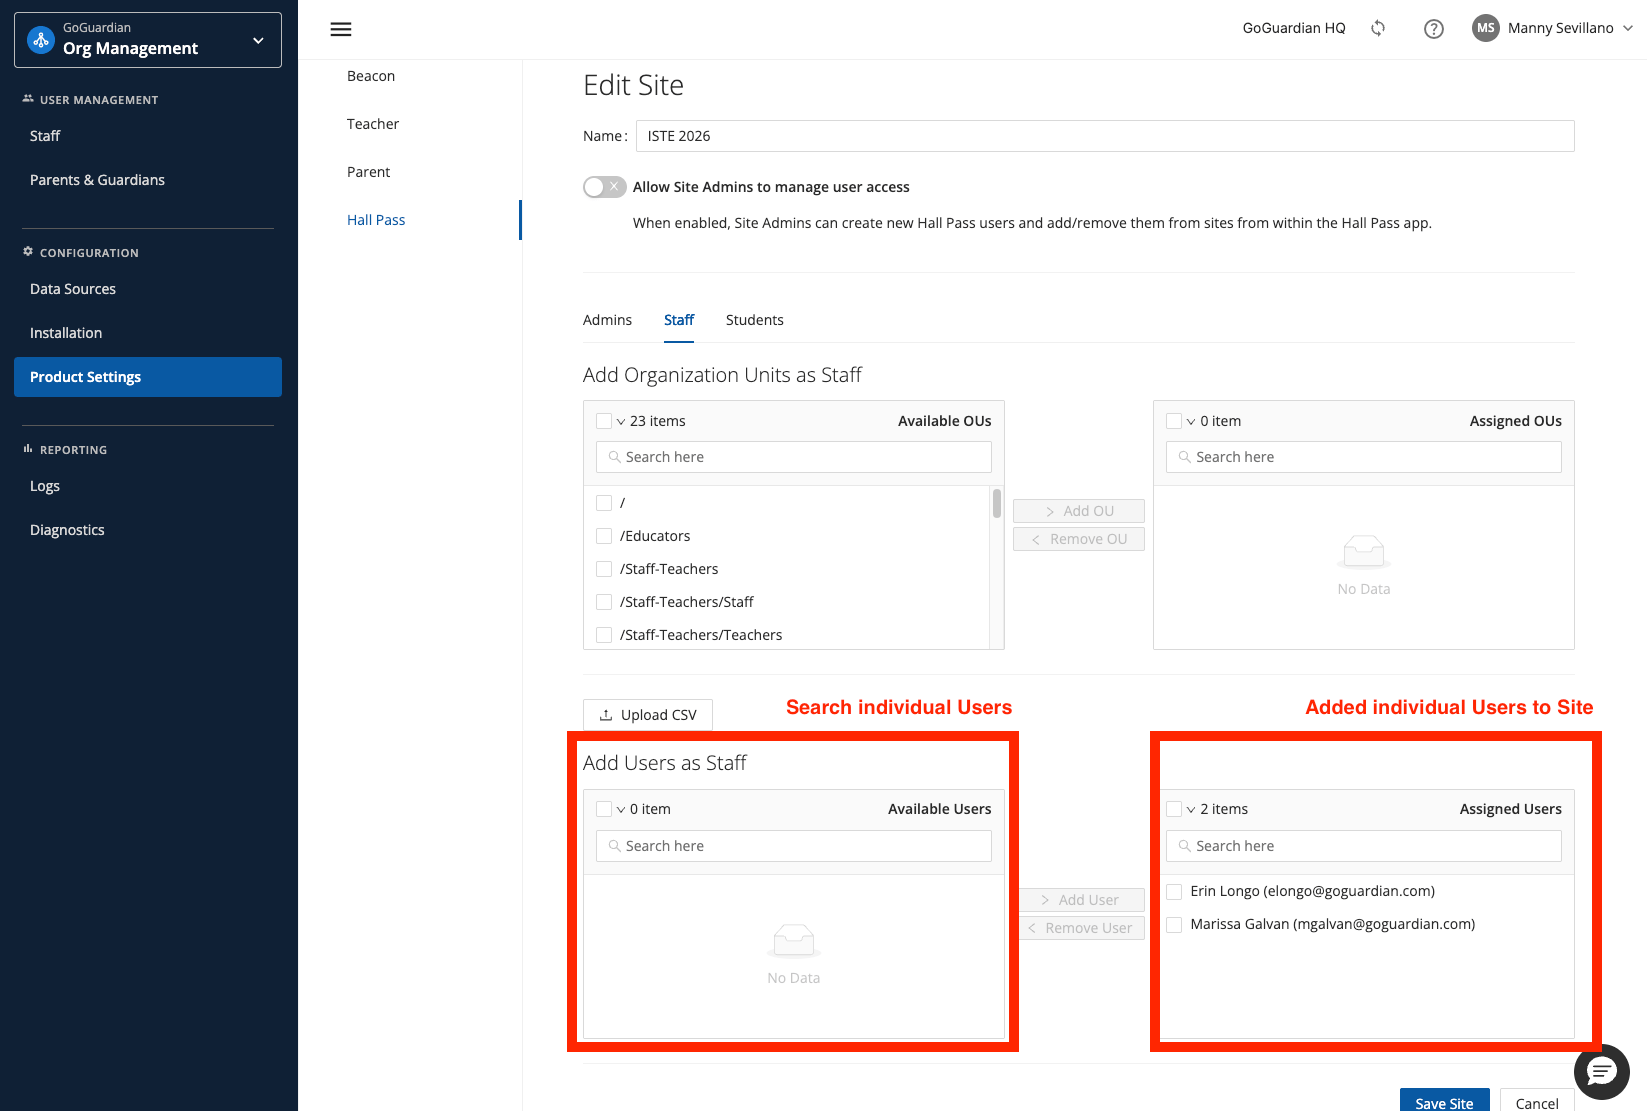
- Click Save Site.
- Verify the result: The user can access the assigned site with the selected role.
Upload Individual Users with CSV
Use a CSV to assign multiple individual users to the selected role.- Open the site with Edit, then select Admins, Staff, or Students.
- Click Upload CSV above Available Users.
- Add the CSV file.
- Click Add Users.
- Click Save Site.
- Verify the result: The uploaded users appear under Assigned Users for the selected role.
The CSV must contain 1 email address per row in a single column with no header. Student CSV uploads are limited to 500 students.
Verify Role and Site Access
Test each assigned role before continuing with site configuration.- Sign in with a test account for each assigned role.
- Confirm that each account opens the correct site.
-
For a Site Admin account, confirm that Hall Pass identifies the site role as Admin.
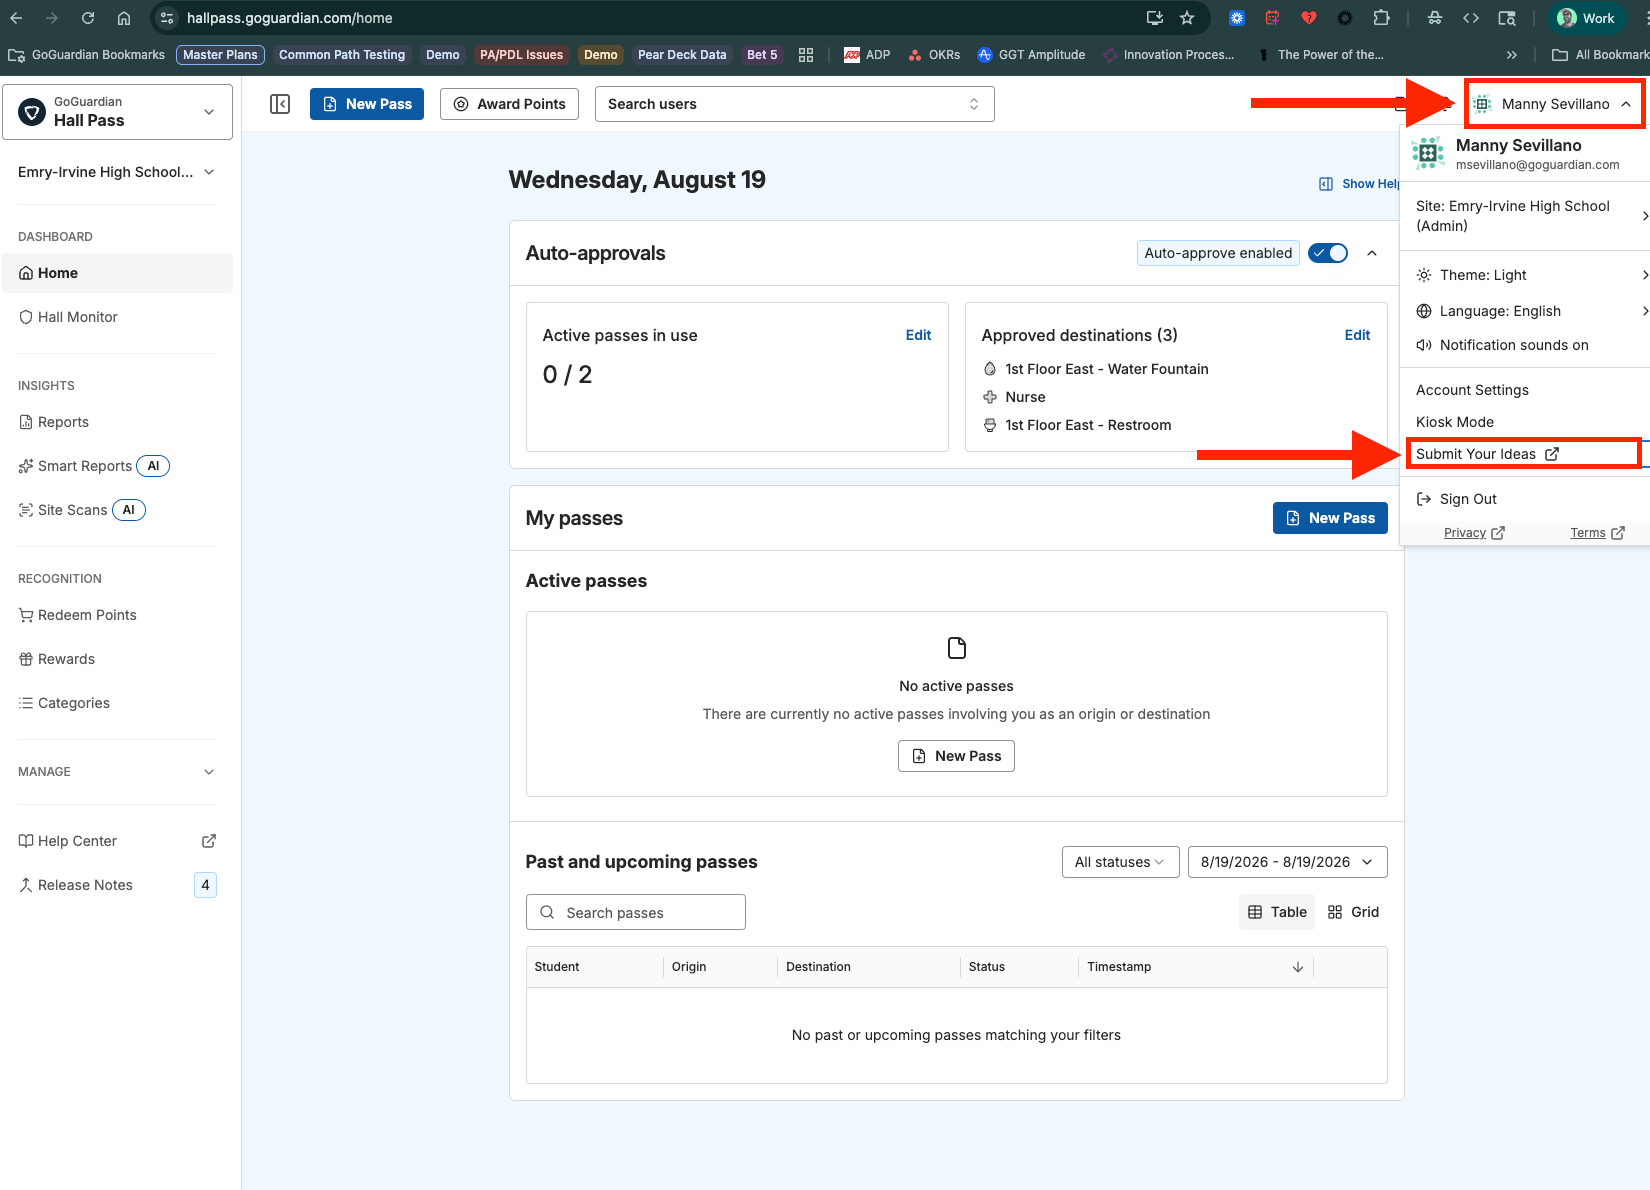
- Verify the result: Every test account reaches the expected site with the expected role.