

Manage Your Flagged Terms List
The terms on your Flagged Terms list are what the Flagged Activity engine scans for on every page visited by a student with GoGuardian installed. A default list is provided, but you can add, remove, and adjust severity for any term. To reach the configuration page, go to GoGuardian Admin and select Flagged Activity, then select Configuration. Add a term:- Go to GoGuardian Admin and select Flagged Activity.
- Select Configuration.
- In the Search or Add Term Here field, enter the term you want to add.
- If the term does not already appear in the list, click Add Term.
- Verify the result: The new term appears in your Flagged Terms list.
- In the Search or Add Term Here field, enter the term you want to update.
- Select the Severity dropdown to the right of the term.
- Select the new severity level.
- Verify the result: The updated severity level appears next to the term in the list.
- Go to GoGuardian Admin and select Flagged Activity.
- Select Configuration.
- In the Search or Add Term Here field, enter the term you want to remove.
- Select the delete icon next to the term in the list.
- Verify the result: The term no longer appears in your Flagged Terms list.
A flagged term does not mean a student searched for it. The Flagged Activity engine scans the full HTML source of every page, including metadata and code. A search for an unrelated topic can generate a flag if a flagged term appears anywhere in the resulting page’s source.
Review Flagged Activity Results
The Flagged Activity results page shows flagged domains across your organization. Filter by org unit to focus on a specific school or group.- Go to GoGuardian Admin and select Flagged Activity.
- Use the Org Units dropdown to filter results by org unit, or leave it set to the full organization.
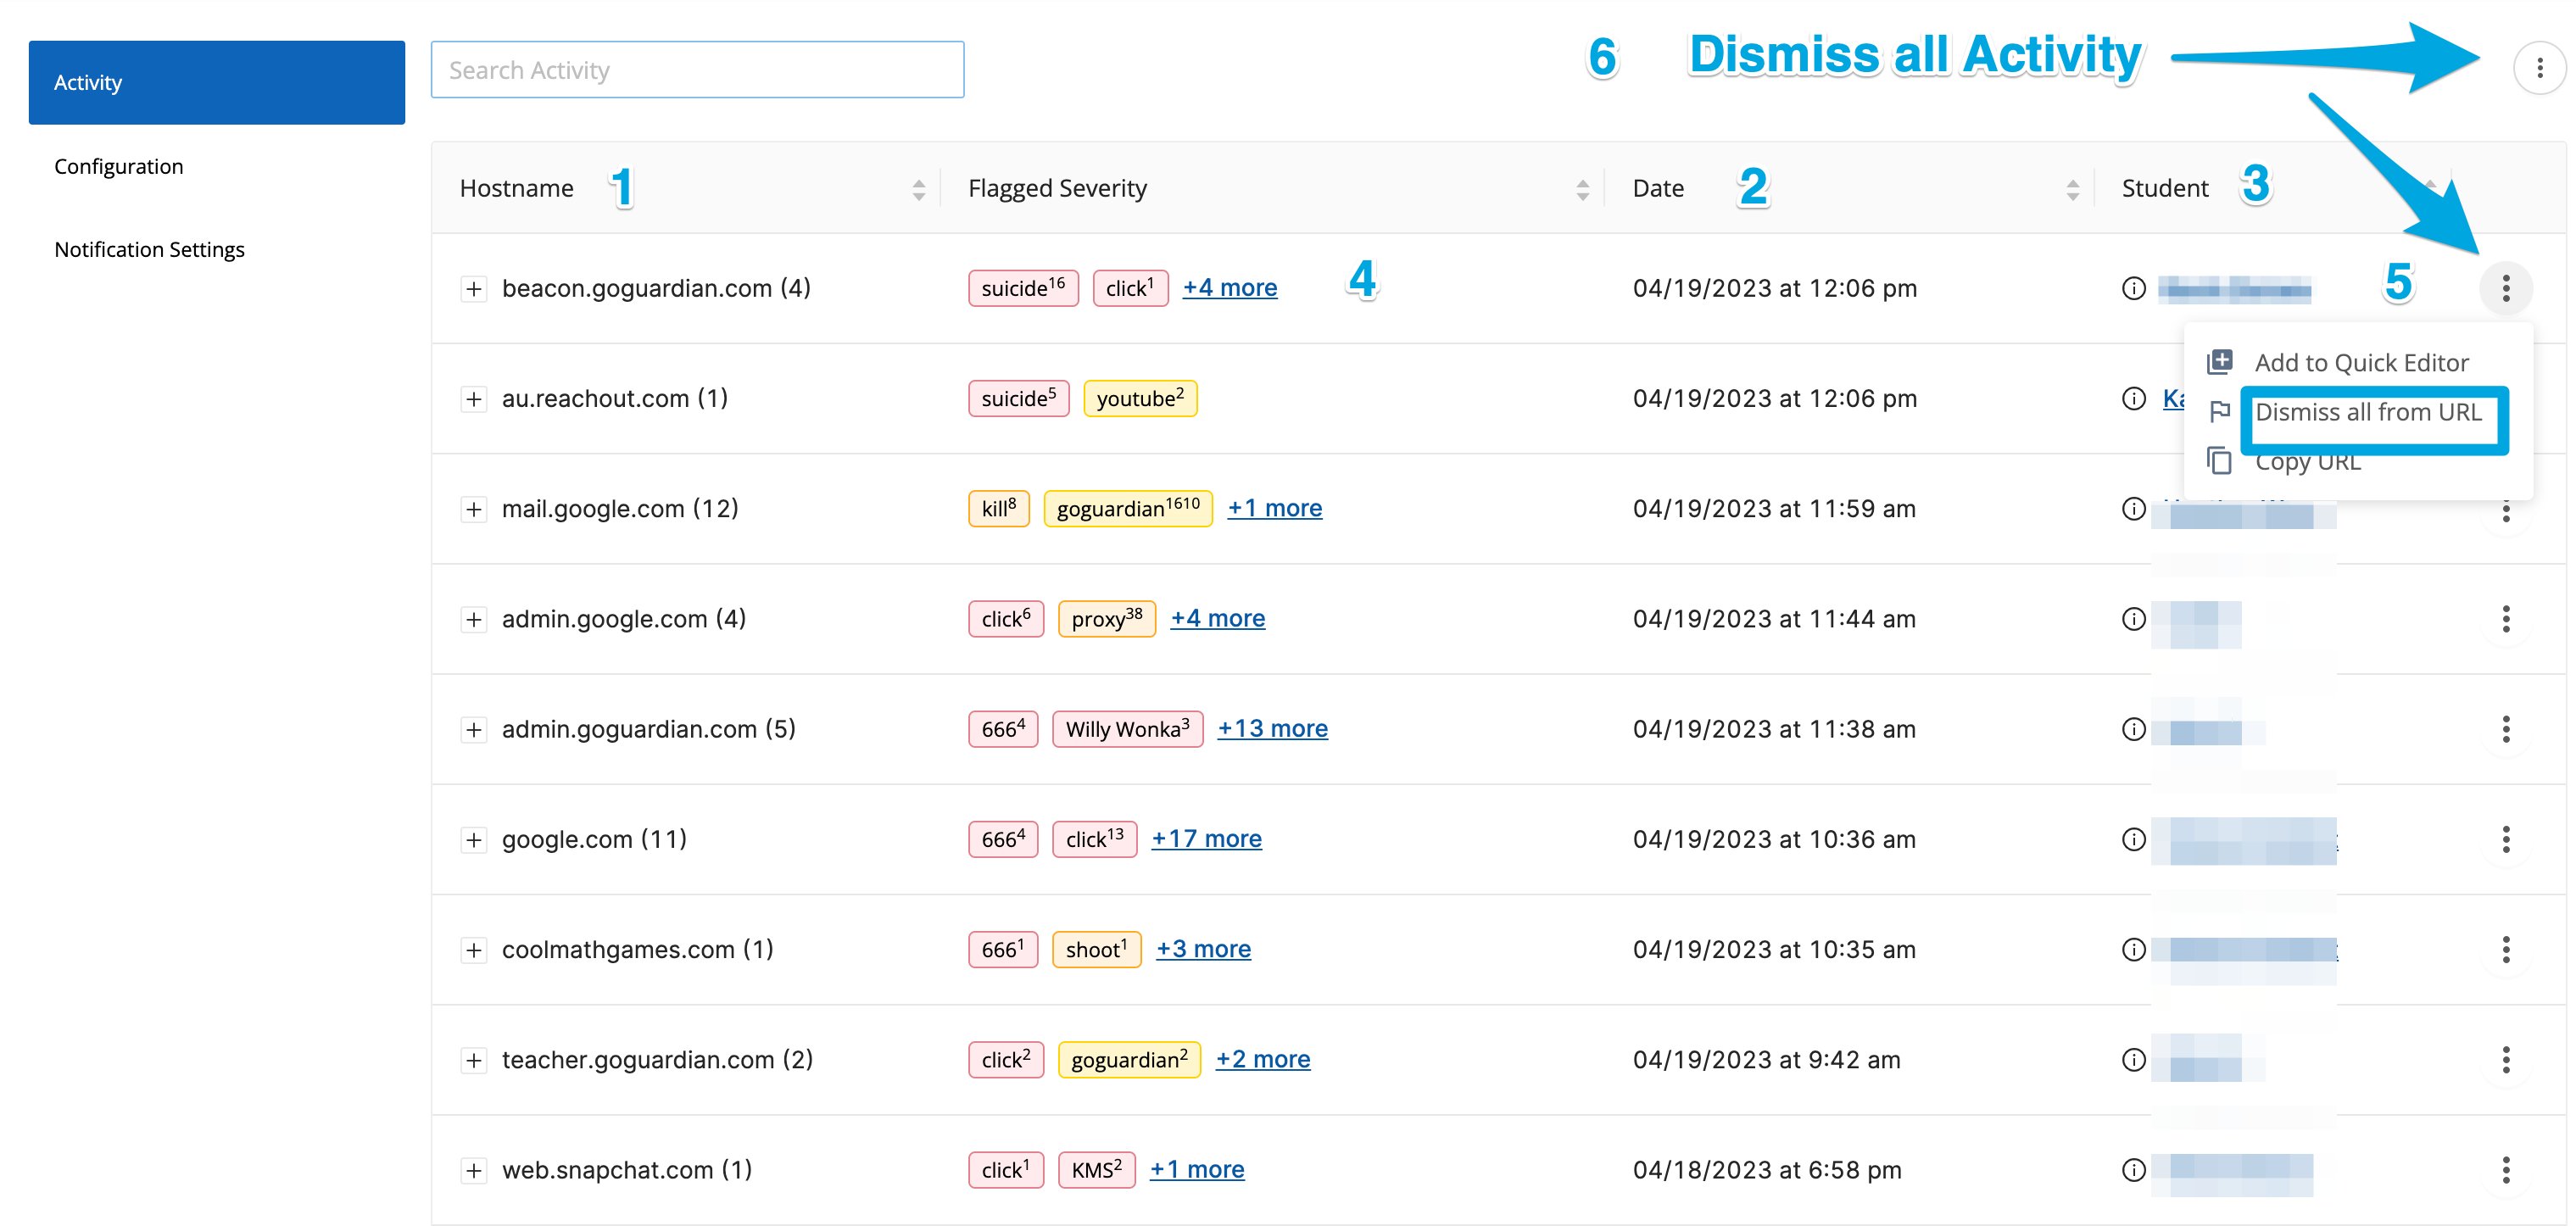
- Review the results table. Each row displays the flagged hostname, severity level, date and time, and the user who generated the flag.
- To see details for a domain, click the + icon to expand the row.

- The exact page URL that was visited
- Additional users who generated a flag on the same domain
- The flagged term or terms, with a number next to each term indicating how many times it appeared on the page or in the page metadata
- A Dismiss all from URL button to clear all alerts from that hostname
The results page supports user-level drill-down. To see exactly which student accessed flagged content, click a username in the results table. The drill-down view shows that student’s full flagged activity log, including the specific URLs visited and the terms triggered.
- To clear all flagged activity at once, click Dismiss All.
- Verify the result: Dismissed alerts no longer appear in the results list.
Flagged Activity does not block pages. It generates alerts only. To block content, use filtering policies or Smart Alerts Triggers.
Export Flagged Activity Data
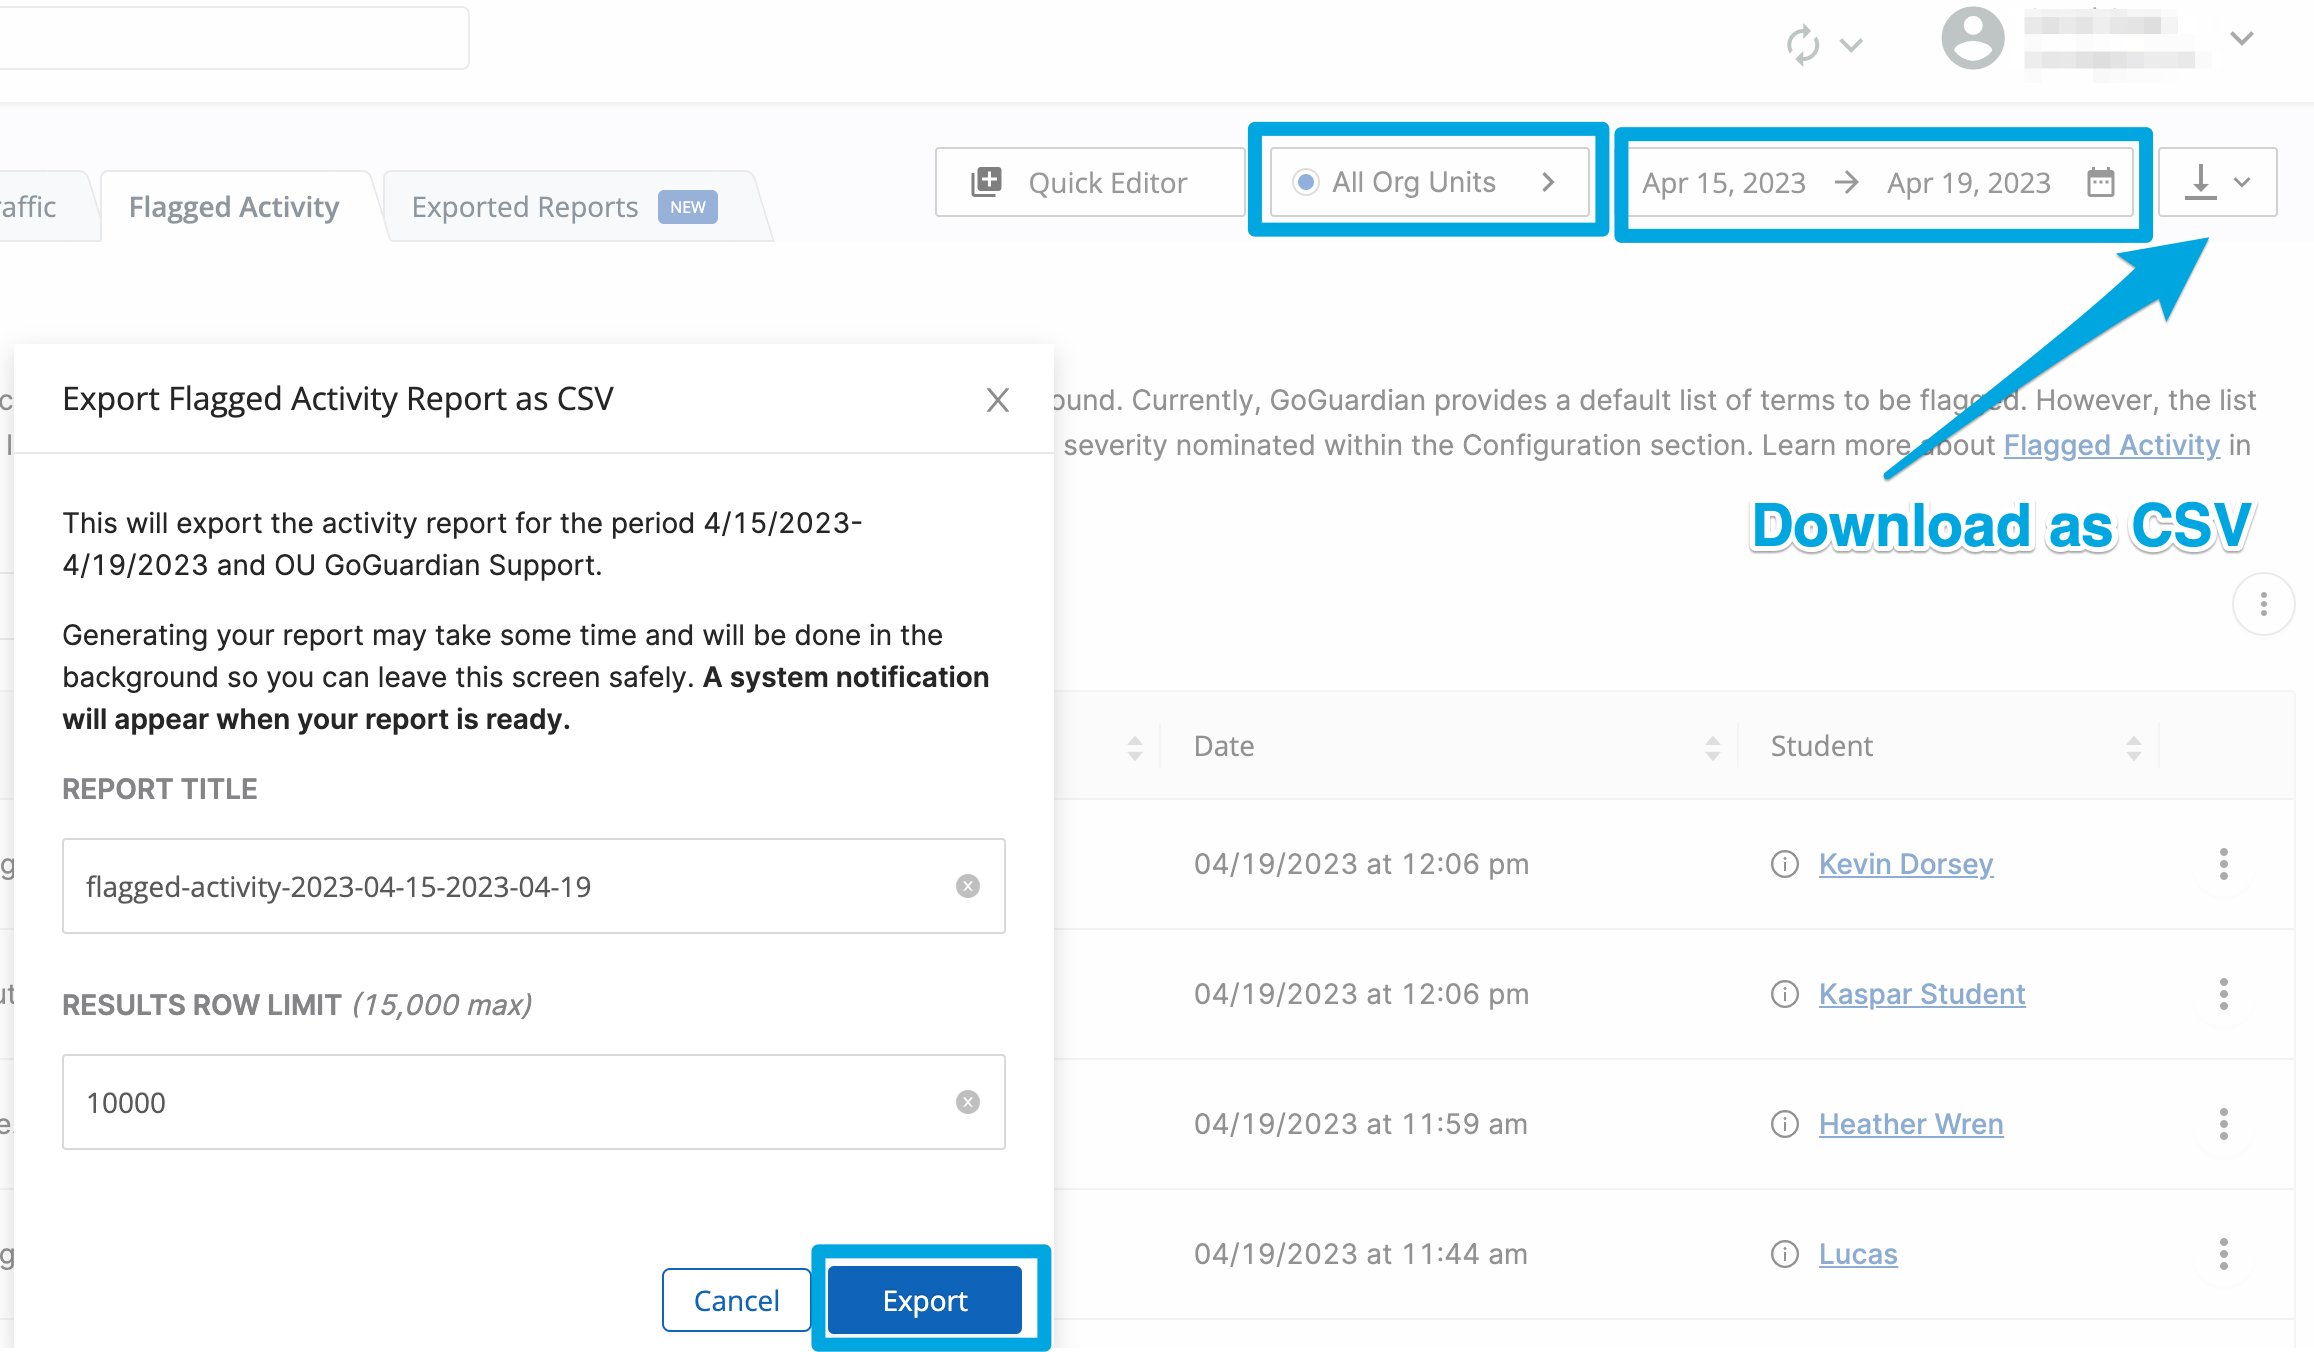
Download a CSV of flagged activity to share with district leadership or for external reporting.- Go to GoGuardian Admin and select Flagged Activity.
- Click Download as CSV.
- Select a timeframe and org unit.
- Enter a title and set a row limit.
- Click Export.
- Verify the result: A CSV file downloads to your device with flagged activity data for the selected timeframe and org unit.
Configure Notification Settings
Control which severity levels trigger email notifications. Administrators only receive notifications for flagged activity from org units they have access to in Org Management.- Go to GoGuardian Admin and select Flagged Activity.
- Select Notification Settings.
- Choose a notification option:
- Verify the result: Your notification setting is saved and applies to all future flagged activity from your accessible org units.
- 1 email per 10 minutes
- 5 emails per hour
- 10 emails per 24 hours
Notification scope is based on org unit access. Administrators receive flagged activity notifications only for org units they can access in Org Management. If you are not receiving expected notifications, confirm your org unit access with your tech director.
Resources
Understand Smart Alerts
Review how GoGuardian Admin uses machine learning to identify flagged content and generate alerts.
Compare Smart Alerts and Flagged Activity
Understand the differences between Smart Alerts and Flagged Activity and when to use each.