The Goals and Interventions Management report in Pear Assessment Data Studio gives you a structured way to define goals for student cohorts, record interventions, and track progress after support has been provided. The report has three sections: Student Groups, Goals, and Interventions. This is an enterprise report available to administrators and teachers.

Manage Student Groups

The Student Groups tab lists all existing student groups with columns for group name, student count, associated goals, and intervention plans.

Create a Student Group

  1. Click + Add New Student Group.
  2. Enter the group name, grades, course, and any other relevant details.
  3. Under Select Students for the Group, click + Add Criterion.
  4. Select the values for your criterion, choose whether to include or exclude those students, and enter the values.
  5. Click Apply Criteria to preview the matching students.
  6. Click Save Student Group.
To set a goal or intervention for an existing group, open the Actions menu at the end of that group’s row. Add Student Group button highlighted. Example of a new Student Group.

Set Goals

The Goals tab lists all goals that have been set, with columns for goal type, target students, improvement areas, decline, and notes. From the Actions menu at the end of a goal’s row, you can:
  • View Summary: opens the Dashboard report
  • View Trends: opens the Performance Trends or Attendance report
  • Edit
  • Delete
The Actions dropdown menu clicked on for a student group.

Add a Goal

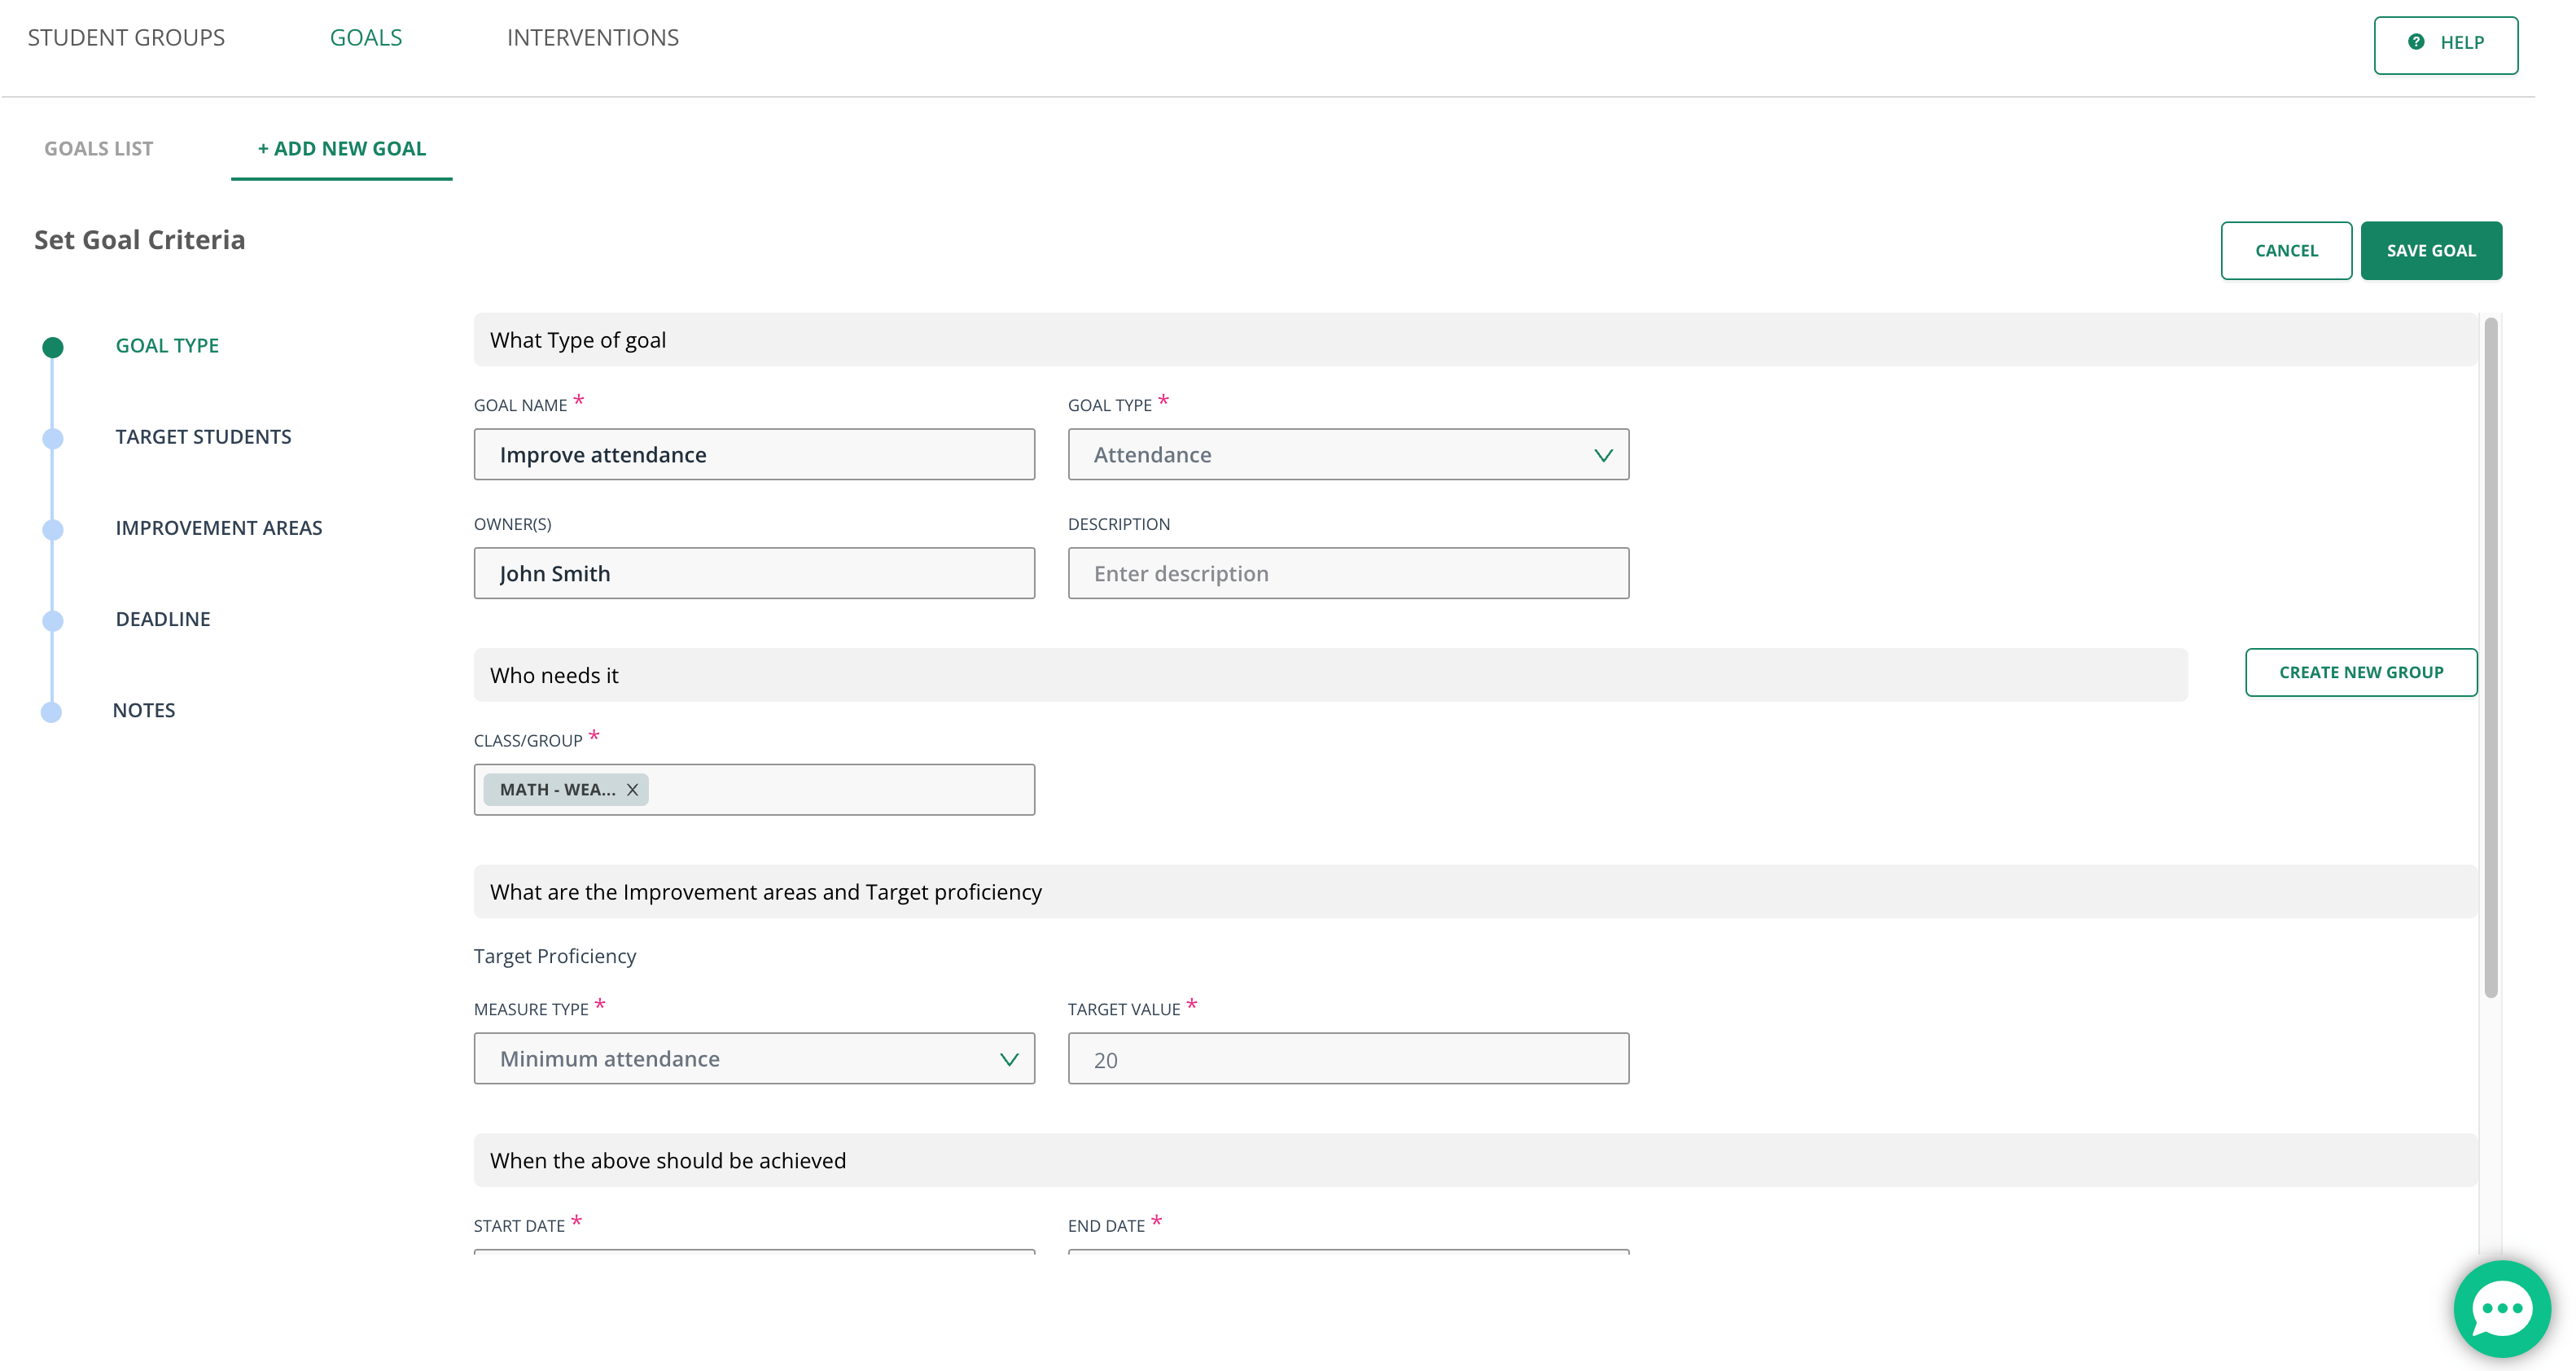
  1. Click + Add New Goal.
  2. Enter the goal name, goal type, target students, and target proficiency.
  3. Click Save Goal.
View of the Goals and Interventions Management report on the Data Studio/Insights screen. Add New Goal screen.

Record Interventions

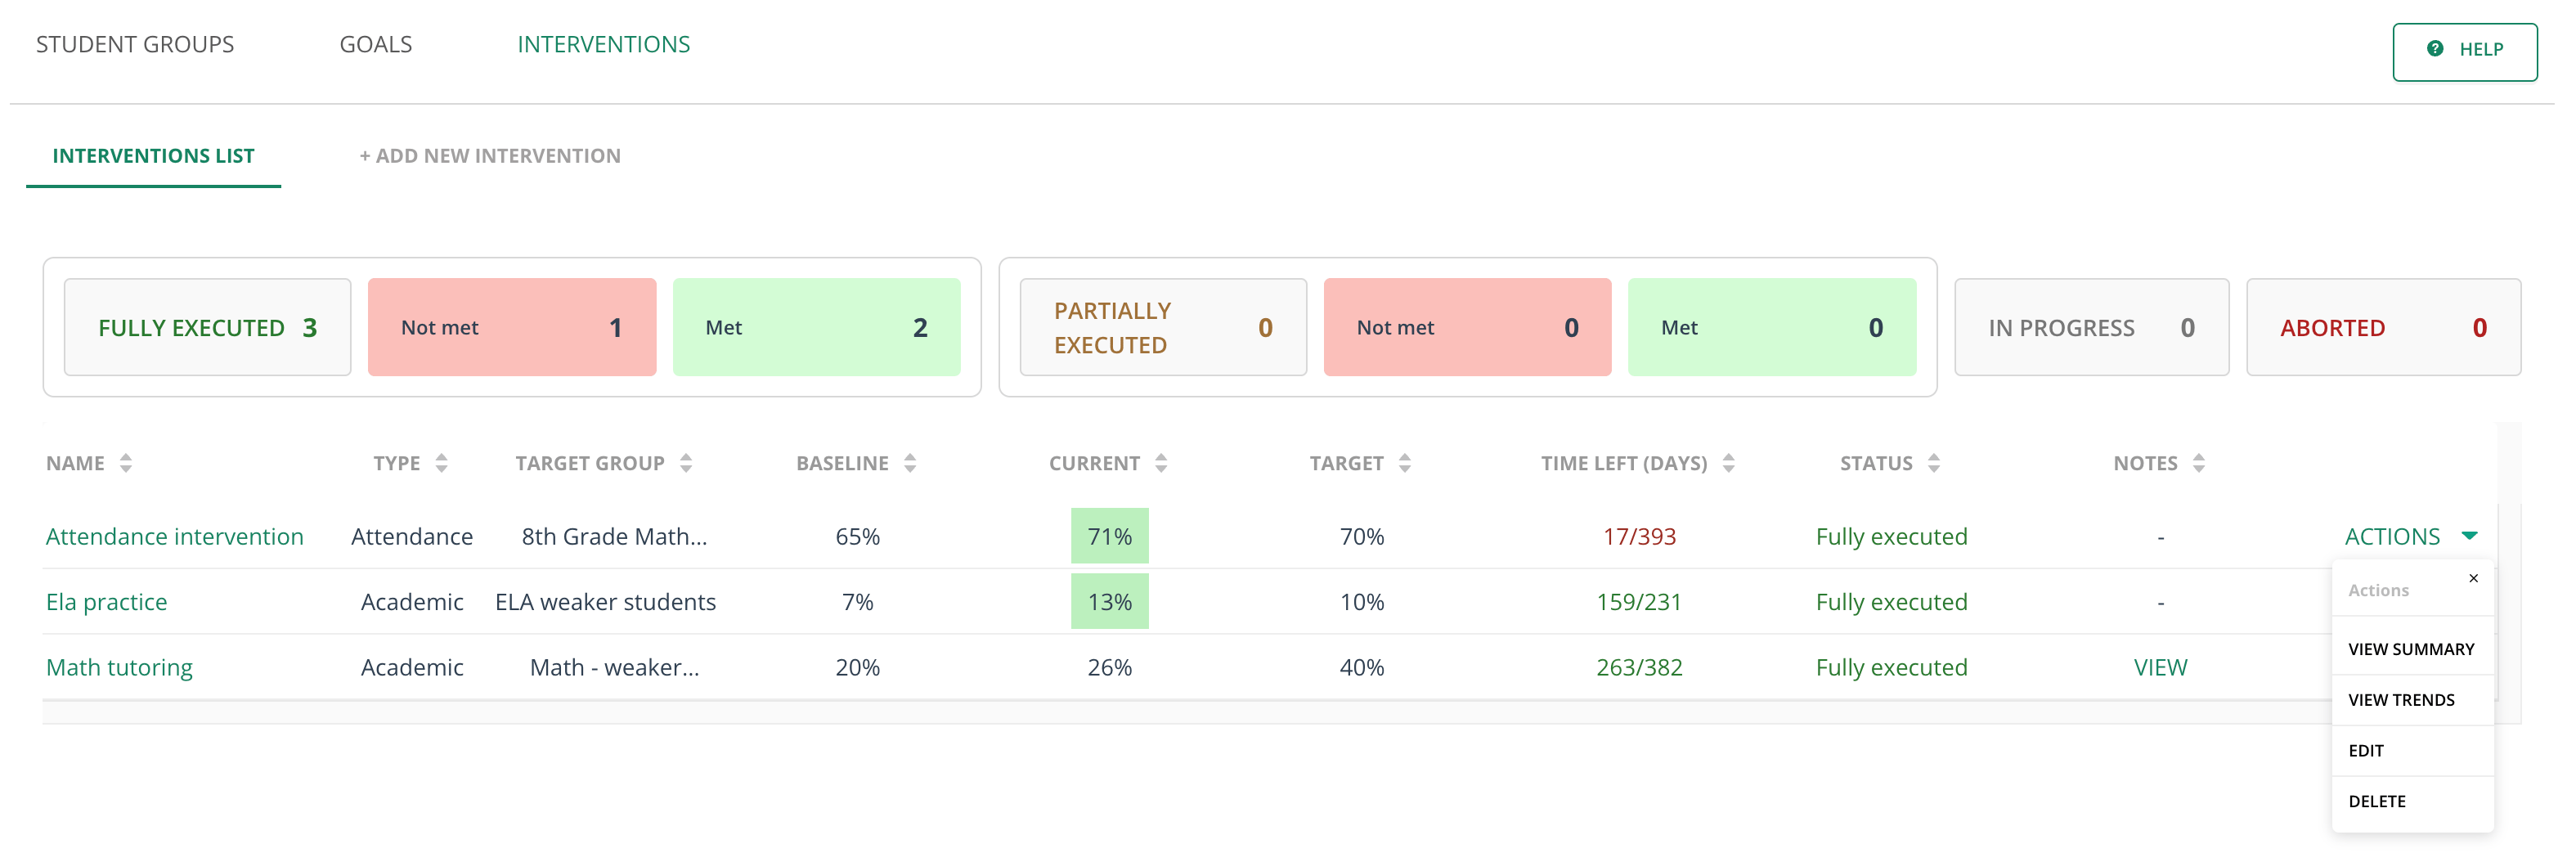
The Interventions tab lists all interventions that have been recorded, with information about the support administrators and teachers have provided. Use the Actions menu to view summaries, view trends, edit, or delete an intervention. Regardless of an intervention’s current status, you can override it and set it to Fully Executed, Aborted, Partially Executed, or In Progress. Overriding to Fully Executed or Aborted marks the intervention as met or not met based on the current target outcome value.

Add an Intervention

You can set an academic intervention or an attendance intervention.
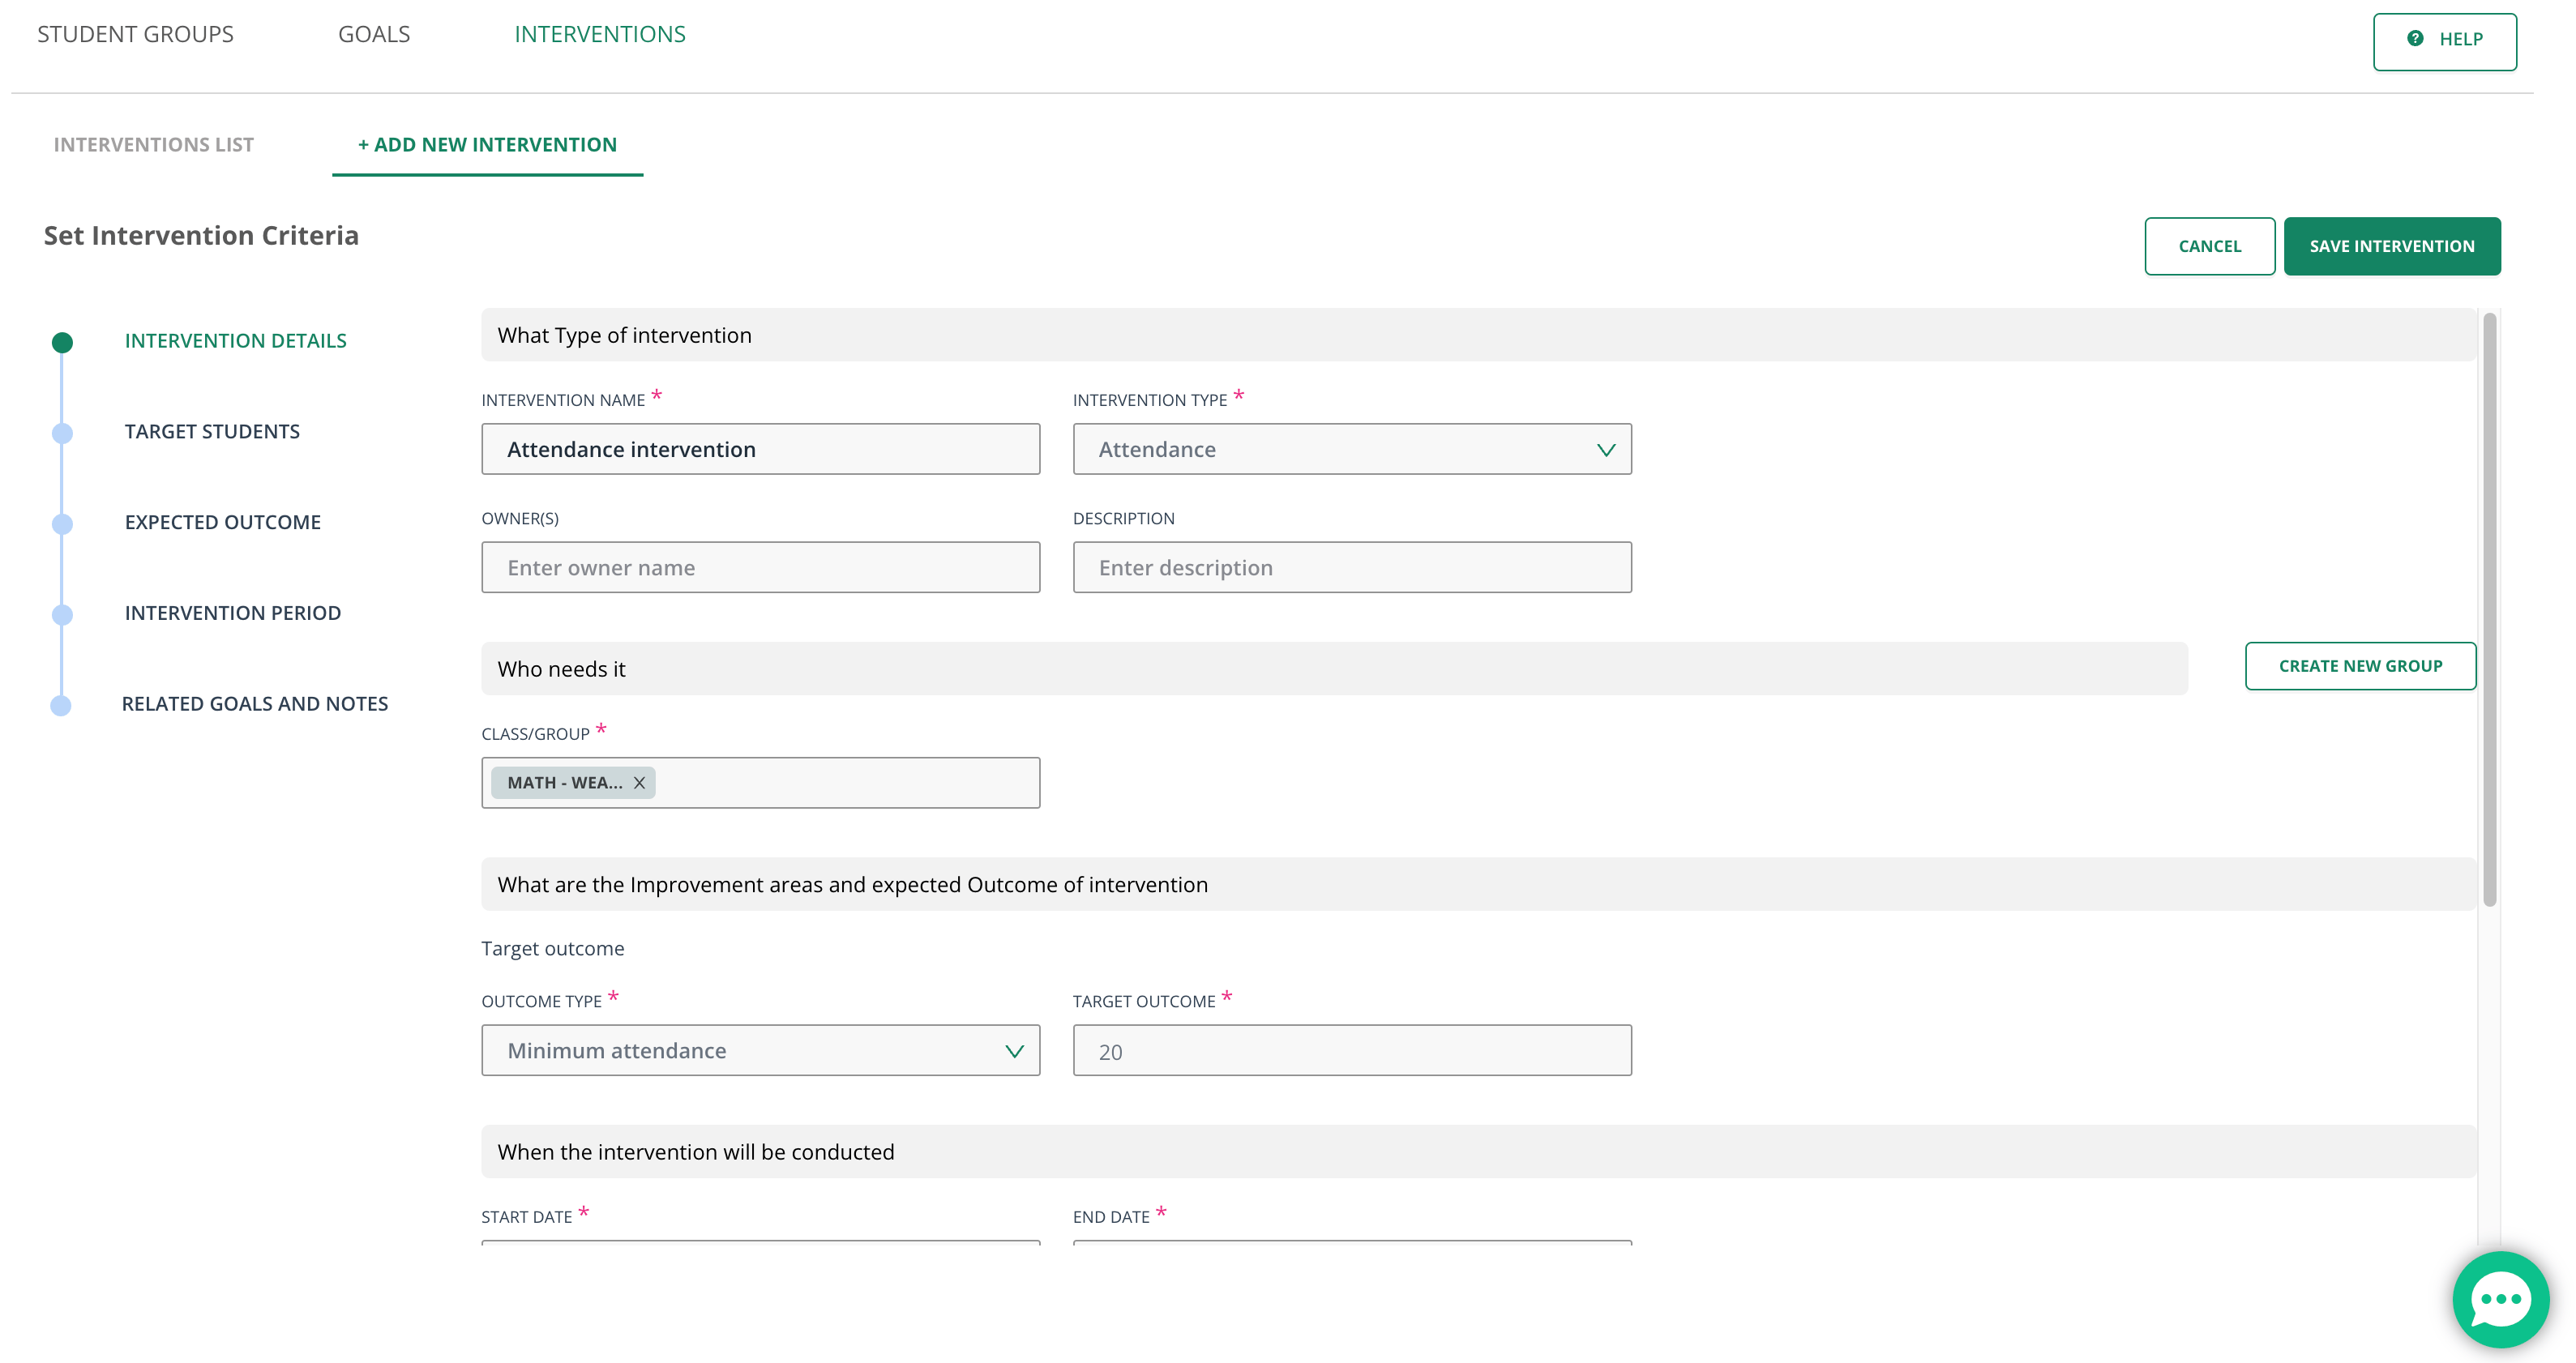
  1. Click + Add New Intervention.
  2. Enter the intervention name, type, target students, target outcome, start date, and end date.
  3. Optionally, link the intervention to a related goal.
  4. Click Save Intervention.
A view of the Actions menu for Interventions. A view of how to set up an Intervention.

Frequently Asked Questions

Yes. When adding an intervention, you can optionally link it to a related goal in the same form.

What Happens When I Override an Intervention’s Status?

Setting the status to Fully Executed or Aborted marks the intervention as met or not met based on the current target outcome value.

Resources

Last modified on July 16, 2026