

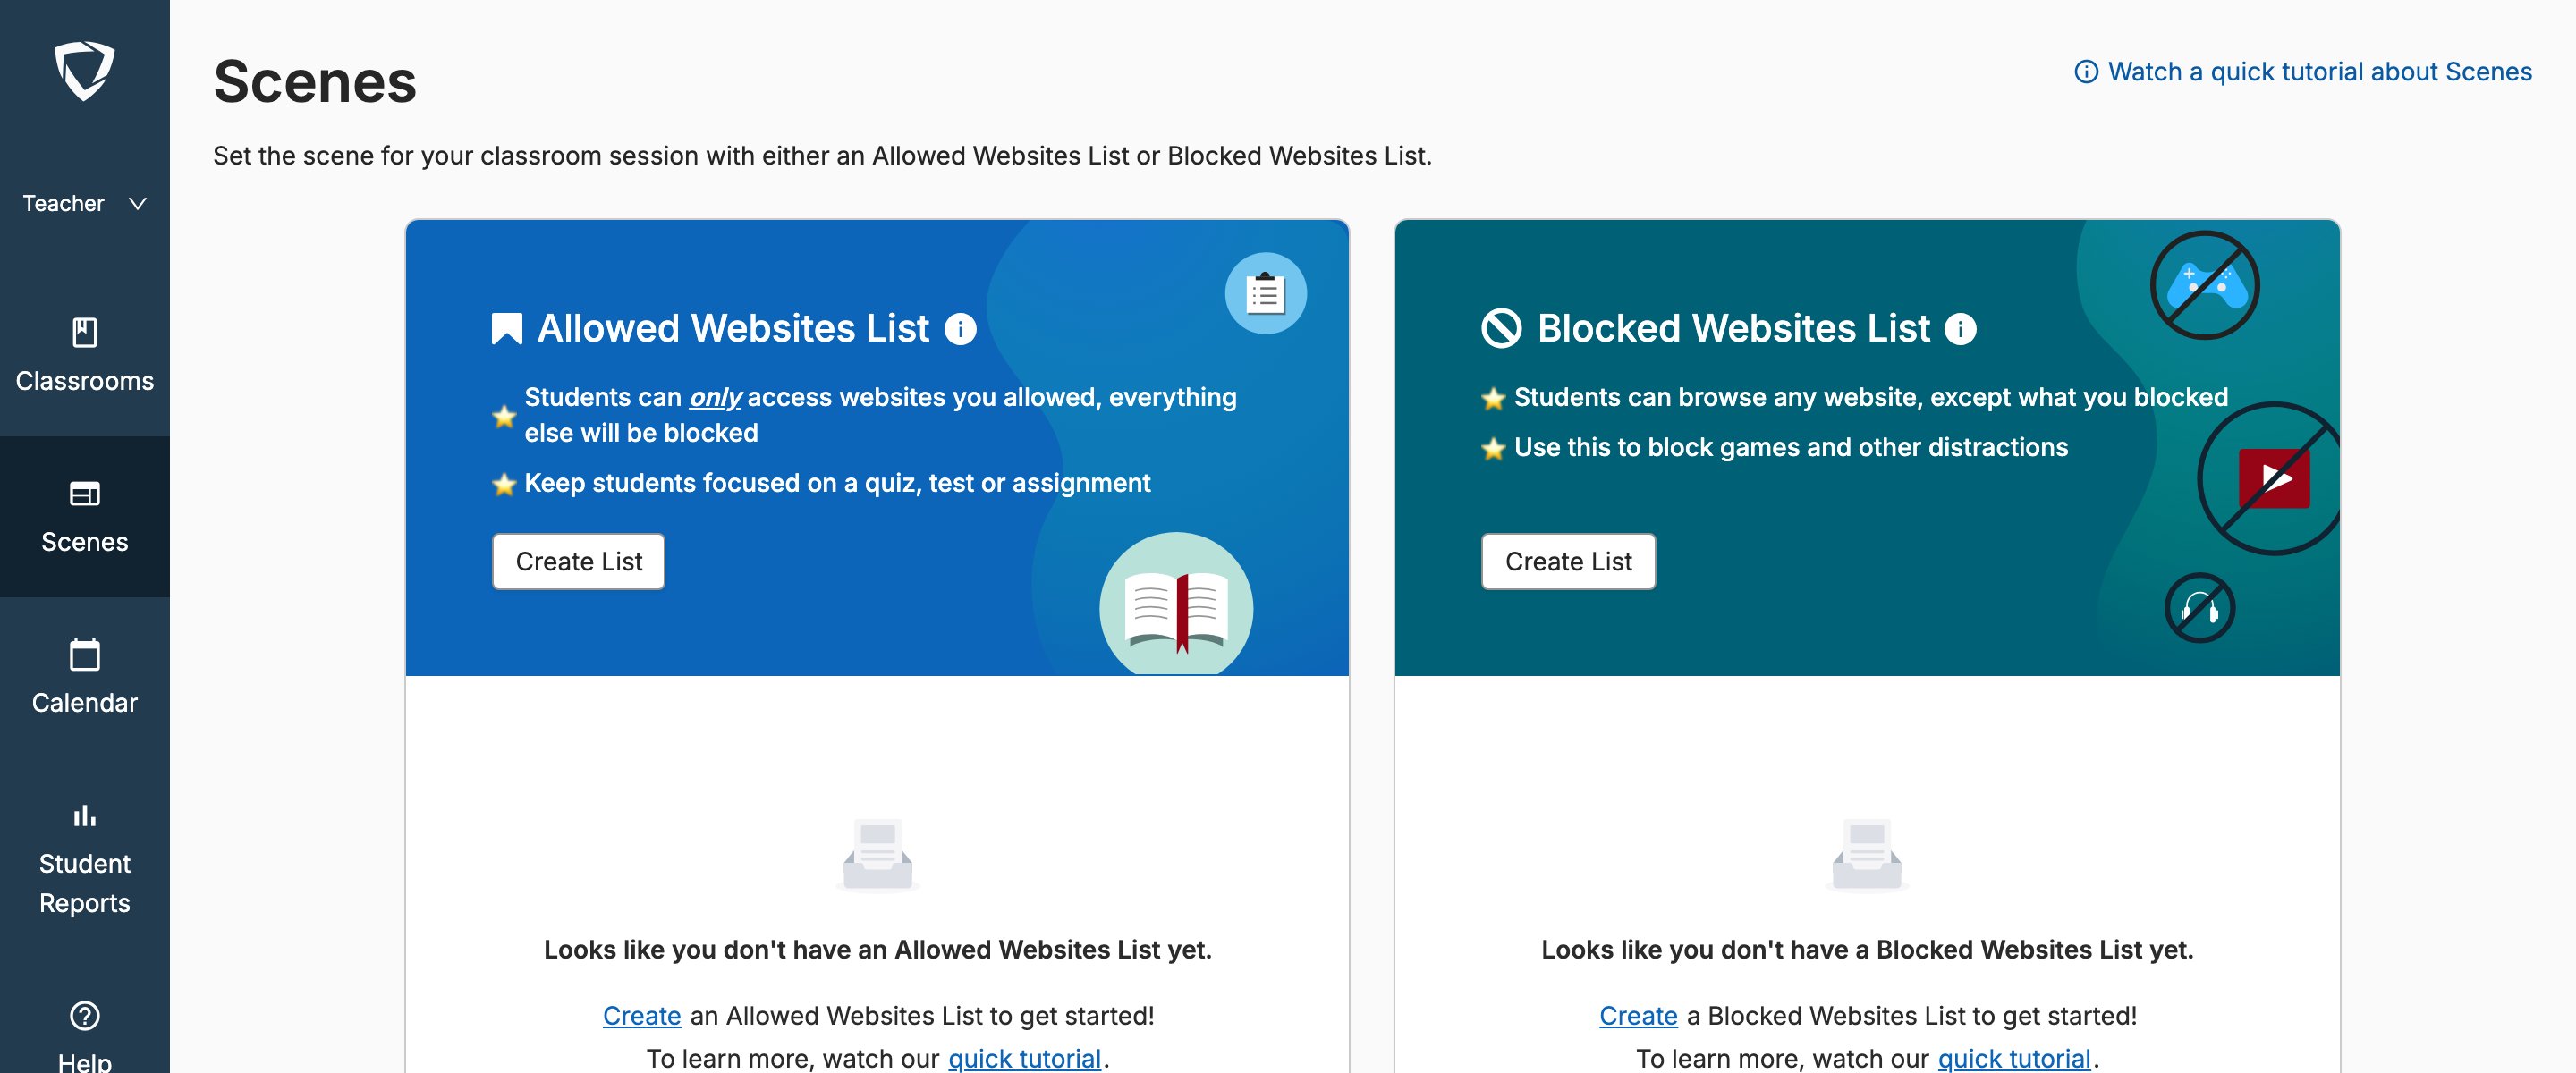
Apply a Scene to a Group
There are 2 ways to apply Scenes at the group level.Option 1: Select Students First
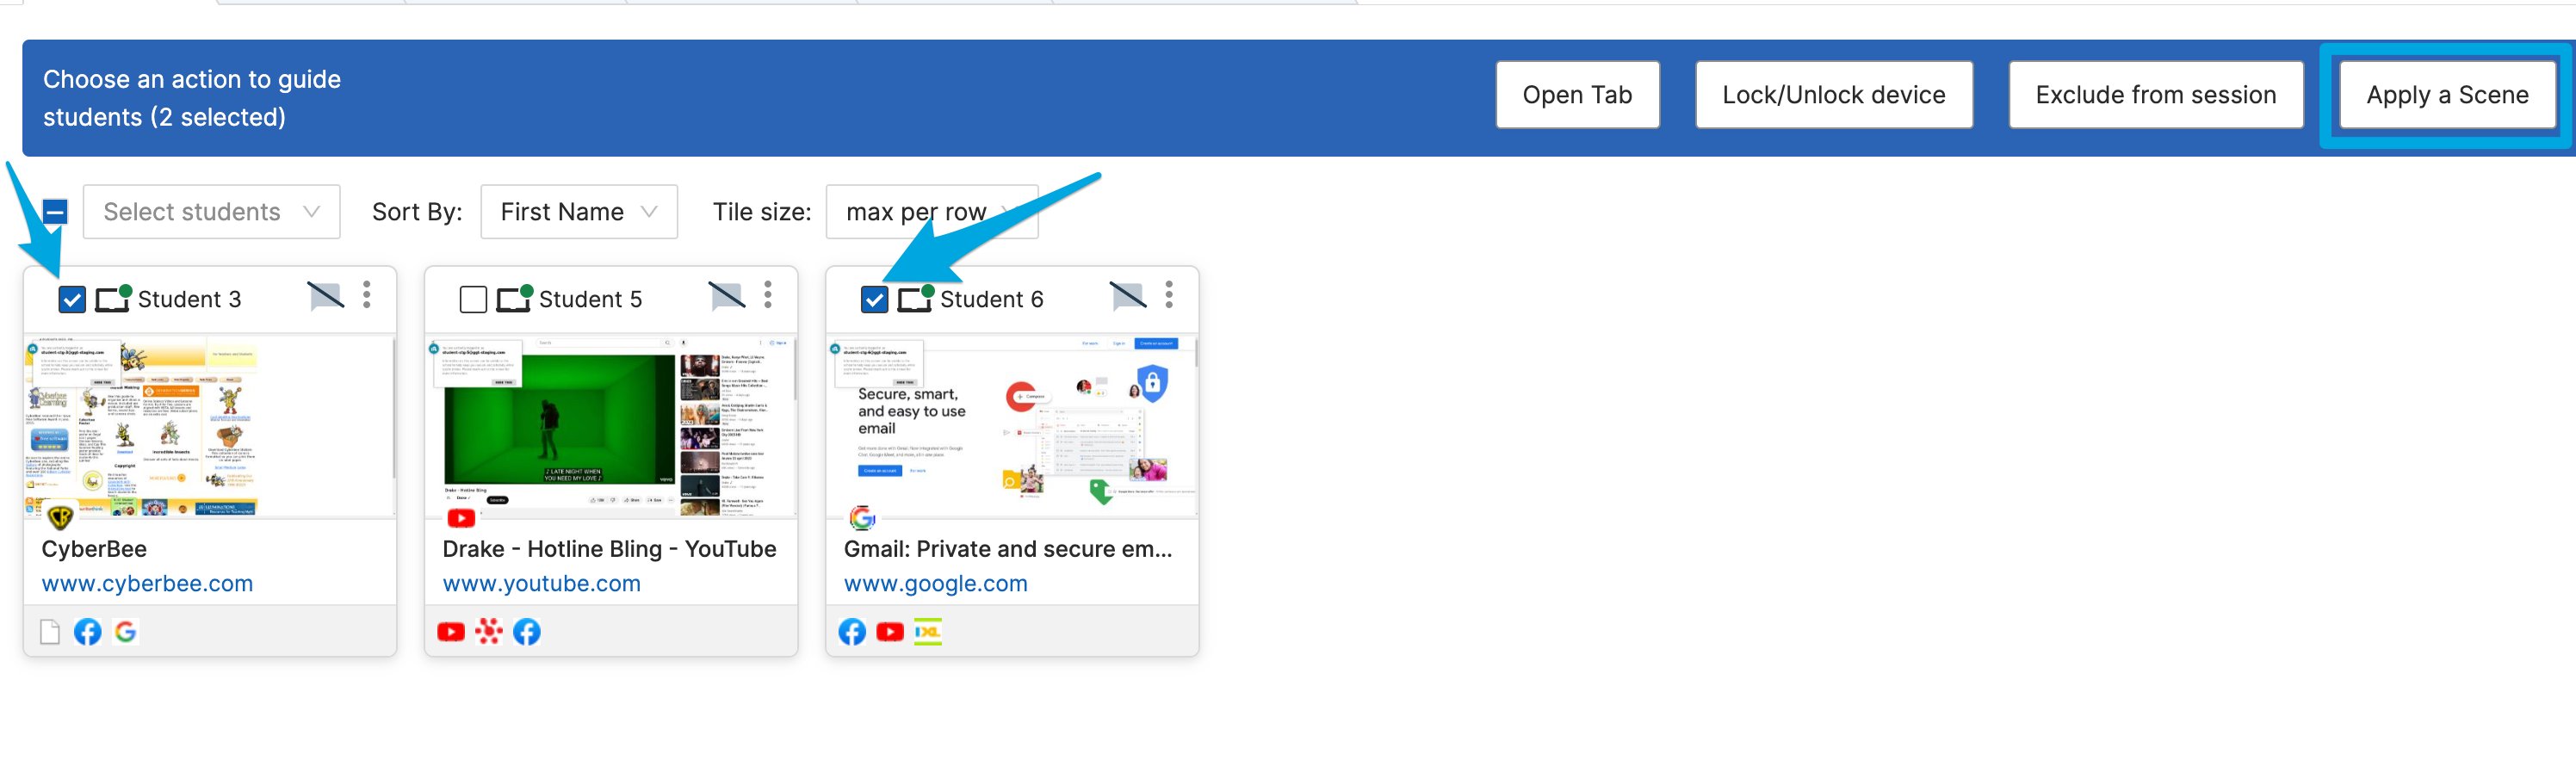
- Select specific students by clicking the checkbox in the corner of their tiles.
- Click the Apply a Scene button on the command bar.
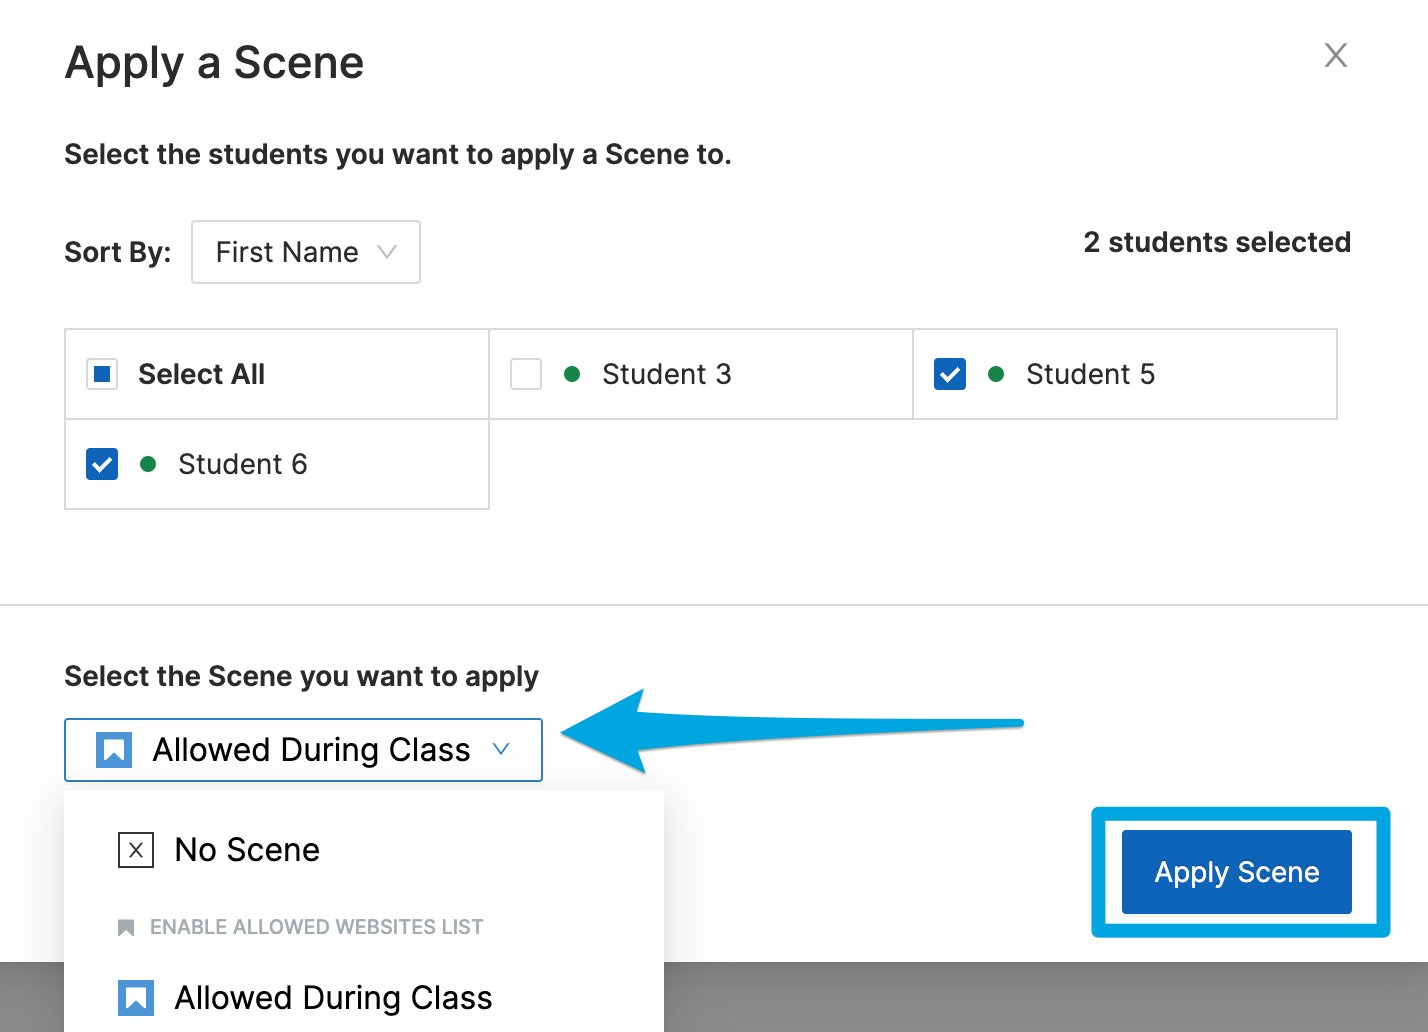
- Select a Scene from the drop-down menu and click Apply Scene.
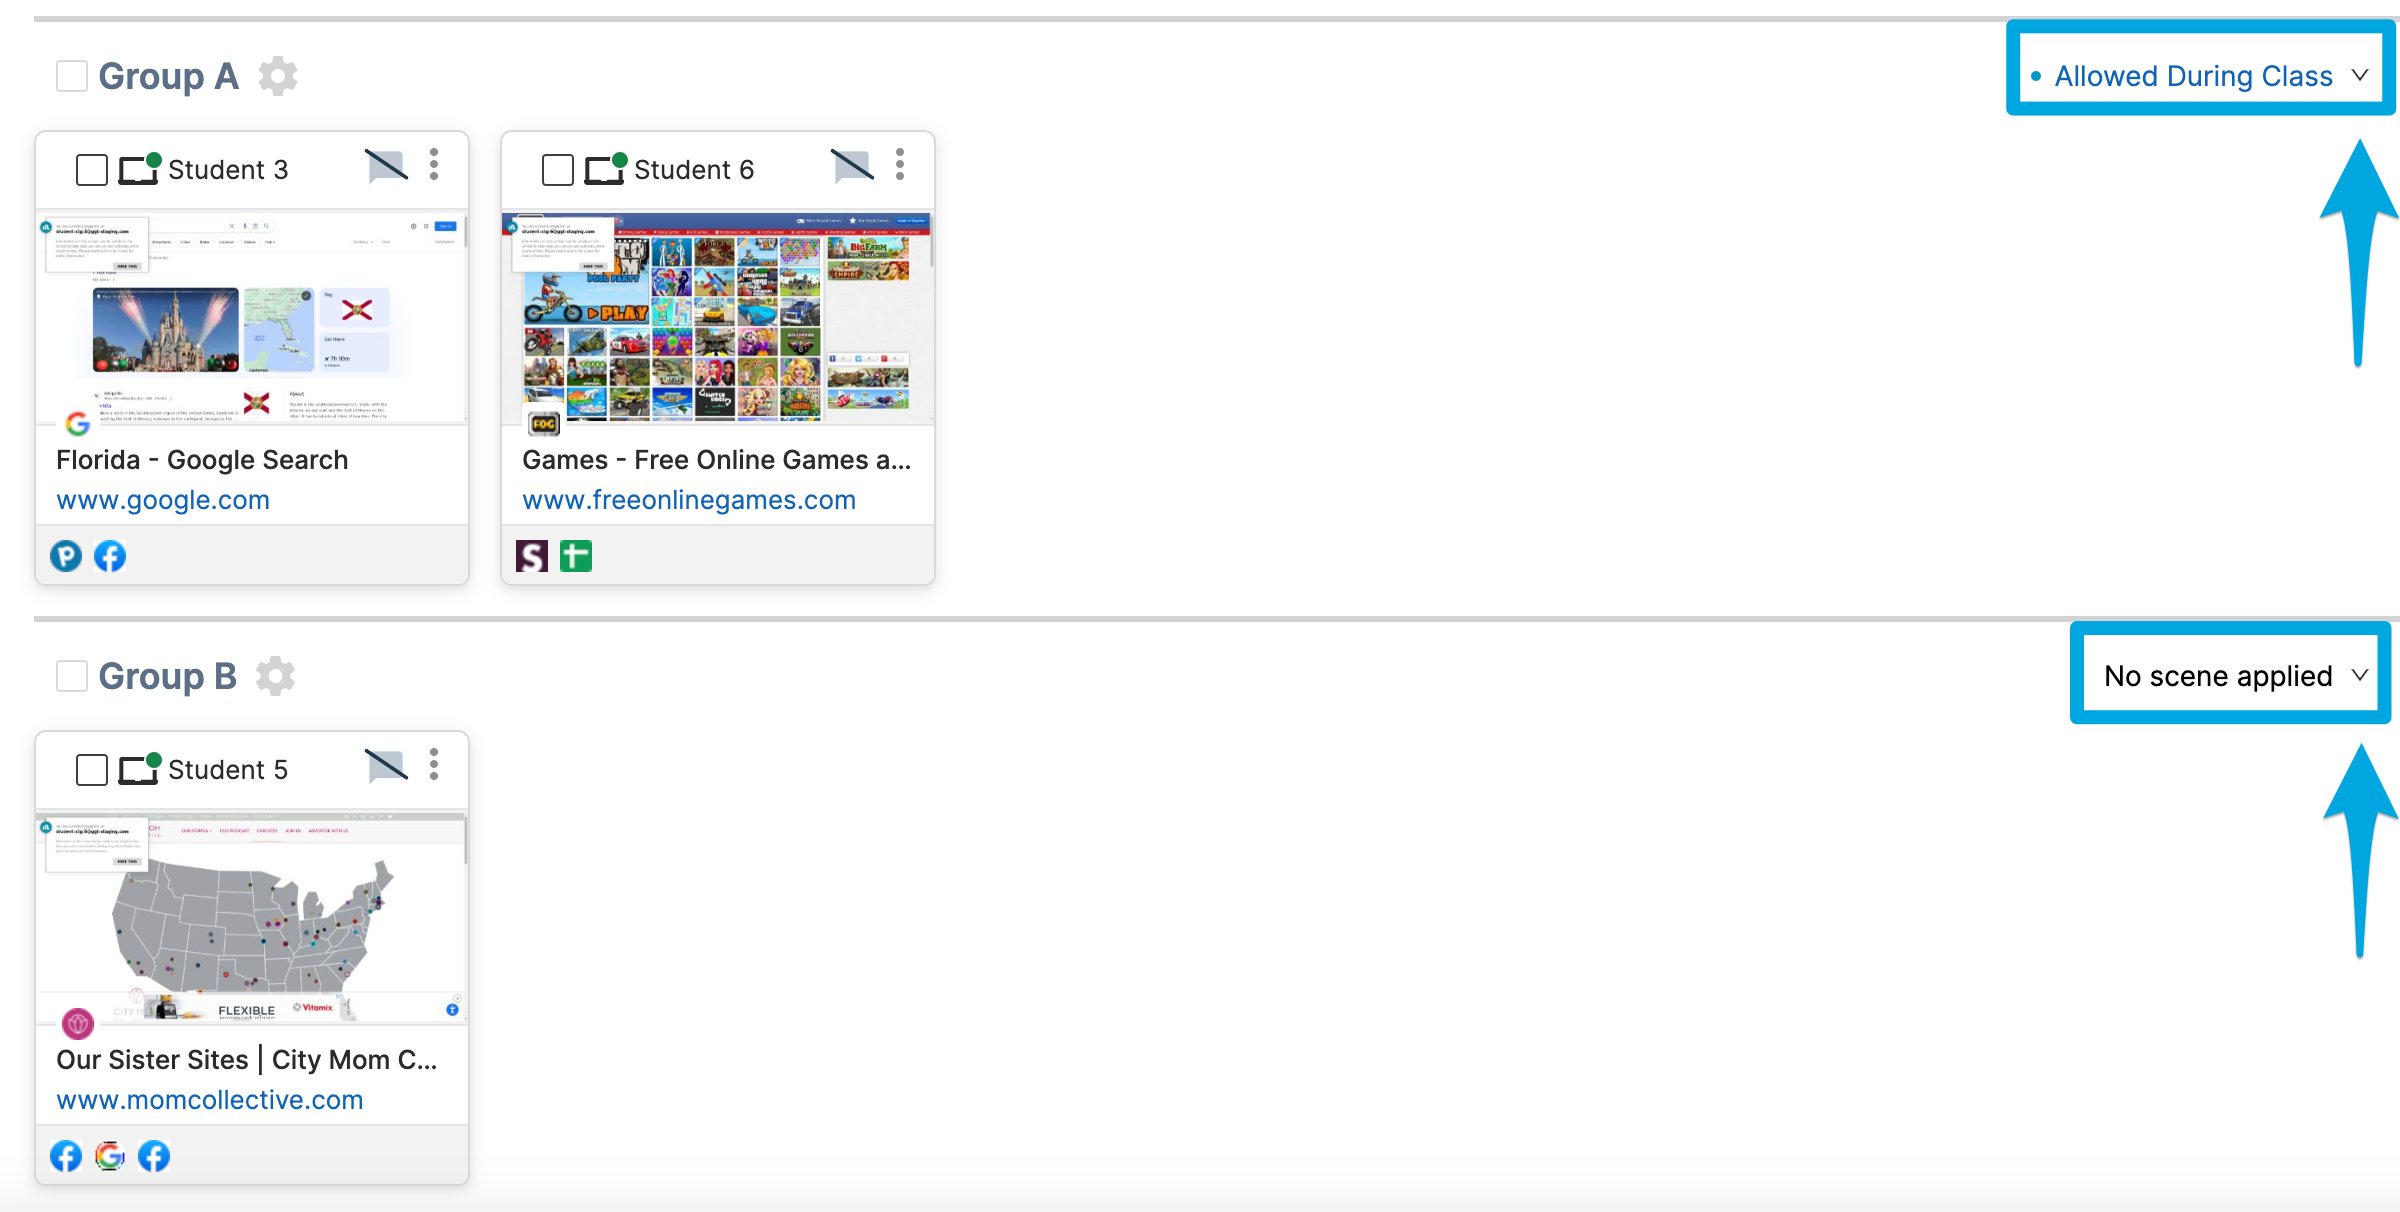
- Verify that students are sorted into 2 groups: Group A includes the selected students with the chosen Scene, and Group B includes all remaining students without a Scene.
While Student Groups are active, use the drop-down menus to apply or change Scenes.
Option 2: Create Groups First, Then Apply Scenes
- Click the Student Groups button.
- Create a new group, or choose from a previously created group.
- Use the Scene drop-down menu to select a Scene for each group.

Move Students Between Groups with Drag and Drop
Teachers can use the drag and drop feature to quickly rearrange students and move them from 1 group to another. Moving a student to a different group also updates their Scene rules to limit which websites they can access.
Resources
Scenes Overview
Learn how Scenes work and what they can do.
Create and Apply a Scene
Step-by-step instructions for building and applying Scenes.
Components of a Scene
Understand the building blocks of a Scene.
Commands Overview
See all available commands for managing a classroom session.