

Complete the Setup Checklist
Complete the following steps in order after deploying the GoGuardian extensions and creating your deployment.- Add users to Beacon
- Set school hours
- Configure alert preferences
- Set staff notification preferences
- Configure the escalation list
- Add custom emergency contact numbers
- Complete your Beacon profile
- Enable parent notifications (optional)
- Enable student messaging (optional)
Add Users to Beacon
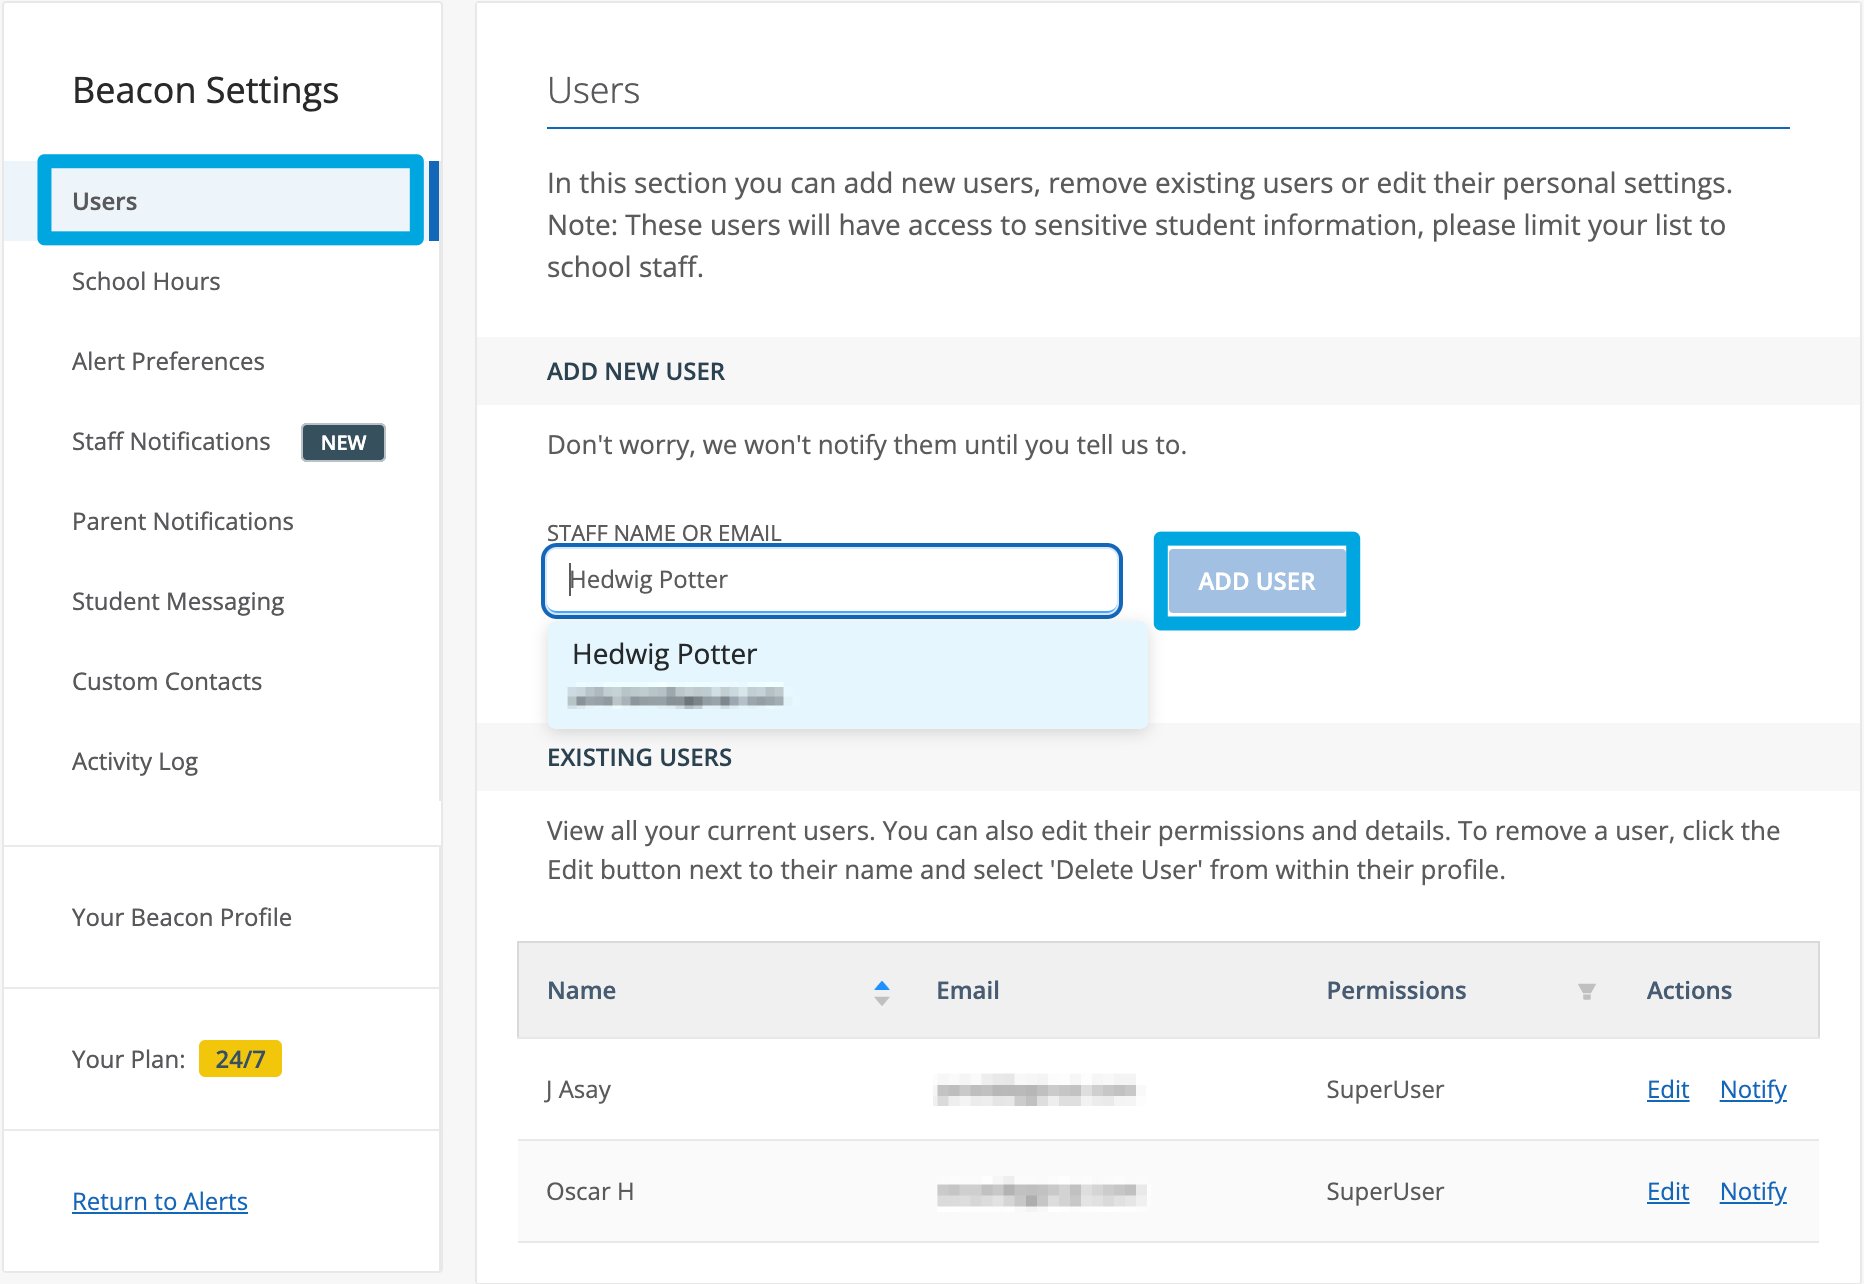
Before adding a user, a Super User must grant that user Beacon permissions in Org Management. For details, see Beacon User Roles and Permissions.- Type the user’s name or email address in the search box as it appears in Org Management. Select the appropriate user from the results.
- Click Add User to the right of the search field.
- Complete any additional fields for the user.
- Click Add User at the bottom of the page.
Set School Hours
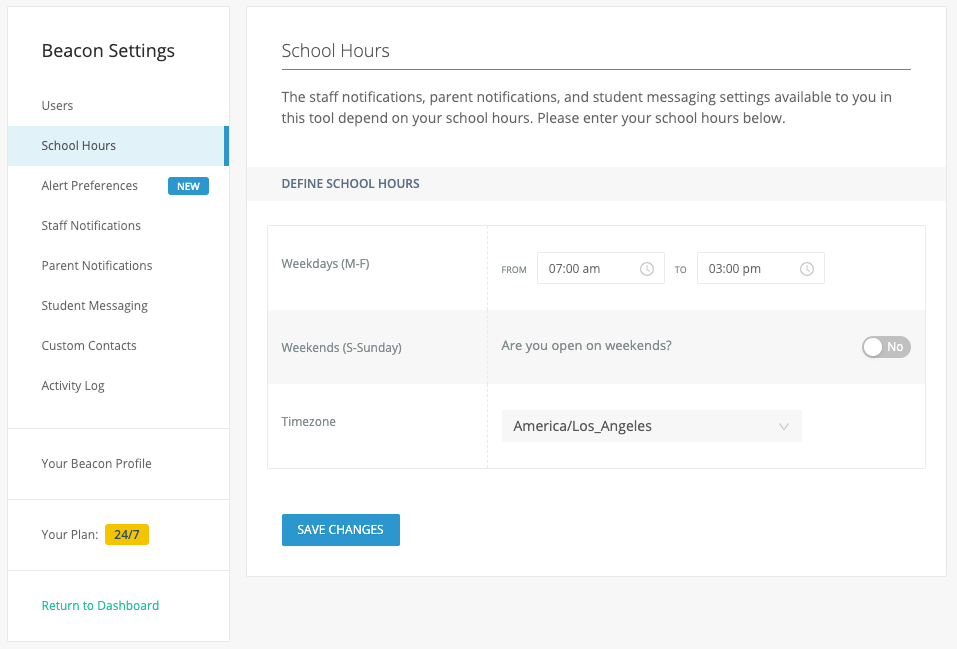
School hours control when staff, parent, and student notifications are sent. Settings in Staff Notifications, Parent Notifications, and Student Messaging all depend on the hours defined here.- Go to Settings in the Beacon navigation menu, then select School Hours.
- Enter your start and end times for Monday through Friday.
- Turn on Weekend Reporting and enter start and end times if your school operates on weekends.
- Select the appropriate timezone from the dropdown.
- Click Save Changes.
Configure Alert Preferences
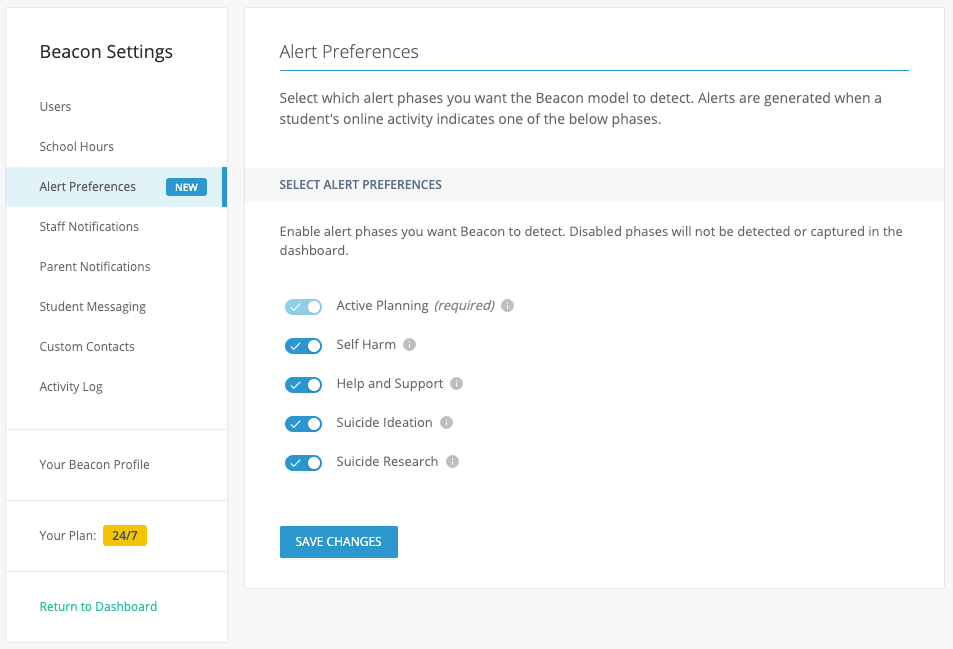
Disable alerts for phases your school does not need. When a phase is disabled, no alert cards appear on the dashboard and no email or text notifications are sent for that phase. By default, all phases are toggled on. Active Planning alerts cannot be disabled.This feature is not available on Beacon Starter. Beacon Starter generates Active Planning alerts only.
- Go to Settings, then select Alert Preferences.
- Turn on or turn off each phase — Active Planning, Suicide Ideation, Self Harm, Help & Support, and Suicide Research — according to your school’s needs.
- Click Save Changes at the bottom of the page.
Set Staff Notification Preferences
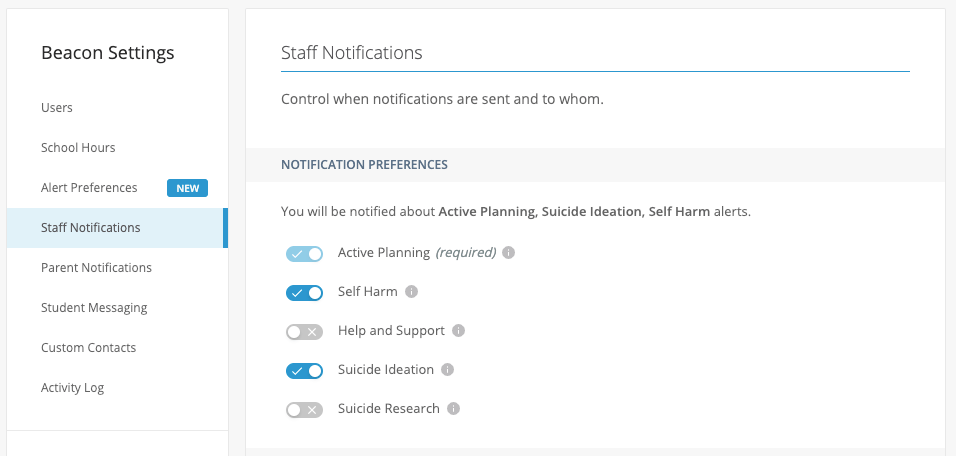
Designate which alert phases generate email and text message notifications for staff. Active Planning notifications are always on and cannot be disabled.This feature is not available on Beacon Starter.
- Go to Settings, then select Staff Notifications.
- Turn on or turn off the phases your staff should be notified about.
- Click Save Changes at the bottom of the page.
Configure the Escalation List
The escalation list determines which staff members receive notifications when an alert is generated and the order in which they are contacted. Escalation List — The ordered list of users who receive email and optional text notifications for new alerts. Only users with Beacon access may be added. Interval Time — The window a user has to respond to an alert before Beacon notifies the next person on the list. After School Notifications — When enabled, email and text notifications are sent during and after school hours. When disabled, notifications are sent during school hours only. How escalation works — When a new alert is generated, the user in position 01 receives an email notification (and text message, if enabled). If that user does not act on the alert within the interval time, Beacon notifies the next user on the list.For Beacon Starter, only position 01 can be filled — with either one individual user or All Users. Selecting All Users notifies all users in the deployment at the same time.

Add Custom Emergency Contact Numbers
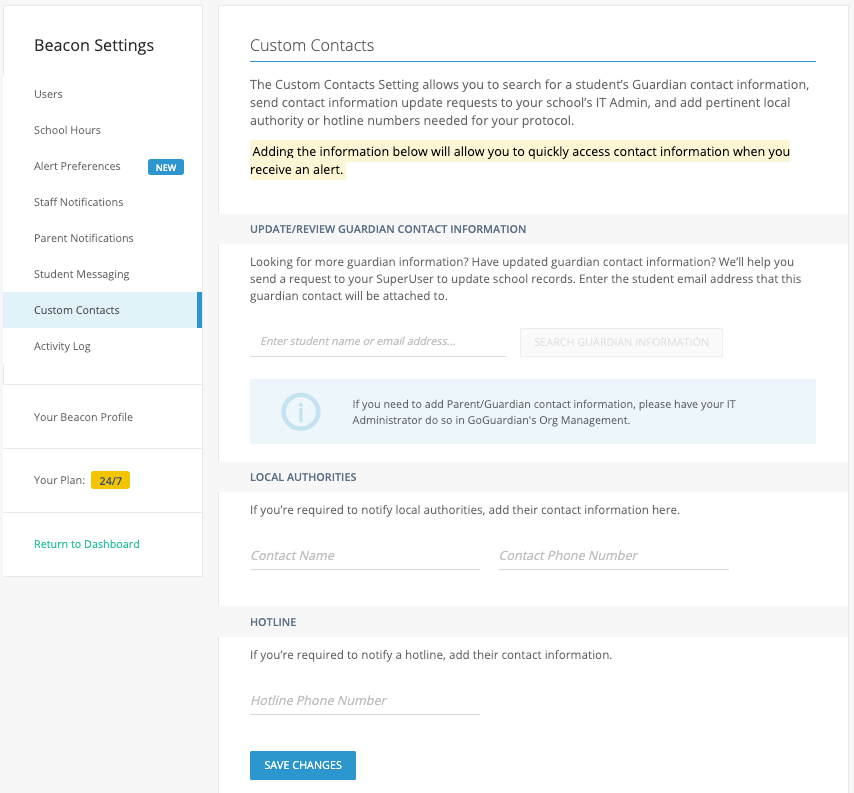
Local authority and hotline contact information appears on each Alert Details report for quick access.- Update Guardian Contact Information — Contact your Super User to update student and guardian information. Super Users can bulk-add parent and guardian contact information at
manage.goguardian.com. - Local Authorities — Add your local authority’s name and non-emergency phone number.
- Hotline — If your organization is required to notify a self-harm hotline, add that information here.
Complete Your Beacon Profile
Go to Your Beacon Profile to add or update your cell phone number and set your notification preferences. You can also view your account’s Beacon permissions from this page. Your name and email address are managed in Org Management and cannot be changed from Beacon. For step-by-step instructions, see Set Up Your Profile.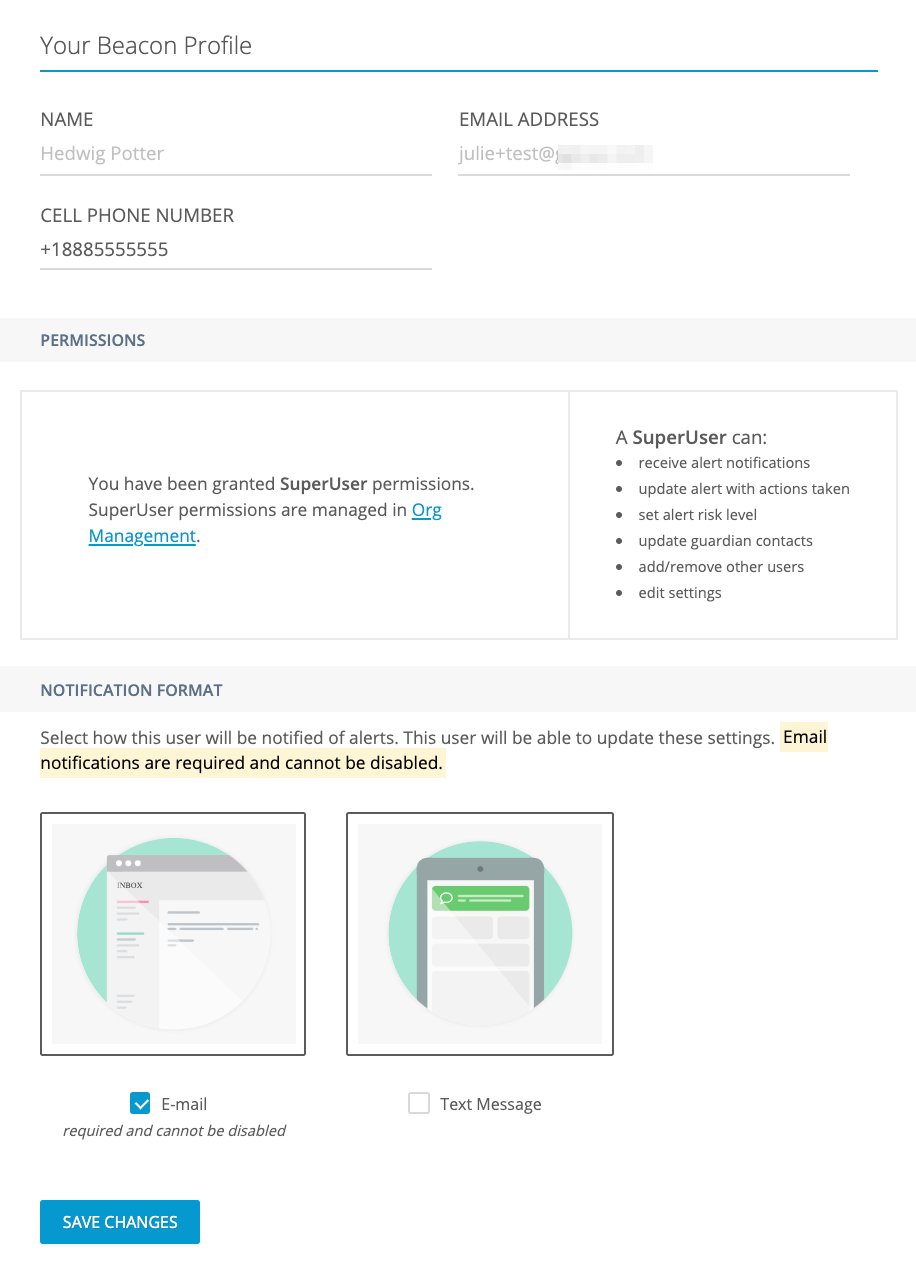
Enable Parent Notifications (Optional)
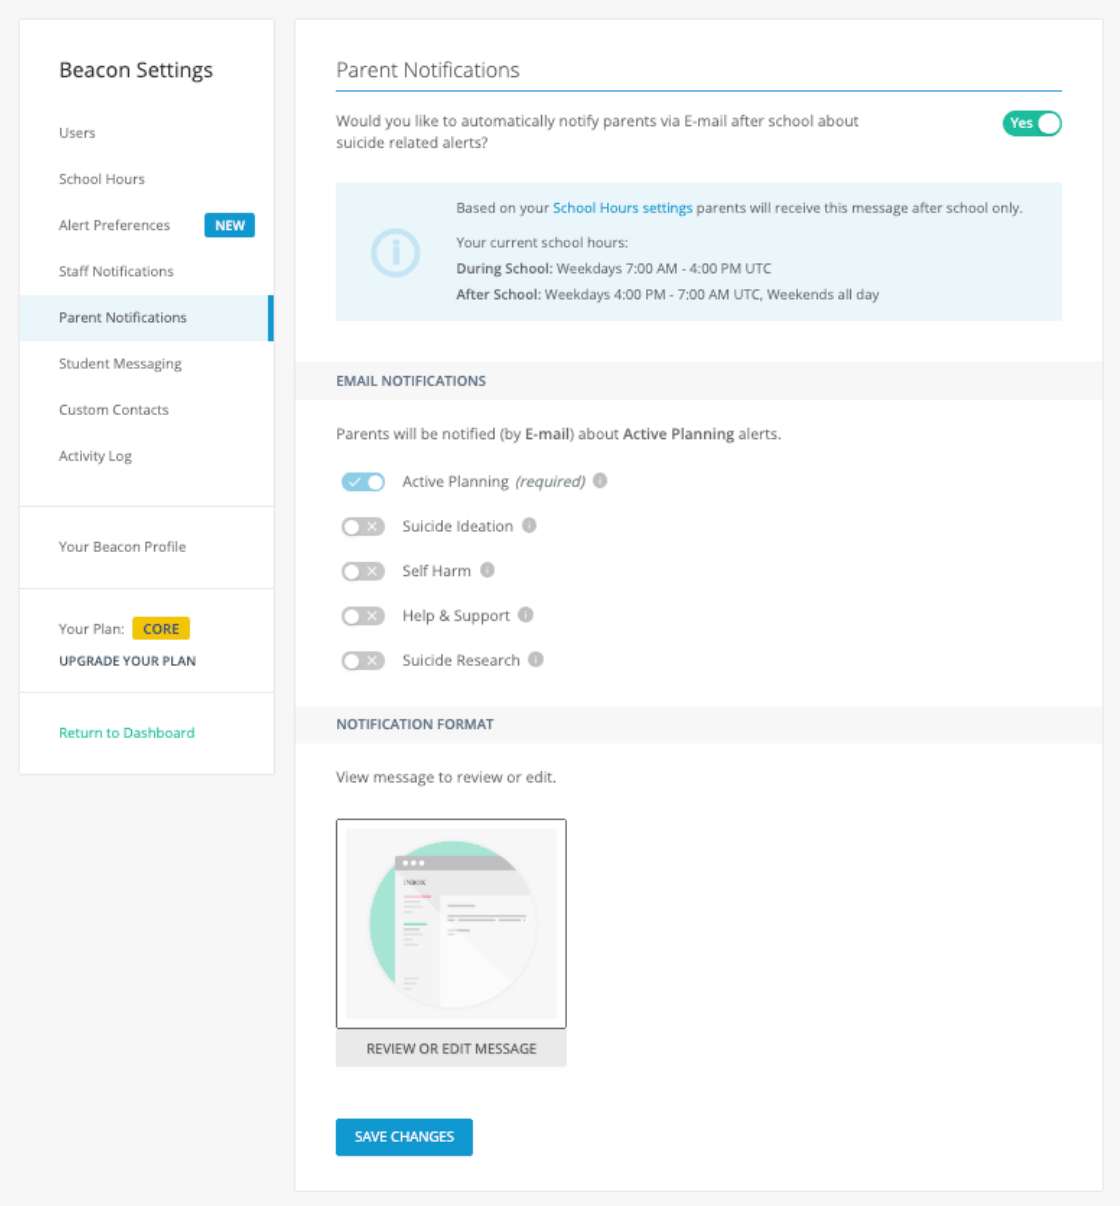
This feature is not available on Beacon Starter.
Enable Student Messaging (Optional)
When self-harm-related activity is identified, Beacon can send the student a message directly. Student messaging is off by default. Once enabled, you can use the default message or enter a custom message. You can also configure when messaging is active: during school, after school, or always. The default message has been approved by the American Foundation for Suicide Prevention and the American Association of Suicidology. Messages appear on the student’s device as a Chrome notification, typically in the bottom right corner of the screen.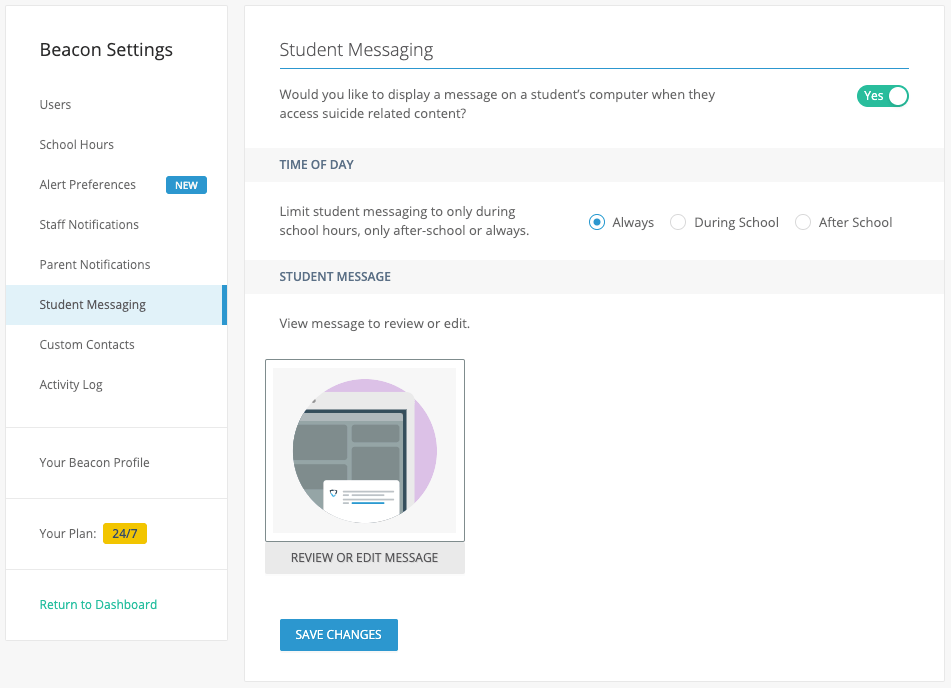
Resources
Configure School Hours
Set the school hours that control when notifications are sent.
Alert Preferences
Control which alert phases generate dashboard cards and notifications.
Schedule a Pause
Pause Beacon for a defined time period across all deployments.
Set Up Your Profile
Add your phone number and configure your notification format.