Understand How Forms Work
Every form starts from a template. The template decides who the form is for and what it does, and you can’t change either after you create the form. Choose the template that matches the kind of check-in or check-out.
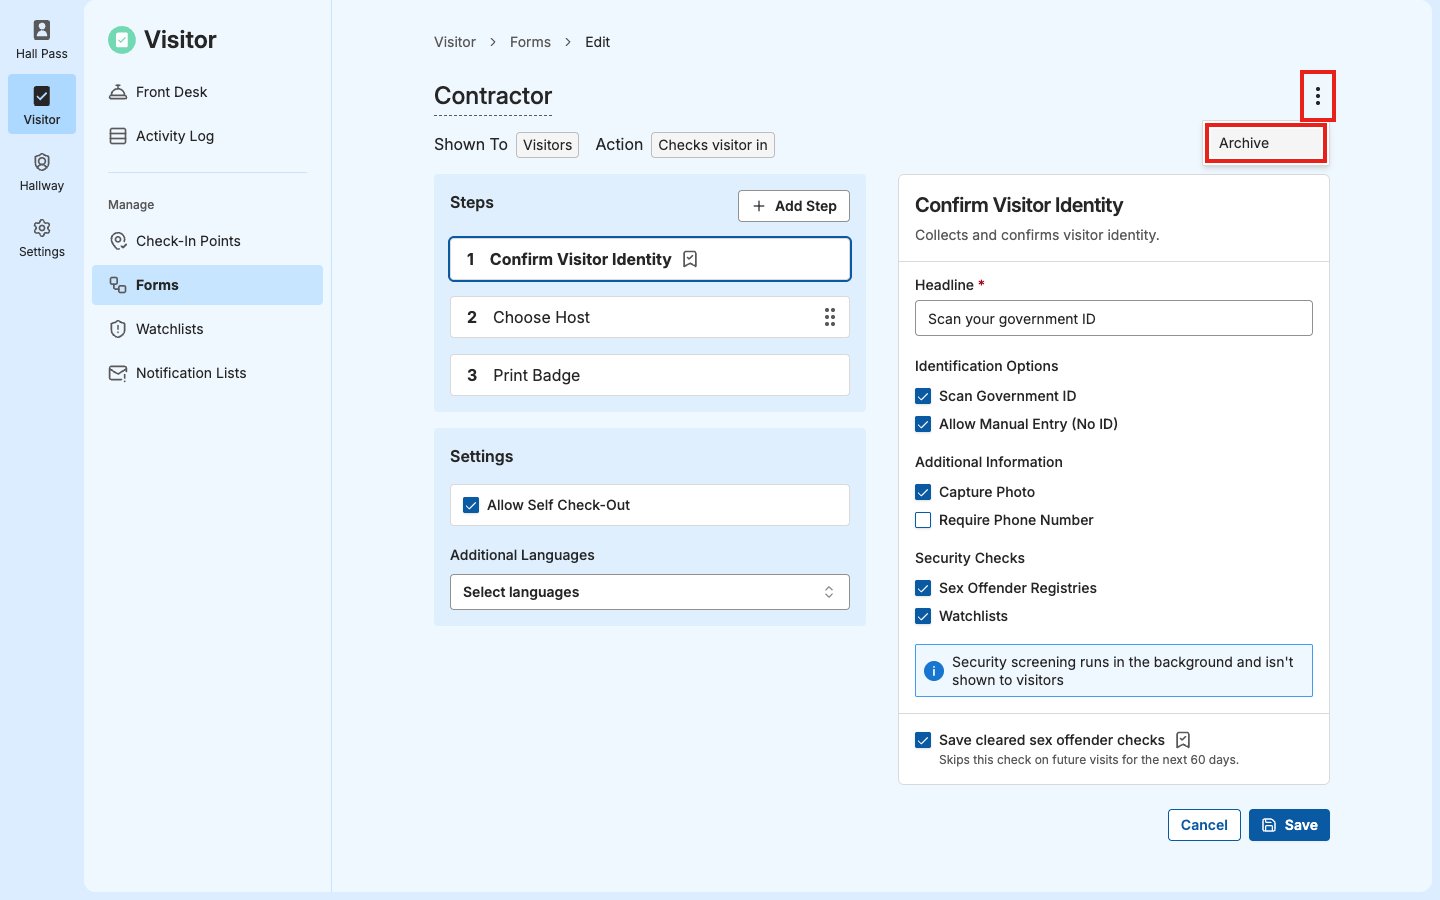
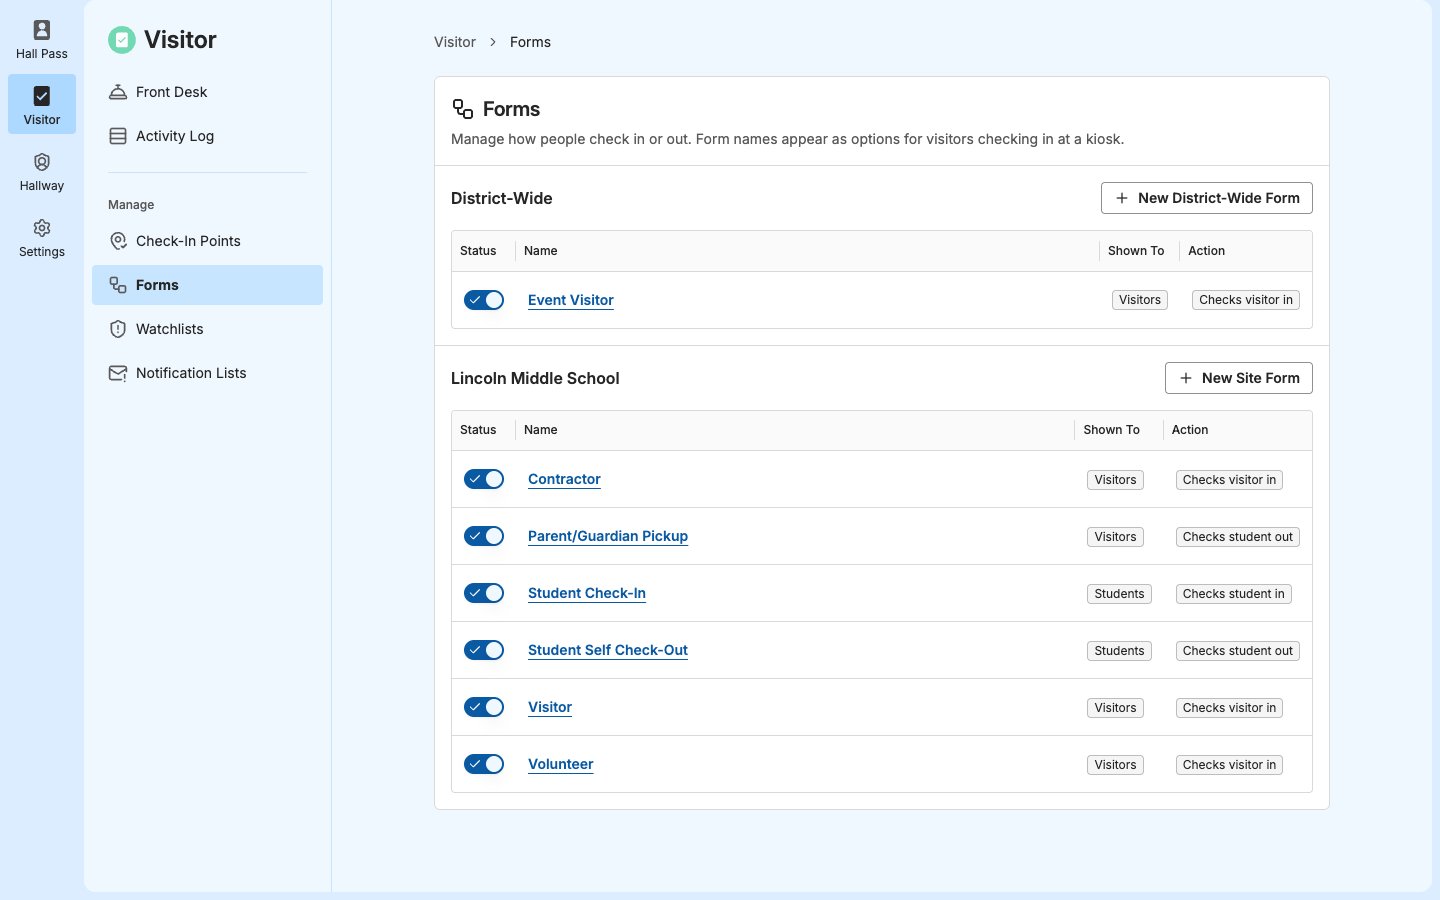
Shown To and Action appear on the Forms page and at the top of the form editor. They’re set by the template:
- Shown To is who fills out the form. At a kiosk that offers forms for both, visitors and students choose who they are first, then see only the forms for them.
- Action is what happens when the form is complete, such as checking a visitor in or checking a student out.
- Front Desk: Staff see every form that’s turned on when they start a check-in or check-out. See Use the Front Desk.
- Kiosks: Each kiosk offers the forms you choose for it. See Kiosks.
Choose a Site Form or a District-Wide Form
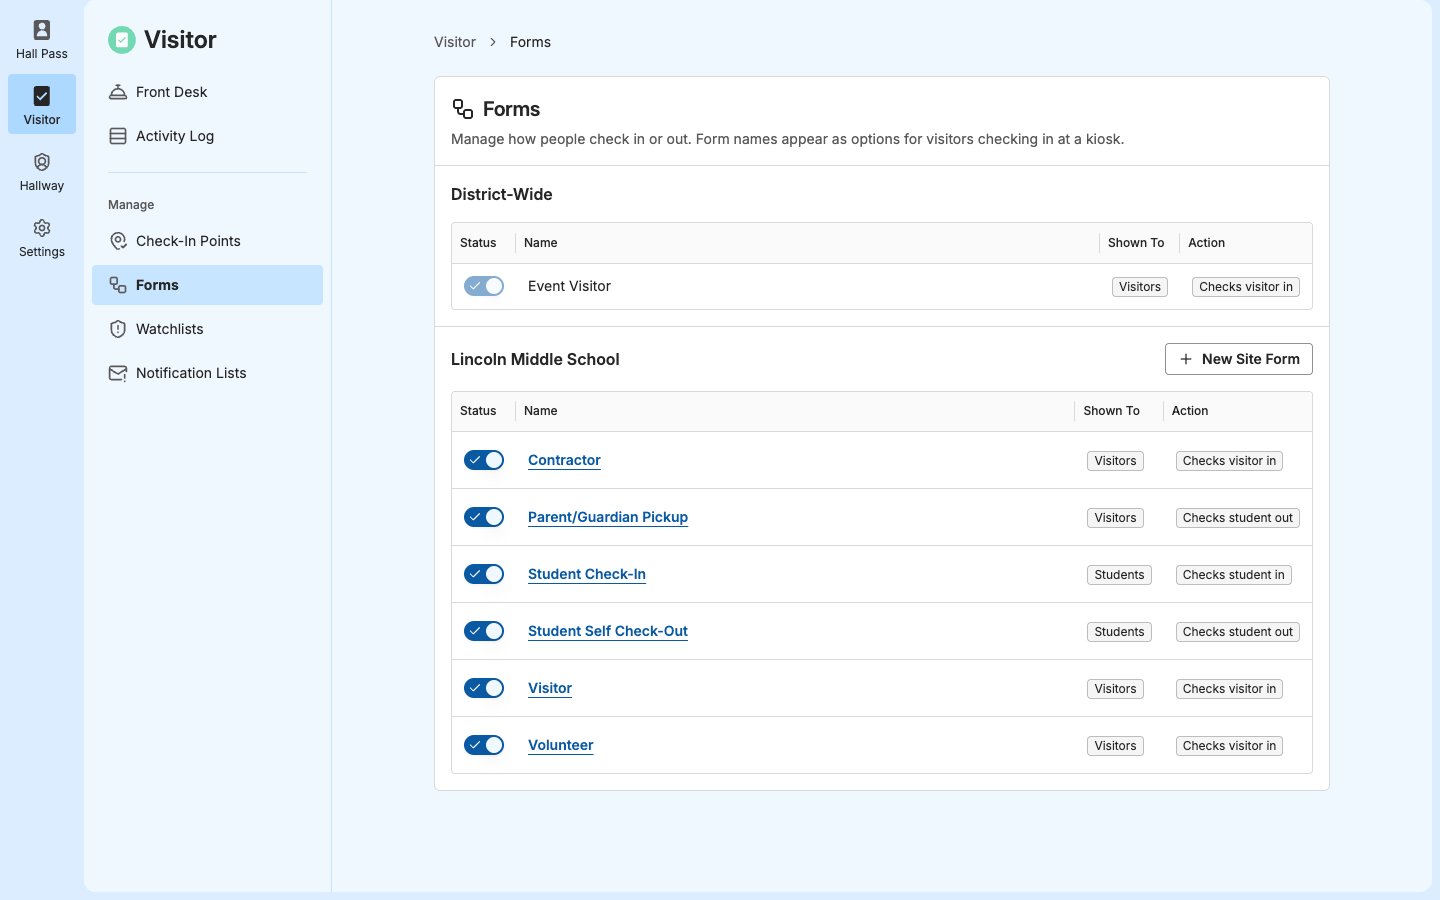
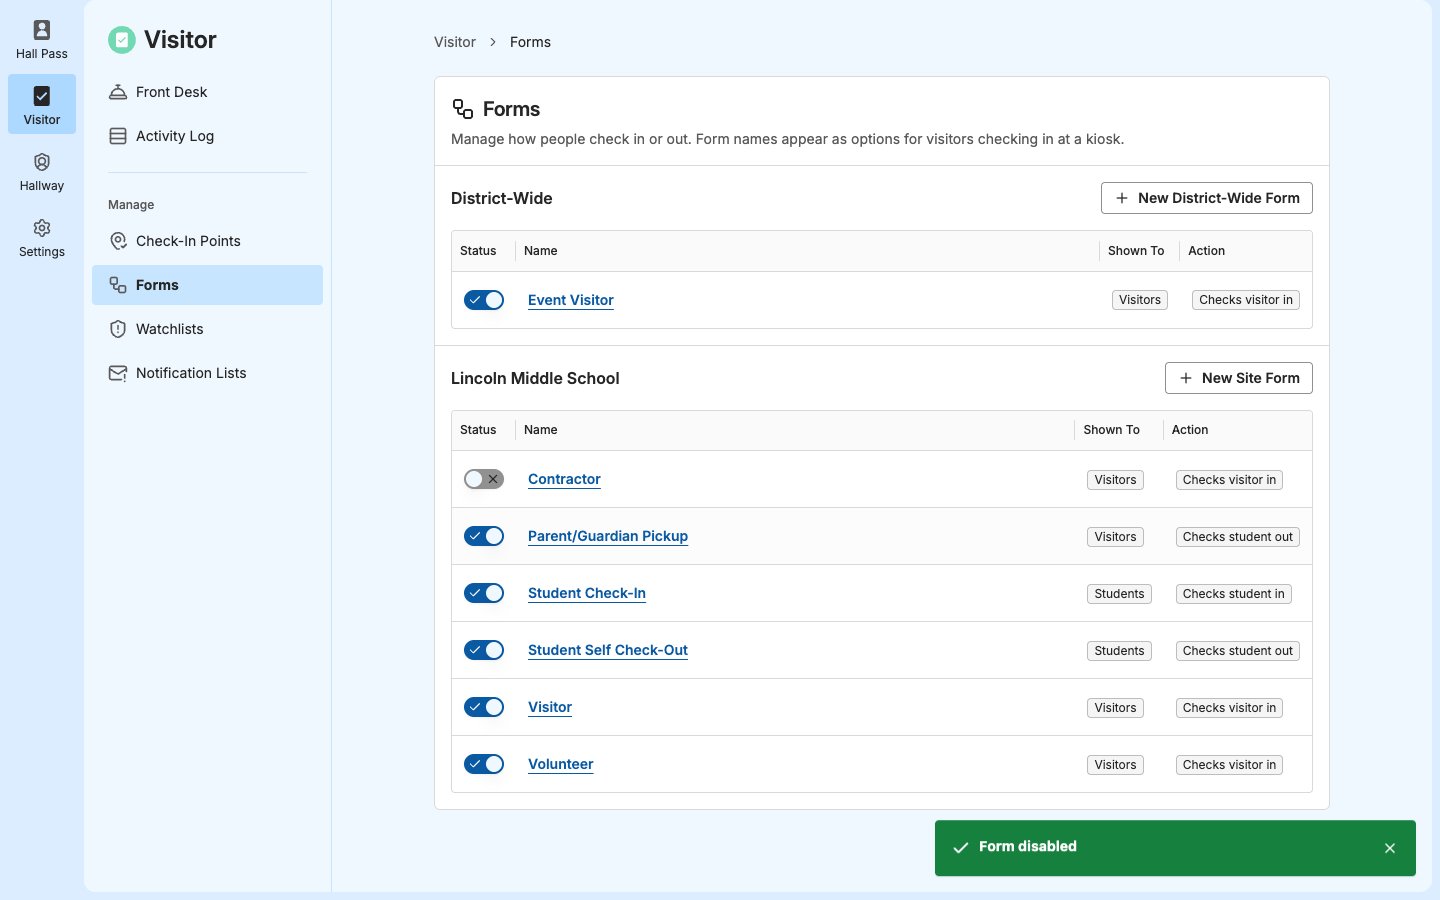
The Forms page has 2 sections, one for each kind of form:
Use a site form for anything specific to one school, such as its contractors or events. Use a District-Wide form when every school should follow the same process, such as one pickup form for the whole district.
Site Admins see only New Site Form. District-Wide forms that are turned on appear in their own section, where Site Admins can see them but not change them. For the rest of the differences, see Share a Form Across Your District.
Plan Your Forms
Create a form for each group that should check in differently. Here are some ideas:- Contractors: A Visitor form with a Choose Host step that suggests your facilities staff, with Allow Host Search turned off so contractors choose only from that list. Add a Choose Destination step with suggested destinations, such as the boiler room or the gym, and a Sign Document step for your safety policy.
- Volunteers: A Visitor form with a Sign Document step for your volunteer agreement, with Save answer and skip for future visits turned on so returning volunteers sign once, until the form changes.
- School events: A Visitor form for back-to-school night or a performance, with fewer steps so the line moves quickly. New forms are on as soon as you save them, so turn it off until the event. Turn it on for the event and off again afterward.
- Late arrivals: A Student Check-In form with an Ask Question (Choice) step for the reason, such as “Appointment” or “Overslept,” and, if your site has Hall Pass, a Create Hall Pass step that sends the student to class.
Create a Form
- In Visitor, go to Forms.
- Next to your site’s name, click New Site Form. To create a form for every site instead, see Share a Form Across Your District.
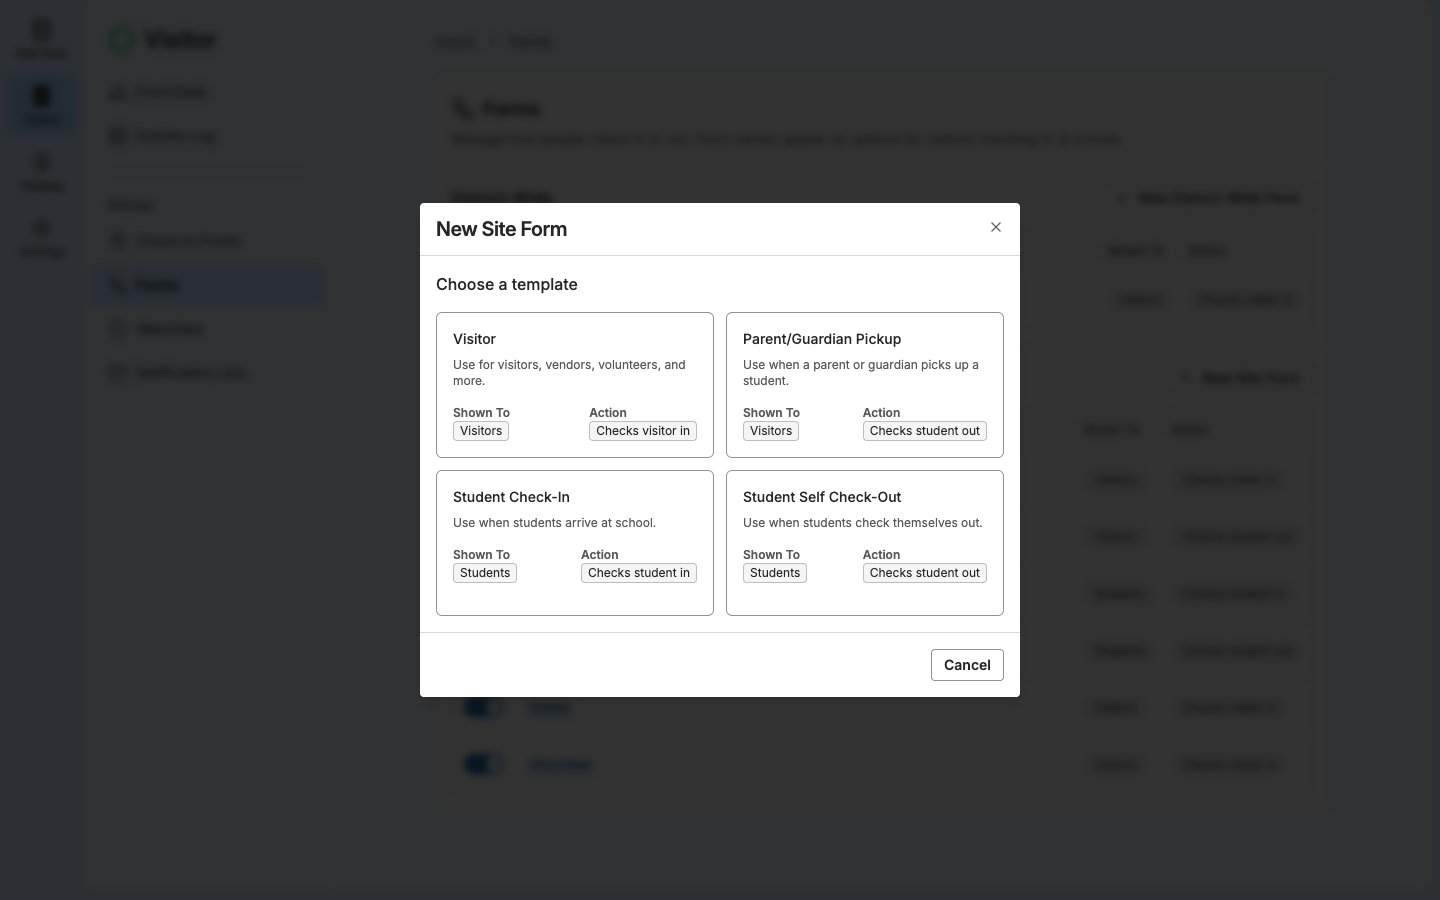
- Under Choose a template, select Visitor, Parent/Guardian Pickup, Student Check-In, or Student Self Check-Out.
- To rename the form, click its name at the top of the editor, enter a Form Name, then click the check mark.
- Add and set up the form’s steps. See Customize a Form’s Steps.
- Optionally, add languages under Settings and translate the form. You can’t save the form until every text is translated. See Translate a Form.
- For a Visitor form, choose whether visitors can check themselves out. Allow Self Check-Out is under Settings and is selected by default. See Allow Self Check-Out.
- Click Save.
- Verify the result: The form appears under your site’s name in Forms, with its Status turned on.
Customize a Form’s Steps
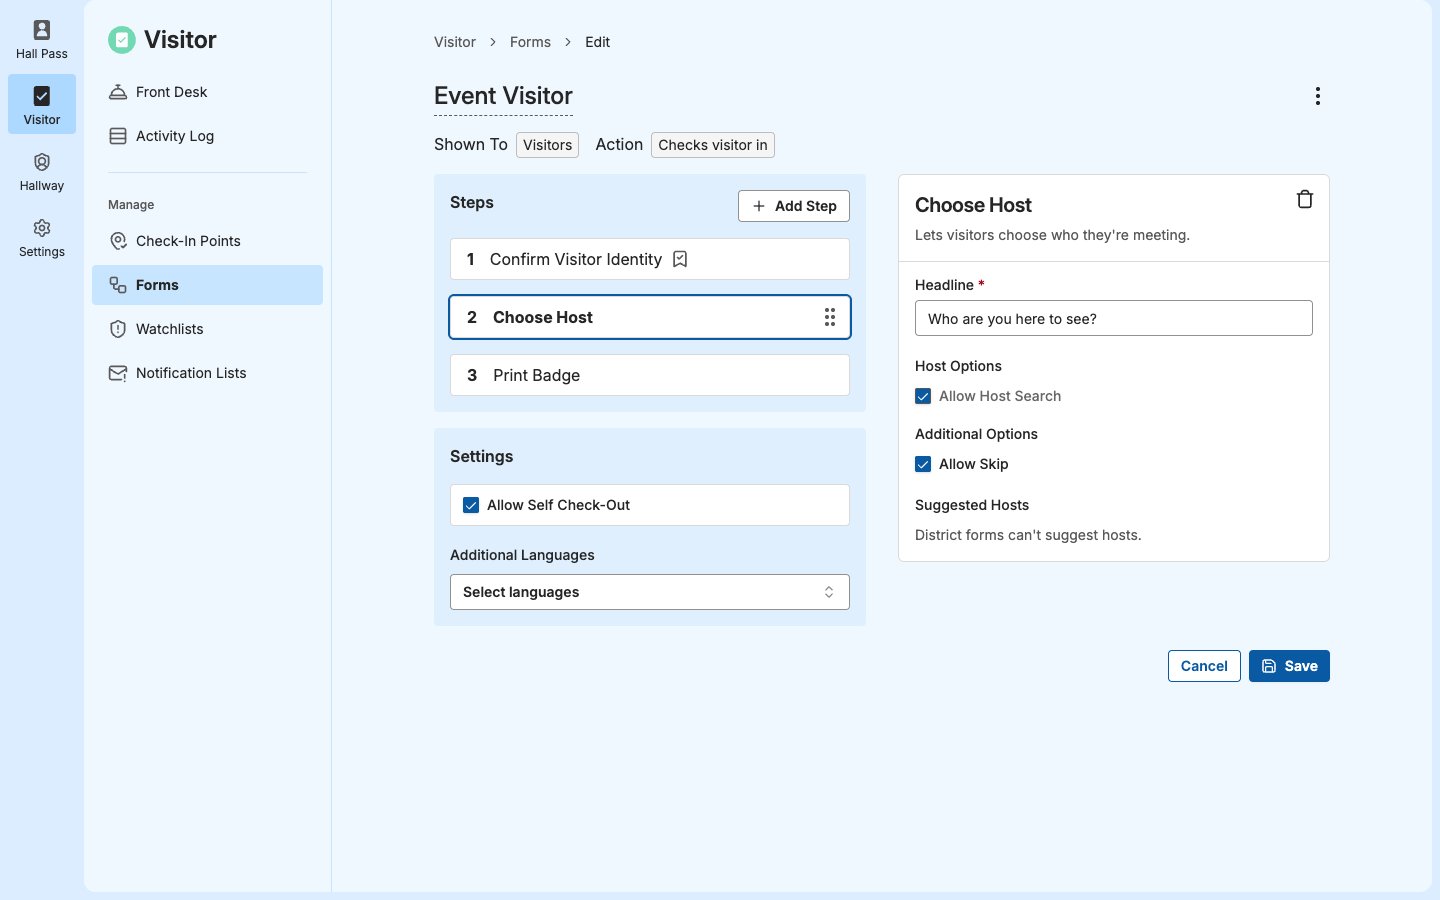
The form editor lists the form’s steps under Steps. Click a step to see its options on the right. Saving any change to a form starts saved answers and saved sex offender checks over for returning visitors. See Edit a Form.Add a Step
- In Visitor, go to Forms and click the form’s name.
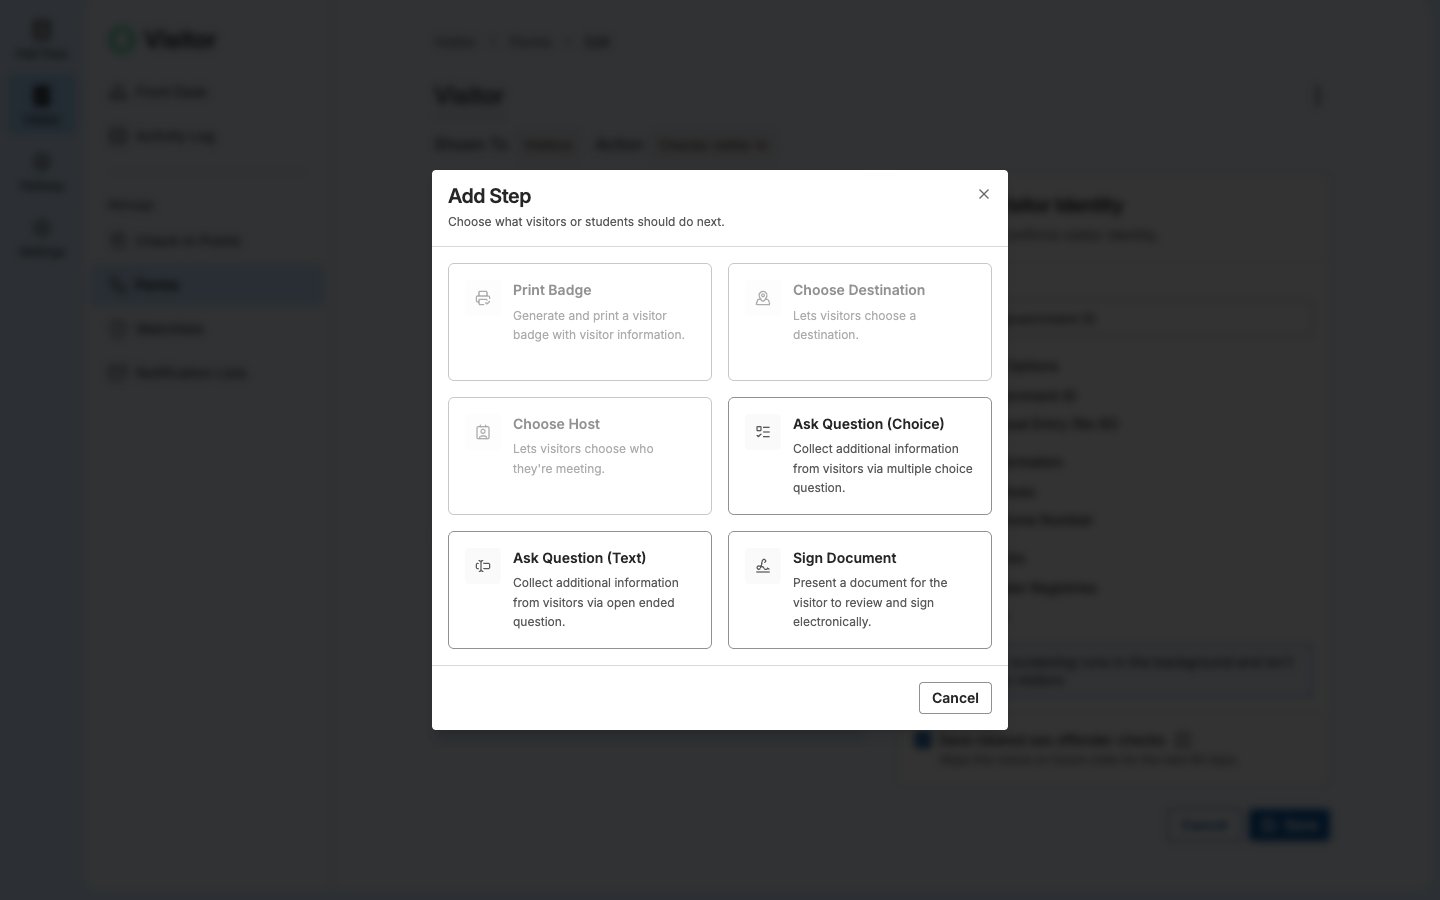
- Under Steps, click Add Step.
- Select the step to add.
- Set the step’s options on the right.
- If the form has Additional Languages, translate the new step. See Keep Translations Up to Date.
- Click Save.
- Verify the result: The step appears in the form’s Steps list.
Reorder Steps
- In Visitor, go to Forms and click the form’s name.
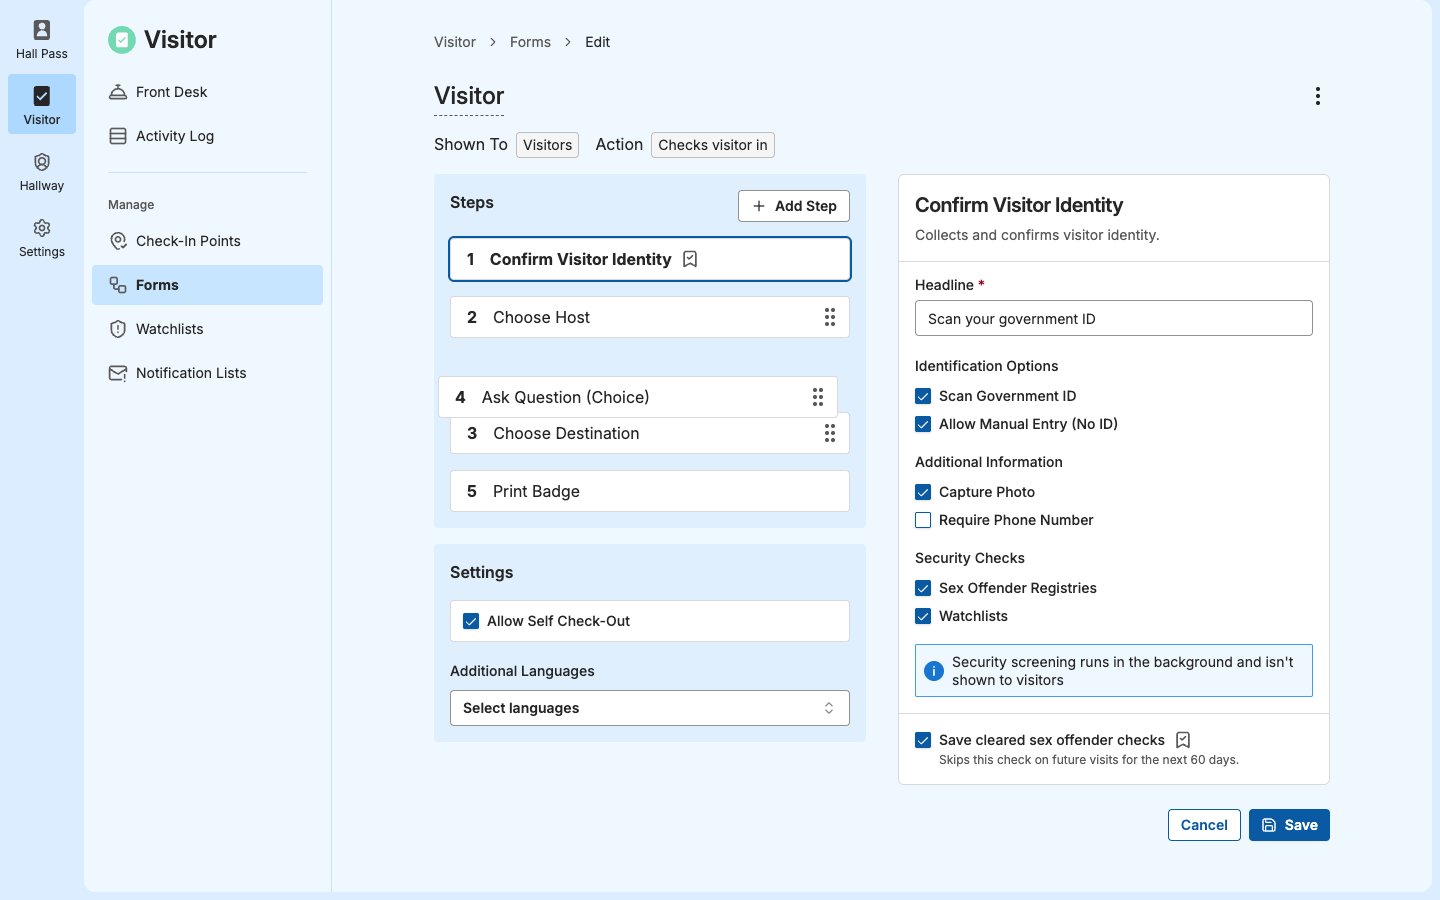
- Under Steps, drag a step by its handle to move it.
- Click Save.
- Verify the result: The step appears in its new position in the Steps list.
- Confirm Visitor Identity or Confirm Student Identity is always first.
- Print Badge is always last.
- Create Hall Pass is last, or right before Print Badge.
Remove a Step
- In Visitor, go to Forms and click the form’s name.
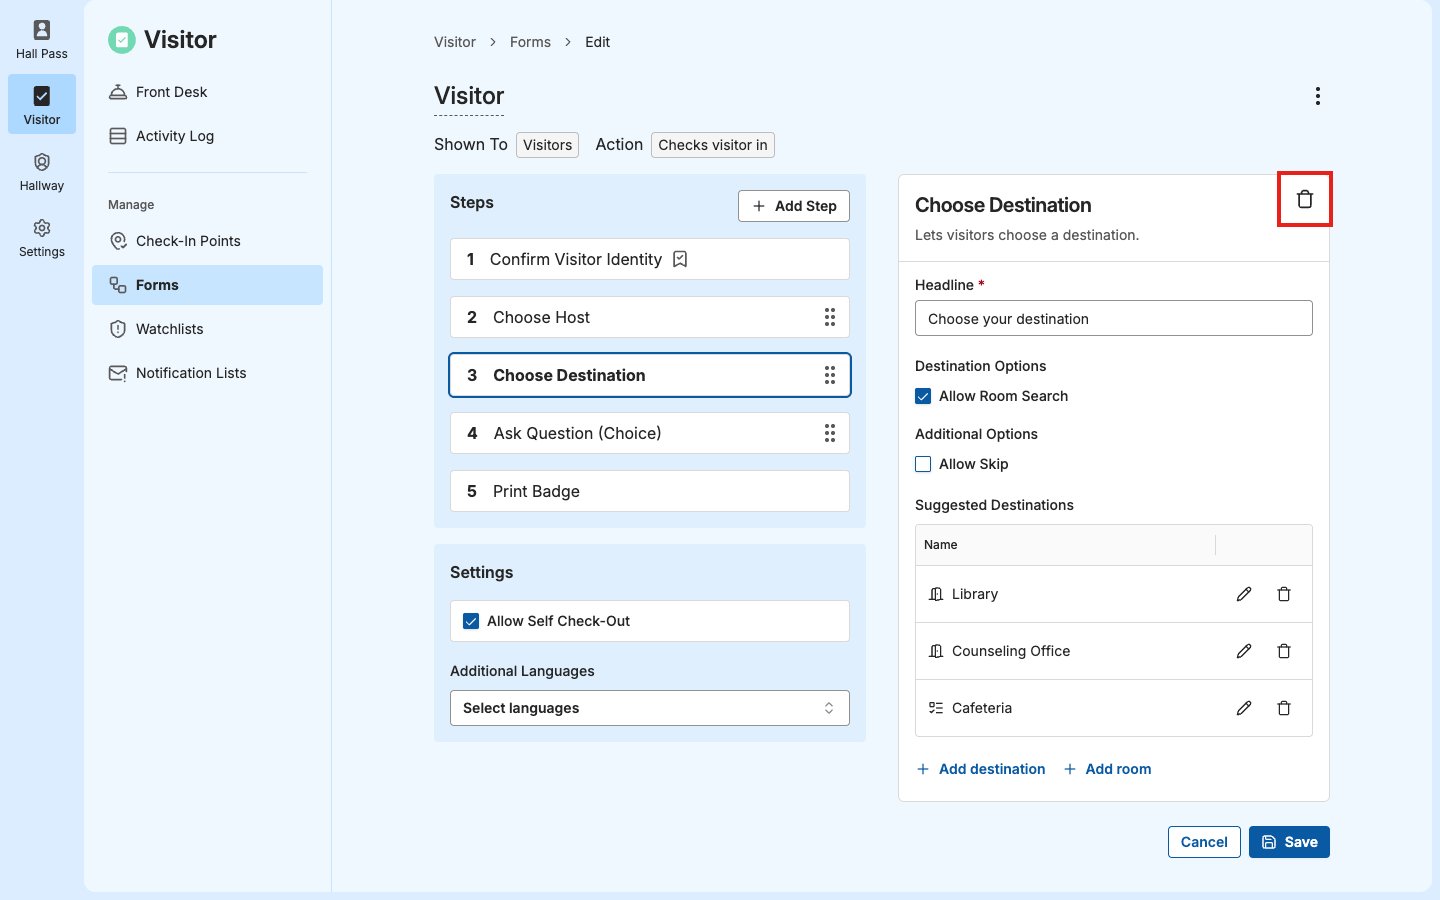
- Under Steps, click the step.
- Click Remove (trash can icon) at the top of the step’s options.
- Click Save.
- Verify the result: The step no longer appears in the form’s Steps list.
Fix Step Errors
A red alert icon next to a step means one of its options needs attention, such as a Sign Document step without a document. Click the step to see what to fix. You can’t save the form until every error is fixed and every text is translated.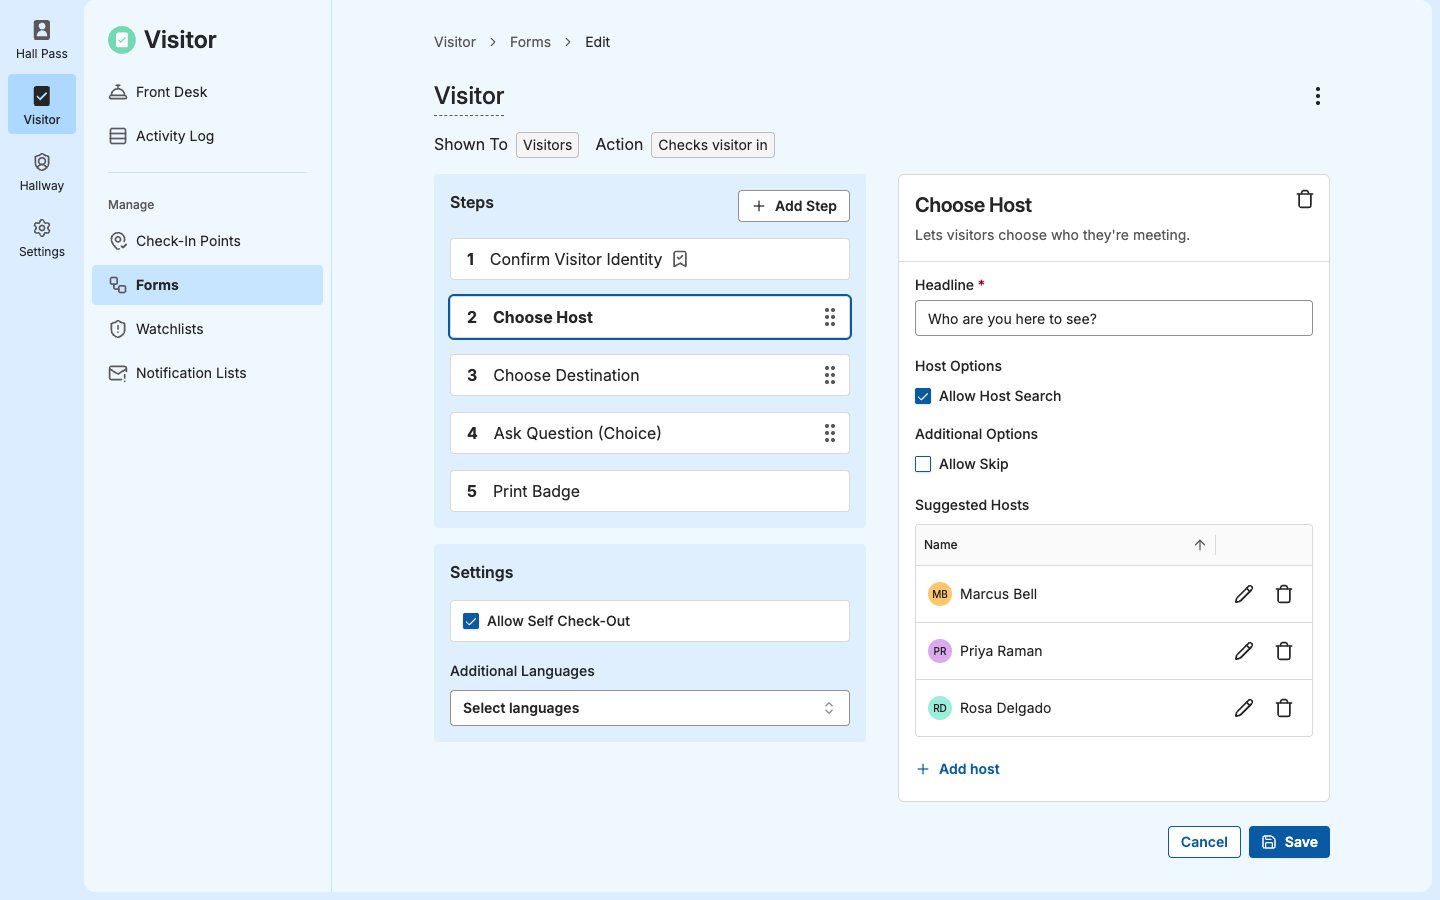
Translate a Form
Add languages so visitors and students can fill out the form in their own language. They choose a language from the menu at the top of the kiosk. GoGuardian Visitor supports Spanish, Chinese, Arabic, and Vietnamese in addition to English. Every text on the form needs a translation for each language you add, including the form’s name, headlines, questions, and choices. You can’t save the form until each one has a translation.Add a Language
- In Visitor, go to Forms and click the form’s name.
- Under Settings, select each language in Additional Languages.
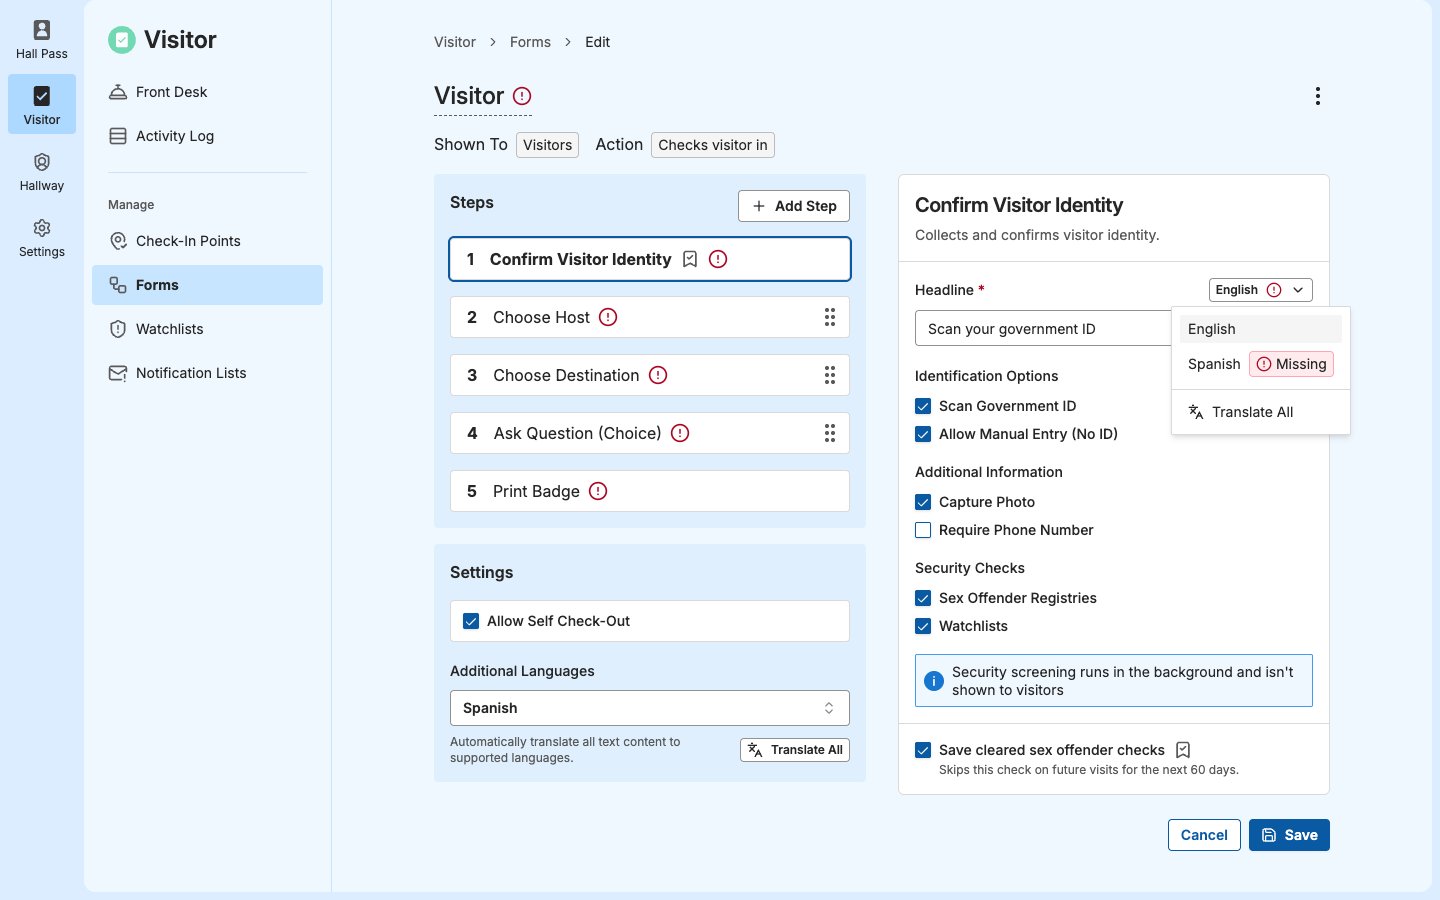
- Click Translate All to translate every text on the form into each language. For other ways to translate, see Choose How to Translate.
- Review the translations. Click the language menu next to a text and select a language to see its translation. Edit any translation that doesn’t read the way you want.
- Click Save.
- Verify the result: The form saves without errors, and the language menu next to each text shows no Missing labels.
Choose How to Translate
Translate All uses AI to translate automatically. Always review its translations before you save, and change any that aren’t right for your school. You have full control over every translation. You can translate in 3 ways:- The whole form: Under Settings, click Translate All. This is the easiest way, and it translates every text into every language you added.
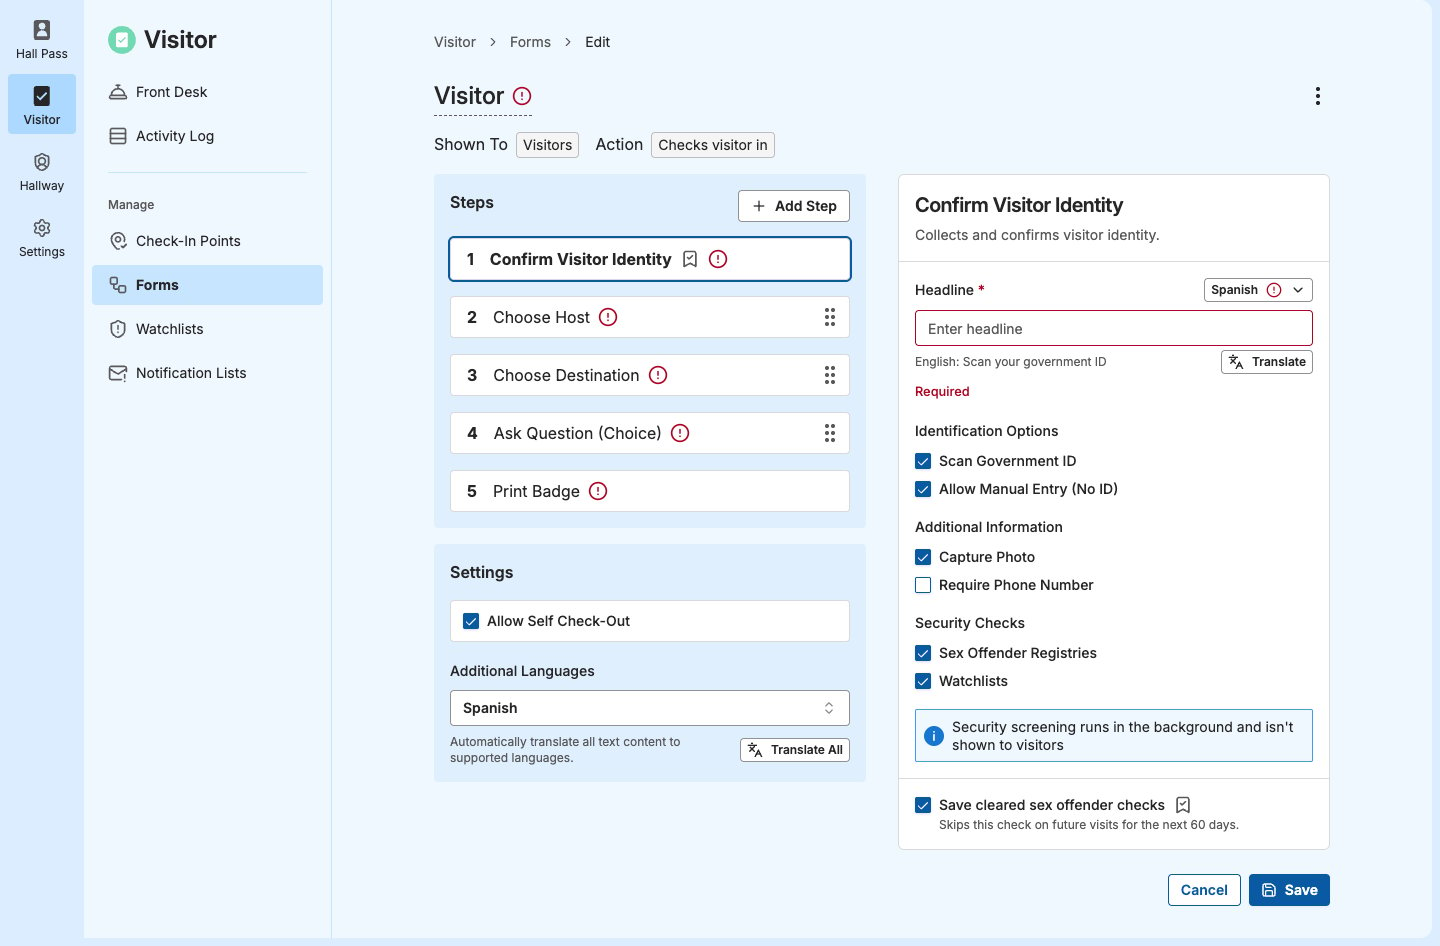
- One text: Click the language menu next to the text, then select Translate All to translate just that text into every language. Or select a language, then click Translate to translate it into that language only. Use this after you change one text.
- By hand: Click the language menu next to the text, select a language, and enter the translation.
Keep Translations Up to Date
Translations don’t update when you change a text. If you edit a question or headline in English, the old translations stay, and the form still saves, so visitors who choose another language see the old wording. After you change any text, click Translate All under Settings, or translate the texts you changed. Then review the translations before you save. New texts, such as a step you just added, show Missing in the language menu until you translate them. To remove a language, clear it from Additional Languages. If the form has translations in that language, click Remove to confirm. Its translations are deleted.Allow Self Check-Out
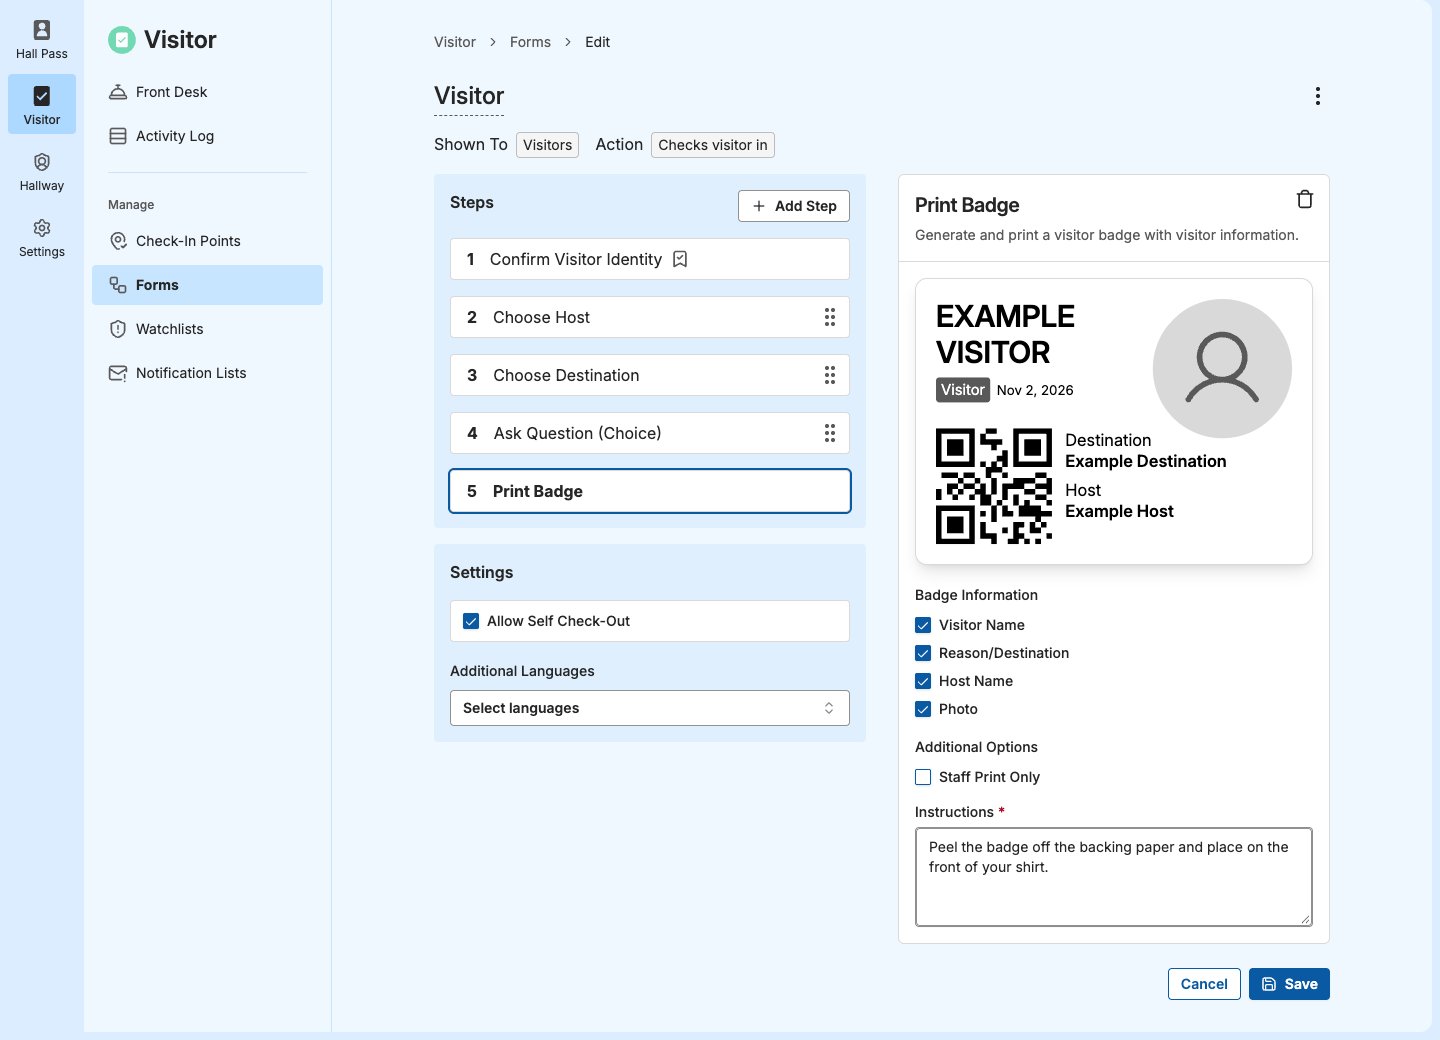
With Allow Self Check-Out, visitors check themselves out by scanning the QR code on their badge at a kiosk. Staff don’t need to check them out from the Front Desk. Allow Self Check-Out is available on Visitor forms, and the form needs a Print Badge step because the QR code prints on the badge. New Visitor forms have it selected.- In Visitor, go to Forms and click the form’s name.
- Under Settings, select Allow Self Check-Out to turn it on, or clear it to turn it off.
- Click Save.
- Verify the result: The badge preview in the Print Badge step shows a QR code when self check-out is on, and none when it’s off.
Edit a Form
- In Visitor, go to Forms and click the form’s name.
- Change the form’s name, steps, or settings.
- Click Save.
- Verify the result: When you open the form again from Forms, its name, steps, and settings show your changes.
- Kiosks offering the form get your changes right away, with no restart. A kiosk in the middle of a check-in applies them as soon as that check-in is done, so no one is interrupted.
- Translations don’t update on their own. If you changed any text, translate it again before you save. See Keep Translations Up to Date.
- Check-ins and check-outs already in progress finish with the steps they started with.
- Saved answers start over. Returning visitors and students answer saved questions and sign saved documents again on their next visit, and the sex offender registry check runs again even if Save cleared sex offender checks is on. After that visit, their answers are saved again.
Turn a Form On or Off
Turn a form off when you don’t need it for a while, such as an event form between events. A form that’s off doesn’t appear on the Front Desk or on kiosks. Kiosks update right away, or as soon as a check-in already in progress is done. Turn the form back on when you need it, with all its steps and settings as you left them.- In Visitor, go to Forms.
- Turn the form’s Status switch on or off.
- Verify the result: The switch shows the new status. When the form is off, it no longer appears in Start a Check-In or Check-Out on the Front Desk or on the kiosks that offered it.
Share a Form Across Your District
Super Users in Org Management can create District-Wide forms. A District-Wide form is available at every GoGuardian Visitor site in your district, so every school can use the same pickup or visitor process.- In Visitor, go to Forms.
- Next to District-Wide, click New District-Wide Form.
- Select a template and set up the form as you would a site form.
- Click Save.
- Verify the result: The form appears under District-Wide in Forms.
- Only Super Users can edit, turn off, or archive them. Site Admins see District-Wide forms that are turned on but can’t open or change them. They don’t see District-Wide forms that are off.
- Turning a District-Wide form on or off applies to every site.
- They can’t suggest hosts or rooms, because staff and rooms differ by site. Choose Host keeps Allow Host Search on, and Choose Destination can suggest only destinations you enter, not rooms.
Archive a Form
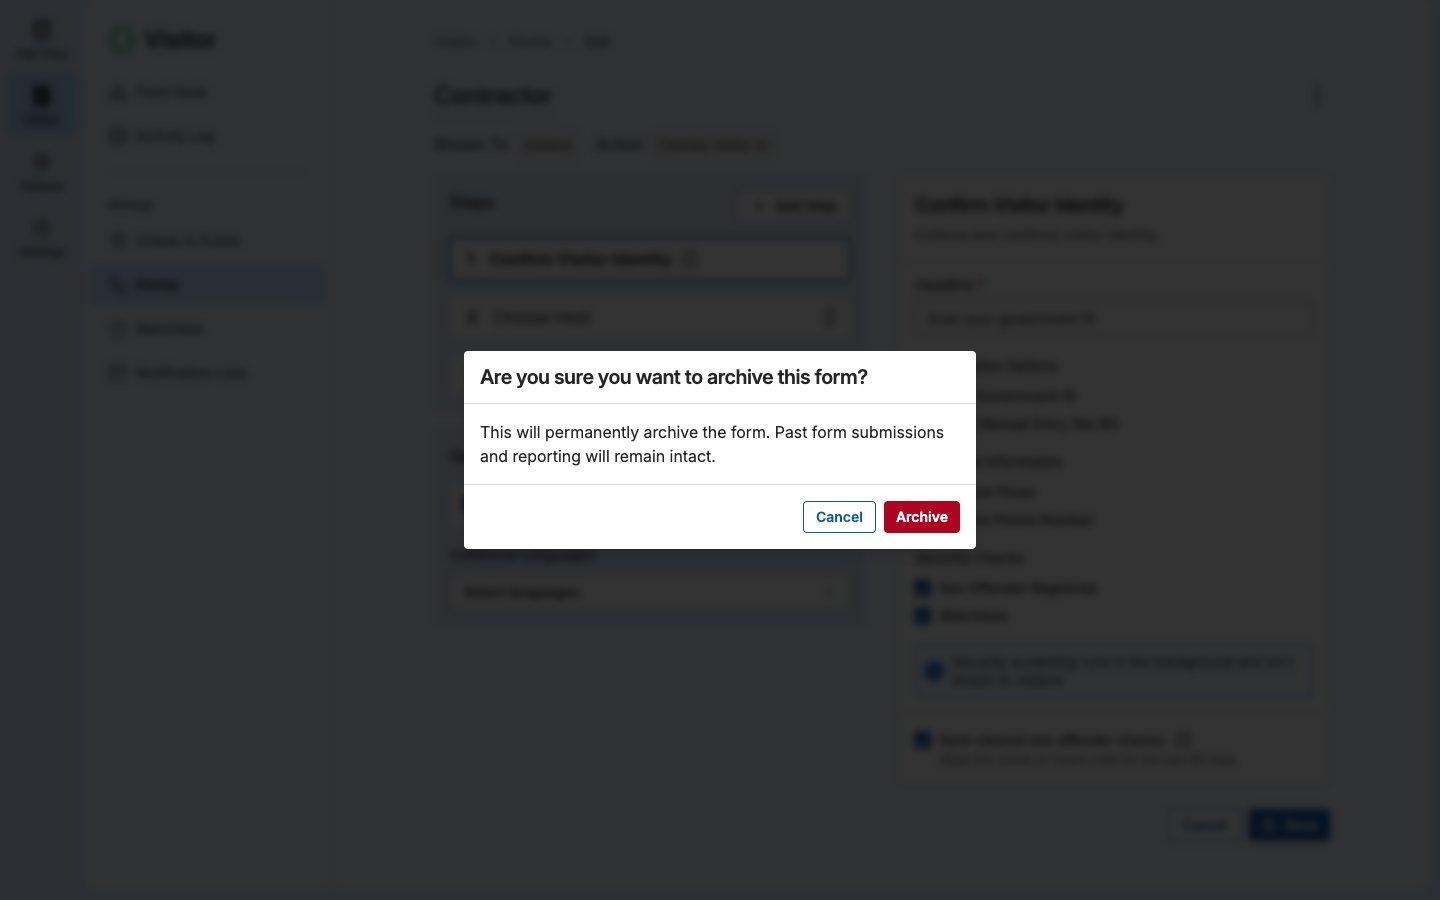
Archive a form you no longer need. Archiving can’t be undone, so to use a form again later, turn it off instead. Past check-ins and check-outs from the form stay in the Activity Log.- In Visitor, go to Forms and click the form’s name.
- Click the menu (⋮) next to the form’s name, then select Archive.
- Click Archive to confirm.
- Verify the result: The form no longer appears in Forms.