

Get to Know the Front Desk
The Front Desk has these parts, from top to bottom:- Alert banners: 1 for each alert that needs a staff decision, such as a possible watchlist match. See Review Screening Alerts.
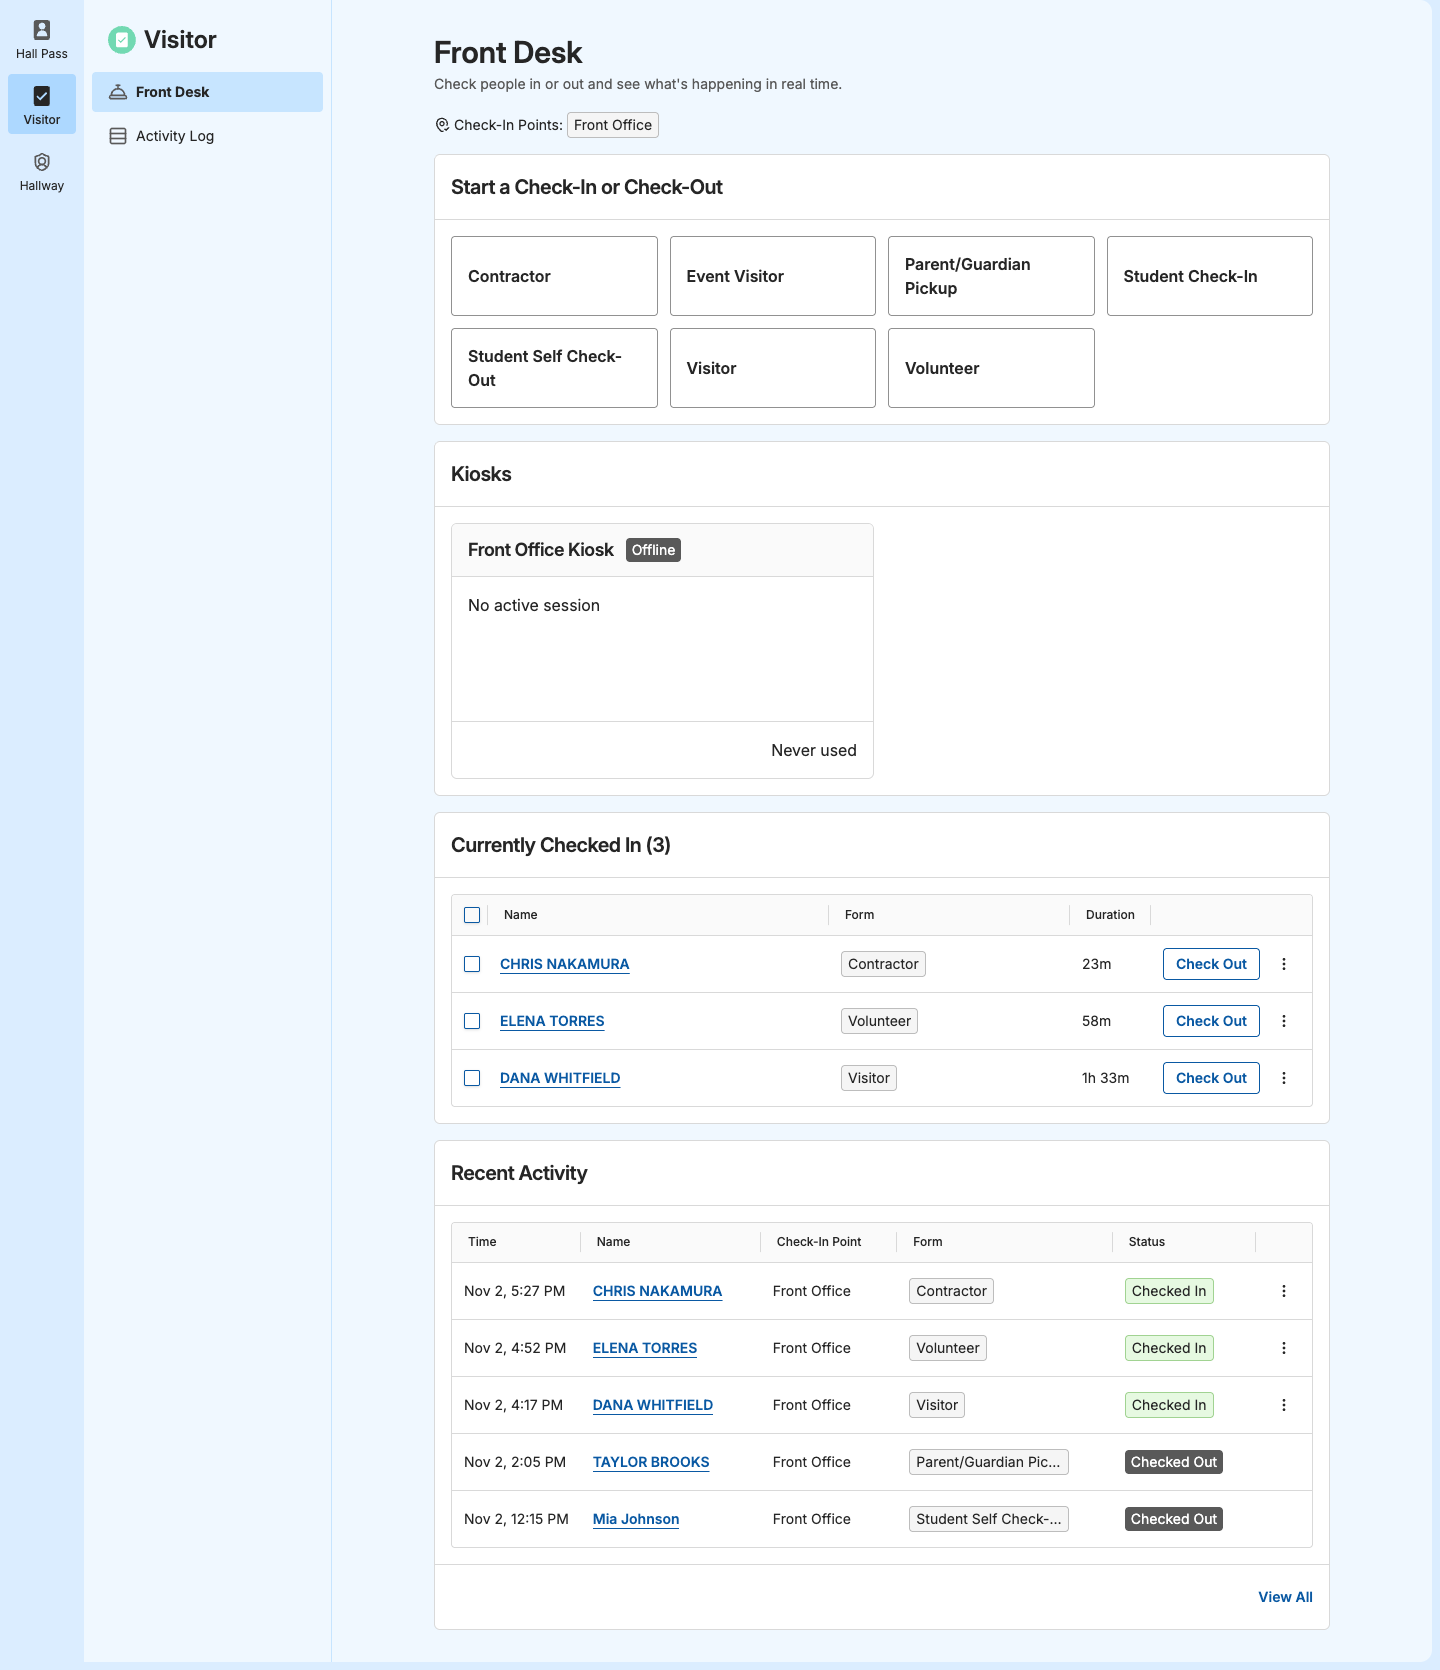
- Start a Check-In or Check-Out: a button for each enabled form, such as Visitor or Parent/Guardian Pickup.
- Kiosks: the status of each kiosk at your check-in points. This card appears only if your check-in points have kiosks.
- Currently Checked In: visitors who are checked in and haven’t checked out yet, with how long they’ve been on site.
- Recent Activity: the 5 latest check-ins and check-outs at your check-in points.
Start a Check-In or Check-Out
Every check-in and check-out at the Front Desk follows the same pattern: choose a form, confirm who’s checking in or out, then finish the rest of the form’s steps.- Under Start a Check-In or Check-Out, click the form you need. The check-in panel opens.
- Check the Check-In Point. The check-in point you used last is filled in. To use another one, select it from the list.
- Under Confirm Visitor Identity or Confirm Student Identity, confirm who’s checking in or out, then click Run Security Screening or Confirm Identity. The steps for each form type are in the sections below.
- Fill out the rest of the form’s steps, such as Choose Destination or Sign Document. For what each step does, see Form Steps Reference.
- Click the finish button, such as Check In Visitor or Check Out Student. For a pickup, you confirm the students first. See Complete a Parent or Guardian Pickup.
- If the form has a Print Badge step, select a Printer and click Print, or click Skip. See Print Badges.
- Verify the result: The panel shows Checked In or Checked Out, with the name and time.
- Step away: After you confirm identity, close the panel and click Leave. The check-in stays In Progress in Recent Activity. To pick it up again, click the name.
- Cancel: Click Cancel Check-in (or Cancel Check-out) in the panel, then click it again to confirm. The visitor or student isn’t checked in, and you can start a new check-in later.
Check In a Visitor
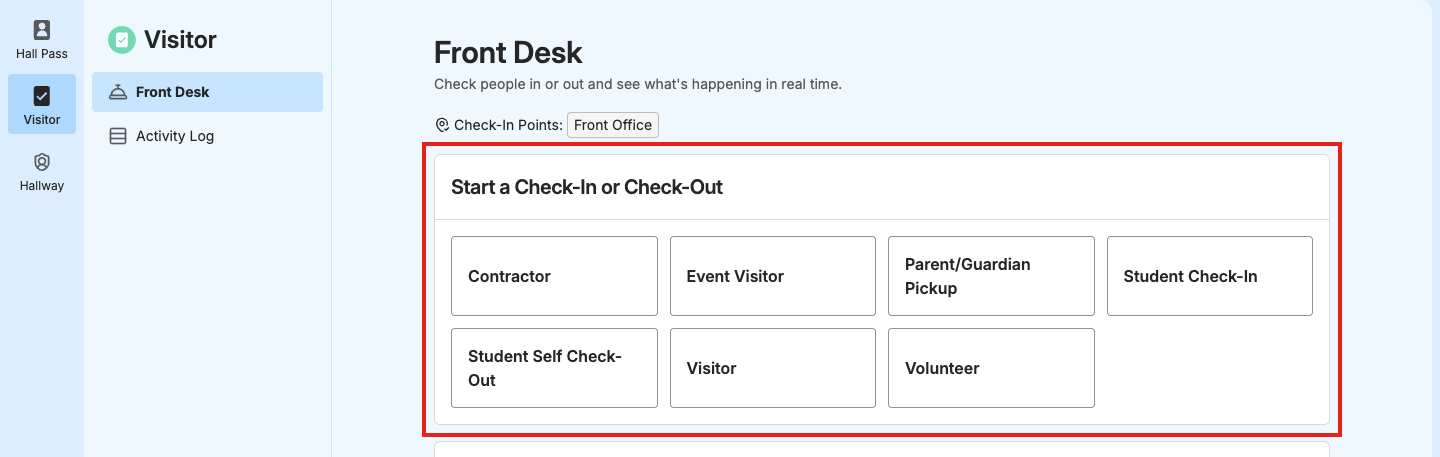
Use a form made from the Visitor template for visitors, vendors, and volunteers. If your school screens visitors, screening runs as soon as you confirm the visitor’s identity.- Under Start a Check-In or Check-Out, click your visitor form.
- Check the Check-In Point.
- Under Confirm Visitor Identity, enter the visitor’s details from their government-issued ID: First name, Last name, and Date of birth, plus Middle name if they have one. Fill in any other details your form asks for, such as Phone number.
- If your form scans IDs, you can click Scan ID instead and hold the front of the ID up to the camera. The details from the ID are filled in for you. Check them against the ID.
- If your form asks for a photo, click Take Photo.
- Click Run Security Screening (or Confirm Identity if your form doesn’t screen visitors). Screening runs in the background while you fill out the rest of the form. If it finds something to review, an alert appears at the top of the panel. See Review Screening Alerts.
- Fill out the rest of the steps, such as Choose Host and Choose Destination.
- Click Check In Visitor. You can click it once screening finishes and any alerts are resolved.
- If your form has a Print Badge step, the visitor is now checked in. Select a Printer and click Print. To skip the badge, click Skip.
- Verify the result: The panel shows Checked In, and the visitor appears in Currently Checked In.
Complete a Parent or Guardian Pickup
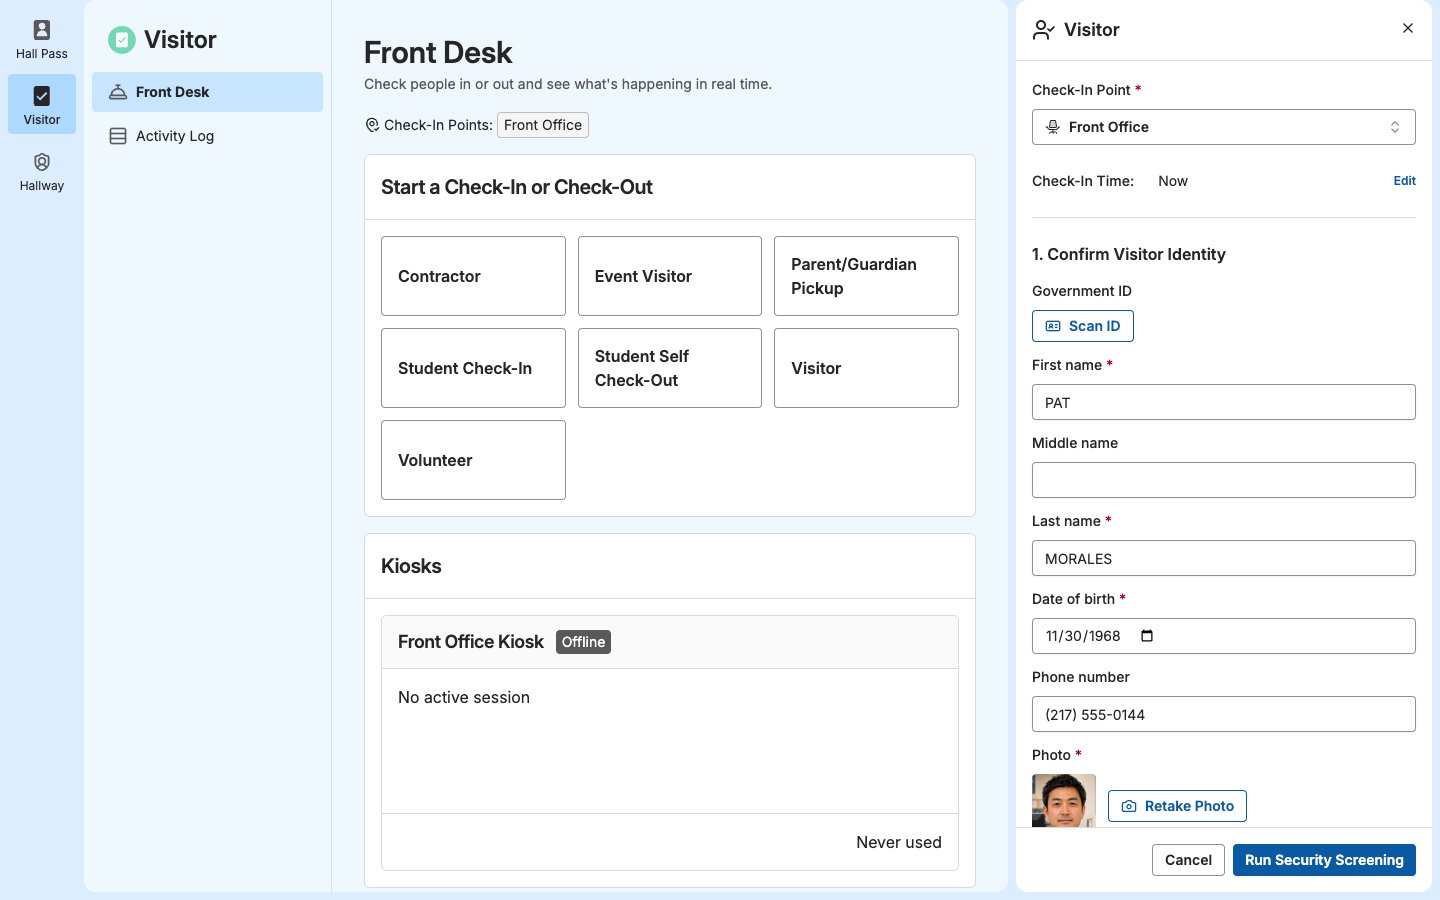
Use a form made from the Parent/Guardian Pickup template when a parent, guardian, or other approved adult picks up a student. A pickup checks the student out, so the guardian doesn’t appear in Currently Checked In.- Under Start a Check-In or Check-Out, click your pickup form.
- Check the Check-In Point.
- Under Confirm Visitor Identity, enter the guardian’s details from their government-issued ID, or click Scan ID.
- Click Run Security Screening (or Confirm Identity).
- Under Select Students, select the students the guardian is picking up. Students associated with the guardian are listed first. To add another student, search for them by name.
- If the form has a Create Hall Pass step, check where each student’s pass starts. The pass brings the student from where they are, such as their class, to the check-in point.
- Click Check Out Student.
- Check the students listed under Select Students against your school’s pickup records.
- Choose what to do:
- If the guardian is approved for every student, click Confirm Students, then click Confirm Students to confirm.
- If not, follow your school’s procedures. Click Deny Check-Out, then click it again to confirm.
- Verify the result: The panel shows Checked Out, or Check-Out Denied if you denied it. If the form has a Create Hall Pass step, each student’s pass appears in GoGuardian Hall Pass after a confirmed pickup.
Check In a Student
Use a form made from the Student Check-In template to check a student in. Students aren’t screened. If the form creates hall passes, your site also needs Hall Pass. For how passes work, see Pass Statuses.- Under Start a Check-In or Check-Out, click your student check-in form.
- Check the Check-In Point.
- Under Confirm Student Identity, search for the student by name, then click Confirm Identity.
- Fill out the rest of the steps. If the form has a Create Hall Pass step, check where the pass goes. The pass brings the student from the check-in point to their destination, so you don’t have to write a separate pass in Hall Pass.
- Click Check In Student.
- Verify the result: The panel shows Checked In. If the form has a Create Hall Pass step, the student’s pass appears in Hall Pass.
Check Out a Student
Use a form made from the Student Self Check-Out template to check a student out. Students can use this form at a kiosk, and you can run it for them at the Front Desk.- Under Start a Check-In or Check-Out, click your student check-out form.
- Check the Check-In Point.
- Under Confirm Student Identity, search for the student by name, then click Confirm Identity.
- Fill out the rest of the steps.
- Click Check Out Student.
- Verify the result: The panel shows Checked Out.
Record a Past Check-In
If a visitor checked in on paper, such as while your kiosk was down, you can add the check-in afterward with the time it happened.- Start the check-in as usual.
- At the top of the check-in panel, next to Check-In Time: Now, click Edit and enter when the visitor arrived.
- If the visitor already left, select Already checked out and enter the Check-Out Time.
- Finish the check-in.
- Verify the result: Recent Activity shows the check-in at the time you entered.
See Who’s Checked In
Currently Checked In lists every visitor who checked in at your check-in points, from the Front Desk or a kiosk, and hasn’t checked out. The number next to the title is how many are on site. Duration shows how long each visitor has been there. Only check-ins made with a visitor form appear here. Student check-ins and check-outs, including pickups, don’t. Click a visitor’s name to open their details in the Activity Log.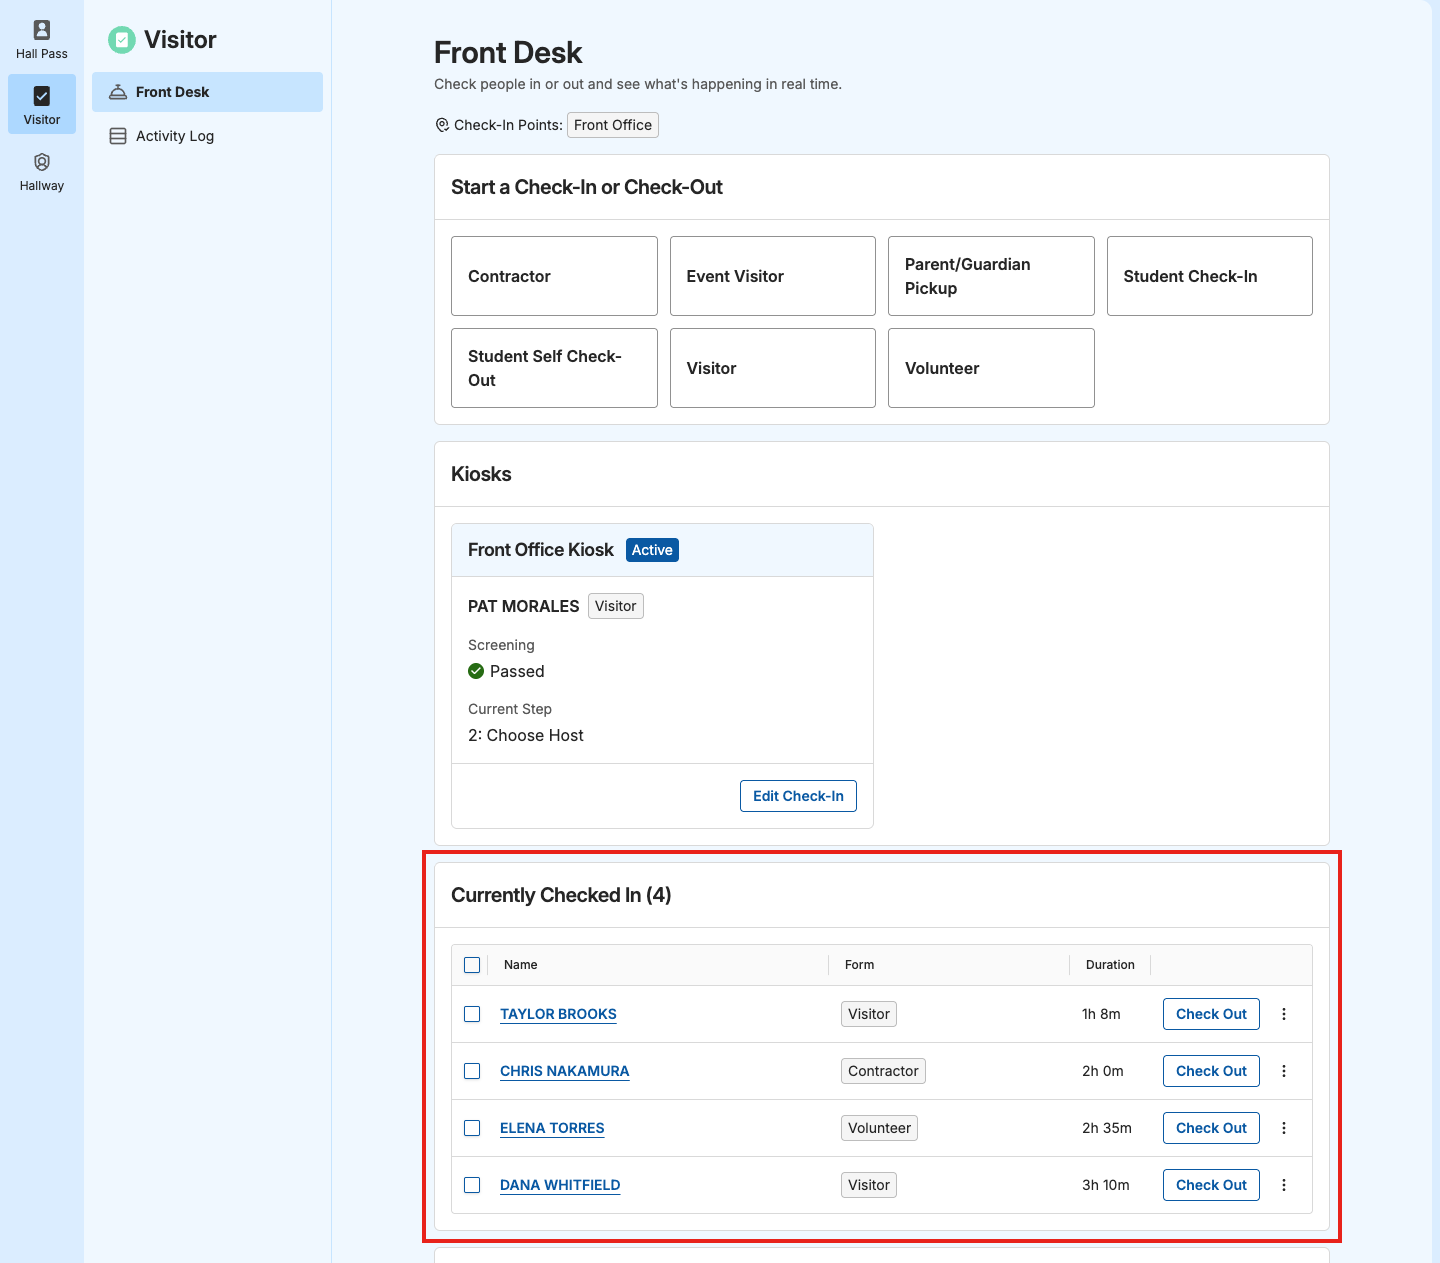
Check Out Visitors
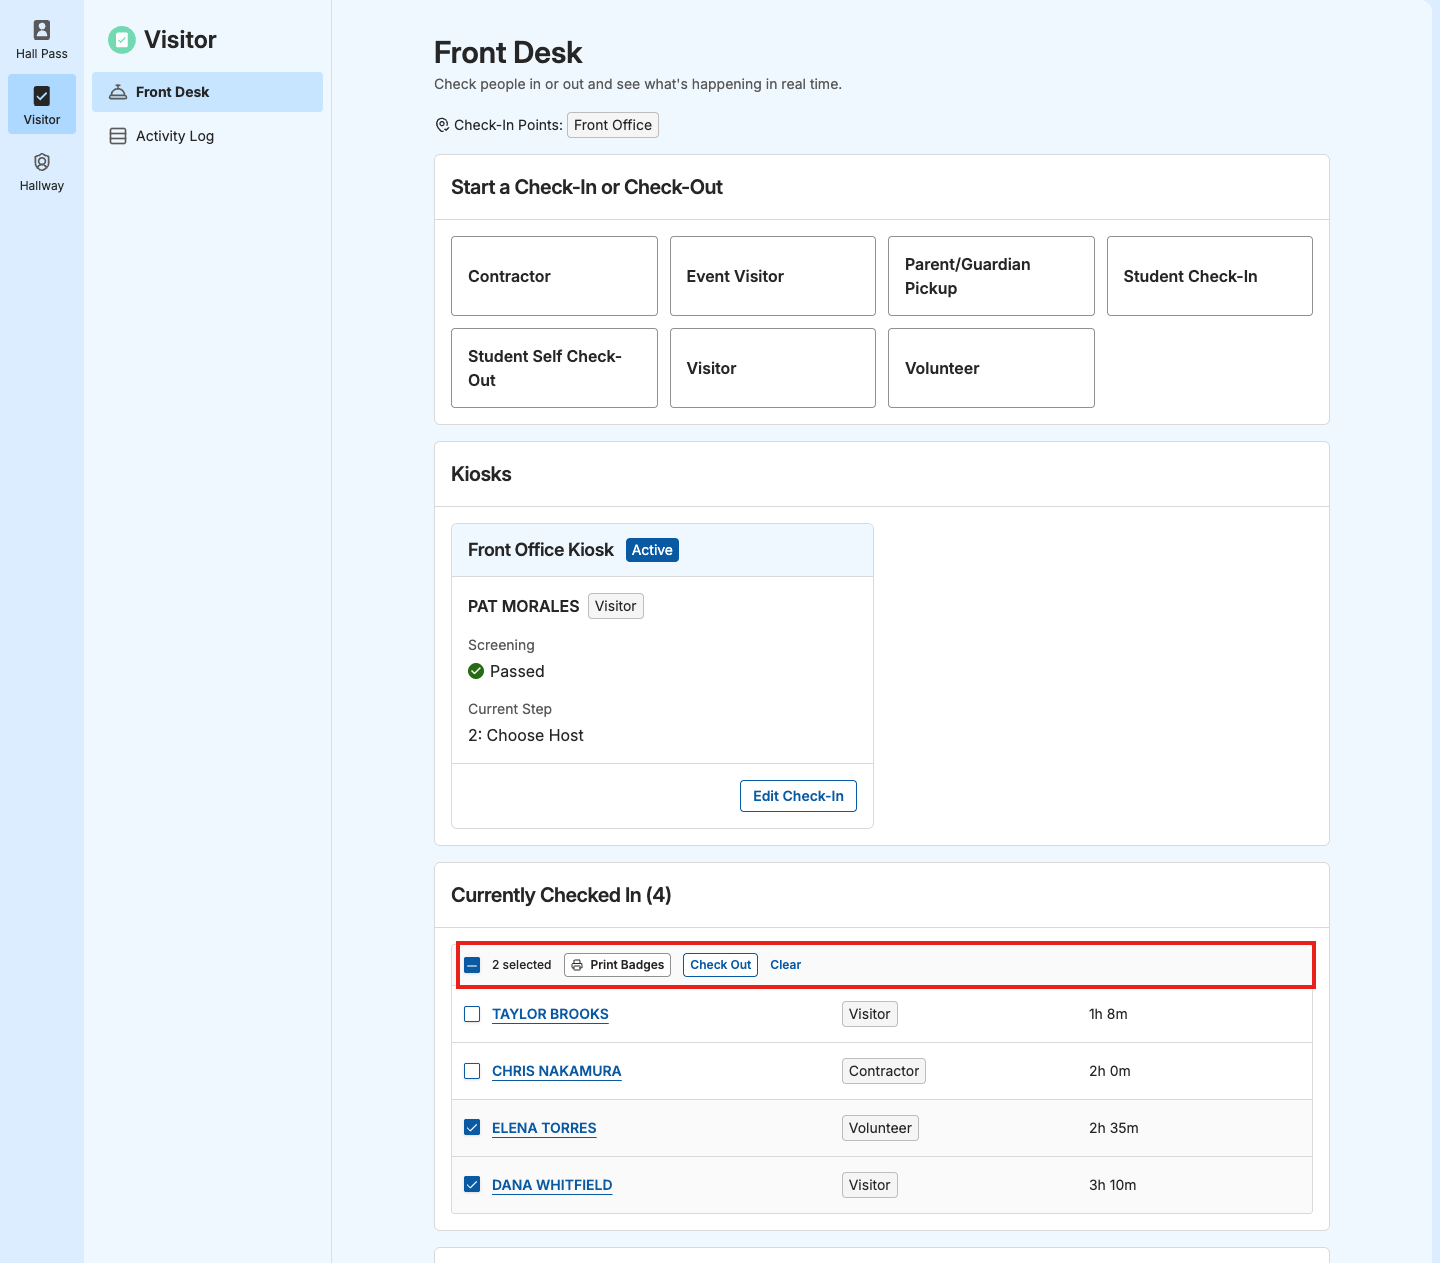
Check out visitors when they leave, so Currently Checked In shows who’s still on site.- In Currently Checked In, click Check Out next to the visitor. To check out several visitors at once, select them and click Check Out above the list.
- Click Check Out to confirm. A check-out can’t be undone, but you can change the check-out time later from the visitor’s Activity Log details.
- Verify the result: The visitor no longer appears in Currently Checked In.
Print Badges
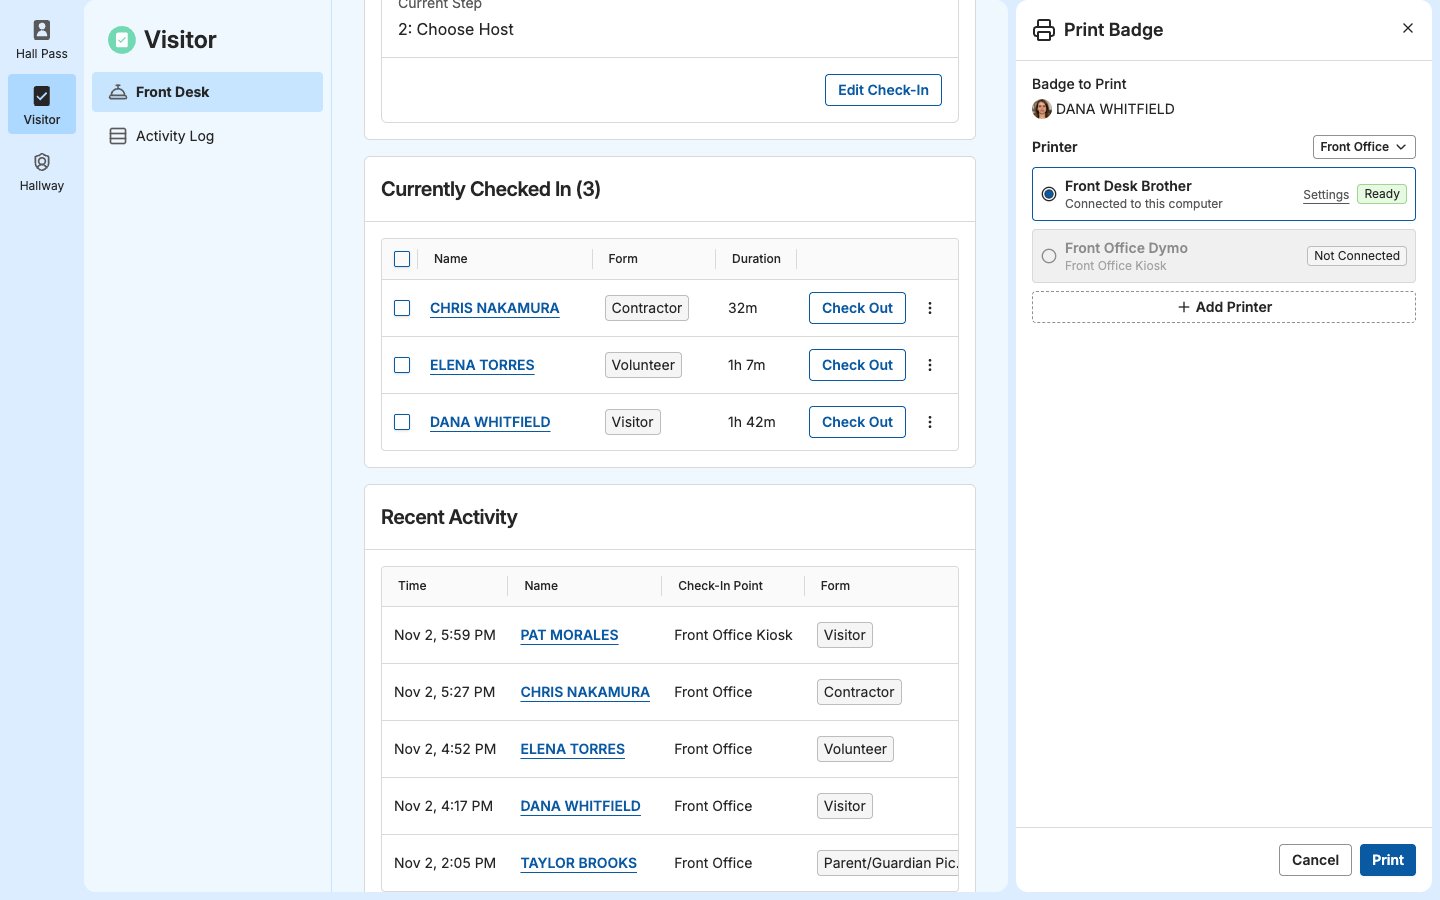
You can print a badge for any checked-in visitor whose form has a Print Badge step. The Front Desk prints to a printer connected to your computer or to a kiosk’s printer. To set up printers, see Badge Printers. When you check a visitor in from the Front Desk, you’re asked to print their badge before you see the result. See Start a Check-In or Check-Out. To print or reprint a badge later:- In Currently Checked In, click More actions (⋮) next to the visitor, then select Print Badge.
- Select a Printer. The printer you last used in this browser is selected for you. To see printers at another check-in point, change the check-in point next to it.
- Click Print.
- Verify the result: The badge prints, and a green check appears next to it.
Watch Your Kiosks
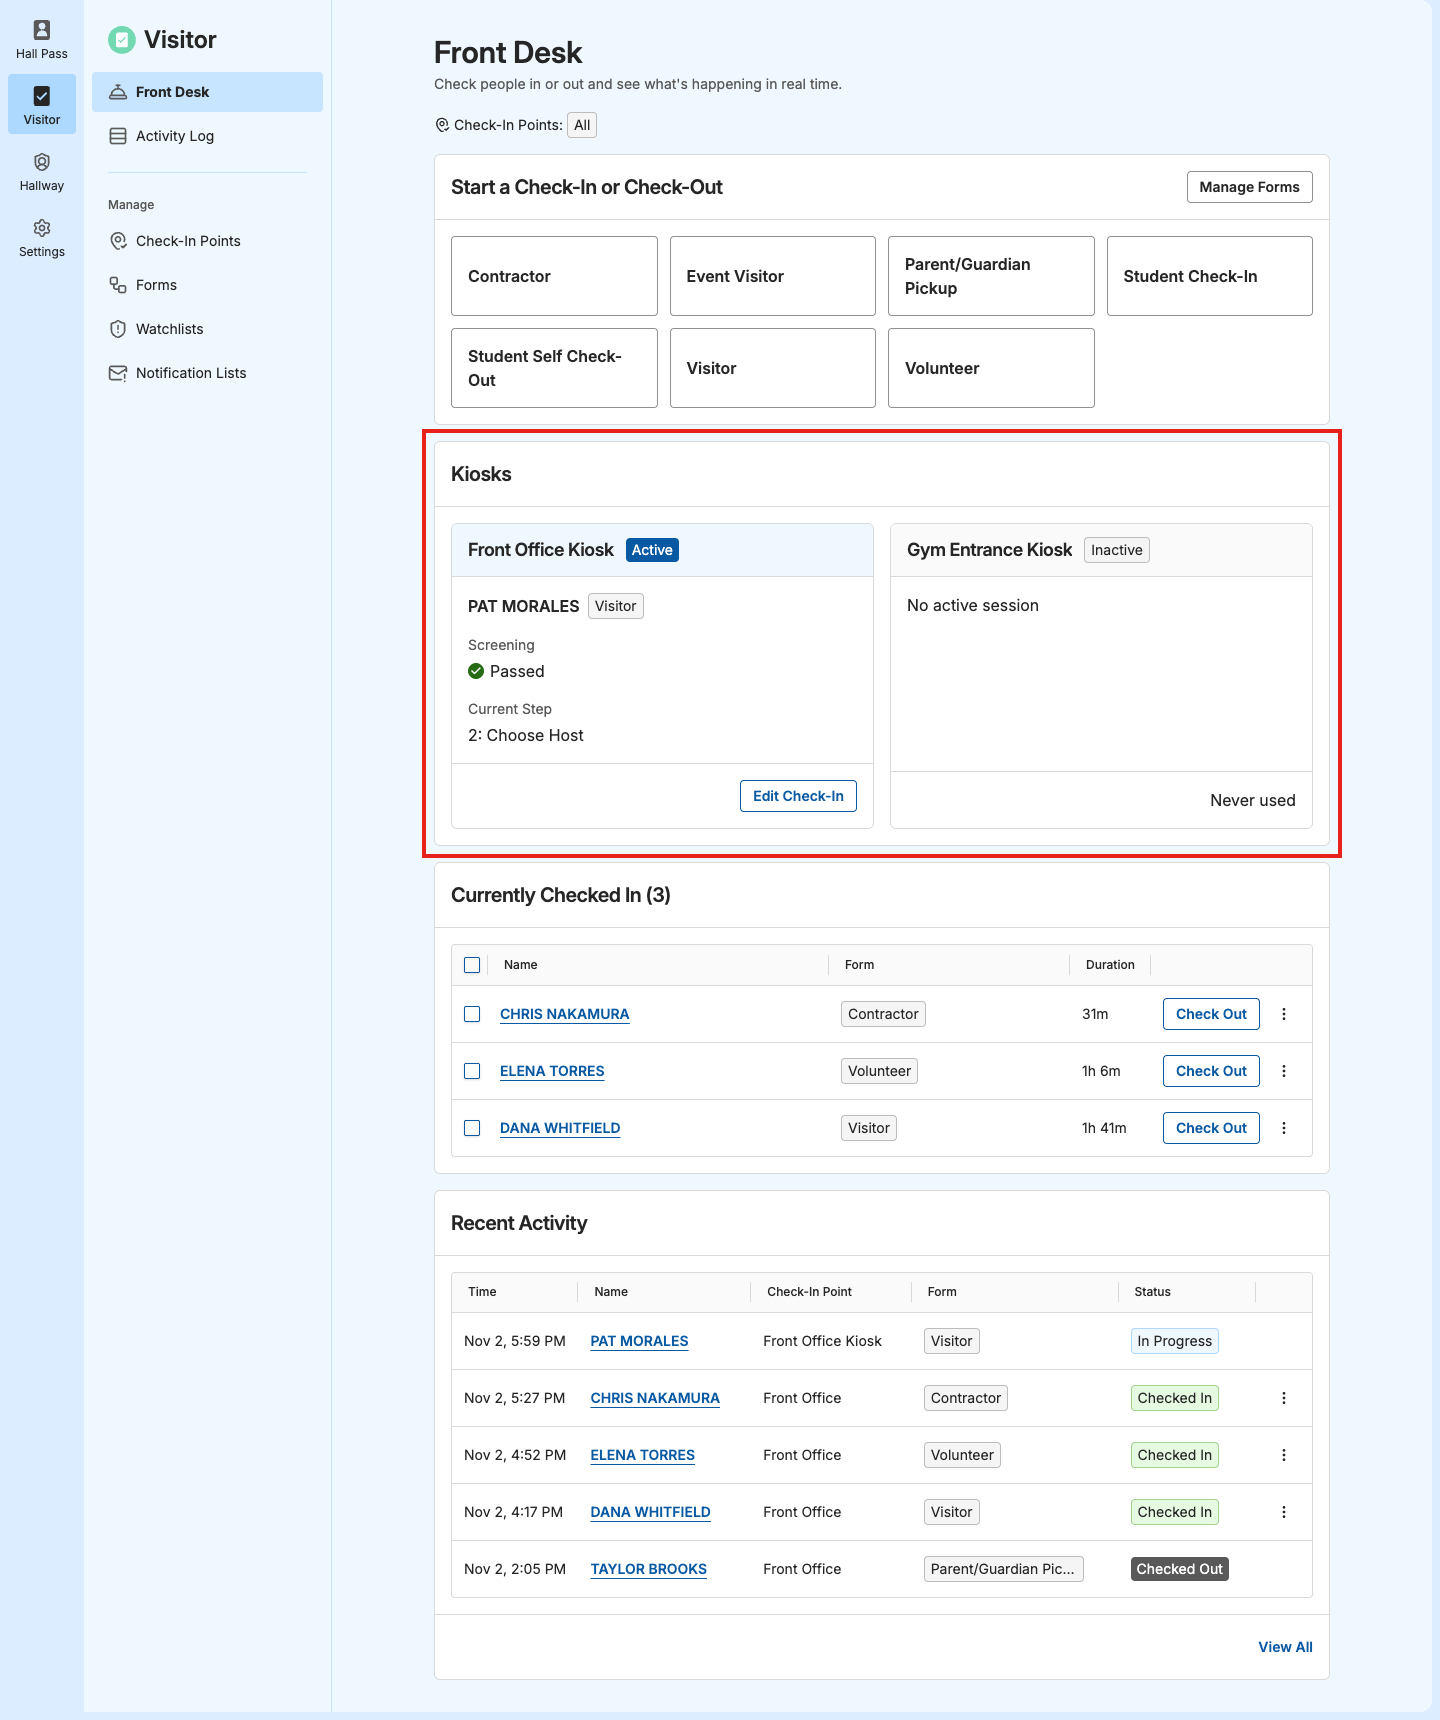
The Kiosks card shows each kiosk at your check-in points and updates as visitors and students use them.
If you need to take over a check-in from the kiosk, such as for a visitor or student who’s stuck, click Edit Check-In (or Edit Check-Out) on the card. Their check-in opens in your panel, where you can finish it on their behalf. When the kiosk has an alert, the same button is View Details.
If a kiosk is offline and you can’t get it back, check visitors and students in from the Front Desk until it’s fixed, and tell your IT team the kiosk’s name and check-in point. See Troubleshoot Kiosks.
Review Alerts
When a check-in or check-out needs a staff decision, a banner appears at the top of the Front Desk, such as “Possible Watchlist Match for JANE DOE at Front Office Kiosk.” Click Review Alerts or Review on the banner. For how to decide on each alert, see Review Screening Alerts.Review Recent Activity
Recent Activity shows the 5 latest check-ins and check-outs at your check-in points, with the time, name, check-in point or kiosk, form, and status. A red alert icon next to the status means the check-in or check-out had a screening alert or flagged answer.- Click a name to open the details in the Activity Log. For a check-in that’s still In Progress, the name opens it in your panel instead.
- To print a badge or check out a visitor from here, click More actions (⋮).
- To see everything, click View All. See Activity Log.