Review possible sex offender registry and watchlist matches, flagged answers, and student pickups on the GoGuardian Visitor Front Desk.
When a check-in or check-out needs a staff decision, an alert appears on the GoGuardian Visitor Front Desk right away. Most alerts are quick checks, such as confirming the students a guardian is picking up. If screening finds a possible match on a sex offender registry or a watchlist, you review the match and either confirm it or mark it as not a match.This article shows you how to work through each alert in Visitor. What you decide is up to your school’s procedures, such as which answers to accept, who can pick up a student, or what to do after a confirmed match. Follow them for every alert.You can review alerts for the check-in points you’re assigned to. Site Admins can review alerts at every check-in point. For how screening works and the settings behind it, see Understand Visitor Screening.
Alert banners at the top of the page, 1 for each alert, such as “Possible Offender Match for JANE DOE at Front Office Kiosk.” Red banners are possible matches, flagged answers, and screening errors. Yellow banners are Confirm Students.
Kiosks card: a kiosk with an alert shows Needs Review, Needs Confirmation, or Screening Error instead of Active.
The check-in panel, for check-ins you run at the Front Desk yourself: alerts appear in the panel, each with Review. Flagged answers and student confirmations appear when you finish the form, 1 at a time. Denying any one of them denies the whole check-in or check-out.
Click Review Alerts or Review to open the alert. If 2 staff members open the same alert, the first decision applies, and the alert closes for the other staff member.
A possible match means screening found a record with details similar to the visitor’s. It isn’t a finding about the visitor, which is why a staff member confirms every possible match before Visitor takes action. The alert tells you which kind of record it found:
Possible Offender Match: a record from a sex offender registry. Registry data comes from a third party, and GoGuardian does not independently verify it.
Possible Watchlist Match: an entry on your school’s watchlists. A watchlist is a list your school keeps of people staff need to know about at check-in, such as a parent who isn’t allowed to pick up their child under a custody order.
You review both kinds of match the same way:
Click Review Alerts on the alert.
Ask the visitor for their government-issued ID. If they scanned an ID at the kiosk, the scan appears on the left. Otherwise, you see “Ask the visitor for their ID.”
Compare the Confirm Identity details with the ID: first name, middle name, last name, and date of birth.
If everything matches, click Confirm Identity.
If anything is wrong, such as a misread date of birth, correct it and click Run Security Screening Again. Visitor closes the alert and screens the corrected identity. If there’s still a possible match, a new alert appears.
Check the visitor against the Possible Match. The review is now titled Potential Offender Match or Potential Watchlist Match. The visitor’s photo, name, date of birth, and ID are on the left, and the record is on the right. To check the ID again, click Go Back.
Potential Offender Match: shows the registry’s photos, name, date of birth, physical details, and Convictions. Click Show more details for the rest of the record, such as Cases, Sources, and Record Links. If the registry returned more than 1 record, click the arrows to move between them.
Potential Watchlist Match: shows the watchlist entry, the Watchlist it’s on, and the Reason your school entered.
Choose Not a Match when the visitor isn’t the one in the record. The check-in or check-out continues, and Visitor doesn’t notify anyone.
On the possible match, click Not a Match. If the registry returned more than 1 record, Visitor shows the next one. Compare it, and click Not a Match or Confirm Match. After the last record, the Not a Match dialog opens.
For a Potential Offender Match, optionally select Permanently dismiss these matches for this visitor. Visitor then stops raising these records for this visitor at your site. A permanent dismissal can’t be undone. Follow your school’s procedures. For how dismissals work, see Understand Visitor Screening.
Click Mark Not a Match.
Verify the result: The alert banner is gone, and the visitor can finish checking in or out.
A watchlist match can’t be dismissed permanently. If the visitor resembles a watchlist entry, it’s a possible match on each visit.
Choose Confirm Match only when you’re confident the visitor is the one in the record. Visitor then denies the check-in or check-out and alerts the notification lists for that match right away.
On the possible match, click Confirm Match.
Read the Confirm Match and Notify Staff dialog. It shows how many staff members will be notified and through which notification lists:
For a possible offender match: your site’s default notification list.
For a possible watchlist match: the notification lists attached to the watchlist.
If no one will be notified, the dialog says why, such as “No one will be notified because a default notification list isn’t set up.”
Click Confirm Match. Escalation Started means Visitor sent the alert to the notification lists. If no notification list with members is set up, you see No Staff Notified instead.
Click Done, then follow your school’s procedures for a confirmed match.
Verify the result: The alert banner is gone.
The check-in’s Activity Log details keep the record you confirmed and show who confirmed it. For what notified staff receive, see Respond to a Visitor Alert.
A Flagged Answer means the visitor or student chose an answer your school marked for review, such as answering yes when asked whether they feel sick. It’s a routine check, and it never notifies anyone.
Click Review Alerts on the alert.
Read the question and the answer in Review Flagged Answer. Follow your school’s procedures, such as talking with the visitor or student.
Choose what to do:
To let the check-in continue, click Accept Answer, then click Accept Answer to confirm.
To stop it, click Deny Check-In (or Deny Check-Out), then click it again to confirm.
Confirm Students asks you to check that the visitor is approved to pick up the students they selected. Every pickup through a Select Students step needs this confirmation before it completes. It’s a routine check, and it never notifies anyone.
Click Review on the alert.
Check the students listed under Select Students against your school’s pickup records.
Choose what to do:
If the visitor is approved for every student, click Confirm Students, then click Confirm Students to confirm.
If not, click Deny Check-Out (or Deny Check-In), then click it again to confirm.
A Screening Error means an error stopped a check from running. It isn’t a match.
Click Review on the alert.
Find the check that shows Error: Offender registry or Watchlist.
Click Retry Screening.
If the error comes back and your school’s procedures allow it, click Skip Screening, then click Skip Screening to confirm. The check-in can then be completed without the checks that had an error.
Verify the result: The alert banner is gone. If you skipped screening, the check-in shows Screening Skipped, and its Activity Log details show who skipped each check.
If screening errors keep happening, tell your IT team which check had the error and when.
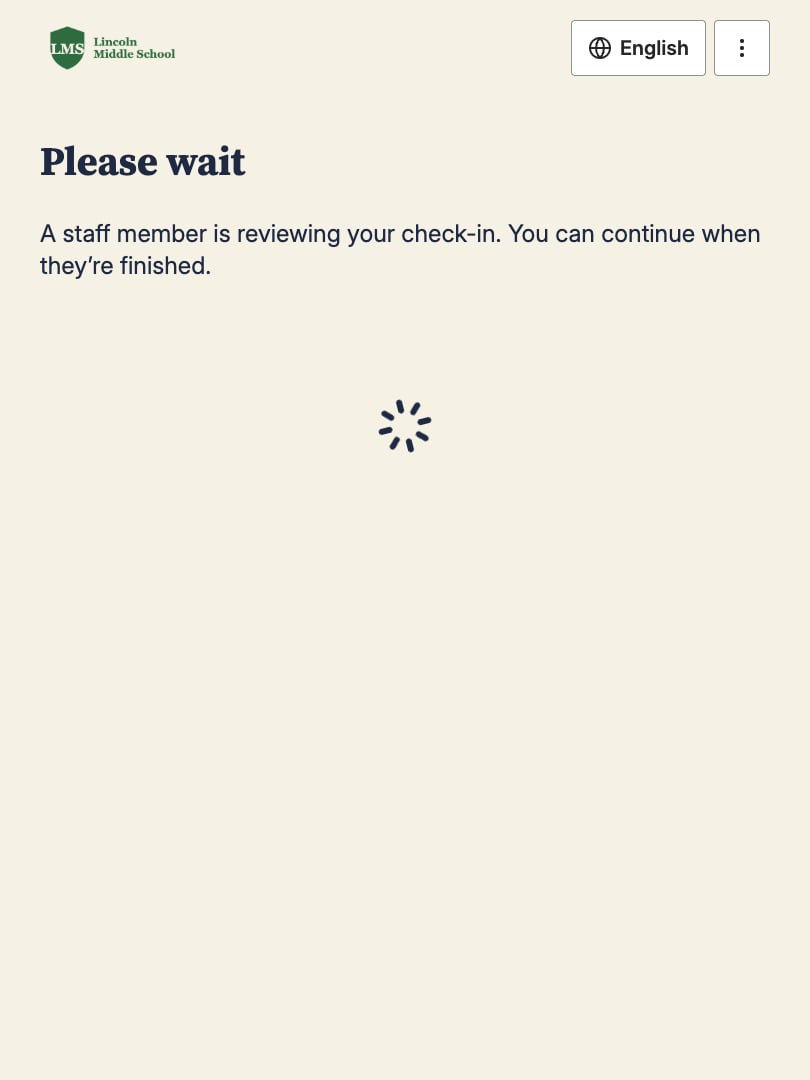
On a kiosk, the visitor keeps filling out the form while you review. If they finish first, the kiosk shows “Please wait” until you decide. They never see what screening found.If you deny the check-in or check-out, or confirm a match, the kiosk shows “You could not check in” and “Please see the front desk.”
Another staff member decided first, or a staff member corrected the identity and ran screening again.
Check the Front Desk for a new alert. The Activity Log shows who decided.
You don’t see an alert another staff member sees
You aren’t assigned to the check-in point where the check-in started.
Ask a Site Admin to assign you to the check-in point. See Check-In Points.
Screening finds the same possible match on every visit
Visitor checks watchlists on every visit, and Not a Match applies to 1 visit.
Choose Not a Match each time, and ask a Site Admin to check the watchlist entry. For a registry match, select Permanently dismiss these matches for this visitor.
No Staff Notified after you confirmed a match
No notification list with members is set up for the match.
Follow your school’s procedures to reach the right staff now. Then ask a Site Admin to set up notification lists. See Notification Lists.
A possible match appeared for a misread ID
The ID scan read a detail wrong, such as the date of birth.
In Confirm Identity, correct the detail and click Run Security Screening Again.
{"docsConfig":{"theme":"linden","$schema":"https://mintlify.com/docs.json","name":"GoGuardian","description":"Help center and product documentation for GoGuardian's K-12 safety and classroom management suite, including Admin (web filtering), Teacher (classroom management), Beacon (student safety alerts), Hall Pass, Discover, and Org Management.","colors":{"primary":"#0A59A3","light":"#439CEF","dark":"#002F6C"},"logo":{"light":"https://mintcdn.com/goguardian/08olqC3O-Uu3gBIf/images/logo/gg-pdl-lockup.svg?fit=max\u0026auto=format\u0026n=08olqC3O-Uu3gBIf\u0026q=85\u0026s=4e52b3255e2eae1b6b38419db0a1bf62","dark":"https://mintcdn.com/goguardian/08olqC3O-Uu3gBIf/images/logo/gg-pdl-lockup-white.svg?fit=max\u0026auto=format\u0026n=08olqC3O-Uu3gBIf\u0026q=85\u0026s=98894adb9647f2b523e0d11de1fc7961"},"favicon":"https://media.brand.dev/fb6d60c3-9a7a-4a85-a889-7a95764fa5ed.png","background":{"color":{"light":"#FFFFFF","dark":"#0F1F36"}},"search":{"prompt":"Search GoGuardian help articles…"},"seo":{"metatags":{"og:site_name":"GoGuardian Help Center","og:type":"website","twitter:card":"summary_large_image"},"indexing":"navigable"},"fonts":{"family":"TTCommonsPro"},"styling":{"eyebrows":"breadcrumbs","latex":false},"metadata":{"timestamp":true},"navigation":{"pages":[]}},"deployment":{"deploymentMetadataValue":{"subdomain":"goguardian","hasAudioNarration":false,"actualSubdomain":"goguardian","customDomains":["docs.goguardian.com"],"gitSource":{"type":"github","owner":"goguardian","repo":"docs","deployBranch":"main","isPrivate":true,"contentDirectory":"","mountPath":"","label":""},"chroma":{"liveDeploymentHistoryId":"6ae8cd1f6b2402847b6c28b5","collectionId":"a59cba30-806d-47be-bea7-bfd586530c65","schemaVersion":"v3","latestBuiltDeploymentHistoryId":"6ae8cd1f6b2402847b6c28b5"},"feedback":{"thumbs":true},"entitlements":{"AI_CHAT":{"status":"ENABLED"},"WEB_MCP":{"status":"ENABLED"},"NARRATION":{"status":"ENABLED"}},"buildId":"6ae93e6cc54790090eebd7f9","clientVersion":"0.0.4045","searchFilterCounts":[{"language":"default","tag":"Products","count":743},{"language":"default","tag":"Pear Deck Learning","count":396},{"language":"default","tag":"GoGuardian","count":357},{"language":"default","tag":"Pear Assessment","count":195},{"language":"default","tag":"Getting Started","count":114},{"language":"default","tag":"Teacher","count":96},{"language":"default","tag":"Admin","count":95},{"language":"default","tag":"Pear Deck","count":84},{"language":"default","tag":"Pear Practice","count":83},{"language":"default","tag":"Troubleshooting","count":77}],"searchSettings":{"maxResults":20,"isFiltersEnabled":true}},"assistantConfig":{"enableAskAiButton":false,"enableStarterQuestions":false,"enableContextualStarterQuestions":false,"enableAskAiSearchBar":true},"basePath":"","hasChatPermissions":false,"hasWebMcpPermissions":true,"toggles":[{"name":"kill-isr","enabled":true,"variant":{"name":"disabled","enabled":false,"feature_enabled":true},"impressionData":false},{"name":"agent-mintlify-slack","enabled":true,"variant":{"name":"disabled","enabled":false,"feature_enabled":true},"impressionData":false},{"name":"agent-integrations-settings","enabled":true,"variant":{"name":"disabled","enabled":false,"feature_enabled":true},"impressionData":false},{"name":"automations-pr-grouping","enabled":true,"variant":{"name":"disabled","enabled":false,"feature_enabled":true},"impressionData":false},{"name":"custom-prefix","enabled":true,"variant":{"name":"disabled","enabled":false,"feature_enabled":true},"impressionData":false},{"name":"analytics-v7","enabled":true,"variant":{"name":"disabled","enabled":false,"feature_enabled":true},"impressionData":false},{"name":"user-flows-analytics","enabled":true,"variant":{"name":"disabled","enabled":false,"feature_enabled":true},"impressionData":false},{"name":"no-publish-flow","enabled":true,"variant":{"name":"disabled","enabled":false,"feature_enabled":true},"impressionData":false},{"name":"workos-onboarding","enabled":true,"variant":{"name":"disabled","enabled":false,"feature_enabled":true},"impressionData":false},{"name":"llms-txt-v2","enabled":true,"variant":{"name":"disabled","enabled":false,"feature_enabled":true},"impressionData":false},{"name":"snapshot-serving-live","enabled":true,"variant":{"name":"disabled","enabled":false,"feature_enabled":true},"impressionData":false},{"name":"stripTemperatureMiddleware","enabled":true,"variant":{"name":"disabled","enabled":false,"feature_enabled":true},"impressionData":false},{"name":"support-platform-pylon-zendesk","enabled":true,"variant":{"name":"disabled","enabled":false,"feature_enabled":true},"impressionData":false},{"name":"snapshot-serving","enabled":true,"variant":{"name":"disabled","enabled":false,"feature_enabled":true},"impressionData":false},{"name":"instant-rollback","enabled":true,"variant":{"name":"disabled","enabled":false,"feature_enabled":true},"impressionData":false},{"name":"granular-notifications-server","enabled":true,"variant":{"name":"disabled","enabled":false,"feature_enabled":true},"impressionData":false},{"name":"granular-notifications","enabled":true,"variant":{"name":"disabled","enabled":false,"feature_enabled":true},"impressionData":false},{"name":"automations-fable","enabled":true,"variant":{"name":"disabled","enabled":false,"feature_enabled":true},"impressionData":false},{"name":"fixed-ai-action-pricing","enabled":true,"variant":{"name":"disabled","enabled":false,"feature_enabled":true},"impressionData":false},{"name":"automation-resolve-merge-conflict","enabled":true,"variant":{"name":"disabled","enabled":false,"feature_enabled":true},"impressionData":false},{"name":"scoped-publishing","enabled":true,"variant":{"name":"disabled","enabled":false,"feature_enabled":true},"impressionData":false},{"name":"mintql","enabled":true,"variant":{"name":"disabled","enabled":false,"feature_enabled":true},"impressionData":false},{"name":"page-level-analytics","enabled":true,"variant":{"name":"disabled","enabled":false,"feature_enabled":true},"impressionData":false},{"name":"editor-version-history-v2","enabled":true,"variant":{"name":"disabled","enabled":false,"feature_enabled":true},"impressionData":false},{"name":"billing-page-v2","enabled":true,"variant":{"name":"disabled","enabled":false,"feature_enabled":true},"impressionData":false},{"name":"full-page-search","enabled":true,"variant":{"name":"disabled","enabled":false,"feature_enabled":true},"impressionData":false},{"name":"workspace-projects","enabled":true,"variant":{"name":"disabled","enabled":false,"feature_enabled":true},"impressionData":false},{"name":"assistant-v5","enabled":true,"variant":{"name":"disabled","enabled":false,"feature_enabled":true},"impressionData":false},{"name":"byok-sep-25","enabled":true,"variant":{"name":"disabled","enabled":false,"feature_enabled":true},"impressionData":false},{"name":"fork-pr-previews","enabled":true,"variant":{"name":"disabled","enabled":false,"feature_enabled":true},"impressionData":false},{"name":"revalidation-jwt","enabled":true,"variant":{"name":"disabled","enabled":false,"feature_enabled":true},"impressionData":false},{"name":"vite-origin","enabled":true,"variant":{"name":"disabled","enabled":false,"feature_enabled":true},"impressionData":false},{"name":"billing-updated-9-15","enabled":true,"variant":{"name":"disabled","enabled":false,"feature_enabled":true},"impressionData":false},{"name":"workos-sso-scim","enabled":true,"variant":{"name":"disabled","enabled":false,"feature_enabled":true},"impressionData":false},{"name":"hobby-abuse-scan","enabled":true,"variant":{"name":"disabled","enabled":false,"feature_enabled":true},"impressionData":false},{"name":"dashboard-inbox","enabled":true,"variant":{"name":"disabled","enabled":false,"feature_enabled":true},"impressionData":false},{"name":"workos-signup","enabled":true,"variant":{"name":"disabled","enabled":false,"feature_enabled":true},"impressionData":false},{"name":"turbopuffer-dual-write","enabled":true,"variant":{"name":"disabled","enabled":false,"feature_enabled":true},"impressionData":false},{"name":"workos-enabled","enabled":true,"variant":{"name":"disabled","enabled":false,"feature_enabled":true},"impressionData":false},{"name":"approve-review-flow","enabled":true,"variant":{"name":"disabled","enabled":false,"feature_enabled":true},"impressionData":false},{"name":"sso-setup-deadline-banner","enabled":true,"variant":{"name":"disabled","enabled":false,"feature_enabled":true},"impressionData":false}],"googleFontsInlined":false},"customCss":[{"filePath":"custom.css","content":"@font-face{font-family:'TTCommonsPro';src:url(/fonts/TTCommonsPro-Thin.otf) format('opentype');font-weight:100;font-style:normal;font-display:swap}@font-face{font-family:'TTCommonsPro';src:url(/fonts/TTCommonsPro-ThinItalic.otf) format('opentype');font-weight:100;font-style:italic;font-display:swap}@font-face{font-family:'TTCommonsPro';src:url(/fonts/TTCommonsPro-ExtraLight.otf) format('opentype');font-weight:200;font-style:normal;font-display:swap}@font-face{font-family:'TTCommonsPro';src:url(/fonts/TTCommonsPro-ExtraLightItalic.otf) format('opentype');font-weight:200;font-style:italic;font-display:swap}@font-face{font-family:'TTCommonsPro';src:url(/fonts/TTCommonsPro-Light.otf) format('opentype');font-weight:300;font-style:normal;font-display:swap}@font-face{font-family:'TTCommonsPro';src:url(/fonts/TTCommonsPro-LightItalic.otf) format('opentype');font-weight:300;font-style:italic;font-display:swap}@font-face{font-family:'TTCommonsPro';src:url(/fonts/TTCommonsPro-Regular.otf) format('opentype');font-weight:400;font-style:normal;font-display:swap}@font-face{font-family:'TTCommonsPro';src:url(/fonts/TTCommonsPro-Italic.otf) format('opentype');font-weight:400;font-style:italic;font-display:swap}@font-face{font-family:'TTCommonsPro';src:url(/fonts/TTCommonsPro-Medium.otf) format('opentype');font-weight:500;font-style:normal;font-display:swap}@font-face{font-family:'TTCommonsPro';src:url(/fonts/TTCommonsPro-MediumItalic.otf) format('opentype');font-weight:500;font-style:italic;font-display:swap}@font-face{font-family:'TTCommonsPro';src:url(/fonts/TTCommonsPro-DemiBold.otf) format('opentype');font-weight:600;font-style:normal;font-display:swap}@font-face{font-family:'TTCommonsPro';src:url(/fonts/TTCommonsPro-DemiBoldItalic.otf) format('opentype');font-weight:600;font-style:italic;font-display:swap}@font-face{font-family:'TTCommonsPro';src:url(/fonts/TTCommonsPro-Bold.otf) format('opentype');font-weight:700;font-style:normal;font-display:swap}@font-face{font-family:'TTCommonsPro';src:url(/fonts/TTCommonsPro-BoldItalic.otf) format('opentype');font-weight:700;font-style:italic;font-display:swap}@font-face{font-family:'TTCommonsPro';src:url(/fonts/TTCommonsPro-ExtraBold.otf) format('opentype');font-weight:800;font-style:normal;font-display:swap}@font-face{font-family:'TTCommonsPro';src:url(/fonts/TTCommonsPro-ExtraBoldItalic.otf) format('opentype');font-weight:800;font-style:italic;font-display:swap}@font-face{font-family:'TTCommonsPro';src:url(/fonts/TTCommonsPro-Black.otf) format('opentype');font-weight:900;font-style:normal;font-display:swap}@font-face{font-family:'TTCommonsPro';src:url(/fonts/TTCommonsPro-BlackItalic.otf) format('opentype');font-weight:900;font-style:italic;font-display:swap}@font-face{font-family:'TTCommonsPro';src:url(/fonts/TTCommonsPro-ExtraBlack.otf) format('opentype');font-weight:950;font-style:normal;font-display:swap}@font-face{font-family:'TTCommonsPro';src:url(/fonts/TTCommonsPro-ExtraBlackItalic.otf) format('opentype');font-weight:950;font-style:italic;font-display:swap}body,html{font-family:'TTCommonsPro',ui-sans-serif,system-ui,-apple-system,BlinkMacSystemFont,'Segoe UI',Roboto,'Helvetica Neue',Arial,sans-serif}div[class*=navbar],header nav,header>div,nav[class*=navbar]{max-width:none!important;width:100%!important}img.nav-logo{height:2.5rem}@media (min-width:1024px){img.nav-logo{margin-left:2rem}}.nav-tabs-item{white-space:nowrap}#pagination .uppercase{text-transform:none}kbd{background:#f0f0f0;border:1px solid #d0d0d0;color:#262626;border-radius:4px;padding:.1rem .4rem;font-size:.85em}html.dark kbd{background:#2d2d2d;border:1px solid #4a4a4a;color:#f0f0f0}"}],"page":{"pagePath":"products/visitor/review-screening-alerts","slug":"/products/visitor/review-screening-alerts","pageMetadata":{"title":"Review Screening Alerts","description":"Review possible sex offender registry and watchlist matches, flagged answers, and student pickups on the GoGuardian Visitor Front Desk.","last_reviewed":"November 2026","article_type":"How-To","products":"GoGuardian Visitor","audience":"Administrators, Staff","keywords":["review visitor alert","possible offender match","possible watchlist match","confirm match or not a match","visitor check-in paused","flagged answer review","confirm students pickup","screening error retry skip","kiosk needs review","no staff notified"],"href":"/products/visitor/review-screening-alerts"},"description":{"compiledSource":"\"use strict\";\nconst {jsx: _jsx} = arguments[0];\nconst {useMDXComponents: _provideComponents} = arguments[0];\nfunction _createMdxContent(props) {\n const _components = {\n p: \"p\",\n ..._provideComponents(),\n ...props.components\n };\n return _jsx(_components.p, {\n children: \"Review possible sex offender registry and watchlist matches, flagged answers, and student pickups on the GoGuardian Visitor Front Desk.\"\n });\n}\nfunction MDXContent(props = {}) {\n const {wrapper: MDXLayout} = {\n ..._provideComponents(),\n ...props.components\n };\n return MDXLayout ? _jsx(MDXLayout, {\n ...props,\n children: _jsx(_createMdxContent, {\n ...props\n })\n }) : _createMdxContent(props);\n}\nreturn {\n default: MDXContent\n};\n","frontmatter":{},"scope":{}},"pageType":"default","mdx":{"mdxSource":{"compiledSource":"\"use strict\";const{Fragment:_Fragment,jsx:_jsx,jsxs:_jsxs}=arguments[0];const{useMDXComponents:_provideComponents}=arguments[0];function _createMdxContent(props){const _components={a:`a`,li:`li`,ol:`ol`,p:`p`,strong:`strong`,tbody:`tbody`,td:`td`,th:`th`,thead:`thead`,tr:`tr`,ul:`ul`,..._provideComponents(),...props.components},{Heading,OptimizedImage,Table}=_components;if(!Heading)_missingMdxReference(`Heading`,true);if(!OptimizedImage)_missingMdxReference(`OptimizedImage`,true);if(!Table)_missingMdxReference(`Table`,true);return _jsxs(_Fragment,{children:[_jsxs(_components.p,{children:[`When a check-in or check-out needs a staff decision, an alert appears on the GoGuardian Visitor `,_jsx(_components.strong,{children:`Front Desk`}),` right away. Most alerts are quick checks, such as confirming the students a guardian is picking up. If screening finds a possible match on a sex offender registry or a watchlist, you review the match and either confirm it or mark it as not a match.`]}),`\n`,_jsx(_components.p,{children:`This article shows you how to work through each alert in Visitor. What you decide is up to your school’s procedures, such as which answers to accept, who can pick up a student, or what to do after a confirmed match. Follow them for every alert.`}),`\n`,_jsxs(_components.p,{children:[`You can review alerts for the check-in points you’re assigned to. Site Admins can review alerts at every check-in point. For how screening works and the settings behind it, see `,_jsx(_components.a,{href:`/products/visitor/visitor-screening`,children:`Understand Visitor Screening`}),`.`]}),`\n`,_jsx(Heading,{level:`2`,id:`find-alerts-waiting-for-review`,children:`Find Alerts Waiting for Review`}),`\n`,_jsxs(_components.p,{children:[`Alerts appear in 3 places on the `,_jsx(_components.strong,{children:`Front Desk`}),`:`]}),`\n`,_jsxs(_components.ul,{children:[`\n`,_jsxs(_components.li,{children:[`Alert banners at the top of the page, 1 for each alert, such as “`,_jsx(_components.strong,{children:`Possible Offender Match`}),` for JANE DOE at Front Office Kiosk.” Red banners are possible matches, flagged answers, and screening errors. Yellow banners are `,_jsx(_components.strong,{children:`Confirm Students`}),`.`]}),`\n`,_jsxs(_components.li,{children:[_jsx(_components.strong,{children:`Kiosks`}),` card: a kiosk with an alert shows `,_jsx(_components.strong,{children:`Needs Review`}),`, `,_jsx(_components.strong,{children:`Needs Confirmation`}),`, or `,_jsx(_components.strong,{children:`Screening Error`}),` instead of `,_jsx(_components.strong,{children:`Active`}),`.`]}),`\n`,_jsxs(_components.li,{children:[`The check-in panel, for check-ins you run at the `,_jsx(_components.strong,{children:`Front Desk`}),` yourself: alerts appear in the panel, each with `,_jsx(_components.strong,{children:`Review`}),`. Flagged answers and student confirmations appear when you finish the form, 1 at a time. Denying any one of them denies the whole check-in or check-out.`]}),`\n`]}),`\n`,_jsxs(_components.p,{children:[`Click `,_jsx(_components.strong,{children:`Review Alerts`}),` or `,_jsx(_components.strong,{children:`Review`}),` to open the alert. If 2 staff members open the same alert, the first decision applies, and the alert closes for the other staff member.`]}),`\n`,_jsx(OptimizedImage,{src:`https://mintcdn.com/goguardian/vbbcOHBdrxzrcZoi/images/screenshots/review-screening-alerts/01-front-desk-alerts.png?fit=max\u0026auto=format\u0026n=vbbcOHBdrxzrcZoi\u0026q=85\u0026s=a44026abce29c7b40d8ec0fc2be8def4`,alt:`Front Desk with red Possible Offender Match and Possible Watchlist Match banners for a fictional visitor at the Front Office Kiosk, each with Review Alerts, and the Kiosks card showing Needs Review`,\"data-og-width\":`1440`,width:`1440`,\"data-og-height\":`1006`,height:`1006`,\"data-path\":`images/screenshots/review-screening-alerts/01-front-desk-alerts.png`,\"data-optimize\":`true`,\"data-opv\":`3`,srcset:`https://mintcdn.com/goguardian/vbbcOHBdrxzrcZoi/images/screenshots/review-screening-alerts/01-front-desk-alerts.png?w=280\u0026fit=max\u0026auto=format\u0026n=vbbcOHBdrxzrcZoi\u0026q=85\u0026s=0844a3b66593b543f7419d4b87d9699d 280w, https://mintcdn.com/goguardian/vbbcOHBdrxzrcZoi/images/screenshots/review-screening-alerts/01-front-desk-alerts.png?w=560\u0026fit=max\u0026auto=format\u0026n=vbbcOHBdrxzrcZoi\u0026q=85\u0026s=b572f947f928762b469973265819d93d 560w, https://mintcdn.com/goguardian/vbbcOHBdrxzrcZoi/images/screenshots/review-screening-alerts/01-front-desk-alerts.png?w=840\u0026fit=max\u0026auto=format\u0026n=vbbcOHBdrxzrcZoi\u0026q=85\u0026s=957c5003e782d31371027c16c72d6559 840w, https://mintcdn.com/goguardian/vbbcOHBdrxzrcZoi/images/screenshots/review-screening-alerts/01-front-desk-alerts.png?w=1100\u0026fit=max\u0026auto=format\u0026n=vbbcOHBdrxzrcZoi\u0026q=85\u0026s=22a5f264bd26bb6e7035e7ecf9d586bb 1100w, https://mintcdn.com/goguardian/vbbcOHBdrxzrcZoi/images/screenshots/review-screening-alerts/01-front-desk-alerts.png?w=1650\u0026fit=max\u0026auto=format\u0026n=vbbcOHBdrxzrcZoi\u0026q=85\u0026s=09c597b8dcd35a4eef9846857a25447b 1650w, https://mintcdn.com/goguardian/vbbcOHBdrxzrcZoi/images/screenshots/review-screening-alerts/01-front-desk-alerts.png?w=2500\u0026fit=max\u0026auto=format\u0026n=vbbcOHBdrxzrcZoi\u0026q=85\u0026s=ac26870eecd590699903cb693830593f 2500w`}),`\n`,_jsx(Heading,{level:`2`,id:`review-a-possible-match`,children:`Review a Possible Match`}),`\n`,_jsx(_components.p,{children:`A possible match means screening found a record with details similar to the visitor’s. It isn’t a finding about the visitor, which is why a staff member confirms every possible match before Visitor takes action. The alert tells you which kind of record it found:`}),`\n`,_jsxs(_components.ul,{children:[`\n`,_jsxs(_components.li,{children:[_jsx(_components.strong,{children:`Possible Offender Match:`}),` a record from a sex offender registry. Registry data comes from a third party, and GoGuardian does not independently verify it.`]}),`\n`,_jsxs(_components.li,{children:[_jsx(_components.strong,{children:`Possible Watchlist Match:`}),` an entry on your school’s watchlists. A watchlist is a list your school keeps of people staff need to know about at check-in, such as a parent who isn’t allowed to pick up their child under a custody order.`]}),`\n`]}),`\n`,_jsx(_components.p,{children:`You review both kinds of match the same way:`}),`\n`,_jsxs(_components.ol,{children:[`\n`,_jsxs(_components.li,{children:[`Click `,_jsx(_components.strong,{children:`Review Alerts`}),` on the alert.`]}),`\n`,_jsx(_components.li,{children:`Ask the visitor for their government-issued ID. If they scanned an ID at the kiosk, the scan appears on the left. Otherwise, you see “Ask the visitor for their ID.”`}),`\n`,_jsxs(_components.li,{children:[`Compare the `,_jsx(_components.strong,{children:`Confirm Identity`}),` details with the ID: first name, middle name, last name, and date of birth.`,`\n`,_jsxs(_components.ul,{children:[`\n`,_jsxs(_components.li,{children:[`If everything matches, click `,_jsx(_components.strong,{children:`Confirm Identity`}),`.`]}),`\n`,_jsxs(_components.li,{children:[`If anything is wrong, such as a misread date of birth, correct it and click `,_jsx(_components.strong,{children:`Run Security Screening Again`}),`. Visitor closes the alert and screens the corrected identity. If there’s still a possible match, a new alert appears.`]}),`\n`]}),`\n`]}),`\n`,_jsxs(_components.li,{children:[`Check the visitor against the `,_jsx(_components.strong,{children:`Possible Match`}),`. The review is now titled `,_jsx(_components.strong,{children:`Potential Offender Match`}),` or `,_jsx(_components.strong,{children:`Potential Watchlist Match`}),`. The visitor’s photo, name, date of birth, and ID are on the left, and the record is on the right. To check the ID again, click `,_jsx(_components.strong,{children:`Go Back`}),`.`,`\n`,_jsxs(_components.ul,{children:[`\n`,_jsxs(_components.li,{children:[_jsx(_components.strong,{children:`Potential Offender Match:`}),` shows the registry’s photos, name, date of birth, physical details, and `,_jsx(_components.strong,{children:`Convictions`}),`. Click `,_jsx(_components.strong,{children:`Show more details`}),` for the rest of the record, such as `,_jsx(_components.strong,{children:`Cases`}),`, `,_jsx(_components.strong,{children:`Sources`}),`, and `,_jsx(_components.strong,{children:`Record Links`}),`. If the registry returned more than 1 record, click the arrows to move between them.`]}),`\n`,_jsxs(_components.li,{children:[_jsx(_components.strong,{children:`Potential Watchlist Match:`}),` shows the watchlist entry, the `,_jsx(_components.strong,{children:`Watchlist`}),` it’s on, and the `,_jsx(_components.strong,{children:`Reason`}),` your school entered.`]}),`\n`]}),`\n`]}),`\n`,_jsxs(_components.li,{children:[`Under “Is this the same person?”, choose `,_jsx(_components.strong,{children:`Not a Match`}),` or `,_jsx(_components.strong,{children:`Confirm Match`}),`. See `,_jsx(_components.a,{href:`#mark-not-a-match`,children:`Mark Not a Match`}),` or `,_jsx(_components.a,{href:`#confirm-a-match`,children:`Confirm a Match`}),`.`]}),`\n`]}),`\n`,_jsx(OptimizedImage,{src:`https://mintcdn.com/goguardian/vbbcOHBdrxzrcZoi/images/screenshots/review-screening-alerts/02-confirm-identity.png?fit=max\u0026auto=format\u0026n=vbbcOHBdrxzrcZoi\u0026q=85\u0026s=4d37f72dafe13d46d511a2f65e5fab44`,alt:`Confirm Identity with a fictional SAMPLE driver license on the left and the visitor's first name, middle name, last name, and date of birth on the right, above Confirm Identity`,\"data-og-width\":`1440`,width:`1440`,\"data-og-height\":`900`,height:`900`,\"data-path\":`images/screenshots/review-screening-alerts/02-confirm-identity.png`,\"data-optimize\":`true`,\"data-opv\":`3`,srcset:`https://mintcdn.com/goguardian/vbbcOHBdrxzrcZoi/images/screenshots/review-screening-alerts/02-confirm-identity.png?w=280\u0026fit=max\u0026auto=format\u0026n=vbbcOHBdrxzrcZoi\u0026q=85\u0026s=4f83ccd5a8bdddafa12acd01efe78e69 280w, https://mintcdn.com/goguardian/vbbcOHBdrxzrcZoi/images/screenshots/review-screening-alerts/02-confirm-identity.png?w=560\u0026fit=max\u0026auto=format\u0026n=vbbcOHBdrxzrcZoi\u0026q=85\u0026s=f2b26a5b3b2ed9738c98d17b0c57d20c 560w, https://mintcdn.com/goguardian/vbbcOHBdrxzrcZoi/images/screenshots/review-screening-alerts/02-confirm-identity.png?w=840\u0026fit=max\u0026auto=format\u0026n=vbbcOHBdrxzrcZoi\u0026q=85\u0026s=ea804afe134b6c7e0aadca75941fd213 840w, https://mintcdn.com/goguardian/vbbcOHBdrxzrcZoi/images/screenshots/review-screening-alerts/02-confirm-identity.png?w=1100\u0026fit=max\u0026auto=format\u0026n=vbbcOHBdrxzrcZoi\u0026q=85\u0026s=d3407913abee15b947181f4b7606b631 1100w, https://mintcdn.com/goguardian/vbbcOHBdrxzrcZoi/images/screenshots/review-screening-alerts/02-confirm-identity.png?w=1650\u0026fit=max\u0026auto=format\u0026n=vbbcOHBdrxzrcZoi\u0026q=85\u0026s=d1b86f5e2cd67f61578b3f5a51442b6a 1650w, https://mintcdn.com/goguardian/vbbcOHBdrxzrcZoi/images/screenshots/review-screening-alerts/02-confirm-identity.png?w=2500\u0026fit=max\u0026auto=format\u0026n=vbbcOHBdrxzrcZoi\u0026q=85\u0026s=9f6b78c441c49e80e0a8f7c3ed566185 2500w`}),`\n`,_jsx(OptimizedImage,{src:`https://mintcdn.com/goguardian/vbbcOHBdrxzrcZoi/images/screenshots/review-screening-alerts/03-offender-match.png?fit=max\u0026auto=format\u0026n=vbbcOHBdrxzrcZoi\u0026q=85\u0026s=a2271bb9203f6b39aff6153312264ee7`,alt:`Potential Offender Match comparing the visitor's photo, name, date of birth, and ID with a fictional registry record's photo, physical details, and Convictions, with Confirm Match and Not a Match`,\"data-og-width\":`1440`,width:`1440`,\"data-og-height\":`900`,height:`900`,\"data-path\":`images/screenshots/review-screening-alerts/03-offender-match.png`,\"data-optimize\":`true`,\"data-opv\":`3`,srcset:`https://mintcdn.com/goguardian/vbbcOHBdrxzrcZoi/images/screenshots/review-screening-alerts/03-offender-match.png?w=280\u0026fit=max\u0026auto=format\u0026n=vbbcOHBdrxzrcZoi\u0026q=85\u0026s=1b1b5bbc9ce8802e117458d8397ca7c0 280w, https://mintcdn.com/goguardian/vbbcOHBdrxzrcZoi/images/screenshots/review-screening-alerts/03-offender-match.png?w=560\u0026fit=max\u0026auto=format\u0026n=vbbcOHBdrxzrcZoi\u0026q=85\u0026s=4206cdf5beb422e3eb8ba6cbc34ee629 560w, https://mintcdn.com/goguardian/vbbcOHBdrxzrcZoi/images/screenshots/review-screening-alerts/03-offender-match.png?w=840\u0026fit=max\u0026auto=format\u0026n=vbbcOHBdrxzrcZoi\u0026q=85\u0026s=2e62fb4586982fa0fdb7d82ee200ce1f 840w, https://mintcdn.com/goguardian/vbbcOHBdrxzrcZoi/images/screenshots/review-screening-alerts/03-offender-match.png?w=1100\u0026fit=max\u0026auto=format\u0026n=vbbcOHBdrxzrcZoi\u0026q=85\u0026s=1352a0b223fbdfe413be0dd709399167 1100w, https://mintcdn.com/goguardian/vbbcOHBdrxzrcZoi/images/screenshots/review-screening-alerts/03-offender-match.png?w=1650\u0026fit=max\u0026auto=format\u0026n=vbbcOHBdrxzrcZoi\u0026q=85\u0026s=0e0bf36b6ab64ba2b7b926f62373146a 1650w, https://mintcdn.com/goguardian/vbbcOHBdrxzrcZoi/images/screenshots/review-screening-alerts/03-offender-match.png?w=2500\u0026fit=max\u0026auto=format\u0026n=vbbcOHBdrxzrcZoi\u0026q=85\u0026s=21174727e47e38d4945cf829d7a978da 2500w`}),`\n`,_jsx(Heading,{level:`2`,id:`mark-not-a-match`,children:`Mark Not a Match`}),`\n`,_jsxs(_components.p,{children:[`Choose `,_jsx(_components.strong,{children:`Not a Match`}),` when the visitor isn’t the one in the record. The check-in or check-out continues, and Visitor doesn’t notify anyone.`]}),`\n`,_jsxs(_components.ol,{children:[`\n`,_jsxs(_components.li,{children:[`On the possible match, click `,_jsx(_components.strong,{children:`Not a Match`}),`. If the registry returned more than 1 record, Visitor shows the next one. Compare it, and click `,_jsx(_components.strong,{children:`Not a Match`}),` or `,_jsx(_components.strong,{children:`Confirm Match`}),`. After the last record, the `,_jsx(_components.strong,{children:`Not a Match`}),` dialog opens.`]}),`\n`,_jsxs(_components.li,{children:[`For a `,_jsx(_components.strong,{children:`Potential Offender Match`}),`, optionally select `,_jsx(_components.strong,{children:`Permanently dismiss these matches for this visitor`}),`. Visitor then stops raising these records for this visitor at your site. A permanent dismissal can’t be undone. Follow your school’s procedures. For how dismissals work, see `,_jsx(_components.a,{href:`/products/visitor/visitor-screening#dismiss-a-match-permanently`,children:`Understand Visitor Screening`}),`.`]}),`\n`,_jsxs(_components.li,{children:[`Click `,_jsx(_components.strong,{children:`Mark Not a Match`}),`.`]}),`\n`,_jsx(_components.li,{children:`Verify the result: The alert banner is gone, and the visitor can finish checking in or out.`}),`\n`]}),`\n`,_jsx(_components.p,{children:`A watchlist match can’t be dismissed permanently. If the visitor resembles a watchlist entry, it’s a possible match on each visit.`}),`\n`,_jsx(Heading,{level:`2`,id:`confirm-a-match`,children:`Confirm a Match`}),`\n`,_jsxs(_components.p,{children:[`Choose `,_jsx(_components.strong,{children:`Confirm Match`}),` only when you’re confident the visitor is the one in the record. Visitor then denies the check-in or check-out and alerts the notification lists for that match right away.`]}),`\n`,_jsxs(_components.ol,{children:[`\n`,_jsxs(_components.li,{children:[`On the possible match, click `,_jsx(_components.strong,{children:`Confirm Match`}),`.`]}),`\n`,_jsxs(_components.li,{children:[`Read the `,_jsx(_components.strong,{children:`Confirm Match and Notify Staff`}),` dialog. It shows how many staff members will be notified and through which notification lists:`,`\n`,_jsxs(_components.ul,{children:[`\n`,_jsx(_components.li,{children:`For a possible offender match: your site’s default notification list.`}),`\n`,_jsx(_components.li,{children:`For a possible watchlist match: the notification lists attached to the watchlist.\nIf no one will be notified, the dialog says why, such as “No one will be notified because a default notification list isn’t set up.”`}),`\n`]}),`\n`]}),`\n`,_jsxs(_components.li,{children:[`Click `,_jsx(_components.strong,{children:`Confirm Match`}),`. `,_jsx(_components.strong,{children:`Escalation Started`}),` means Visitor sent the alert to the notification lists. If no notification list with members is set up, you see `,_jsx(_components.strong,{children:`No Staff Notified`}),` instead.`]}),`\n`,_jsxs(_components.li,{children:[`Click `,_jsx(_components.strong,{children:`Done`}),`, then follow your school’s procedures for a confirmed match.`]}),`\n`,_jsx(_components.li,{children:`Verify the result: The alert banner is gone.`}),`\n`]}),`\n`,_jsxs(_components.p,{children:[`The check-in’s `,_jsx(_components.strong,{children:`Activity Log`}),` details keep the record you confirmed and show who confirmed it. For what notified staff receive, see `,_jsx(_components.a,{href:`/products/visitor/respond-to-a-visitor-alert`,children:`Respond to a Visitor Alert`}),`.`]}),`\n`,_jsx(OptimizedImage,{src:`https://mintcdn.com/goguardian/vbbcOHBdrxzrcZoi/images/screenshots/review-screening-alerts/04-confirm-match-dialog.png?fit=max\u0026auto=format\u0026n=vbbcOHBdrxzrcZoi\u0026q=85\u0026s=938284004a34127383d50933a4ac986e`,alt:`Confirm Match and Notify Staff dialog saying 3 people will be notified through the Front Office Safety notification list, with Go Back and Confirm Match`,\"data-og-width\":`1440`,width:`1440`,\"data-og-height\":`900`,height:`900`,\"data-path\":`images/screenshots/review-screening-alerts/04-confirm-match-dialog.png`,\"data-optimize\":`true`,\"data-opv\":`3`,srcset:`https://mintcdn.com/goguardian/vbbcOHBdrxzrcZoi/images/screenshots/review-screening-alerts/04-confirm-match-dialog.png?w=280\u0026fit=max\u0026auto=format\u0026n=vbbcOHBdrxzrcZoi\u0026q=85\u0026s=c92e8c6992fbd08e9118f47c043811ab 280w, https://mintcdn.com/goguardian/vbbcOHBdrxzrcZoi/images/screenshots/review-screening-alerts/04-confirm-match-dialog.png?w=560\u0026fit=max\u0026auto=format\u0026n=vbbcOHBdrxzrcZoi\u0026q=85\u0026s=145cc148a5086138509ebd838f91ccd6 560w, https://mintcdn.com/goguardian/vbbcOHBdrxzrcZoi/images/screenshots/review-screening-alerts/04-confirm-match-dialog.png?w=840\u0026fit=max\u0026auto=format\u0026n=vbbcOHBdrxzrcZoi\u0026q=85\u0026s=fbc08734de1843612d0fcffade97c5e3 840w, https://mintcdn.com/goguardian/vbbcOHBdrxzrcZoi/images/screenshots/review-screening-alerts/04-confirm-match-dialog.png?w=1100\u0026fit=max\u0026auto=format\u0026n=vbbcOHBdrxzrcZoi\u0026q=85\u0026s=9057c89a24066742e7136f252c7f0cb6 1100w, https://mintcdn.com/goguardian/vbbcOHBdrxzrcZoi/images/screenshots/review-screening-alerts/04-confirm-match-dialog.png?w=1650\u0026fit=max\u0026auto=format\u0026n=vbbcOHBdrxzrcZoi\u0026q=85\u0026s=02ca40071765dd5789f2a2f29041734d 1650w, https://mintcdn.com/goguardian/vbbcOHBdrxzrcZoi/images/screenshots/review-screening-alerts/04-confirm-match-dialog.png?w=2500\u0026fit=max\u0026auto=format\u0026n=vbbcOHBdrxzrcZoi\u0026q=85\u0026s=6b8777b0dbadc71228f2dacadb7e8954 2500w`}),`\n`,_jsx(Heading,{level:`2`,id:`review-a-flagged-answer`,children:`Review a Flagged Answer`}),`\n`,_jsxs(_components.p,{children:[`A `,_jsx(_components.strong,{children:`Flagged Answer`}),` means the visitor or student chose an answer your school marked for review, such as answering yes when asked whether they feel sick. It’s a routine check, and it never notifies anyone.`]}),`\n`,_jsxs(_components.ol,{children:[`\n`,_jsxs(_components.li,{children:[`Click `,_jsx(_components.strong,{children:`Review Alerts`}),` on the alert.`]}),`\n`,_jsxs(_components.li,{children:[`Read the question and the answer in `,_jsx(_components.strong,{children:`Review Flagged Answer`}),`. Follow your school’s procedures, such as talking with the visitor or student.`]}),`\n`,_jsxs(_components.li,{children:[`Choose what to do:`,`\n`,_jsxs(_components.ul,{children:[`\n`,_jsxs(_components.li,{children:[`To let the check-in continue, click `,_jsx(_components.strong,{children:`Accept Answer`}),`, then click `,_jsx(_components.strong,{children:`Accept Answer`}),` to confirm.`]}),`\n`,_jsxs(_components.li,{children:[`To stop it, click `,_jsx(_components.strong,{children:`Deny Check-In`}),` (or `,_jsx(_components.strong,{children:`Deny Check-Out`}),`), then click it again to confirm.`]}),`\n`]}),`\n`]}),`\n`,_jsx(_components.li,{children:`Verify the result: The alert banner is gone.`}),`\n`]}),`\n`,_jsx(Heading,{level:`2`,id:`confirm-students-for-a-pickup`,children:`Confirm Students for a Pickup`}),`\n`,_jsxs(_components.p,{children:[_jsx(_components.strong,{children:`Confirm Students`}),` asks you to check that the visitor is approved to pick up the students they selected. Every pickup through a `,_jsx(_components.strong,{children:`Select Students`}),` step needs this confirmation before it completes. It’s a routine check, and it never notifies anyone.`]}),`\n`,_jsxs(_components.ol,{children:[`\n`,_jsxs(_components.li,{children:[`Click `,_jsx(_components.strong,{children:`Review`}),` on the alert.`]}),`\n`,_jsxs(_components.li,{children:[`Check the students listed under `,_jsx(_components.strong,{children:`Select Students`}),` against your school’s pickup records.`]}),`\n`,_jsxs(_components.li,{children:[`Choose what to do:`,`\n`,_jsxs(_components.ul,{children:[`\n`,_jsxs(_components.li,{children:[`If the visitor is approved for every student, click `,_jsx(_components.strong,{children:`Confirm Students`}),`, then click `,_jsx(_components.strong,{children:`Confirm Students`}),` to confirm.`]}),`\n`,_jsxs(_components.li,{children:[`If not, click `,_jsx(_components.strong,{children:`Deny Check-Out`}),` (or `,_jsx(_components.strong,{children:`Deny Check-In`}),`), then click it again to confirm.`]}),`\n`]}),`\n`]}),`\n`,_jsx(_components.li,{children:`Verify the result: The alert banner is gone.`}),`\n`]}),`\n`,_jsx(Heading,{level:`2`,id:`resolve-a-screening-error`,children:`Resolve a Screening Error`}),`\n`,_jsxs(_components.p,{children:[`A `,_jsx(_components.strong,{children:`Screening Error`}),` means an error stopped a check from running. It isn’t a match.`]}),`\n`,_jsxs(_components.ol,{children:[`\n`,_jsxs(_components.li,{children:[`Click `,_jsx(_components.strong,{children:`Review`}),` on the alert.`]}),`\n`,_jsxs(_components.li,{children:[`Find the check that shows `,_jsx(_components.strong,{children:`Error`}),`: `,_jsx(_components.strong,{children:`Offender registry`}),` or `,_jsx(_components.strong,{children:`Watchlist`}),`.`]}),`\n`,_jsxs(_components.li,{children:[`Click `,_jsx(_components.strong,{children:`Retry Screening`}),`.`]}),`\n`,_jsxs(_components.li,{children:[`If the error comes back and your school’s procedures allow it, click `,_jsx(_components.strong,{children:`Skip Screening`}),`, then click `,_jsx(_components.strong,{children:`Skip Screening`}),` to confirm. The check-in can then be completed without the checks that had an error.`]}),`\n`,_jsxs(_components.li,{children:[`Verify the result: The alert banner is gone. If you skipped screening, the check-in shows `,_jsx(_components.strong,{children:`Screening Skipped`}),`, and its `,_jsx(_components.strong,{children:`Activity Log`}),` details show who skipped each check.`]}),`\n`]}),`\n`,_jsx(_components.p,{children:`If screening errors keep happening, tell your IT team which check had the error and when.`}),`\n`,_jsx(OptimizedImage,{src:`https://mintcdn.com/goguardian/vbbcOHBdrxzrcZoi/images/screenshots/review-screening-alerts/05-screening-error.png?fit=max\u0026auto=format\u0026n=vbbcOHBdrxzrcZoi\u0026q=85\u0026s=b193abf9269f6f7a62d5444b6eac8c8b`,alt:`Screening Error dialog with Offender registry showing Error and Watchlist showing Completed, and Cancel, Skip Screening, and Retry Screening`,\"data-og-width\":`1440`,width:`1440`,\"data-og-height\":`900`,height:`900`,\"data-path\":`images/screenshots/review-screening-alerts/05-screening-error.png`,\"data-optimize\":`true`,\"data-opv\":`3`,srcset:`https://mintcdn.com/goguardian/vbbcOHBdrxzrcZoi/images/screenshots/review-screening-alerts/05-screening-error.png?w=280\u0026fit=max\u0026auto=format\u0026n=vbbcOHBdrxzrcZoi\u0026q=85\u0026s=7bc5aa0a82edd01b046d10da65356185 280w, https://mintcdn.com/goguardian/vbbcOHBdrxzrcZoi/images/screenshots/review-screening-alerts/05-screening-error.png?w=560\u0026fit=max\u0026auto=format\u0026n=vbbcOHBdrxzrcZoi\u0026q=85\u0026s=7690b0537dc160bb0f7db0c9cd3aab9a 560w, https://mintcdn.com/goguardian/vbbcOHBdrxzrcZoi/images/screenshots/review-screening-alerts/05-screening-error.png?w=840\u0026fit=max\u0026auto=format\u0026n=vbbcOHBdrxzrcZoi\u0026q=85\u0026s=b6c66f1dac5ad099384fcebf89131a7b 840w, https://mintcdn.com/goguardian/vbbcOHBdrxzrcZoi/images/screenshots/review-screening-alerts/05-screening-error.png?w=1100\u0026fit=max\u0026auto=format\u0026n=vbbcOHBdrxzrcZoi\u0026q=85\u0026s=df9edb69e9a3ac5e3247b663e8cd3d0e 1100w, https://mintcdn.com/goguardian/vbbcOHBdrxzrcZoi/images/screenshots/review-screening-alerts/05-screening-error.png?w=1650\u0026fit=max\u0026auto=format\u0026n=vbbcOHBdrxzrcZoi\u0026q=85\u0026s=548bfb245c3804ded55d0fb109a9bc38 1650w, https://mintcdn.com/goguardian/vbbcOHBdrxzrcZoi/images/screenshots/review-screening-alerts/05-screening-error.png?w=2500\u0026fit=max\u0026auto=format\u0026n=vbbcOHBdrxzrcZoi\u0026q=85\u0026s=92945a65e37f3742d06ba33652d343bb 2500w`}),`\n`,_jsx(Heading,{level:`2`,id:`understand-what-the-visitor-sees`,children:`Understand What the Visitor Sees`}),`\n`,_jsx(_components.p,{children:`On a kiosk, the visitor keeps filling out the form while you review. If they finish first, the kiosk shows “Please wait” until you decide. They never see what screening found.`}),`\n`,_jsx(_components.p,{children:`If you deny the check-in or check-out, or confirm a match, the kiosk shows “You could not check in” and “Please see the front desk.”`}),`\n`,_jsx(OptimizedImage,{src:`https://mintcdn.com/goguardian/vbbcOHBdrxzrcZoi/images/screenshots/kiosk-check-in-experience/07-please-wait.png?fit=max\u0026auto=format\u0026n=vbbcOHBdrxzrcZoi\u0026q=85\u0026s=4759074edc4382071e071325d608404b`,alt:`Kiosk Please wait screen saying a staff member is reviewing the check-in`,\"data-og-width\":`810`,width:`810`,\"data-og-height\":`1080`,height:`1080`,\"data-path\":`images/screenshots/kiosk-check-in-experience/07-please-wait.png`,\"data-optimize\":`true`,\"data-opv\":`3`,srcset:`https://mintcdn.com/goguardian/vbbcOHBdrxzrcZoi/images/screenshots/kiosk-check-in-experience/07-please-wait.png?w=280\u0026fit=max\u0026auto=format\u0026n=vbbcOHBdrxzrcZoi\u0026q=85\u0026s=8cf9d95dac7e21316aa2965ff7514055 280w, https://mintcdn.com/goguardian/vbbcOHBdrxzrcZoi/images/screenshots/kiosk-check-in-experience/07-please-wait.png?w=560\u0026fit=max\u0026auto=format\u0026n=vbbcOHBdrxzrcZoi\u0026q=85\u0026s=8c0491508275dc2b8eb87660f9d32bc2 560w, https://mintcdn.com/goguardian/vbbcOHBdrxzrcZoi/images/screenshots/kiosk-check-in-experience/07-please-wait.png?w=840\u0026fit=max\u0026auto=format\u0026n=vbbcOHBdrxzrcZoi\u0026q=85\u0026s=8624ade22ca88e932bc3e6946cf4347b 840w, https://mintcdn.com/goguardian/vbbcOHBdrxzrcZoi/images/screenshots/kiosk-check-in-experience/07-please-wait.png?w=1100\u0026fit=max\u0026auto=format\u0026n=vbbcOHBdrxzrcZoi\u0026q=85\u0026s=ae84df6dc69bfdc72922fb5914c152fc 1100w, https://mintcdn.com/goguardian/vbbcOHBdrxzrcZoi/images/screenshots/kiosk-check-in-experience/07-please-wait.png?w=1650\u0026fit=max\u0026auto=format\u0026n=vbbcOHBdrxzrcZoi\u0026q=85\u0026s=d95c7f785c40b9143acc3c3896726e2a 1650w, https://mintcdn.com/goguardian/vbbcOHBdrxzrcZoi/images/screenshots/kiosk-check-in-experience/07-please-wait.png?w=2500\u0026fit=max\u0026auto=format\u0026n=vbbcOHBdrxzrcZoi\u0026q=85\u0026s=18b7a71d8d267e5c0b3144b32e091873 2500w`}),`\n`,_jsx(OptimizedImage,{src:`https://mintcdn.com/goguardian/vbbcOHBdrxzrcZoi/images/screenshots/review-screening-alerts/06-kiosk-denied.png?fit=max\u0026auto=format\u0026n=vbbcOHBdrxzrcZoi\u0026q=85\u0026s=2d6b0f98d7e19c6d3a0e40c5b68f44fb`,alt:`Kiosk screen saying You could not check in and Please see the front desk, with Return to Start`,\"data-og-width\":`810`,width:`810`,\"data-og-height\":`1080`,height:`1080`,\"data-path\":`images/screenshots/review-screening-alerts/06-kiosk-denied.png`,\"data-optimize\":`true`,\"data-opv\":`3`,srcset:`https://mintcdn.com/goguardian/vbbcOHBdrxzrcZoi/images/screenshots/review-screening-alerts/06-kiosk-denied.png?w=280\u0026fit=max\u0026auto=format\u0026n=vbbcOHBdrxzrcZoi\u0026q=85\u0026s=cb6dbed93f34a76ac6fb7b470908a183 280w, https://mintcdn.com/goguardian/vbbcOHBdrxzrcZoi/images/screenshots/review-screening-alerts/06-kiosk-denied.png?w=560\u0026fit=max\u0026auto=format\u0026n=vbbcOHBdrxzrcZoi\u0026q=85\u0026s=98f1f047d2cd3e1fd630f43d12712ec1 560w, https://mintcdn.com/goguardian/vbbcOHBdrxzrcZoi/images/screenshots/review-screening-alerts/06-kiosk-denied.png?w=840\u0026fit=max\u0026auto=format\u0026n=vbbcOHBdrxzrcZoi\u0026q=85\u0026s=8eea5bc42303df2ba73977902eac63db 840w, https://mintcdn.com/goguardian/vbbcOHBdrxzrcZoi/images/screenshots/review-screening-alerts/06-kiosk-denied.png?w=1100\u0026fit=max\u0026auto=format\u0026n=vbbcOHBdrxzrcZoi\u0026q=85\u0026s=a276b81fde333c29aa046c3efb09fd42 1100w, https://mintcdn.com/goguardian/vbbcOHBdrxzrcZoi/images/screenshots/review-screening-alerts/06-kiosk-denied.png?w=1650\u0026fit=max\u0026auto=format\u0026n=vbbcOHBdrxzrcZoi\u0026q=85\u0026s=4d3d9542abb00de9c2490e392f0c7844 1650w, https://mintcdn.com/goguardian/vbbcOHBdrxzrcZoi/images/screenshots/review-screening-alerts/06-kiosk-denied.png?w=2500\u0026fit=max\u0026auto=format\u0026n=vbbcOHBdrxzrcZoi\u0026q=85\u0026s=ad3beb740a8c250688422078648fbc47 2500w`}),`\n`,_jsx(Heading,{level:`2`,id:`troubleshoot-screening-alerts`,children:`Troubleshoot Screening Alerts`}),`\n`,_jsxs(Table,{children:[_jsx(_components.thead,{children:_jsxs(_components.tr,{children:[_jsx(_components.th,{children:`Problem`}),_jsx(_components.th,{children:`Cause`}),_jsx(_components.th,{children:`Fix`})]})}),_jsxs(_components.tbody,{children:[_jsxs(_components.tr,{children:[_jsx(_components.td,{children:`The alert closed while you were reviewing it`}),_jsx(_components.td,{children:`Another staff member decided first, or a staff member corrected the identity and ran screening again.`}),_jsxs(_components.td,{children:[`Check the `,_jsx(_components.strong,{children:`Front Desk`}),` for a new alert. The `,_jsx(_components.strong,{children:`Activity Log`}),` shows who decided.`]})]}),_jsxs(_components.tr,{children:[_jsx(_components.td,{children:`You don’t see an alert another staff member sees`}),_jsx(_components.td,{children:`You aren’t assigned to the check-in point where the check-in started.`}),_jsxs(_components.td,{children:[`Ask a Site Admin to assign you to the check-in point. See `,_jsx(_components.a,{href:`/products/visitor/check-in-points`,children:`Check-In Points`}),`.`]})]}),_jsxs(_components.tr,{children:[_jsx(_components.td,{children:`Screening finds the same possible match on every visit`}),_jsxs(_components.td,{children:[`Visitor checks watchlists on every visit, and `,_jsx(_components.strong,{children:`Not a Match`}),` applies to 1 visit.`]}),_jsxs(_components.td,{children:[`Choose `,_jsx(_components.strong,{children:`Not a Match`}),` each time, and ask a Site Admin to check the watchlist entry. For a registry match, select `,_jsx(_components.strong,{children:`Permanently dismiss these matches for this visitor`}),`.`]})]}),_jsxs(_components.tr,{children:[_jsxs(_components.td,{children:[_jsx(_components.strong,{children:`No Staff Notified`}),` after you confirmed a match`]}),_jsx(_components.td,{children:`No notification list with members is set up for the match.`}),_jsxs(_components.td,{children:[`Follow your school’s procedures to reach the right staff now. Then ask a Site Admin to set up notification lists. See `,_jsx(_components.a,{href:`/products/visitor/notification-lists`,children:`Notification Lists`}),`.`]})]}),_jsxs(_components.tr,{children:[_jsx(_components.td,{children:`A possible match appeared for a misread ID`}),_jsx(_components.td,{children:`The ID scan read a detail wrong, such as the date of birth.`}),_jsxs(_components.td,{children:[`In `,_jsx(_components.strong,{children:`Confirm Identity`}),`, correct the detail and click `,_jsx(_components.strong,{children:`Run Security Screening Again`}),`.`]})]})]})]}),`\n`,_jsx(Heading,{level:`2`,id:`resources`,children:`Resources`}),`\n`,_jsxs(_components.ul,{children:[`\n`,_jsx(_components.li,{children:_jsx(_components.a,{href:`/products/visitor/visitor-screening`,children:`Understand Visitor Screening`})}),`\n`,_jsx(_components.li,{children:_jsx(_components.a,{href:`/products/visitor/respond-to-a-visitor-alert`,children:`Respond to a Visitor Alert`})}),`\n`,_jsx(_components.li,{children:_jsx(_components.a,{href:`/products/visitor/front-desk`,children:`Use the Front Desk`})}),`\n`,_jsx(_components.li,{children:_jsx(_components.a,{href:`/products/visitor/watchlists`,children:`Watchlists`})}),`\n`,_jsx(_components.li,{children:_jsx(_components.a,{href:`/products/visitor/notification-lists`,children:`Notification Lists`})}),`\n`,_jsx(_components.li,{children:_jsx(_components.a,{href:`/products/visitor/activity-log`,children:`Activity Log`})}),`\n`]})]})}function MDXContent(props={}){const{wrapper:MDXLayout}={..._provideComponents(),...props.components};return MDXLayout?_jsx(MDXLayout,{...props,children:_jsx(_createMdxContent,{...props})}):_createMdxContent(props)}return{default:MDXContent};function _missingMdxReference(id,component){throw new Error(`Expected `+(component?`component`:`object`)+\" `\"+id+\"` to be defined: you likely forgot to import, pass, or provide it.\")}","frontmatter":{},"scope":{"config":{},"pageMetadata":{"title":"Review Screening Alerts","description":"Review possible sex offender registry and watchlist matches, flagged answers, and student pickups on the GoGuardian Visitor Front Desk.","last_reviewed":"November 2026","article_type":"How-To","products":"GoGuardian Visitor","audience":"Administrators, Staff","keywords":["review visitor alert","possible offender match","possible watchlist match","confirm match or not a match","visitor check-in paused","flagged answer review","confirm students pickup","screening error retry skip","kiosk needs review","no staff notified"],"href":"/products/visitor/review-screening-alerts"}}},"mdxSourceWithNoJs":null},"mdxExtracts":{"tableOfContents":[{"title":"Find Alerts Waiting for Review","slug":"find-alerts-waiting-for-review","depth":2,"children":[]},{"title":"Review a Possible Match","slug":"review-a-possible-match","depth":2,"children":[]},{"title":"Mark Not a Match","slug":"mark-not-a-match","depth":2,"children":[]},{"title":"Confirm a Match","slug":"confirm-a-match","depth":2,"children":[]},{"title":"Review a Flagged Answer","slug":"review-a-flagged-answer","depth":2,"children":[]},{"title":"Confirm Students for a Pickup","slug":"confirm-students-for-a-pickup","depth":2,"children":[]},{"title":"Resolve a Screening Error","slug":"resolve-a-screening-error","depth":2,"children":[]},{"title":"Understand What the Visitor Sees","slug":"understand-what-the-visitor-sees","depth":2,"children":[]},{"title":"Troubleshoot Screening Alerts","slug":"troubleshoot-screening-alerts","depth":2,"children":[]},{"title":"Resources","slug":"resources","depth":2,"children":[]}],"codeExamples":{}},"jsLinks":["/_mintlify/custom/goguardian/6782fcf1d7fb5a3b/scripts/scrape-and-convert.js","/_mintlify/custom/goguardian/8381199bed4c67a2/scripts/scrape-articles.js","/_mintlify/custom/goguardian/2c3caca81eed856c/scripts/build-dashboard-data.js","/_mintlify/custom/goguardian/e8b250ad39ec8372/bot.js","/_mintlify/custom/goguardian/d06a21d0e2ea70ca/scripts/legacy-screenshot/build-mapping.js","/_mintlify/custom/goguardian/7f2923f811257823/scripts/legacy-screenshot/lib.js","/_mintlify/custom/goguardian/073ab821f8b5f779/scripts/legacy-screenshot/migrate-article.js","/_mintlify/custom/goguardian/d7c722b087def904/scripts/legacy-screenshot/migrate-batch.js","/_mintlify/custom/goguardian/3e4031e7a1248e44/scripts/legacy-screenshot/migrate-core.js","/_mintlify/custom/goguardian/a8f363b6346cb963/scripts/legacy-screenshot/preview.js","/_mintlify/custom/goguardian/4031161c6df3f968/scripts/pull-mintlify-analytics-full.js","/_mintlify/custom/goguardian/de6381608244a6eb/scripts/check-nav-orphans.js"],"subdomain":"goguardian","siteName":"GoGuardian","title":"Review Screening Alerts - GoGuardian","navMaps":{"firstHrefInVersion":{},"firstHrefInLanguage":{}},"lastModified":"2026-11-03T01:53:04.907Z","gitLastModified":"2026-11-03T01:52:40.000Z","originalFileLocation":"products/visitor/review-screening-alerts.mdx"},"headHtml":"\u003cscript data-mint-head>(function(){var d=document.documentElement,p=null;if(!p){try{p=localStorage.getItem(\"isDarkMode\")}catch(e){}if(p==='true')p='dark';else if(p==='false')p='light';if(p!=='light'\u0026\u0026p!=='dark'\u0026\u0026p!=='system')p=\"system\"}var r=p==='system'?(matchMedia(\"(prefers-color-scheme: dark)\").matches?'dark':'light'):p;d.classList.remove(r==='dark'?'light':'dark');d.classList.add(r);d.setAttribute(\"data-theme-preference\",p)})();\u003c/script>\u003cmeta data-mint-head name=\"description\" content=\"Review possible sex offender registry and watchlist matches, flagged answers, and student pickups on the GoGuardian Visitor Front Desk.\">\u003cmeta data-mint-head name=\"application-name\" content=\"GoGuardian\">\u003cmeta data-mint-head name=\"generator\" content=\"Mintlify\">\u003clink data-mint-head rel=\"apple-touch-icon\" type=\"image/png\" sizes=\"180x180\" href=\"https://media.brand.dev/fb6d60c3-9a7a-4a85-a889-7a95764fa5ed.png\">\u003clink data-mint-head rel=\"icon\" type=\"image/png\" sizes=\"32x32\" href=\"https://media.brand.dev/fb6d60c3-9a7a-4a85-a889-7a95764fa5ed.png\">\u003clink data-mint-head rel=\"icon\" type=\"image/png\" sizes=\"16x16\" href=\"https://media.brand.dev/fb6d60c3-9a7a-4a85-a889-7a95764fa5ed.png\">\u003clink data-mint-head rel=\"shortcut icon\" type=\"image/png\" href=\"https://media.brand.dev/fb6d60c3-9a7a-4a85-a889-7a95764fa5ed.png\">\u003cmeta data-mint-head property=\"og:title\" content=\"Review Screening Alerts - GoGuardian\">\u003cmeta data-mint-head property=\"og:description\" content=\"Review possible sex offender registry and watchlist matches, flagged answers, and student pickups on the GoGuardian Visitor Front Desk.\">\u003cmeta data-mint-head property=\"og:site_name\" content=\"GoGuardian Help Center\">\u003cmeta data-mint-head property=\"og:url\" content=\"https://docs.goguardian.com/products/visitor/review-screening-alerts\">\u003cmeta data-mint-head property=\"og:type\" content=\"website\">\u003cmeta data-mint-head property=\"og:image\" content=\"https://goguardian.mintlify.app/_mintlify/api/og/v2?division=Front+Desk\u0026amp;title=Review+Screening+Alerts\u0026amp;description=Review+possible+sex+offender+registry+and+watchlist+matches%2C+flagged+answers%2C+and+student+pickups+on+the+GoGuardian+Visitor+Front+Desk.\u0026amp;theme=a478a7b878d5e32243ff1cc9\u0026amp;signature=0bd15051eed6a08161c646cc394383e1fc52ae71464be73be4886f241b28c77b\">\u003cmeta data-mint-head property=\"og:image:width\" content=\"1200\">\u003cmeta data-mint-head property=\"og:image:height\" content=\"630\">\u003cmeta data-mint-head name=\"twitter:card\" content=\"summary_large_image\">\u003cmeta data-mint-head name=\"twitter:title\" content=\"Review Screening Alerts - GoGuardian\">\u003cmeta data-mint-head name=\"twitter:description\" content=\"Review possible sex offender registry and watchlist matches, flagged answers, and student pickups on the GoGuardian Visitor Front Desk.\">\u003cmeta data-mint-head name=\"twitter:image\" content=\"https://goguardian.mintlify.app/_mintlify/api/og/v2?division=Front+Desk\u0026amp;title=Review+Screening+Alerts\u0026amp;description=Review+possible+sex+offender+registry+and+watchlist+matches%2C+flagged+answers%2C+and+student+pickups+on+the+GoGuardian+Visitor+Front+Desk.\u0026amp;theme=a478a7b878d5e32243ff1cc9\u0026amp;signature=0bd15051eed6a08161c646cc394383e1fc52ae71464be73be4886f241b28c77b\">\u003cmeta data-mint-head name=\"twitter:image:width\" content=\"1200\">\u003cmeta data-mint-head name=\"twitter:image:height\" content=\"630\">\u003cmeta data-mint-head name=\"msapplication-config\" content=\"https://mintlify.s3.us-west-1.amazonaws.com/goguardian/_generated/favicon/browserconfig.xml?v=3\">\u003cmeta data-mint-head name=\"apple-mobile-web-app-title\" content=\"GoGuardian\">\u003cmeta data-mint-head name=\"msapplication-TileColor\" content=\"#0A59A3\">\u003clink data-mint-head rel=\"canonical\" href=\"https://docs.goguardian.com/products/visitor/review-screening-alerts\">\u003clink data-mint-head rel=\"alternate\" type=\"application/xml\" href=\"/sitemap.xml\">\u003clink data-mint-head rel=\"alternate\" type=\"text/markdown\" href=\"/products/visitor/review-screening-alerts.md\">\u003cscript data-mint-head type=\"application/ld+json\">{\"@context\":\"https://schema.org\",\"@graph\":[{\"@type\":\"Organization\",\"@id\":\"https://docs.goguardian.com/#organization\",\"name\":\"GoGuardian\",\"url\":\"https://docs.goguardian.com\",\"logo\":{\"@type\":\"ImageObject\",\"url\":\"https://mintcdn.com/goguardian/08olqC3O-Uu3gBIf/images/logo/gg-pdl-lockup.svg?fit=max\u0026auto=format\u0026n=08olqC3O-Uu3gBIf\u0026q=85\u0026s=4e52b3255e2eae1b6b38419db0a1bf62\"}},{\"@type\":\"WebSite\",\"@id\":\"https://docs.goguardian.com#website\",\"name\":\"GoGuardian\",\"url\":\"https://docs.goguardian.com\",\"publisher\":{\"@id\":\"https://docs.goguardian.com/#organization\"}},{\"@type\":\"WebPage\",\"@id\":\"https://docs.goguardian.com/products/visitor/review-screening-alerts#webpage\",\"url\":\"https://docs.goguardian.com/products/visitor/review-screening-alerts\",\"name\":\"Review Screening Alerts\",\"description\":\"Review possible sex offender registry and watchlist matches, flagged answers, and student pickups on the GoGuardian Visitor Front Desk.\",\"dateModified\":\"2026-11-03T01:52:40.000Z\",\"isPartOf\":{\"@id\":\"https://docs.goguardian.com#website\"},\"breadcrumb\":{\"@id\":\"https://docs.goguardian.com/products/visitor/review-screening-alerts#breadcrumb\"}},{\"@type\":\"BreadcrumbList\",\"@id\":\"https://docs.goguardian.com/products/visitor/review-screening-alerts#breadcrumb\",\"itemListElement\":[{\"@type\":\"ListItem\",\"position\":1,\"name\":\"Products\",\"item\":\"https://docs.goguardian.com/products/admin\"},{\"@type\":\"ListItem\",\"position\":2,\"name\":\"Visitor\",\"item\":\"https://docs.goguardian.com/products/visitor\"},{\"@type\":\"ListItem\",\"position\":3,\"name\":\"Front Desk\",\"item\":\"https://docs.goguardian.com/products/visitor/front-desk\"},{\"@type\":\"ListItem\",\"position\":4,\"name\":\"Review Screening Alerts\",\"item\":\"https://docs.goguardian.com/products/visitor/review-screening-alerts\"}]},{\"@type\":[\"Article\",\"TechArticle\"],\"@id\":\"https://docs.goguardian.com/products/visitor/review-screening-alerts#article\",\"headline\":\"Review Screening Alerts\",\"name\":\"Review Screening Alerts\",\"description\":\"Review possible sex offender registry and watchlist matches, flagged answers, and student pickups on the GoGuardian Visitor Front Desk.\",\"url\":\"https://docs.goguardian.com/products/visitor/review-screening-alerts\",\"mainEntityOfPage\":{\"@id\":\"https://docs.goguardian.com/products/visitor/review-screening-alerts#webpage\"},\"dateModified\":\"2026-11-03T01:52:40.000Z\",\"keywords\":\"review visitor alert, possible offender match, possible watchlist match, confirm match or not a match, visitor check-in paused, flagged answer review, confirm students pickup, screening error retry skip, kiosk needs review, no staff notified\",\"publisher\":{\"@id\":\"https://docs.goguardian.com/#organization\"},\"isPartOf\":{\"@id\":\"https://docs.goguardian.com#website\"}}]}\u003c/script>\u003cscript data-mint-head type=\"application/ld+json\">{\"@context\":\"https://schema.org\",\"@type\":\"WebSite\",\"name\":\"GoGuardian\",\"creator\":{\"@type\":\"Organization\",\"name\":\"Mintlify\",\"url\":\"https://mintlify.com\"}}\u003c/script>","siteName":"GoGuardian","nav":{"global":null,"tabs":[{"tab":"GoGuardian","groups":[{"group":"Getting Started","expanded":false,"pages":[{"title":"GoGuardian Help Center","sidebarTitle":"Welcome","href":"/welcome"},{"title":"Prepare for Onboarding","href":"/getting-started"},{"group":"GoGuardian Extensions","pages":[{"title":"Install GoGuardian Extensions and Configure Google Admin Console","href":"/products/admin/install-extensions"},{"title":"Verify the GoGuardian Extension Deployment","href":"/products/org-management/verify-extension-deployment"}]},{"group":"The GoGuardian App","pages":[{"title":"Overview","href":"/products/gg-app/overview"},{"title":"The GoGuardian App on Windows","href":"/products/gg-app/windows"},{"title":"The GoGuardian App on iPad","href":"/products/gg-app/ipad"},{"title":"The GoGuardian App on macOS","href":"/products/gg-app/macos"}]}]},{"group":"Products","pages":[{"group":"Admin","expanded":false,"pages":[{"title":"Overview","sidebarTitle":"Overview","href":"/products/admin"},{"group":"Filtering","pages":[{"title":"Overview","href":"/products/admin/filtering-overview"},{"title":"Apply Recommendations in GoGuardian Admin","href":"/products/admin/recommendation-engine"},{"group":"Policies","pages":[{"title":"Understand Filtering Policies","href":"/products/admin/filtering-policies"},{"title":"How Filtering Rules Interact","href":"/products/admin/how-filtering-rules-interact"},{"title":"Create a Filtering Policy","href":"/products/admin/create-a-filtering-policy"},{"title":"Block Multiple Google Account Sign-Ins","href":"/products/admin/block-multiple-google-account-sign-ins"},{"title":"Allow and Block Websites","href":"/products/admin/block-and-allow-websites"},{"title":"Update Multiple Policies with Quick Editor","href":"/products/admin/use-quick-editor"},{"title":"Use Wildcard Rules in Policies","href":"/products/admin/filtering-with-wildcards"},{"title":"Use Auto-Format Domains for Website URL Rules","href":"/products/admin/auto-format-domains"},{"title":"Review Website Categories","href":"/products/admin/website-categories"},{"title":"Block Uncategorized Websites","href":"/products/admin/block-uncategorized-websites"},{"title":"Simulate Policies","href":"/products/admin/filtering-simulator"},{"title":"Understand Block Pages","href":"/products/admin/block-pages"},{"title":"Manage Custom Groups","href":"/products/admin/custom-groups"},{"title":"Sync Entra Groups to Admin Custom Groups","href":"/products/admin/entra-custom-groups-sync"},{"title":"Advanced Filtering Tips for GoGuardian Admin Policies","href":"/products/admin/advanced-filtering-tips"},{"title":"Filter Chrome Apps and Extensions in GoGuardian Admin","href":"/products/admin/filter-apps-and-extensions"},{"group":"YouTube Filtering","pages":[{"title":"Explore YouTube Filtering Layers","href":"/products/admin/youtube-filtering-layers"},{"title":"Configure YouTube Filtering","href":"/products/admin/youtube-filtering"},{"title":"Block Live Chat in YouTube","href":"/products/admin/block-live-chat-in-youtube"}]},{"group":"Custom Configuration","pages":[{"title":"Configure Bypass Passwords","href":"/products/admin/configure-bypass-passwords"},{"title":"Configure Global Filter Settings","href":"/products/admin/global-config"},{"title":"Configure Smart Rules","href":"/products/admin/smart-rules"},{"title":"GoGuardian Admin and Chromebook Desks","href":"/products/admin/chromebook-desks"},{"title":"Configure At-Home Filtering","href":"/products/admin/configure-at-home-filtering"},{"title":"Block Access to Personal Google Accounts","href":"/products/admin/block-personal-google-accounts"},{"title":"Customize the GoGuardian Admin Block Page","href":"/products/admin/customize-the-block-page"}]}]},{"group":"Smart Alerts","pages":[{"title":"Manage the Smart Alerts Allowlist","href":"/products/admin/smart-alerts-allowlist"},{"title":"Configure Smart Alerts Access","href":"/products/admin/smart-alerts-access"},{"title":"Configure Smart Alert Triggers","href":"/products/admin/configure-smart-alert-triggers"},{"title":"Compare Smart Alerts and Flagged Activity","href":"/products/admin/smart-alerts-vs-flagged-activity"},{"title":"Smart Alerts Image Filtering","href":"/products/admin/smart-alerts-image-filtering"},{"title":"Block Proxy Sites with Smart Alerts","href":"/products/admin/smart-alerts-for-proxies"},{"title":"Block Gaming Sites with Smart Alerts","href":"/products/admin/smart-alerts-for-games"},{"title":"Smart Alert Notifications and Email Alerts","href":"/products/admin/smart-alert-notifications-and-email-alerts"}]}]},{"group":"Reporting","pages":[{"title":"Overview","href":"/products/admin/reporting-overview"},{"group":"Dashboard","pages":[{"title":"Review the Admin Dashboard","href":"/products/admin/admin-dashboard"},{"title":"Review Browsing Activity","href":"/products/admin/browsing-activity"},{"title":"Review Student Activity","href":"/products/admin/student-activity"},{"title":"Review Screen Time Activity","href":"/products/admin/screen-time-activity"},{"title":"Use Global Search","href":"/products/admin/global-search"},{"title":"A Student Name Shows as Pending","href":"/products/admin/troubleshoot-pending-students"},{"title":"Review AI Activity with Prompt Visibility","href":"/products/admin/ai-activity-prompt-visibility"},{"title":"Understand AI Activity Classifications","href":"/products/admin/understand-ai-activity-classifications"}]},{"group":"Reports and Logs","pages":[{"title":"Export Student Reports","href":"/products/admin/export-student-reports"},{"title":"Review Exported Reports","href":"/products/admin/exported-reports"},{"title":"Look Up a Student by Device","href":"/products/admin/device-lookup"},{"title":"Review the Admin Audit Log","href":"/products/admin/audit-log"}]},{"group":"Flagged Activity","pages":[{"title":"Manage Flagged Activity","href":"/products/admin/manage-flagged-activity"},{"title":"Manage Flagged Terms ","href":"/products/admin/manage-flagged-terms"}]}]},{"group":"Troubleshooting","boost":6,"pages":[{"title":"Review Filtering Contexts","href":"/products/admin/filtering-contexts"},{"title":"Site Blocked Unexpectedly","href":"/products/admin/site-blocked-unexpectedly"},{"title":"Site Not Blocked Unexpectedly","href":"/products/admin/site-not-blocked-unexpectedly"},{"title":"Embedded Content Filtering","href":"/products/admin/troubleshoot-iframe-filtering"},{"title":"YouTube Video Blocked Unexpectedly","href":"/products/admin/youtube-video-blocked-unexpectedly"},{"title":"Google Searches Are Blocked Unexpectedly","href":"/products/admin/google-searches-blocked-unexpectedly"},{"title":"Block CROSH","href":"/products/admin/troubleshoot-crosh"},{"title":"Block Google Doodle Games","href":"/products/admin/block-google-doodle"},{"title":"A Device Is Not Filtering on the School Network","href":"/products/admin/device-not-filtering-on-school-network"},{"title":"A Windows Device Is Not Filtering","href":"/products/admin/windows-device-not-filtering"},{"title":"Troubleshoot Why a Website Is Blocked in GoGuardian Admin","href":"/products/admin/troubleshoot-blocked-websites"},{"title":"Troubleshoot Theft Recovery Devices and Statuses","href":"/products/admin/troubleshoot-theft-recovery"}]},{"group":"Theft Recovery","pages":[{"title":"Understand Theft Recovery","href":"/products/admin/theft-recovery"},{"title":"Set Up Theft Recovery","href":"/products/admin/set-up-theft-recovery"},{"title":"Migrate Chromebooks to New Theft Recovery Extension","href":"/products/admin/migrate-chromebooks-theft-recovery"},{"title":"Track a Missing Device","href":"/products/admin/track-a-missing-device"},{"title":"Recover a Missing Device","href":"/products/admin/recover-a-missing-device"},{"title":"Understand Data Collected by Theft Recovery","href":"/products/admin/theft-recovery-data-collected"}]},{"group":"Fleet","pages":[{"title":"Overview","href":"/products/fleet"},{"title":"How GoGuardian Fleet Works","href":"/products/fleet/understand-goguardian-fleet"},{"title":"FAQs","href":"/products/fleet/fleet-faqs"},{"group":"Users and Access","pages":[{"title":"Manage Fleet Users","href":"/products/fleet/manage-fleet-users"},{"title":"Grant a User Access to GoGuardian Fleet","href":"/products/fleet/grant-user-access-to-fleet"},{"title":"Revoke a User's Access to GoGuardian Fleet","href":"/products/fleet/revoke-fleet-access"}]},{"group":"Device Management","pages":[{"title":"Import Devices","href":"/products/fleet/import-devices"},{"title":"Sync with Google Admin Console","href":"/products/fleet/sync-with-google-admin-console"},{"title":"Search and Filter Devices","href":"/products/fleet/search-and-filter-devices"},{"title":"Update Device Status","href":"/products/fleet/update-device-status"},{"title":"Check Device Software Versions in GoGuardian Fleet","href":"/products/fleet/check-device-software-versions"},{"title":"Change Displayed Device Data in GoGuardian Fleet","href":"/products/fleet/change-displayed-device-data"}]},{"group":"Repairs","pages":[{"title":"Track Device Repairs","href":"/products/fleet/track-device-repairs"},{"title":"Export Repair Data","href":"/products/fleet/export-repair-data"},{"title":"Start a Device Repair in GoGuardian Fleet","href":"/products/fleet/start-a-device-repair"}]},{"group":"Troubleshooting","boost":6,"pages":[{"title":"Troubleshoot a Fleet Authorization Error","href":"/products/fleet/troubleshoot-fleet-authorization-error"}]}]},{"group":"DNS","pages":[{"title":"Overview","href":"/products/dns"},{"title":"Review DNS Traffic Data","href":"/products/dns/dns-reporting"},{"title":"FAQs","href":"/products/dns/dns-faqs"},{"group":"Network Configuration","pages":[{"title":"Set Up GoGuardian DNS","href":"/products/dns/set-up-goguardian-dns"},{"title":"Enable AdDeflect","href":"/products/dns/addeflect"},{"title":"Delete DNS Network","href":"/products/dns/delete-a-network"},{"title":"How GoGuardian DNS Works","href":"/products/dns/understand-goguardian-dns"}]},{"group":"Troubleshooting","boost":6,"pages":[{"title":"Fix DNS Resolver Connectivity","href":"/products/dns/troubleshoot-dns-resolvers"}]}]},{"title":"DNS Precision Filtering","href":"/products/admin/dns-precision-filtering"}]},{"group":"Beacon","expanded":false,"pages":[{"title":"Overview","href":"/products/beacon"},{"group":"Getting Started","pages":[{"title":"About GoGuardian Beacon","href":"/products/beacon/about-beacon"},{"title":"How Beacon Works","href":"/products/beacon/how-beacon-works"},{"title":"Beacon Glossary","href":"/products/beacon/beacon-glossary"},{"title":"Initial Setup Checklist","href":"/products/beacon/initial-setup-checklist"},{"title":"Best Practices: Beacon Rollout","href":"/products/beacon/best-practices-rollout"},{"title":"Tips and Resources","href":"/products/beacon/tips-and-resources"}]},{"group":"Beacon Settings","pages":[{"title":"Create a Deployment","href":"/products/beacon/create-a-deployment"},{"title":"Understand How Students Appear in GoGuardian Beacon","href":"/products/beacon/student-roster-sync"},{"title":"Configure Beacon Settings","href":"/products/beacon/configure-beacon-settings"},{"title":"Enable Threats and Violence Alert Categories","href":"/products/beacon/enable-categories"},{"title":"Alert Categories","href":"/products/beacon/alert-categories"},{"title":"Configure School Hours","href":"/products/beacon/configure-school-hours"},{"title":"Alert Preferences","href":"/products/beacon/alert-preferences"},{"title":"Schedule a Pause","href":"/products/beacon/schedule-a-pause"},{"title":"Set Up Your Profile","href":"/products/beacon/set-up-your-profile"},{"title":"Beacon API Coverage","href":"/products/beacon/beacon-api-coverage"},{"title":"Enable Enhanced Microsoft Outlook Monitoring","href":"/products/beacon/outlook-email-monitoring"},{"title":"Enable Google Docs Coverage in GoGuardian Beacon","href":"/products/beacon/enable-google-docs-coverage"},{"title":"Domain Wide Delegation for GoGuardian Beacon and Admin","href":"/products/beacon/domain-wide-delegation-beacon-admin"},{"title":"Enhanced Gmail Alert Cards","href":"/products/beacon/enhanced-gmail-alert-cards"}]},{"group":"Beacon 24/7","pages":[{"title":"Review a Beacon 24/7 Alert","href":"/products/beacon/review-a-247-alert"},{"title":"Grouped Alerts","href":"/products/beacon/grouped-alerts"},{"title":"Risk Levels","href":"/products/beacon/risk-levels"},{"title":"Alert Phases","href":"/products/beacon/alert-phases"},{"title":"Enable Enhanced Gmail Monitoring","href":"/products/beacon/enhanced-gmail-monitoring"},{"title":"Best Practices: Beacon 24/7","href":"/products/beacon/best-practices-247"},{"title":"Beacon 24/7 FAQ","href":"/products/beacon/247-faq"}]},{"group":"Users and Escalation","pages":[{"title":"Beacon User Roles and Permissions","href":"/products/beacon/user-roles-and-permissions"},{"title":"Add and Manage Beacon Users","href":"/products/beacon/manage-beacon-users"},{"title":"Configure Escalation Lists","href":"/products/beacon/escalation-lists"},{"title":"Configure a Beacon 24/7 Escalation List","href":"/products/beacon/247-escalation-list"},{"title":"Include Student Names in Email Notifications","href":"/products/beacon/include-student-names-in-notifications"}]},{"group":"Alerts and Dashboard","pages":[{"title":"Beacon Dashboard Overview","href":"/products/beacon/dashboard-overview"},{"title":"Alert Card Anatomy","href":"/products/beacon/alert-card-anatomy"},{"title":"Beacon 24/7 Alert Card Anatomy","href":"/products/beacon/alert-card-anatomy-247"},{"title":"Understand Alert Generation","href":"/products/beacon/understand-alert-generation"},{"title":"Investigate a Beacon Alert","href":"/products/beacon/investigate-an-alert"},{"title":"Respond to Email Notification Alerts","href":"/products/beacon/respond-to-email-alerts"},{"title":"Save an Alert as PDF","href":"/products/beacon/save-alert-as-pdf"},{"title":"Snooze an Alert","href":"/products/beacon/snooze-an-alert"},{"title":"Activity Log","href":"/products/beacon/activity-log"}]},{"group":"Notifications","pages":[{"title":"Configure Alert Notifications","href":"/products/beacon/configure-alert-notifications"},{"title":"Set Up Staff Notifications for Threats and Violence Alerts","href":"/products/beacon/set-up-staff-notifications"},{"title":"SMS Notifications","href":"/products/beacon/sms-notifications"},{"title":"Notification Settings","href":"/products/beacon/notification-settings"},{"title":"SMS Notification Terms","href":"/products/beacon/sms-notification-terms"},{"title":"Parent and Guardian Notifications","href":"/products/beacon/parent-guardian-notifications"},{"title":"Review Alerts on Mobile","href":"/products/beacon/review-alerts-on-mobile"},{"title":"Stop Email Notifications","href":"/products/beacon/stop-email-notifications"}]},{"group":"Threats and Violence","pages":[{"title":"Student Messaging","href":"/products/beacon/student-messaging"},{"title":"Threats and Violence Student Messaging","href":"/products/beacon/threats-and-violence-student-messaging"},{"title":"Threats and Violence Parent and Guardian Notifications","href":"/products/beacon/threats-and-violence-parent-notifications"},{"title":"Threats and Violence FAQ","href":"/products/beacon/threats-and-violence-faq"}]},{"group":"Communication Resources","pages":[{"title":"Letter Template for Parents and Guardians","href":"/products/beacon/letter-template"},{"title":"Core Letter Template for Counselors — Suicide and Self-Harm Alerts","href":"/products/beacon/core-letter-template"},{"title":"24/7 Letter Template for Escalation List Counselors","href":"/products/beacon/247-letter-template"},{"title":"Threats and Violence Letter Template for Counselors","href":"/products/beacon/threats-violence-letter-template"},{"title":"Parent and Guardian Communication Resources","href":"/products/beacon/parent-guardian-communication-resources"},{"title":"Communicating with Guardians — Additional Resources","href":"/products/beacon/communicating-with-guardians"},{"title":"Communicating with Parents and Guardians About GoGuardian Beacon","href":"/products/beacon/communicating-with-parents-and-guardians"},{"title":"Preguntas Frecuentes — GoGuardian Beacon (Spanish)","href":"/products/beacon/faq-spanish"}]},{"group":"Troubleshooting","boost":6,"pages":[{"title":"Troubleshoot SMS Short Code Issues","href":"/products/beacon/troubleshoot-sms-short-code"}]}]},{"group":"Discover","expanded":false,"pages":[{"title":"Overview","href":"/products/discover"},{"title":"Manage Email Notifications","href":"/products/discover/manage-email-notifications"},{"group":"Dashboard and Data","pages":[{"title":"Filter Dashboard Data","href":"/products/discover/filter-dashboard-data"},{"title":"Ask Questions About Discover Data","href":"/products/discover/ask-questions-about-data"},{"title":"Find Usage Trends","href":"/products/discover/find-usage-trends"},{"title":"Identify Underused Apps","href":"/products/discover/identify-underused-apps"},{"title":"Review Dashboard Metrics","href":"/products/discover/review-dashboard-metrics"}]},{"group":"Screen Time Insights","pages":[{"title":"Understand Screen Time Insights","href":"/products/discover/understand-screen-time-insights"}]},{"group":"App Catalog","pages":[{"title":"Browse App Catalog","href":"/products/discover/browse-app-catalog"},{"title":"Compare App Usage Across Groups","href":"/products/discover/compare-app-usage-across-schools"},{"title":"Suggest App for Catalog","href":"/products/discover/suggest-app-for-catalog"},{"title":"Review App Catalog Fields","href":"/products/discover/review-app-catalog-fields"},{"title":"Manage App Approval Details","href":"/products/discover/manage-app-approval-details"},{"title":"Review App Policy and Terms","href":"/products/discover/review-app-policy-and-terms"},{"title":"Block App in GoGuardian Admin","href":"/products/discover/block-app-in-admin"}]},{"group":"Shared Views","pages":[{"title":"Understand Shared Views","href":"/products/discover/understand-shared-views"},{"title":"Create and Manage Shared Views","href":"/products/discover/create-manage-shared-views"}]},{"group":"Licenses and Contracts","pages":[{"title":"Manage Licenses","href":"/products/discover/manage-licenses"},{"title":"Upload Contract","href":"/products/discover/upload-contract"},{"title":"Review License Status Fields","href":"/products/discover/review-license-status-fields"}]},{"group":"Troubleshooting","boost":6,"pages":[{"title":"Fix Missing Data","href":"/products/discover/fix-missing-data"},{"title":"Troubleshoot Contract Upload","href":"/products/discover/troubleshoot-contract-upload"}]}]},{"group":"Hall Pass","expanded":false,"pages":[{"title":"Overview","sidebarTitle":"Overview","href":"/products/hall-pass"},{"group":"Getting Started","pages":[{"title":"Set Up Hall Pass in Org Management","href":"/products/hall-pass/set-up-hall-pass"},{"title":"Add Users to GoGuardian Hall Pass","href":"/products/hall-pass/add-users-to-hall-pass"},{"title":"Understand Rooms and Locations","href":"/products/hall-pass/rooms-and-locations"},{"title":"Review Site Settings","href":"/products/hall-pass/site-settings"},{"title":"Integrate GoGuardian Teacher with Hall Pass","href":"/products/hall-pass/integrate-teacher"}]},{"group":"Role Guides","pages":[{"title":"Hall Pass User Roles and Permissions","href":"/products/hall-pass/user-roles-and-permissions"},{"title":"Request and Manage Your Hall Pass","href":"/products/hall-pass/student-passes"},{"title":"Create and Manage Passes as Staff","href":"/products/hall-pass/teacher-staff-passes"},{"title":"Use Hallway","href":"/products/hall-pass/hall-monitor"}]},{"group":"Passes","pages":[{"title":"Understand Approvals, Limits, and Rules","href":"/products/hall-pass/approvals-limits-and-rules"},{"title":"Request a Pass","href":"/products/hall-pass/request-a-pass"},{"title":"Approve, Reject, Cancel, or End a Pass","href":"/products/hall-pass/approve-reject-cancel-end-a-pass"},{"title":"Understand Pass Statuses and Timing","href":"/products/hall-pass/pass-statuses"},{"title":"Set Up Recurring Passes","href":"/products/hall-pass/recurring-passes"}]},{"group":"Rules and Enforcement","pages":[{"title":"Enable Auto-Approve for a Room","href":"/products/hall-pass/auto-approve-passes"},{"title":"Create Group Rules","href":"/products/hall-pass/group-rules"},{"title":"Create Out-together Rules","href":"/products/hall-pass/out-together-rules"},{"title":"Create Time Restrictions","href":"/products/hall-pass/time-restrictions"},{"title":"Use Emergency Mode","href":"/products/hall-pass/emergency-mode"},{"title":"Hall Pass Notifications","href":"/products/hall-pass/notifications"}]},{"group":"Kiosk and Badges","pages":[{"title":"Set Up Kiosk Mode","href":"/products/hall-pass/kiosk-mode"},{"title":"Set Up Hall Pass as a PWA in Kiosk Mode","href":"/products/hall-pass/pwa-kiosk-mode"},{"title":"Set Up QR Codes and Badges","href":"/products/hall-pass/qr-codes-and-badges"}]},{"group":"Reporting","pages":[{"title":"Review Reports","href":"/products/hall-pass/reports"},{"title":"Set Up Smart Reports","href":"/products/hall-pass/smart-reports"},{"title":"Review Site Scans","href":"/products/hall-pass/site-scans"}]}]},{"group":"Org Management","expanded":false,"pages":[{"title":"Overview","sidebarTitle":"Overview","href":"/products/org-management"},{"group":"Integrations","pages":[{"title":"Enable GoGuardian in Google Admin Console","href":"/products/org-management/enable-in-google-admin-console"},{"title":"Sync OUs from Google Admin Console","href":"/products/org-management/sync-ous-from-google"},{"title":"Google Directory Teacher Provisioning","href":"/products/org-management/google-directory-provisioning"},{"title":"Provision Admin Accounts from Google","href":"/products/org-management/provision-admins"},{"title":"User Provisioning with CSV via SFTP Sync","href":"/products/org-management/user-provisioning-csv-sftp"},{"title":"Sync Rosters with Clever, ClassLink, or OneRoster","href":"/products/org-management/clever-classlink-sync"},{"title":"Sync Groups with Microsoft Entra","href":"/products/org-management/microsoft-entra-sync"},{"title":"Understand Active Directory OU Sync","href":"/products/org-management/active-directory"},{"title":"Set Up Active Directory Sync","href":"/products/org-management/setup-active-directory"},{"title":"Sync Organizational Units via Clever","href":"/products/org-management/sync-ous-via-clever"},{"title":"Modify an Existing Clever or ClassLink Integration","href":"/products/org-management/modify-an-existing-integration"}]},{"group":"User Management","pages":[{"title":"Create and Manage User Accounts","href":"/products/org-management/create-manage-user-accounts"},{"title":"User Roles and Permissions","href":"/products/org-management/user-roles-and-permissions"},{"title":"Understand OU Mapping and Assigned Org Units","href":"/products/org-management/ou-permissions"},{"title":"Set Up Granular Access Control with RBAC","href":"/products/org-management/granular-access-control"},{"title":"Bulk Update User Permissions by CSV","href":"/products/org-management/bulk-update-permissions-csv"},{"title":"Set Up Teacher Accounts","href":"/products/org-management/set-up-teacher-accounts"},{"title":"Make Another User a Super User","href":"/products/org-management/make-another-user-an-administrator"},{"title":"Welcome Email, Password Setup, and Login Options","href":"/products/org-management/welcome-email-and-login-options"}]},{"group":"Security and Authentication","pages":[{"title":"Set Up Multi-Factor Authentication","href":"/products/org-management/multi-factor-authentication"},{"title":"Configure Staff SAML SSO","href":"/products/org-management/saml-sso"},{"title":"Turn On Automatic Logout","href":"/products/org-management/automatic-logout"},{"title":"Use ClassLink SSO with GoGuardian Teacher","href":"/products/org-management/classlink-sso-for-teacher"},{"title":"Verify User Logins with GoGuardian","href":"/products/org-management/verified-login"}]},{"group":"Settings and Scheduling","pages":[{"title":"Configure At Home Mode","href":"/products/org-management/at-home-mode"},{"title":"Temporarily Disable Filtering and Activity Review","href":"/products/org-management/disable-filtering-and-monitoring"}]},{"group":"Reports and Audits","pages":[{"title":"Understand When GoGuardian Is Active","href":"/products/org-management/when-is-goguardian-active"},{"title":"Review the Audit Log","href":"/products/org-management/audit-log"},{"title":"Review Teacher Usage and Reporting","href":"/products/org-management/teacher-usage-reporting"},{"title":"Access Historical Chat Logs","href":"/products/org-management/access-historical-chat-logs"},{"title":"Review and Manage Teacher Classroom Activity","href":"/products/org-management/review-teacher-classroom-activity"},{"title":"Manage Teacher Daily Summary Emails","href":"/products/org-management/teacher-daily-summary-emails"}]},{"group":"Troubleshooting","boost":6,"pages":[{"title":"Add Exceptions in Organization Management","href":"/products/org-management/add-exceptions"},{"title":"Fix GoGuardian Sign-In and Account Access Errors","href":"/products/org-management/troubleshoot-login"},{"title":"Review Licensing, Renewals, and Sales Contacts","href":"/products/org-management/licensing-and-renewals"},{"title":"Troubleshoot Rostering and Sync Issues Across GoGuardian","href":"/products/org-management/troubleshoot-clever-classlink-sync"},{"title":"Troubleshoot Active Directory Sync","href":"/products/org-management/troubleshoot-active-directory-sync"},{"title":"Troubleshoot with Diagnostics in Organization Management","href":"/products/org-management/diagnostics"},{"title":"End GoGuardian Subscription","href":"/products/org-management/end-goguardian-subscription"}]}]},{"group":"Parent","expanded":false,"pages":[{"title":"Overview","href":"/products/parent-app"},{"title":"Overview","sidebarTitle":"Understand GoGuardian Parent","href":"/products/parent-app/overview"},{"title":"Get Started with GoGuardian Parent","href":"/products/parent-app/get-started-with-goguardian-parent"},{"title":"Set Up GoGuardian Parent","href":"/products/parent-app/set-up-goguardian-parent"},{"title":"Add Guardian Contact Information","href":"/products/parent-app/add-guardian-contact-information"},{"title":"Review Student Activity in GoGuardian Parent","href":"/products/parent-app/review-student-activity"}]},{"group":"Teacher","expanded":false,"pages":[{"title":"Overview","href":"/products/teacher"},{"group":"Getting Started","pages":[{"group":"Accounts and Access","pages":[{"title":"Import Teachers from Google Directory","href":"/products/teacher/import-teachers-from-google-directory"},{"title":"Manage Users and Organization Settings","href":"/products/teacher/manage-users-and-settings"},{"title":"Log In as a Teacher","href":"/products/teacher/log-in-as-a-teacher"},{"title":"Create a Test Student Account for GoGuardian Teacher","sidebarTitle":"Create a Test Student Account","href":"/products/teacher/create-a-test-student-account"},{"title":"Accept Terms of Service","href":"/products/teacher/accept-terms-of-service"},{"title":"Export Chrome Policy JSON","href":"/products/teacher/export-chrome-policy"},{"title":"Enable Screenshots for Students via Google Admin Console","href":"/products/teacher/enable-screenshots-for-students"}]},{"group":"Classrooms","pages":[{"title":"Create a Classroom","href":"/products/teacher/create-a-classroom"},{"title":"Add Students to a Class","href":"/products/teacher/add-students-to-a-class"},{"title":"Edit Classroom Information","href":"/products/teacher/edit-classroom-info"},{"title":"Remove Students From a Classroom","href":"/products/teacher/remove-students-from-a-classroom"},{"title":"Sort and Reorganize Classrooms","href":"/products/teacher/sort-classrooms"},{"title":"Merge Classrooms","href":"/products/teacher/merge-classrooms"},{"title":"Communicate with Parents and Guardians About GoGuardian Teacher","href":"/products/teacher/communicate-with-parents-and-guardians"},{"title":"Template Letter for Parents and Guardians About GoGuardian Admin and Teacher","href":"/products/teacher/template-letter-for-guardians"},{"title":"Enroll Students in GoGuardian Teacher Classes","href":"/products/teacher/enroll-students-in-teacher-classes"},{"title":"Add Additional Teachers and Helpers to a Class","href":"/products/teacher/add-co-teachers-and-helpers"}]},{"group":"Integrations","pages":[{"title":"Manage Classes Integrated from Clever and ClassLink","href":"/products/teacher/classroom-integrations"},{"title":"Use Google Classroom Coursework Integration","href":"/products/teacher/google-classroom-coursework"},{"title":"Integrate GoGuardian Teacher with Hall Pass","href":"/products/teacher/integrate-hall-pass"},{"title":"Use Pear Deck Instant Share","href":"/products/teacher/integrate-pear-deck"}]},{"group":"Best Practices","pages":[{"title":"End-of-Year and End-of-Semester Best Practices","href":"/products/teacher/end-of-year-best-practices"},{"title":"Chromebook Desks and Chrome Split View in GoGuardian Teacher","href":"/products/teacher/chromebook-multi-desk"},{"title":"GoGuardian Teacher Training and Professional Development Resources","href":"/products/teacher/professional-development"}]}]},{"group":"Scenes","pages":[{"title":"Scenes Overview","href":"/products/teacher/scenes-overview"},{"title":"Create and Apply a Scene","href":"/products/teacher/create-and-apply-a-scene"},{"title":"Components of a Scene","href":"/products/teacher/components-of-a-scene"},{"title":"Allow Access to Blocked Sites","href":"/products/teacher/allow-access-to-blocked-sites"},{"title":"Use Wildcards in Scenes","href":"/products/teacher/use-wildcards-in-scenes"},{"title":"Use Advanced Filtering in Scenes","href":"/products/teacher/advanced-filtering"},{"title":"Apply Scenes to Student Groups","href":"/products/teacher/scenes-for-student-groups"},{"title":"Share Scenes With Another Teacher","href":"/products/teacher/share-scenes"},{"title":"Delete a Scene","href":"/products/teacher/delete-a-scene"},{"title":"Check if a Website Is Blocked","href":"/products/teacher/website-checker"},{"title":"Shared Quick Lists in GoGuardian Teacher","href":"/products/teacher/shared-quick-lists"}]},{"group":"Classroom Sessions","pages":[{"group":"Start Sessions","pages":[{"title":"Start a Classroom Session","href":"/products/teacher/start-a-classroom-session"},{"title":"Schedule Classroom Sessions","href":"/products/teacher/schedule-classroom-sessions"},{"title":"Use Teacher Chat","href":"/products/teacher/use-teacher-chat"},{"title":"Send Announcements to Students","href":"/products/teacher/use-announcements"},{"title":"Use Student Check-Ins","href":"/products/teacher/teacher-check-ins"},{"title":"Session Report Emails","href":"/products/teacher/session-report-emails"}]},{"group":"Video Calls","pages":[{"title":"Enable Video Conferencing","href":"/products/teacher/enable-video-conferencing"},{"title":"Video Call Mode","href":"/products/teacher/video-call-mode"},{"title":"Voice-Only Call Mode","href":"/products/teacher/voice-only-call-mode"},{"title":"Use Lecture and Presentation Mode","href":"/products/teacher/lecture-presentation-mode"},{"title":"Enable Screen Sharing for a Media Device","href":"/products/teacher/enable-screen-sharing"},{"title":"Super Users: Enable Video Conferencing and Present to Class","href":"/products/teacher/enable-present-to-class"}]},{"group":"Student Activity","pages":[{"title":"Active Screens View","href":"/products/teacher/active-screens-view"},{"title":"Active Classroom: Timelines View","href":"/products/teacher/timelines-view"},{"title":"Student Browsing Reports","href":"/products/teacher/student-browsing-reports"},{"title":"Email a Student Report as a PDF","href":"/products/teacher/email-student-reports"},{"title":"Access Data from Past Sessions","href":"/products/teacher/access-past-session-data"},{"title":"View Data from Past Sessions","href":"/products/teacher/view-past-sessions"},{"title":"Access Chat Logs","href":"/products/teacher/access-chat-logs"},{"title":"Take a Screenshot","href":"/products/teacher/take-a-screenshot"},{"title":"Off-Task Alerts","href":"/products/teacher/off-task-alerts"},{"title":"Allow Desktop Notifications","href":"/products/teacher/allow-desktop-notifications"}]},{"group":"Controls","pages":[{"title":"Commands Overview","href":"/products/teacher/commands-overview"},{"title":"Lock Screen","href":"/products/teacher/lock-screen"},{"title":"Unlock a Student's Screen","href":"/products/teacher/unlock-screen"},{"title":"Close a Tab","href":"/products/teacher/close-tab"},{"title":"Open Tab","href":"/products/teacher/open-tab"},{"title":"Exclude and Include Students","href":"/products/teacher/exclude-and-include-students"},{"title":"Focus Tabs","href":"/products/teacher/focus-tabs"},{"title":"Reorganize Classes and Students Using Drag and Drop","href":"/products/teacher/drag-and-drop"},{"title":"Enable Teacher Override","href":"/products/teacher/teacher-override"},{"title":"Set Up and Use Student Groups","href":"/products/teacher/student-groups"},{"title":"Archive, Restore, or Delete a Classroom","href":"/products/teacher/archive-restore-delete-a-classroom"}]}]},{"group":"Troubleshooting","boost":6,"pages":[{"group":"Student Status","pages":[{"title":"Device Unavailable","href":"/products/teacher/device-unavailable"},{"title":"Run Diagnostic on Unavailable Device","href":"/products/teacher/troubleshoot-student-device-diagnostics"},{"title":"Student Screen Shows No Active Tab","href":"/products/teacher/no-active-tab"},{"title":"Fix \"No Data\" on Students Screen","href":"/products/teacher/no-data"},{"title":"Waiting for Activity","href":"/products/teacher/waiting-for-activity"},{"title":"Student May Be Idle","href":"/products/teacher/student-may-be-idle"},{"title":"Reviewing Activity Is Restricted","href":"/products/teacher/reviewing-activity-restricted"},{"title":"Reviewing Activity Not Allowed By Admin","href":"/products/teacher/reviewing-activity-not-allowed"},{"title":"Student Not Found","href":"/products/teacher/student-not-found"},{"title":"Seeing Multiple Student Screens","href":"/products/teacher/multiple-student-screens"},{"title":"Students Missing from Classroom Session","href":"/products/teacher/students-missing-from-session"}]},{"group":"Filtering and Integrations","pages":[{"title":"Scene Conflicts","href":"/products/teacher/scene-conflicts"},{"title":"Troubleshoot Common Scene Problems","href":"/products/teacher/common-scene-problems"},{"title":"Troubleshoot Teacher Commands","href":"/products/teacher/troubleshoot-commands"},{"title":"Troubleshoot Google Classroom Issues","href":"/products/teacher/troubleshoot-google-classroom"},{"title":"Troubleshoot ClassLink Classes Not Syncing in Teacher","href":"/products/teacher/troubleshoot-classlink-sync"},{"title":"Disable Ad Blockers in GoGuardian Teacher","href":"/products/teacher/disable-ad-blockers"},{"title":"Troubleshoot Google OU Sync Issues","href":"/products/teacher/troubleshoot-ou-import"}]},{"group":"App and Extensions","pages":[{"title":"Fix GoGuardian Teacher Loading and Performance Issues","href":"/products/teacher/troubleshoot-loading-performance"},{"title":"Fix the GoGuardian Extension on Teacher Devices","href":"/products/teacher/troubleshoot-teacher-extension"}]},{"group":"FAQs","pages":[{"title":"Unlock a Student's Device","href":"/products/teacher/faq-unlock-student"},{"title":"Why Is a Student Getting Blocked?","href":"/products/teacher/faq-student-getting-blocked"},{"title":"FAQ: Refresh a Student's Scene","href":"/products/teacher/faq-scene-override"},{"title":"FAQ: Multiple Sessions for Students and Teachers","href":"/products/teacher/faq-multiple-sessions"},{"title":"FAQ: Archived Classroom Reports Show Wrong Students","href":"/products/teacher/faq-archived-classroom-reports"},{"title":"Turn Off Teacher Sessions During School Breaks","href":"/products/teacher/faq-turn-off-sessions"},{"title":"GoGuardian Teacher FAQs","href":"/products/teacher/faqs"}]}]}]},{"group":"Visitor","expanded":false,"pages":[{"title":"Overview","sidebarTitle":"Overview","href":"/products/visitor"},{"group":"Getting Started","pages":[{"title":"Add Sites and Users in Org Management","href":"/products/visitor/add-sites-and-users-in-org-management"},{"title":"Set Up GoGuardian Visitor","href":"/products/visitor/set-up-visitor"},{"title":"Users and Permissions","href":"/products/visitor/users-and-permissions"},{"title":"Compatibility and Requirements","href":"/products/visitor/compatibility-and-requirements"}]},{"group":"Front Desk","pages":[{"title":"Use the Front Desk","description":"Check visitors and students in and out, print badges, and see who's on site from the GoGuardian Visitor Front Desk.","href":"/products/visitor/front-desk"},{"title":"Review Screening Alerts","href":"/products/visitor/review-screening-alerts"},{"title":"The Kiosk Check-In Experience","description":"What visitors, guardians, and students see and do at a GoGuardian Visitor kiosk, from the welcome screen to their badge, so front office staff can help them and Site Admins can plan forms.","href":"/products/visitor/kiosk-check-in-experience"}]},{"title":"Activity Log","href":"/products/visitor/activity-log"},{"title":"Hallway View","href":"/products/visitor/hallway-view"},{"title":"Visitor Notifications","href":"/products/visitor/notifications"},{"group":"Forms","pages":[{"title":"Create and Manage Forms","href":"/products/visitor/create-and-manage-forms"},{"title":"Form Steps Reference","href":"/products/visitor/form-steps-reference"}]},{"group":"Check-In Points and Devices","pages":[{"title":"Check-In Points","href":"/products/visitor/check-in-points"},{"title":"Kiosks","href":"/products/visitor/kiosks"},{"title":"Badge Printers","href":"/products/visitor/badge-printers"}]},{"group":"Screening and Safety","pages":[{"title":"Understand Visitor Screening","href":"/products/visitor/visitor-screening"},{"title":"Watchlists","href":"/products/visitor/watchlists"},{"title":"Notification Lists","href":"/products/visitor/notification-lists"},{"title":"Respond to a Visitor Alert","href":"/products/visitor/respond-to-a-visitor-alert"}]},{"title":"Use GoGuardian Visitor with Hall Pass","href":"/products/visitor/visitor-and-hall-pass"},{"group":"Troubleshooting","pages":[{"title":"Troubleshoot Kiosks","href":"/products/visitor/troubleshoot-kiosks"},{"title":"Troubleshoot Badge Printing","href":"/products/visitor/troubleshoot-badge-printing"}]}]}]},{"group":"Looking for Pear Deck Learning?","pages":[{"title":"Pear Deck Learning Help Center","sidebarTitle":"Pear Deck Learning Help Center","url":"/pear-deck/welcome","href":"/shortcuts/pear-deck-learning-help-center"}]}]},{"tab":"Pear Deck Learning","pages":[{"title":"Pear Deck Learning","href":"/pear-deck/welcome"}]},{"tab":"Support","pages":[{"title":"Support","href":"/support/contact-support"}]}]},"basePath":"","title":"Review Screening Alerts - GoGuardian","buildId":"dpl_36EDyZCDfRuoUD9af5CH4M1bqY2h","deploymentId":"dpl_36EDyZCDfRuoUD9af5CH4M1bqY2h","dynamics":["a74be98ba7"],"chunks":["zoom-image-lightbox-eHyQ0tlO.js","lightbox-handle-r17bVUz3.js"]}