

Understand How Alerts Reach Your Lists
Visitor alerts a notification list only after a staff member reviews a possible match and clicks Confirm Match. Visitor then denies the check-in or check-out and alerts the lists for that match right away:
Visitor doesn’t alert the default list for a watchlist match unless the list is attached to that watchlist. Flagged Answer and Confirm Students alerts never go to a notification list. For every alert type, see Understand Visitor Screening. For what the alert email and SMS contain, see Respond to a Visitor Alert.
Members don’t need Visitor access to receive alerts. Members who can use the Front Desk also get a link to it in the alert email.
To see who was alerted for a check-in, open it in the Activity Log. Under Notifications, each list member’s Email and SMS status shows Sent, Failed, Pending, or Off, with the reason for any failure.
Notification lists are only for screening alerts. Everyday notifications, such as the email a host gets when their visitor checks in, work differently. See Notifications.
Plan Your Notification Lists
Decide who needs each kind of alert before you create lists.- Default list: the staff who should respond to every confirmed sex offender registry match, such as your principal and school security. The first list you create becomes the default automatically, and from then on your site always has exactly 1 default list.
- Watchlist lists: for each watchlist, decide who should respond to a match and attach the lists for those staff members. One list can serve several watchlists, and a watchlist can alert several lists, such as a security list and an administrators list.
Create a Notification List
- In Visitor, go to Notification Lists.
- Click Create Notification List.
- Enter a Name and, optionally, a Description. Use a name that says who’s on the list, such as “Security Team,” so it’s easy to pick when you set up a watchlist.
- Under Notification Settings, select Send email notifications, Send SMS notifications, or both. At least 1 is required.
- Under Members, find each staff member to alert in Add Members and select them. You can add anyone with the Staff or Admin role at the site, and every list needs at least 1 member.
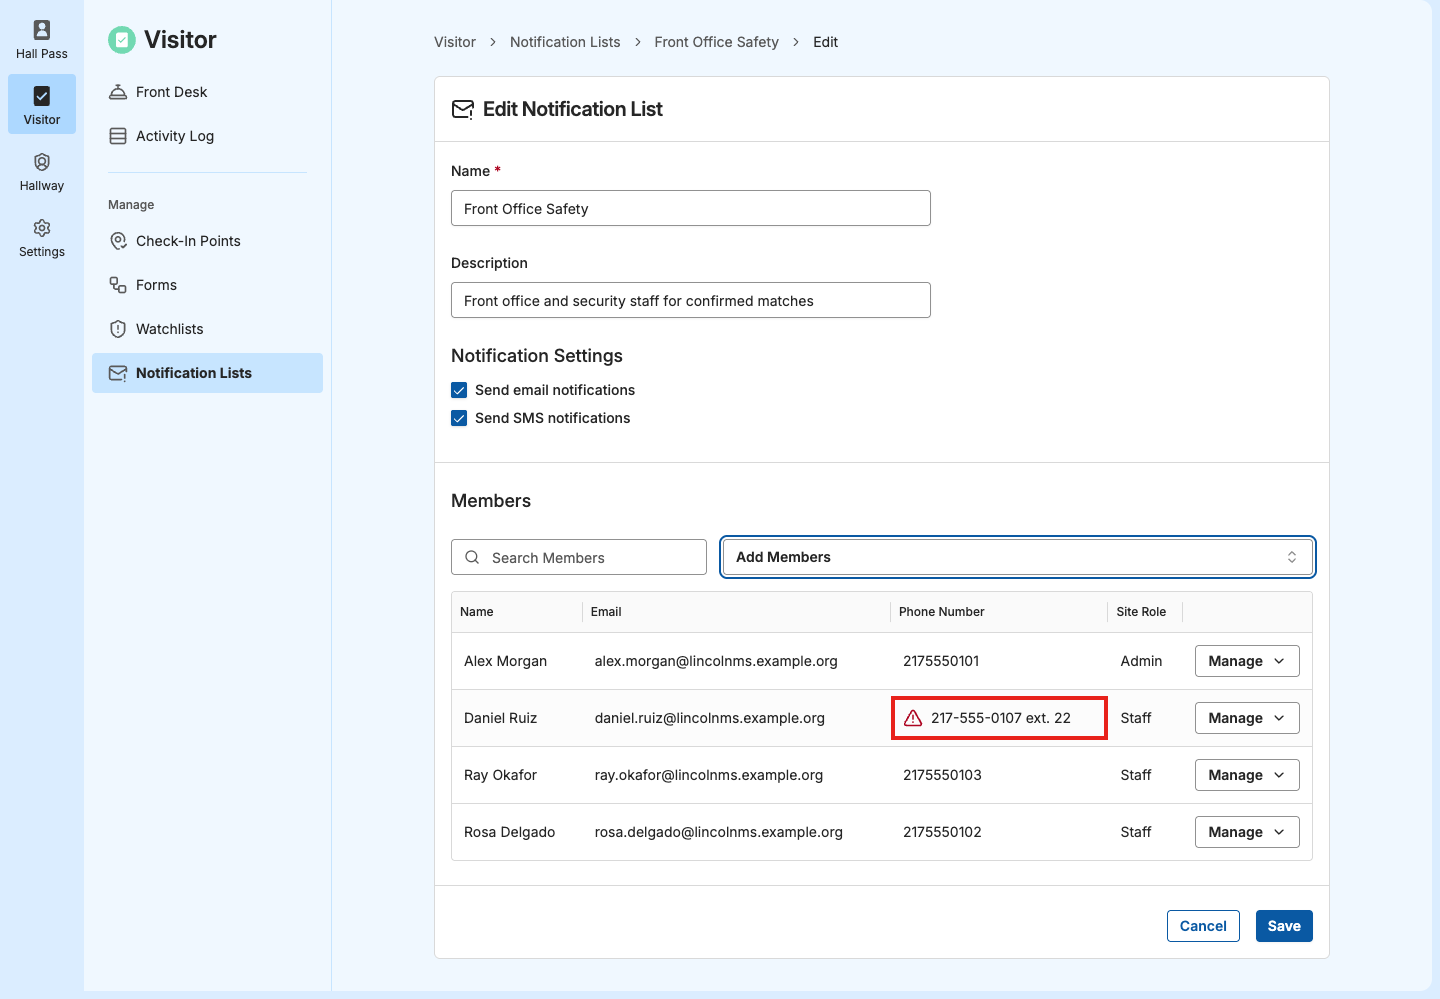
- If you selected Send SMS notifications, check the Phone Number column for warnings. See Set Up SMS Alerts.
- Click Save.
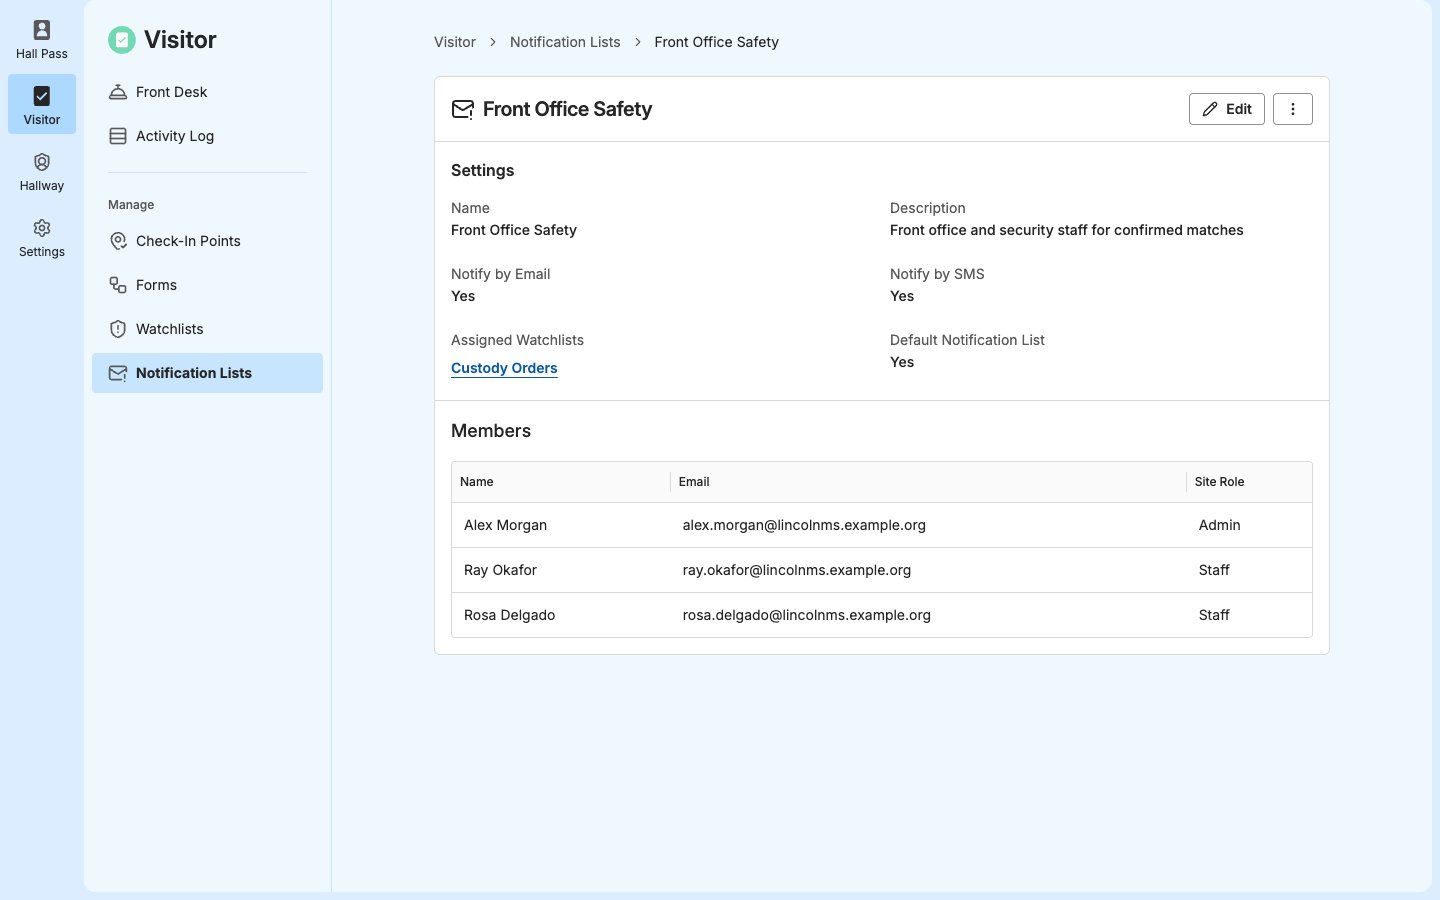
- Verify the result: The list’s page opens with its members and settings. If it’s your site’s first list, Default Notification List shows Yes.
Set Up SMS Alerts
SMS alerts go to the phone number on each member’s account in GoGuardian Org Management. Visitor can text a number only if it has 10 digits (or 11 starting with 1) and no extension. It also needs to be a mobile number: a desk phone number passes the check but can’t receive texts. When Send SMS notifications is selected, Visitor checks each member’s number while you create or edit the list. A warning icon in the Phone Number column means that member can’t receive texts, for example:- “The staff member cannot receive SMS without a valid phone number”
- “The phone number for this staff member cannot be used for SMS because it contains an extension”
Attach a Notification List to a Watchlist
You choose a watchlist’s notification lists from the watchlist, not from the notification list.- In Visitor, go to Watchlists and open the watchlist.
- Click Edit.
- In Notification Lists, select the lists to alert on a match.
- Click Save.
- Verify the result: The watchlist’s page shows the lists under Notification Lists. On the notification list’s page, the watchlist appears under Assigned Watchlists.
Change the Default Notification List
- In Visitor, go to Notification Lists.
- Under Default Notification List, select the list.
- Click Save.
- Verify the result: The list you selected shows under Default Notification List.
Edit a Notification List
- In Visitor, go to Notification Lists and open the list.
- Click Edit.
- Change the Name, Description, Notification Settings, or Members. To remove a member, click Manage next to them, select Remove, then click Remove to confirm.
- Click Save.
- Verify the result: The list’s page shows your changes.
Archive a Notification List
Archiving can’t be undone. An archived list no longer gets alerts for any watchlist it’s attached to. You can’t archive the default list. To archive it, first make another list the default. See Change the Default Notification List.- In Visitor, go to Notification Lists and open the list.
- Click More actions, then select Archive.
- Click Archive to confirm.
- Verify the result: The list no longer appears under Notification Lists.