

How Visitor Fits Together
A Visitor site is built from a few connected pieces.- Check-in points are where people check in and out, such as the front office. Every check-in and check-out happens at a check-in point, so you always know where it happened.
- Forms define how each visitor or student checks in or out: who they are, what they’re asked, and what happens next. Staff complete a form on a visitor’s or student’s behalf at the Front Desk, or visitors and students complete one themselves at a kiosk.
- Screening checks visitors against the sex offender registry and your watchlists as they confirm their identity. When staff confirm a match, Visitor alerts a notification list: your default list for registry matches, or the lists you choose for each watchlist.
- Kiosks and badge printers are optional, and a check-in point can have as many of each as you need. Add kiosks if you want visitors and students to check themselves in and out, and badge printers if you want to print badges. You can set up either one without the other, but a kiosk whose forms print badges needs a printer. Visitor works entirely from the Front Desk without them.
Use the Setup Guide
When you open the Front Desk, the setup guide lists every step. Each step links to the page where you complete it.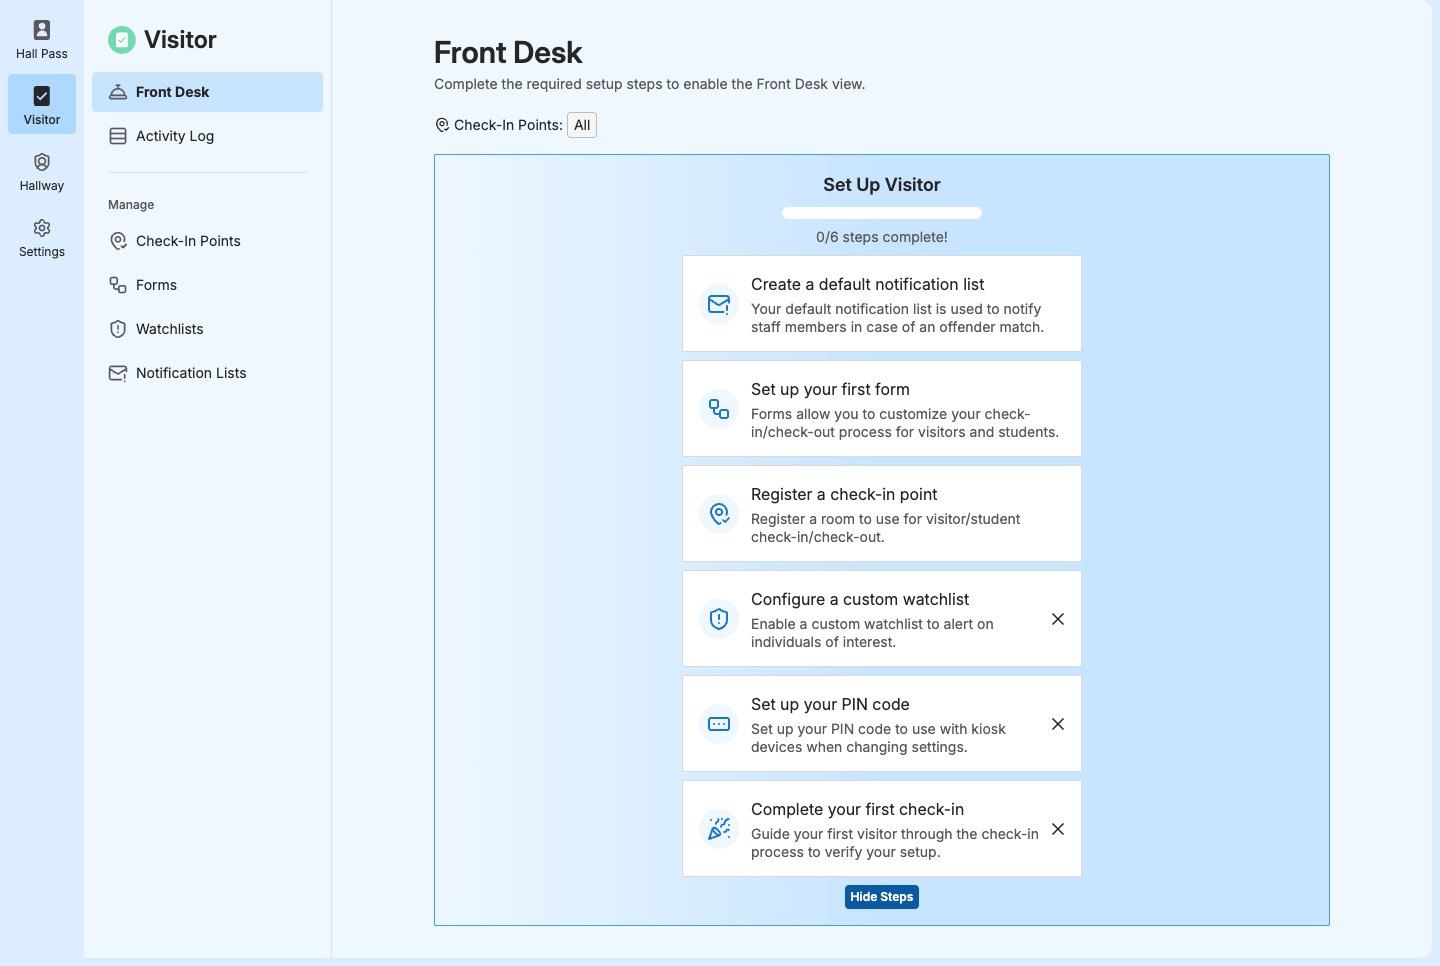
Create Your First Notification List
A notification list is a group of staff that Visitor alerts by email or SMS when staff confirm a screening match. When staff confirm a sex offender registry match, Visitor alerts your site’s default notification list. The first list you create becomes the default automatically.- In Visitor, go to Notification Lists.
- Click Create Notification List.
- Enter a Name and, optionally, a Description.
- Under Members, add the staff who should be alerted.
- Under Notification Settings, turn on Send email notifications, Send SMS notifications, or both.
- Click Save.
- Verify the result: The list’s page opens, and Default Notification List shows Yes.
Set Up Your First Form
Every check-in and check-out at your site runs through a form, from identity confirmation and screening to questions, signed documents, hall passes, and badges. New forms are turned on as soon as you create them. Every form starts from a template:
Templates are a starting point, not a limit. Forms are flexible enough to fit almost any group or event. For example:
- A contractor form that suggests only facilities staff as hosts.
- A parent-teacher conference or school dance form that you turn on for the event and turn off afterward.
- In Visitor, go to Forms.
- Click New Site Form.
- Choose a template.
- Review the steps, and change any options your school needs.
- Click Save.
- Verify the result: The form appears in Forms with its status turned on.
Register a Check-In Point
A check-in point is a room registered for check-in and check-out. The Activity Log and the Front Desk show which check-in point each check-in happened at. Staff see and manage check-ins only at the check-in points they’re assigned to. Rooms are shared between GoGuardian Hall Pass and GoGuardian Visitor. You can register an existing room or create a new one.- In Visitor, go to Check-In Points.
- Click Register Check-In Point.
- Select Existing room and select a room, or select New room and enter a Name and Room Number.
- In Assign staff to room, add the staff who check people in and out here. Staff assigned to a check-in point can open Visitor. If you chose an existing room, its current staff are already listed and get Visitor access too, so remove anyone who shouldn’t have it. Any changes also apply to the room in Hall Pass.
- If your school uses Hall Pass and the existing room’s rules don’t support hall passes, you see Update Room Rules to support Hall Pass steps, selected by default. It lists the rule changes it makes. Clear it if you don’t plan to create hall passes from forms at this check-in point.
- Click Submit.
- Verify the result: The check-in point’s page opens, and the room appears in Check-In Points.
Add a Watchlist
A watchlist is your own list of people staff need to know about at check-in, such as a parent who isn’t allowed to pick up their child under a custody order, or someone with a restraining order against them. Screening checks visitors against your watchlists along with the sex offender registry. Each watchlist alerts the notification lists you choose when staff confirm a match. You can create as many watchlists as you need.- In Visitor, go to Watchlists.
- Click Create Watchlist.
- Enter a Name and, optionally, a Description.
- In Notification Lists, select the lists to alert on a match.
- Click Add Identity to add each person.
- Click Save.
- Verify the result: The watchlist appears in Watchlists with the correct number of Watchlist Entries.
Set Up Your PIN
Kiosk settings are protected by a PIN, so visitors and students can’t change them. Only Site Admins can unlock kiosk settings with their PIN, so if you use kiosks, at least 1 Site Admin needs a PIN, usually the admin setting them up. A PIN is 4 to 8 digits, and it’s the same PIN used for Hall Pass kiosks.- In the setup guide, click Set up your PIN code.
- Create your PIN. For details, see Set Your PIN.
- Verify the result: The step shows as complete in the setup guide.
Complete Your First Check-In
Run a test check-in before go-live to confirm your form, check-in point, and screening work together.- On the Front Desk, under Start a Check-In or Check-Out, select your form.
- Complete the steps as a test visitor.
- Verify the result: The check-in appears under Recent Activity right away. If you used a Visitor form, it also appears under Currently Checked In.
- If you used a Visitor form, check out the test visitor. If you plan to add a badge printer from a front desk computer, do that first. See Set Up a Badge Printer.
Set Up a Kiosk (Optional)
A kiosk lets visitors and students check themselves in and out. It runs on a Chromebook, or in the GoGuardian Campus app for iPad or Windows.- Go to Check-In Points and open the check-in point.
- Under Kiosks, click Create Kiosk.
- Enter a Kiosk Name, select 1 or more Forms, and click Submit. Each kiosk offers only the forms you select, so you can set up a kiosk for a specific purpose, such as student check-in at a side entrance.
- The kiosk’s page opens with its Kiosk Login. On the kiosk device, scan the QR code, or open the sign-in URL shown there and enter the username and password in Kiosk Username and Kiosk Password. Then tap Login to Kiosk.
- If the kiosk doesn’t have a printer yet, it asks you to Choose a Printer. If you don’t plan to print badges from this kiosk, click Skip. If any of the kiosk’s forms print badges, the kiosk shows This Kiosk Isn’t Ready until it has a printer.
- Allow camera access when the device asks. On an iPad, also allow local network access.
- Verify the result: The kiosk shows Online on the check-in point’s page.
Set Up a Badge Printer (Optional)
Visitor prints badges on supported label printers connected by USB or over your network. See Compatibility and Requirements for the list. Add a printer from the device it prints from: a kiosk or a front desk computer. From a kiosk: Choose the printer when the kiosk first asks, or later from Kiosk Settings → Printer Settings. Kiosk settings require a Site Admin’s PIN. From a front desk computer:- On the Front Desk, check someone in with a form that prints badges, such as a test check-in. When the check-in is done, the panel asks you to choose a printer for their badge.
- Under Printer, make sure the check-in point is selected.
- Click Add Printer.
- Select the printer. If a USB printer doesn’t appear, click Find USB Printer.
- Select the Media Type that matches your labels.
- Click Print Sample to test the printer.
- Click Add.
- Verify the result: The printer appears under Printers on the check-in point’s page.