

Understand the CSV Format
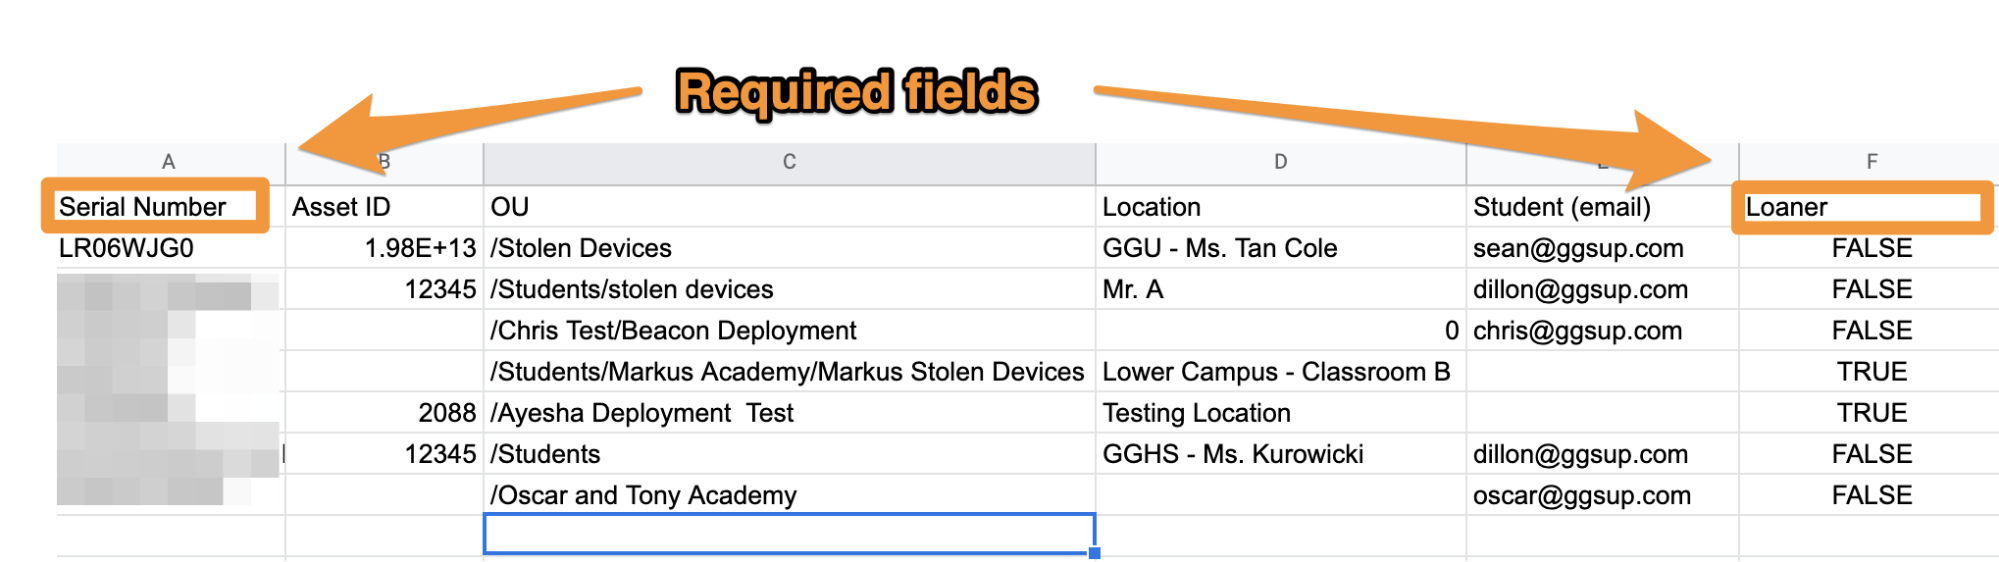
Fleet CSV files must include all 6 column headers, in this exact order and with these exact names:
Blank cells: Blank cells are treated as null. For most columns, a blank cell preserves the existing value in Fleet. The
Loaner column is the exception — it must always contain true/1 or false/0.
Importing an existing device: If a device with the same serial number already exists in Fleet, the CSV values overwrite the values in Fleet. For example, if Fleet shows user@school.edu for a device but the CSV shows newuser@school.edu, Fleet updates to newuser@school.edu. The new email must be a valid, existing address in your domain.
Create a Fleet CSV File
- Open Google Sheets and create a new blank spreadsheet.
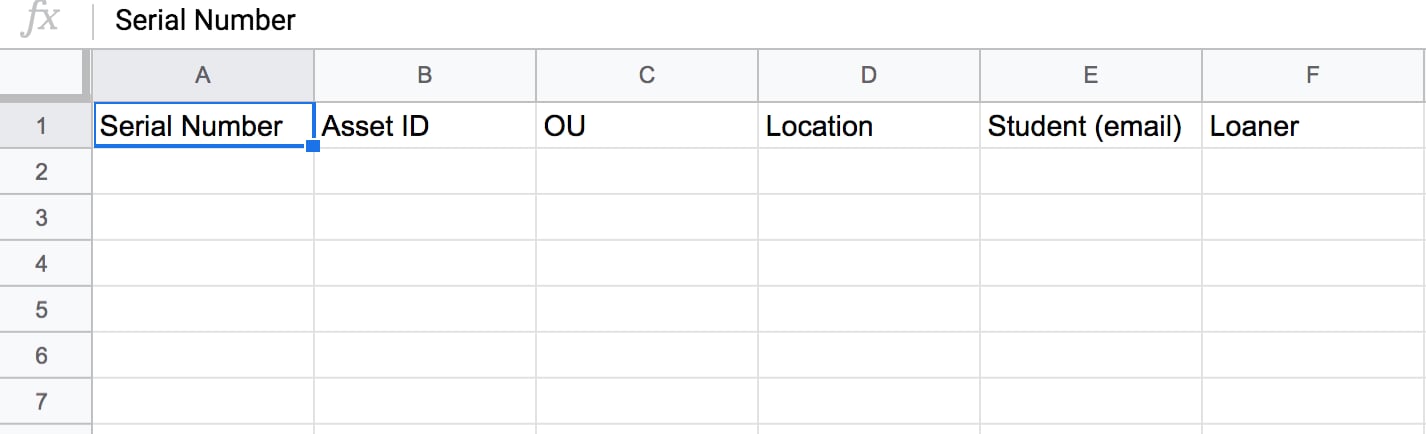
- In row 1, enter the column headers in order:
Serial Number,Asset ID,OU,Location,Student (email),Loaner. - Add device data in the rows below. Only
Serial NumberandLoanerare required for each row. - Select File → Download → Comma-separated values (.csv, current sheet).
- Verify the result: A
.csvfile downloads to your computer.
Import Devices into Fleet
- Go to fleet.goguardian.com and select the Devices tab.
- Click Update Device Data.
- Drag and drop your CSV file into the upload panel, or click inside the panel to browse and select the file.
- Click Upload CSV.
- Verify the result: Devices appear in the Devices tab. See Sync with Google Admin Console to confirm counts match.
Sync GAC Data into Fleet via CSV
When Google Admin Console has updated values (such as OU or Asset ID) that are not yet reflected in Fleet, use this method to force GAC values into Fleet:- Export devices from Google Admin Console: go to
admin.google.com→ Devices → Chrome Devices, select all organizational units, and export to CSV. - Delete all columns except: serial number, orgunitpath, annotatedAssetId, annotatedUser, annotatedLocation.
- Rename the column headers to match the Fleet format:
Serial Number,Asset ID,OU,Location,Student (email),Loaner. - Add the
Loanercolumn with appropriatetrue/falsevalues. - Make 2 copies of this file.
- In one copy, set the values you want to reset to blank or zero (for example, set all OUs to
/). Upload this copy to Fleet — this “zeros out” the fields. - Upload the original copy with the correct GAC values — this pushes the correct values into both Fleet and Google Admin Console.