

Confirm GoGuardian Admin Coverage
GoGuardian Parent shows activity collected through your organization’s GoGuardian Admin deployment. If GoGuardian Admin already works for the student accounts you want to include, no additional installation is required. Otherwise, complete the appropriate deployment before you continue:- For managed ChromeOS accounts, install the GoGuardian Extensions.
- For other supported managed devices, confirm that your GoGuardian Admin deployment is active.
Inform Staff, Guardians, and Students
Before enabling GoGuardian Parent, notify staff, guardians, and students that guardians will be able to review student browsing activity through the app. GoGuardian provides ready-to-use email templates at the bottom of the Parent App settings page for this purpose.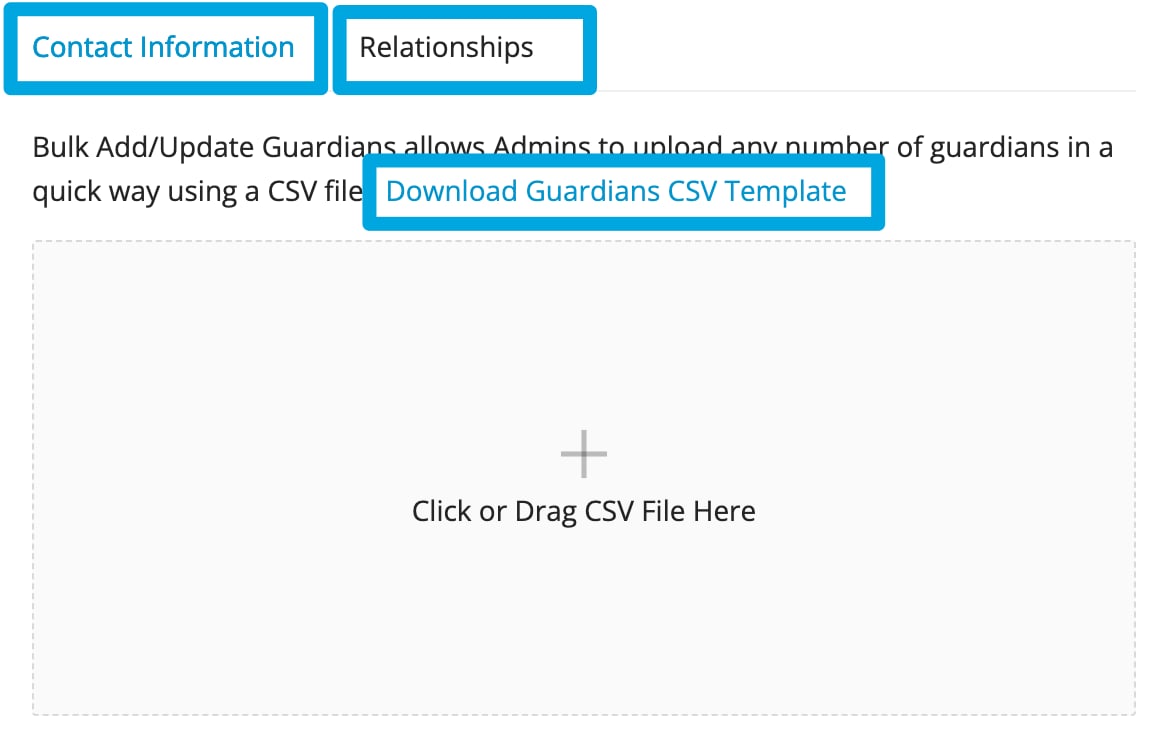
Add Guardian Accounts and Relationships
Adding guardians is a two-step process: add the guardian’s contact information, then link the guardian to one or more students.Add Guardians
Guardians can be added one at a time or in bulk. To add a single guardian:- Go to manage.goguardian.com in your browser.
- Click Parent & Guardians in the navigation menu.
- Click Add Guardian.
- Enter the guardian’s full name and email address.
- Optional: Enter a phone number and turn on SMS notifications.
- Click Save.
- Verify the result: The guardian appears in the Guardians list.
- Go to manage.goguardian.com in your browser.
- Click Parent & Guardians in the navigation menu.
- Click Bulk Add/Edit and select the Contact Information template to download the CSV.
- Complete the CSV using the column definitions below, then upload the file.
- Verify the result: Guardians appear in the list after the upload completes.
If your organization integrates with Clever or ClassLink, guardian and relationship data can be synced automatically. Use the Field Access settings in Clever to control which student fields are shared.
Link Students to Guardians
After adding guardians, link each guardian to their students. To add a relationship one at a time:- Go to manage.goguardian.com in your browser.
- Click Parent & Guardians in the navigation menu.
- Click + next to the guardian’s name, then click Add Relationship.
- Enter the student’s name or email address and select it from the list.
- Enter the relationship type, for example, Mother, Father, Step-Father, or Guardian.
- Click Save.
- Verify the result: The student appears under the guardian’s entry.
guardian_email must exactly match the guardian email address already in GoGuardian Org Management.
- Click Bulk Add/Edit and select the Relationships template.
- Complete the CSV using the column definitions below, then upload the file.
Enable the Parent App and Configure Features
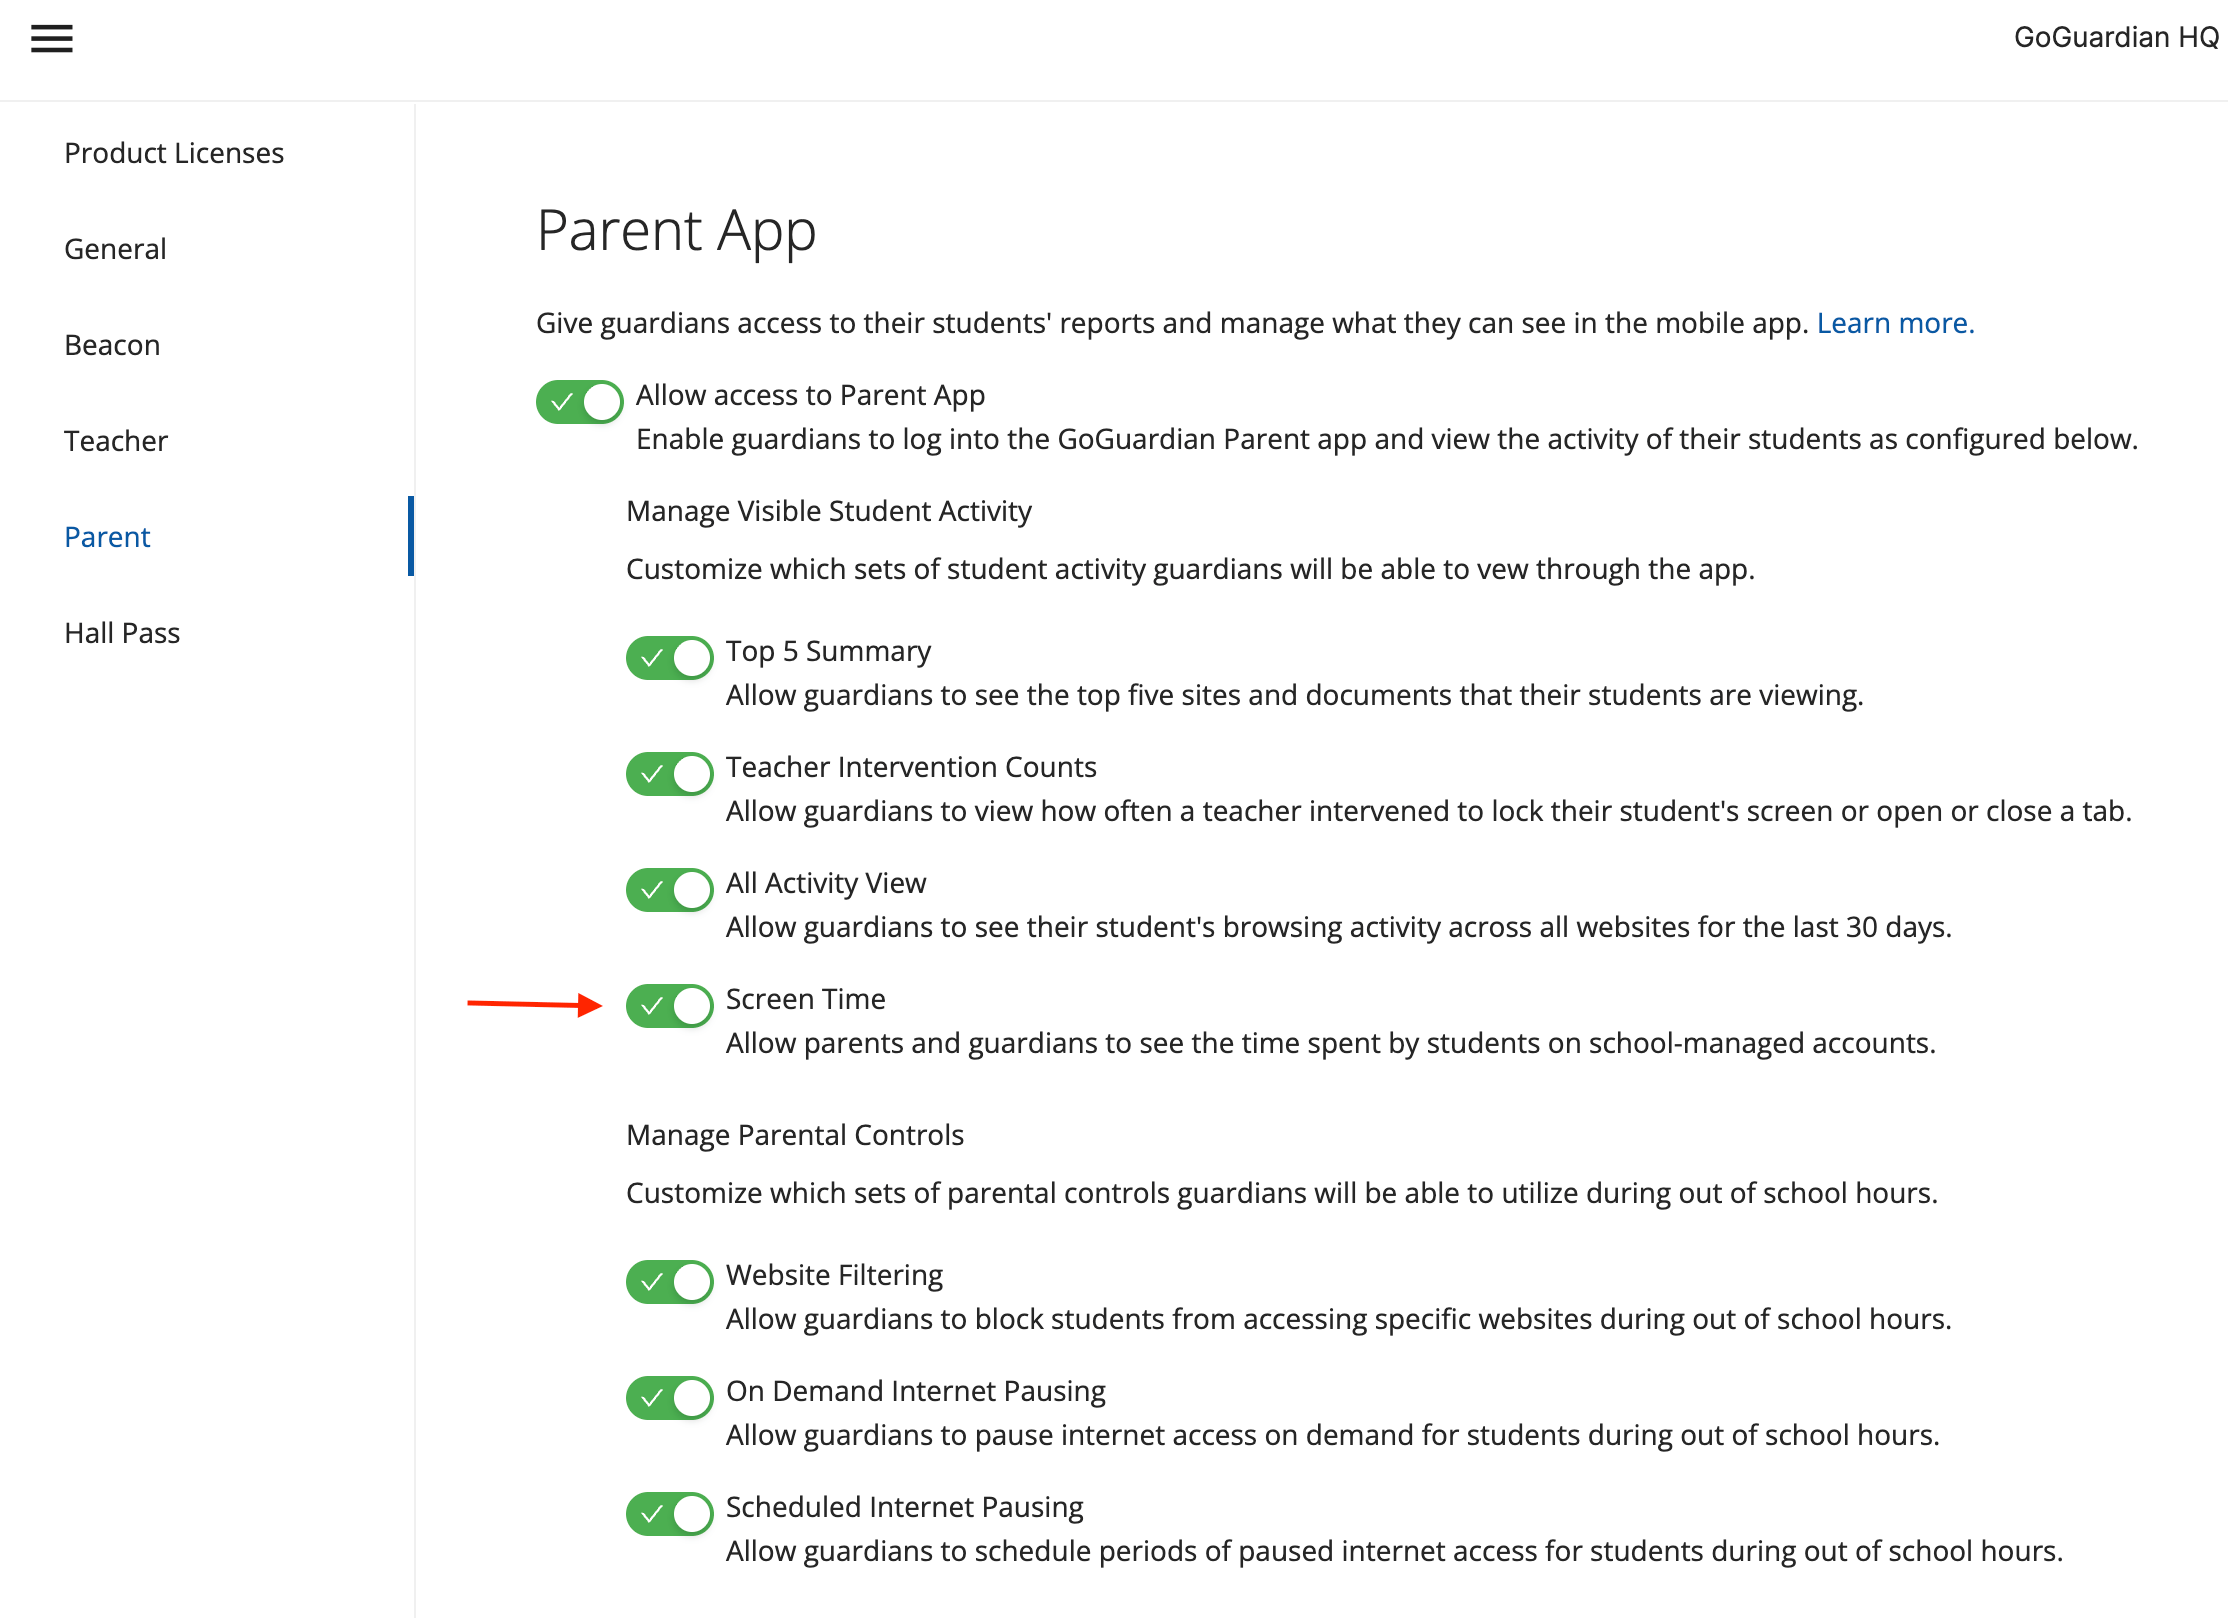
After adding guardians and relationships, enable the Parent App and configure which features guardians can access.- Go to the Parent tab in GoGuardian Org Management.
- Turn on the GoGuardian Parent toggle to enable the app.
- Select which activity views guardians can access:
- Top 5 Summary: top visited websites, Google Workspace files, apps and extensions, and videos
- Teacher Intervention Counts: count of teacher actions taken during sessions (requires GoGuardian Teacher subscription)
- All Activity View: full browsing activity log
- Screen Time: student Screen Time data
- Optional: Turn on parental controls:
- Website Filtering
- On Demand Internet Pausing
- Scheduled Internet Pausing
- Verify the result: Guardians with access enabled receive an invitation to download the app and can access only the data and controls your organization enabled.
Top 5 Summary, Teacher Interventions, All Activity, and Screen Time data are limited to the past 30 days.
Parental controls require At Home Mode to be configured. See At Home Mode for setup instructions.
Manage Guardian Access in Bulk
To enable or disable Parent App access for multiple guardians at once:- Go to manage.goguardian.com in your browser.
- Click Parent & Guardians in the navigation menu.
- Select the checkboxes next to the guardians you want to update. Select the top checkbox to select all guardians.
- Click Enable or Disable to update access for all selected guardians.
- Verify the result: The Parent App status updates for all selected guardians.