

Understand What Site Scans Review
Site Scans look for issues a school leader may want to follow up on. Each scan compares the week with the 4 weeks before it. For example, a scan can point out:- Screening alerts left waiting for staff, or slow to be reviewed
- Visitors who didn’t check out and were checked out automatically at midnight
- Check-ins at unusual times for your site, such as late at night or on a weekend
- Badge printers still failing at the end of the week, or kiosks checking in visitors with no printer
- Pickups left in progress, or pickups at the Front Desk taking longer than before
- A form answer that raises many alerts staff then clear
- A busy check-in point with no kiosk, or a form with many canceled check-ins
Turn On Site Scans
Site Scans are off until a Site Admin turns them on.- In the Visitor sidebar, under Insights, select Site Scans.
- Click Enable.
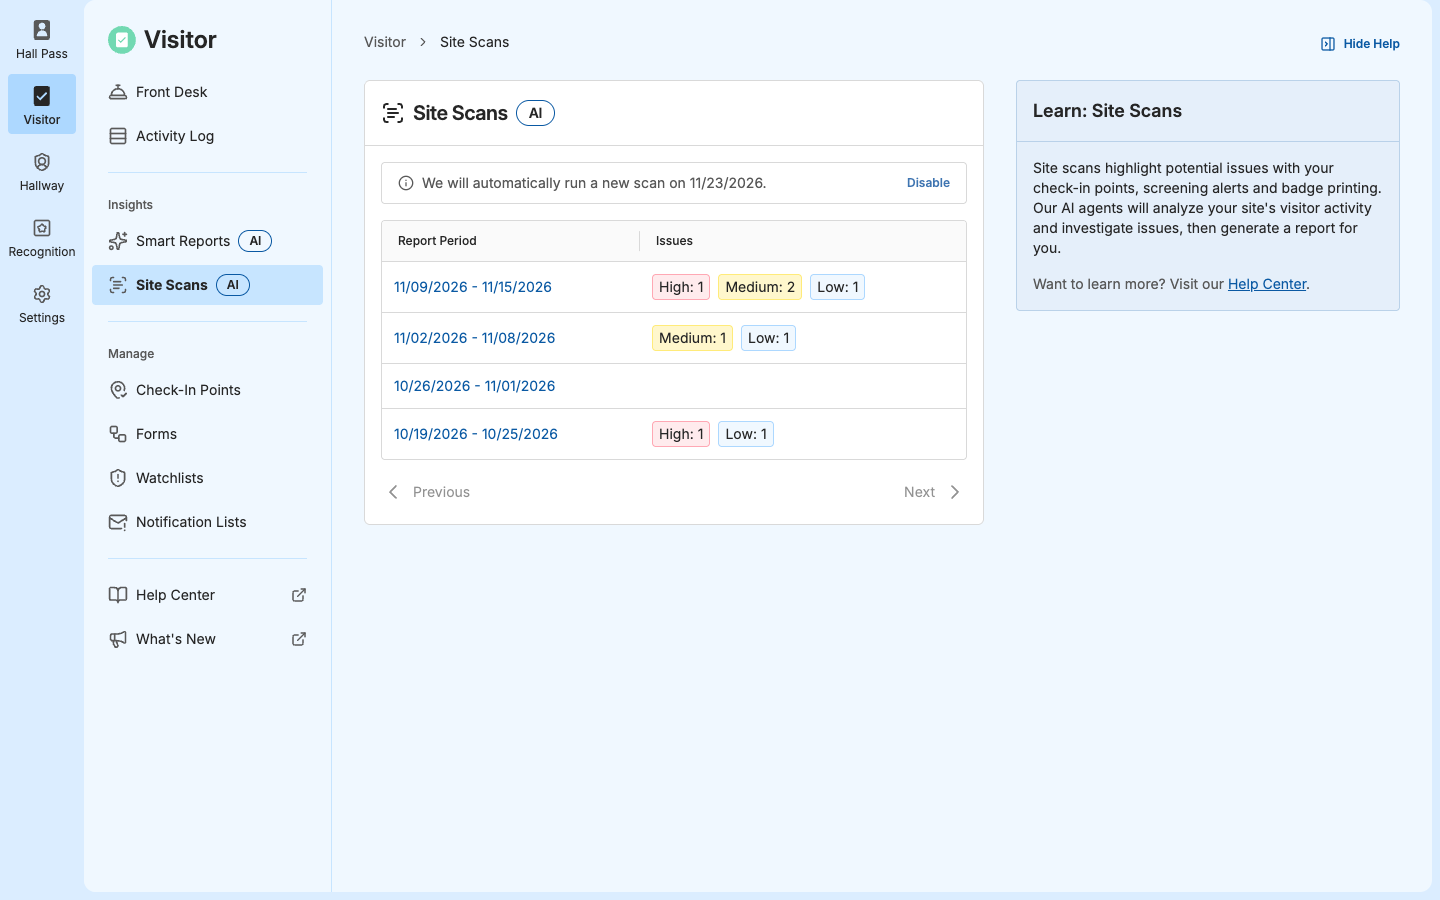
- Verify the result: The page says “We will automatically run a new scan on” and the date of the next scan.
Read Site Scan Reports
- Open the notification for a new scan, or select Site Scans in the Visitor sidebar.
- Select a report in the list. The list shows each scan’s Report Period and how many High, Medium, and Low issues it found.
- Click an issue to expand it, then read its Description and Next Steps.
- Next to Is this helpful?, click the thumbs-up (Yes) or thumbs-down (No) button.
- Verify the result: Your answer stays selected when you reopen the report.
Interpret Issue Priorities
Use the next steps as a starting point, and follow your school’s procedures. Changes you make, such as fixing a printer or assigning staff to a check-in point, show up in the next week’s scan, not in the current report.
A site with few check-ins may get short reports. A short report means there was little to review, not that the scan failed.
Turn Off Site Scans
Turning off scans stops new scans and their notifications. Past reports stay in the list.- In the Visitor sidebar, select Site Scans.
- Click Disable.
- In Disable Site Scans, click Disable.
- Verify the result: The page says “Site scans are disabled.”