To install the extensions using Active Directory or Microsoft Intune, or to deploy The GoGuardian App to Windows, iPads, or Mac, contact your GoGuardian Account Manager for guidance. If you have already installed the extensions, skip to Verify Extension Deployment.
Locate Your GoGuardian Extensions
Every GoGuardian account has a unique pair of Chrome extensions. To find your organization’s extensions, sign in to GoGuardian with your Super User credentials and open the Org Management Installation page. Keep this window open for the next step.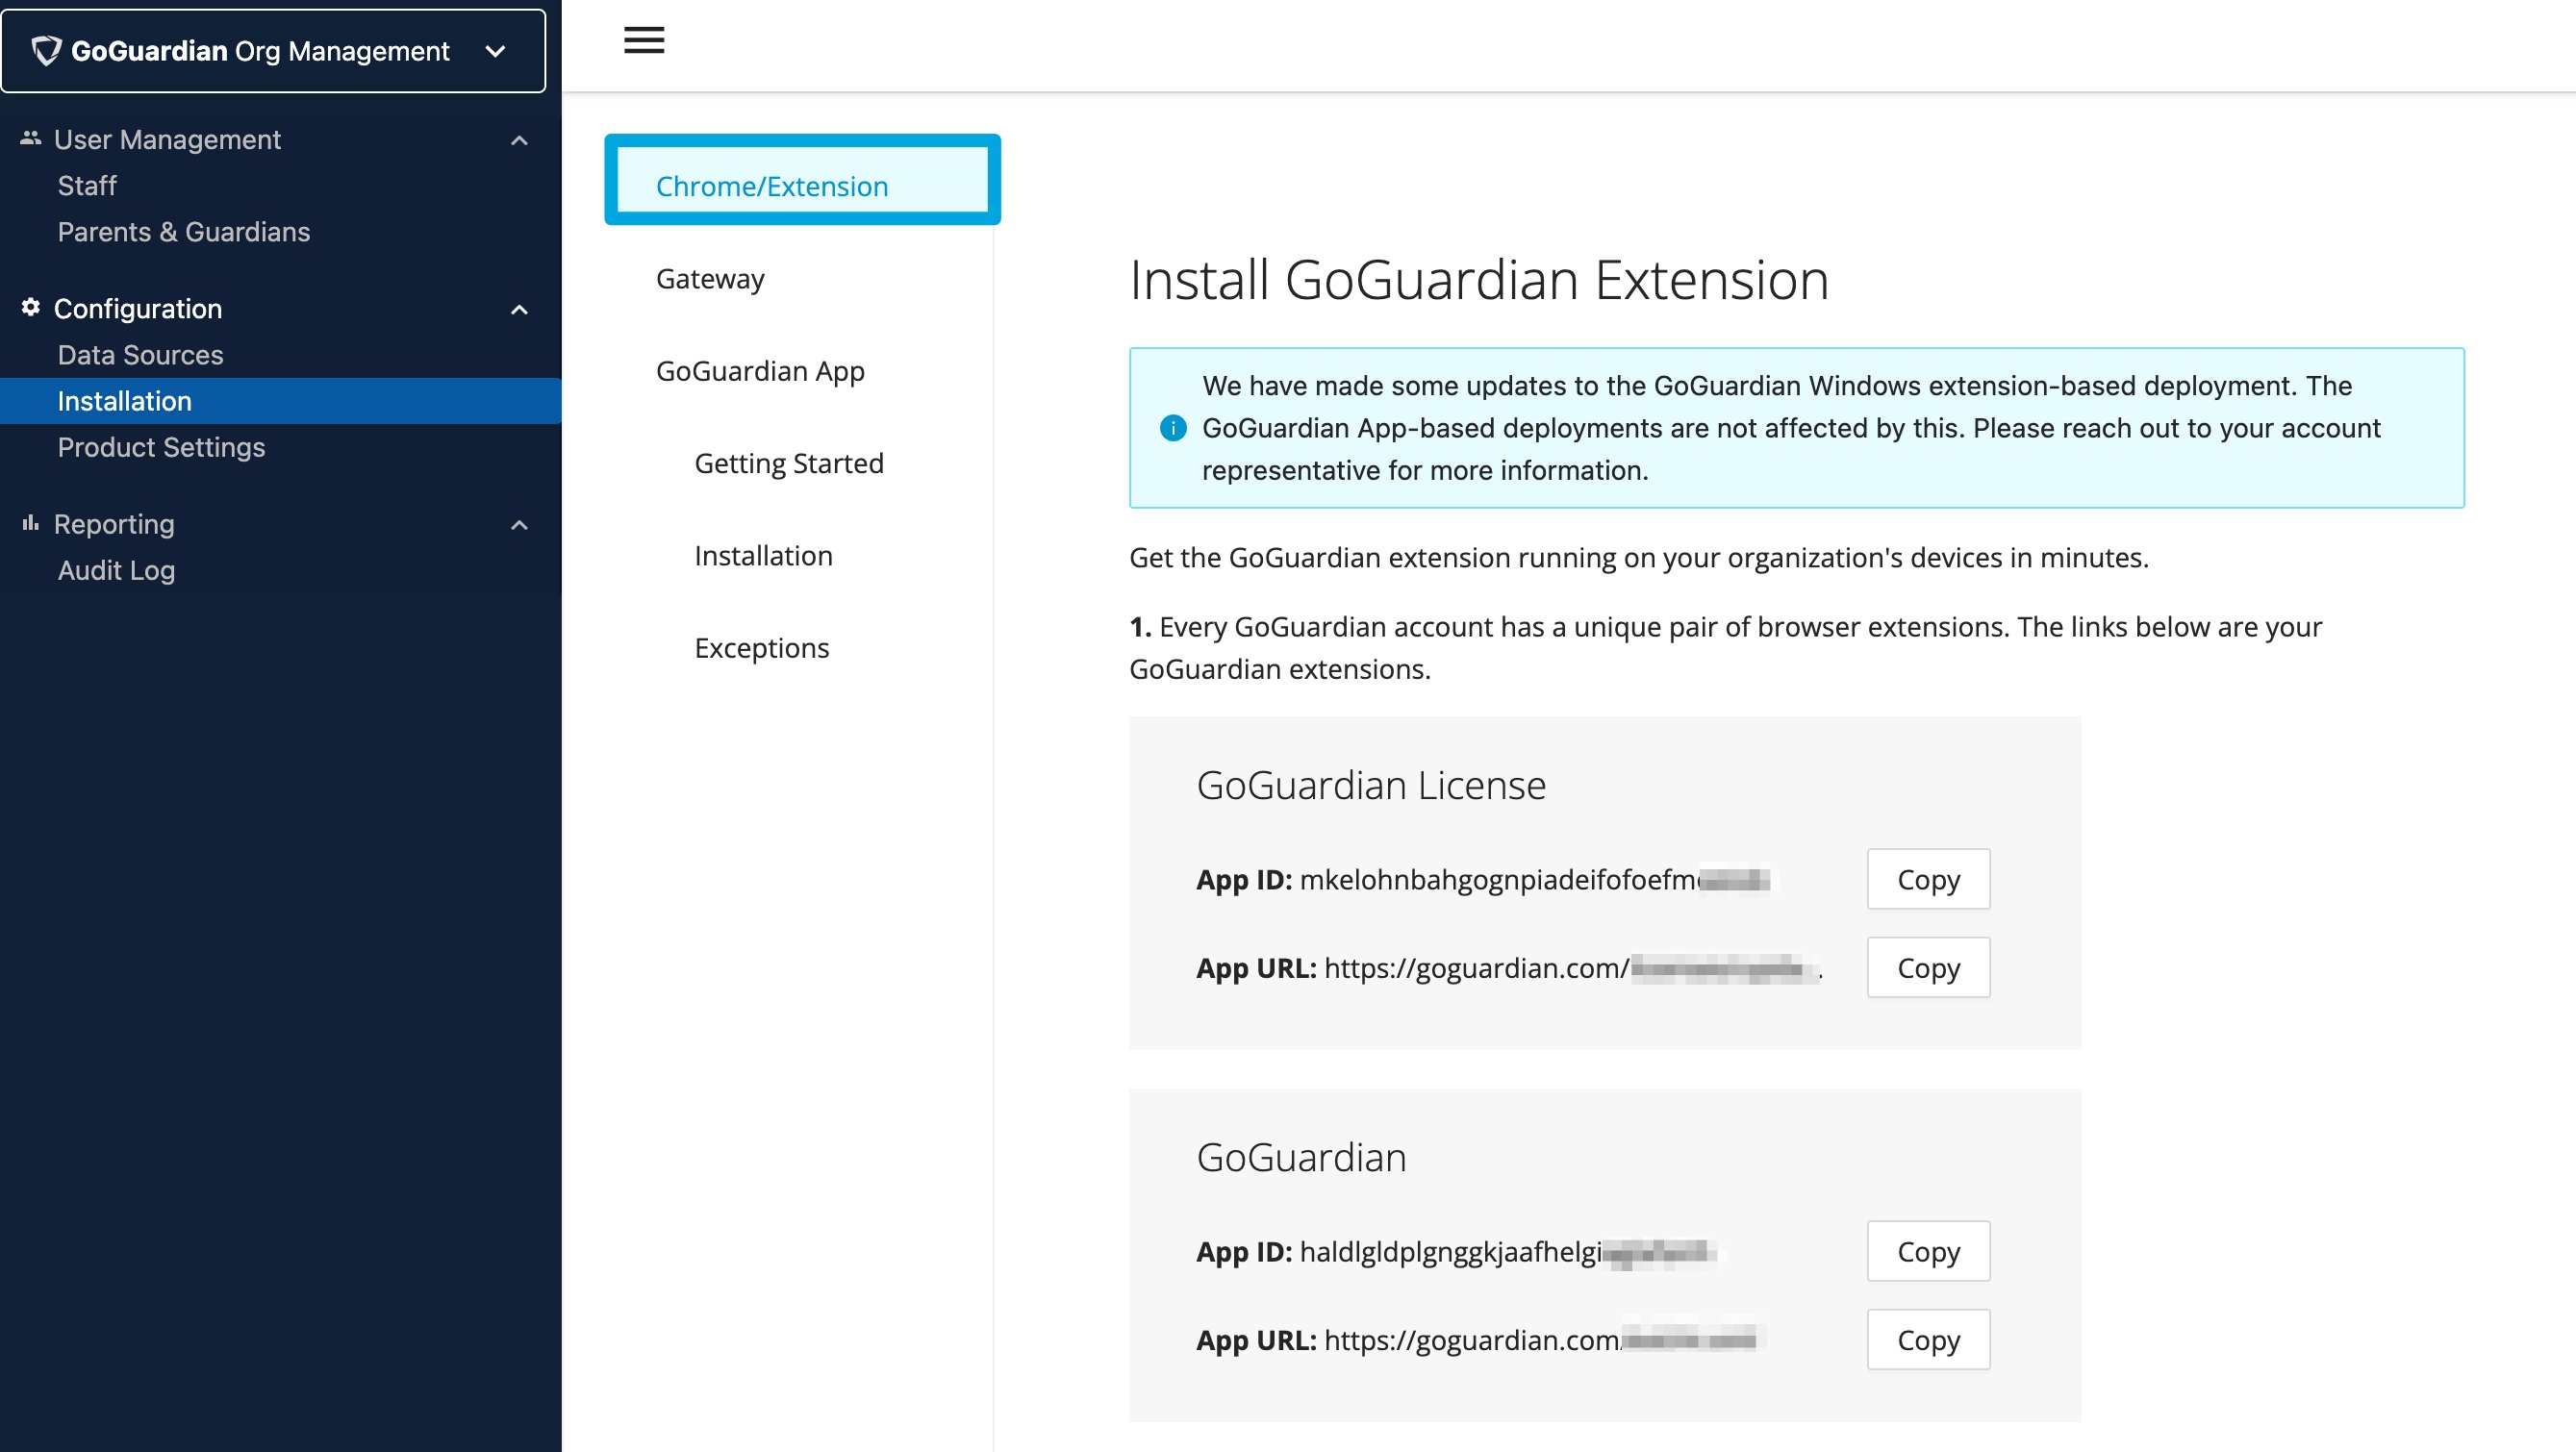
Force-Install the Extensions
- Using your Google Admin credentials, sign in to admin.google.com.
- In the left panel, click Devices → Chrome → Apps & extensions → Users & browsers.
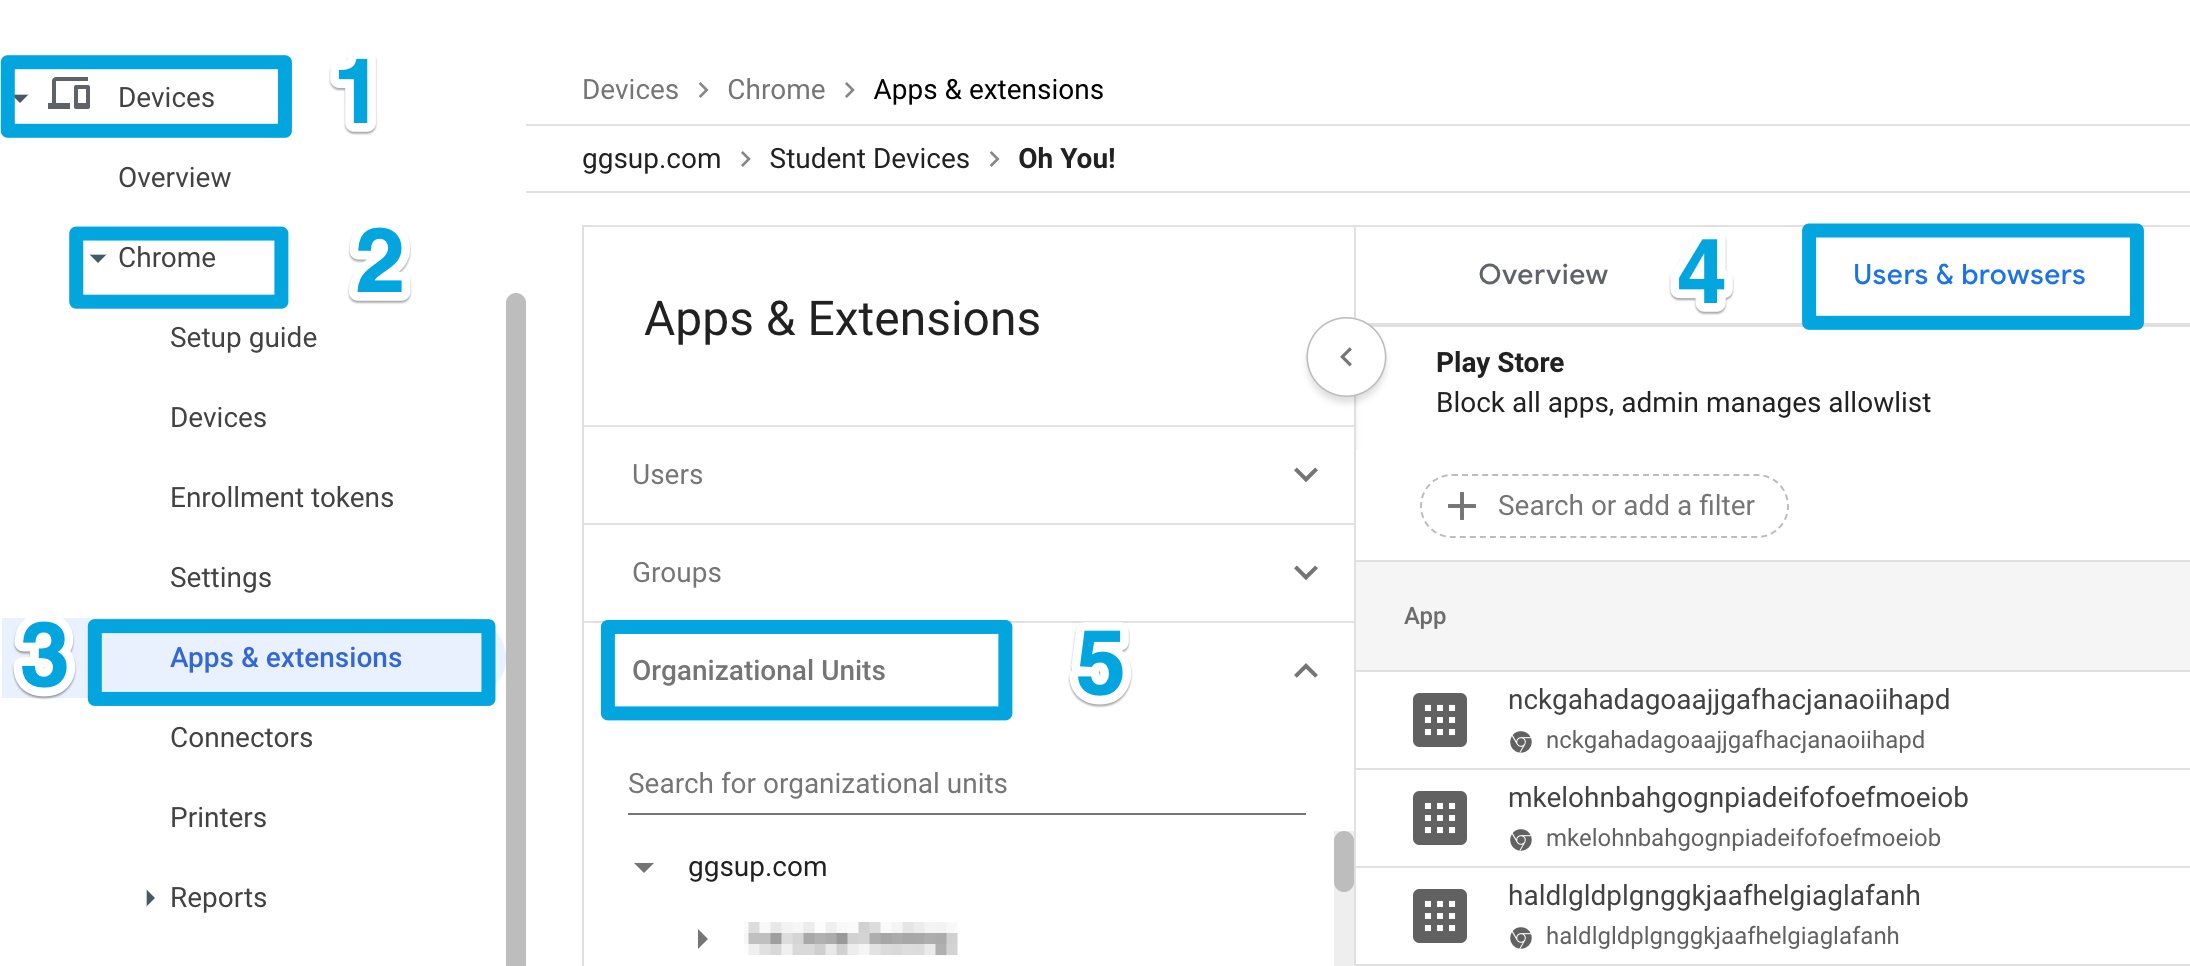
- Select the organizational unit or units that contain the student accounts you intend to filter and review.
- To filter all users in the organization, including teachers and staff, select the domain-level (top-level) OU. Sub-OUs inherit extensions from their parent OU, but double-check each OU and sub-OU you intend to deploy to.
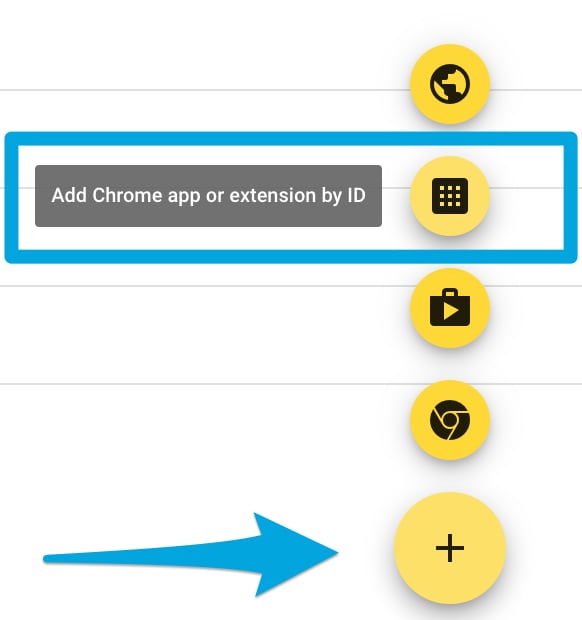
- Hover over the plus sign near the bottom corner of the screen.
- Click the waffle icon to add a Chrome app or extension by ID.
- Click the drop-down menu and select From a Custom URL.
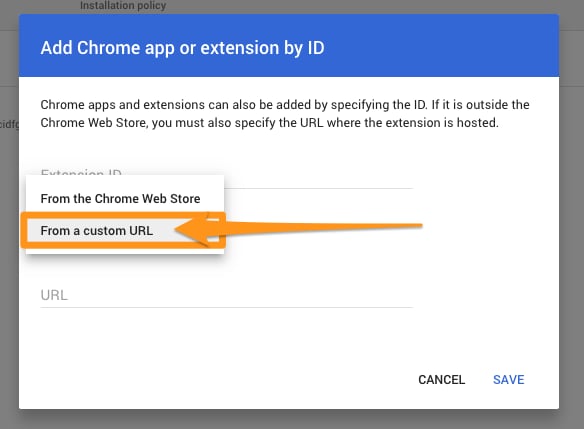
- Refer back to the Chrome extension install page in Org Management for the App IDs and URLs.
- Copy and paste the first App ID and URL pair into their fields, then click Save. Both extensions have unique installation URLs.
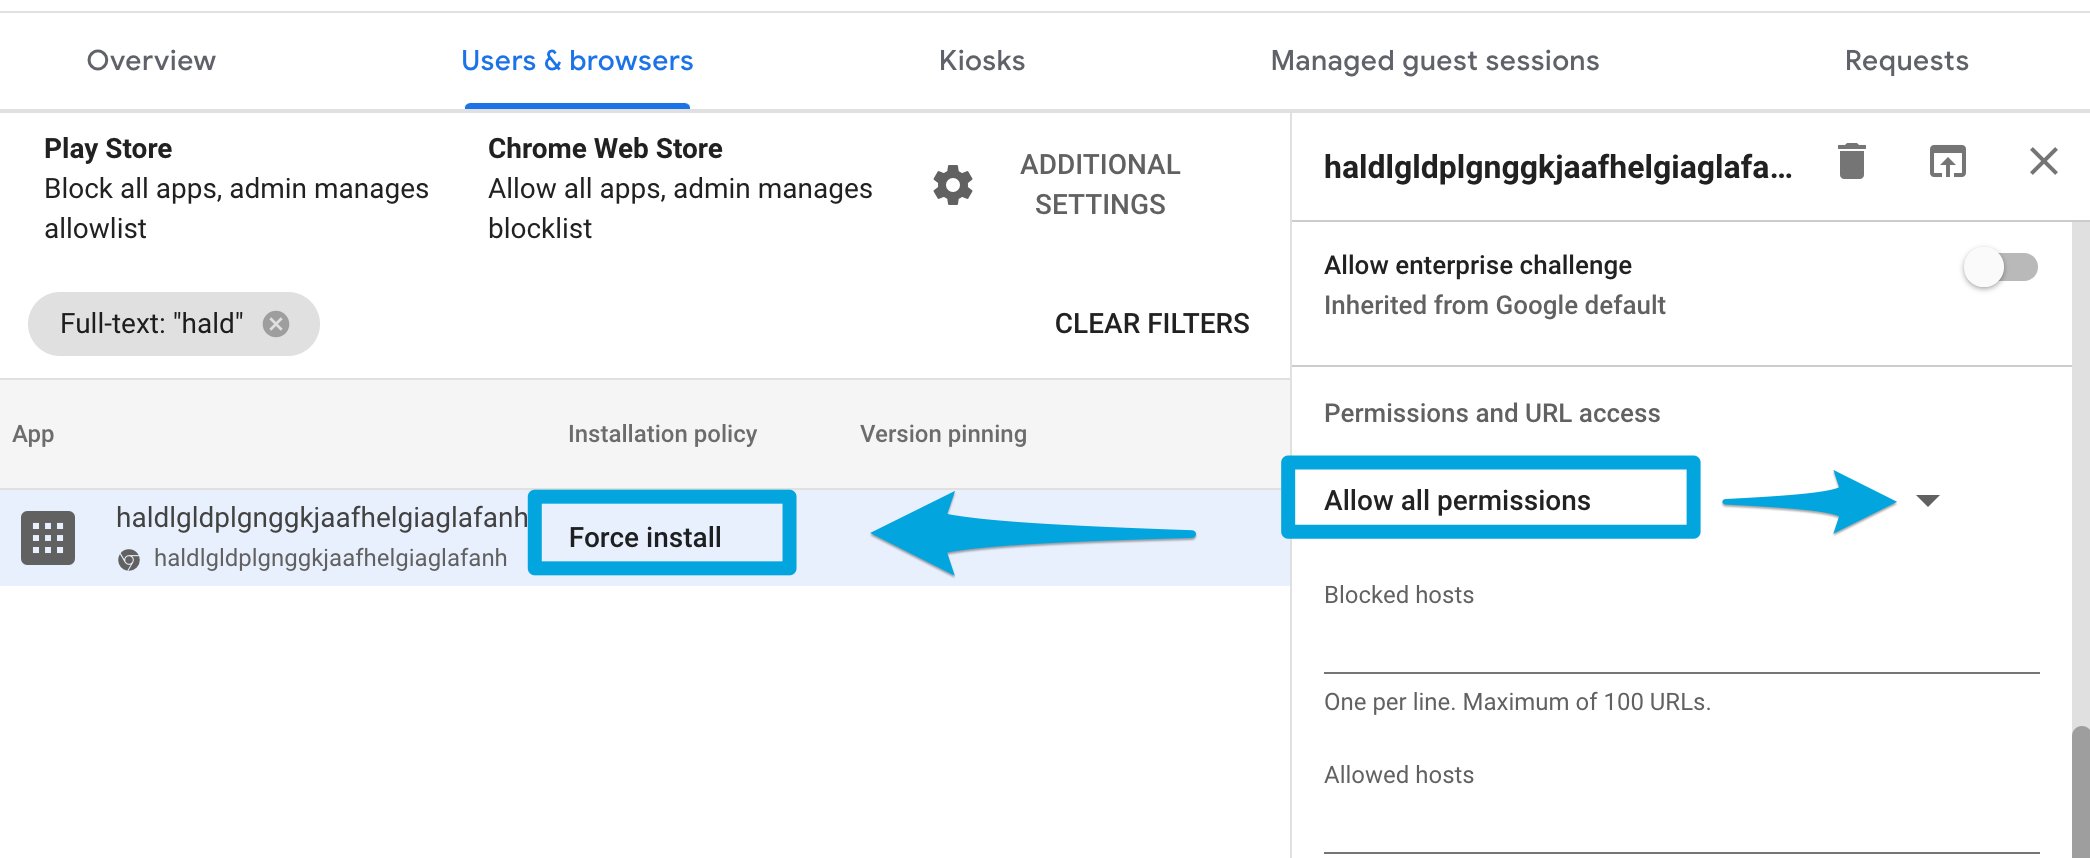
- In the following window, open the Installation policy drop-down and select Force install, then select Allow all permissions under Permissions and URL access.
Configure User and Browser Settings
User and browser settings control Chrome browser behavior and apply to signed-in managed accounts. From the Google Admin home screen, click Devices → Chrome → Settings → Users & browsers, select the OU that contains the user accounts you are deploying to, and configure the following policies. Use the Find tool (Command+F on Mac, Ctrl+F on Windows) to locate policies quickly.Configure Required Policies

Configure Recommended Policies
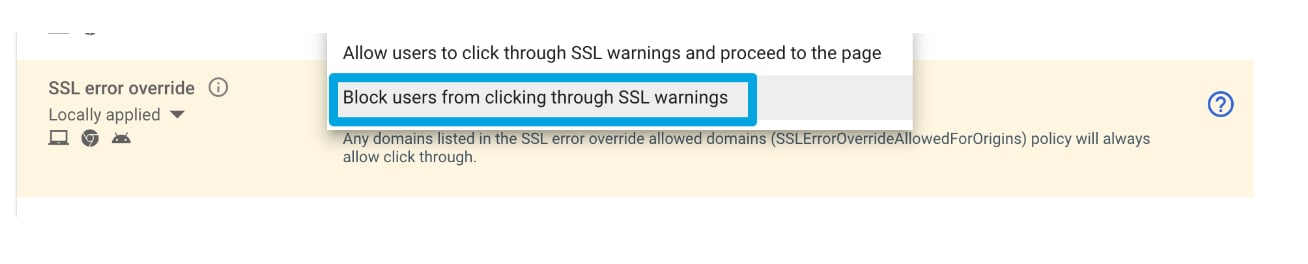
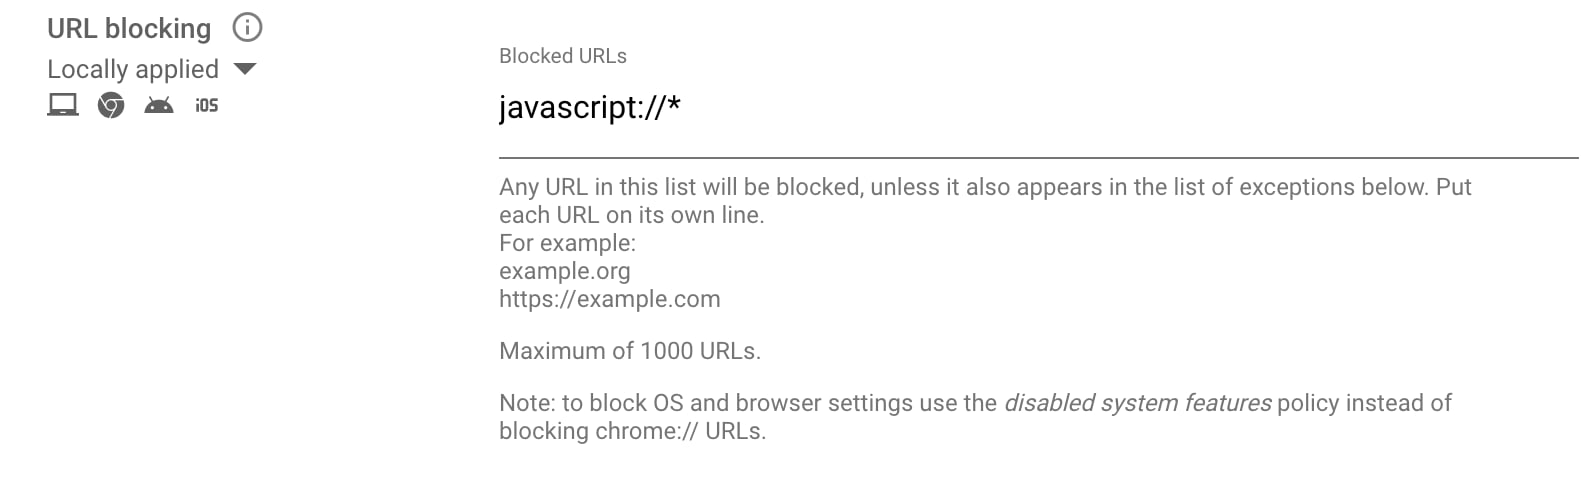

Review Optional Policies
Configure App Settings
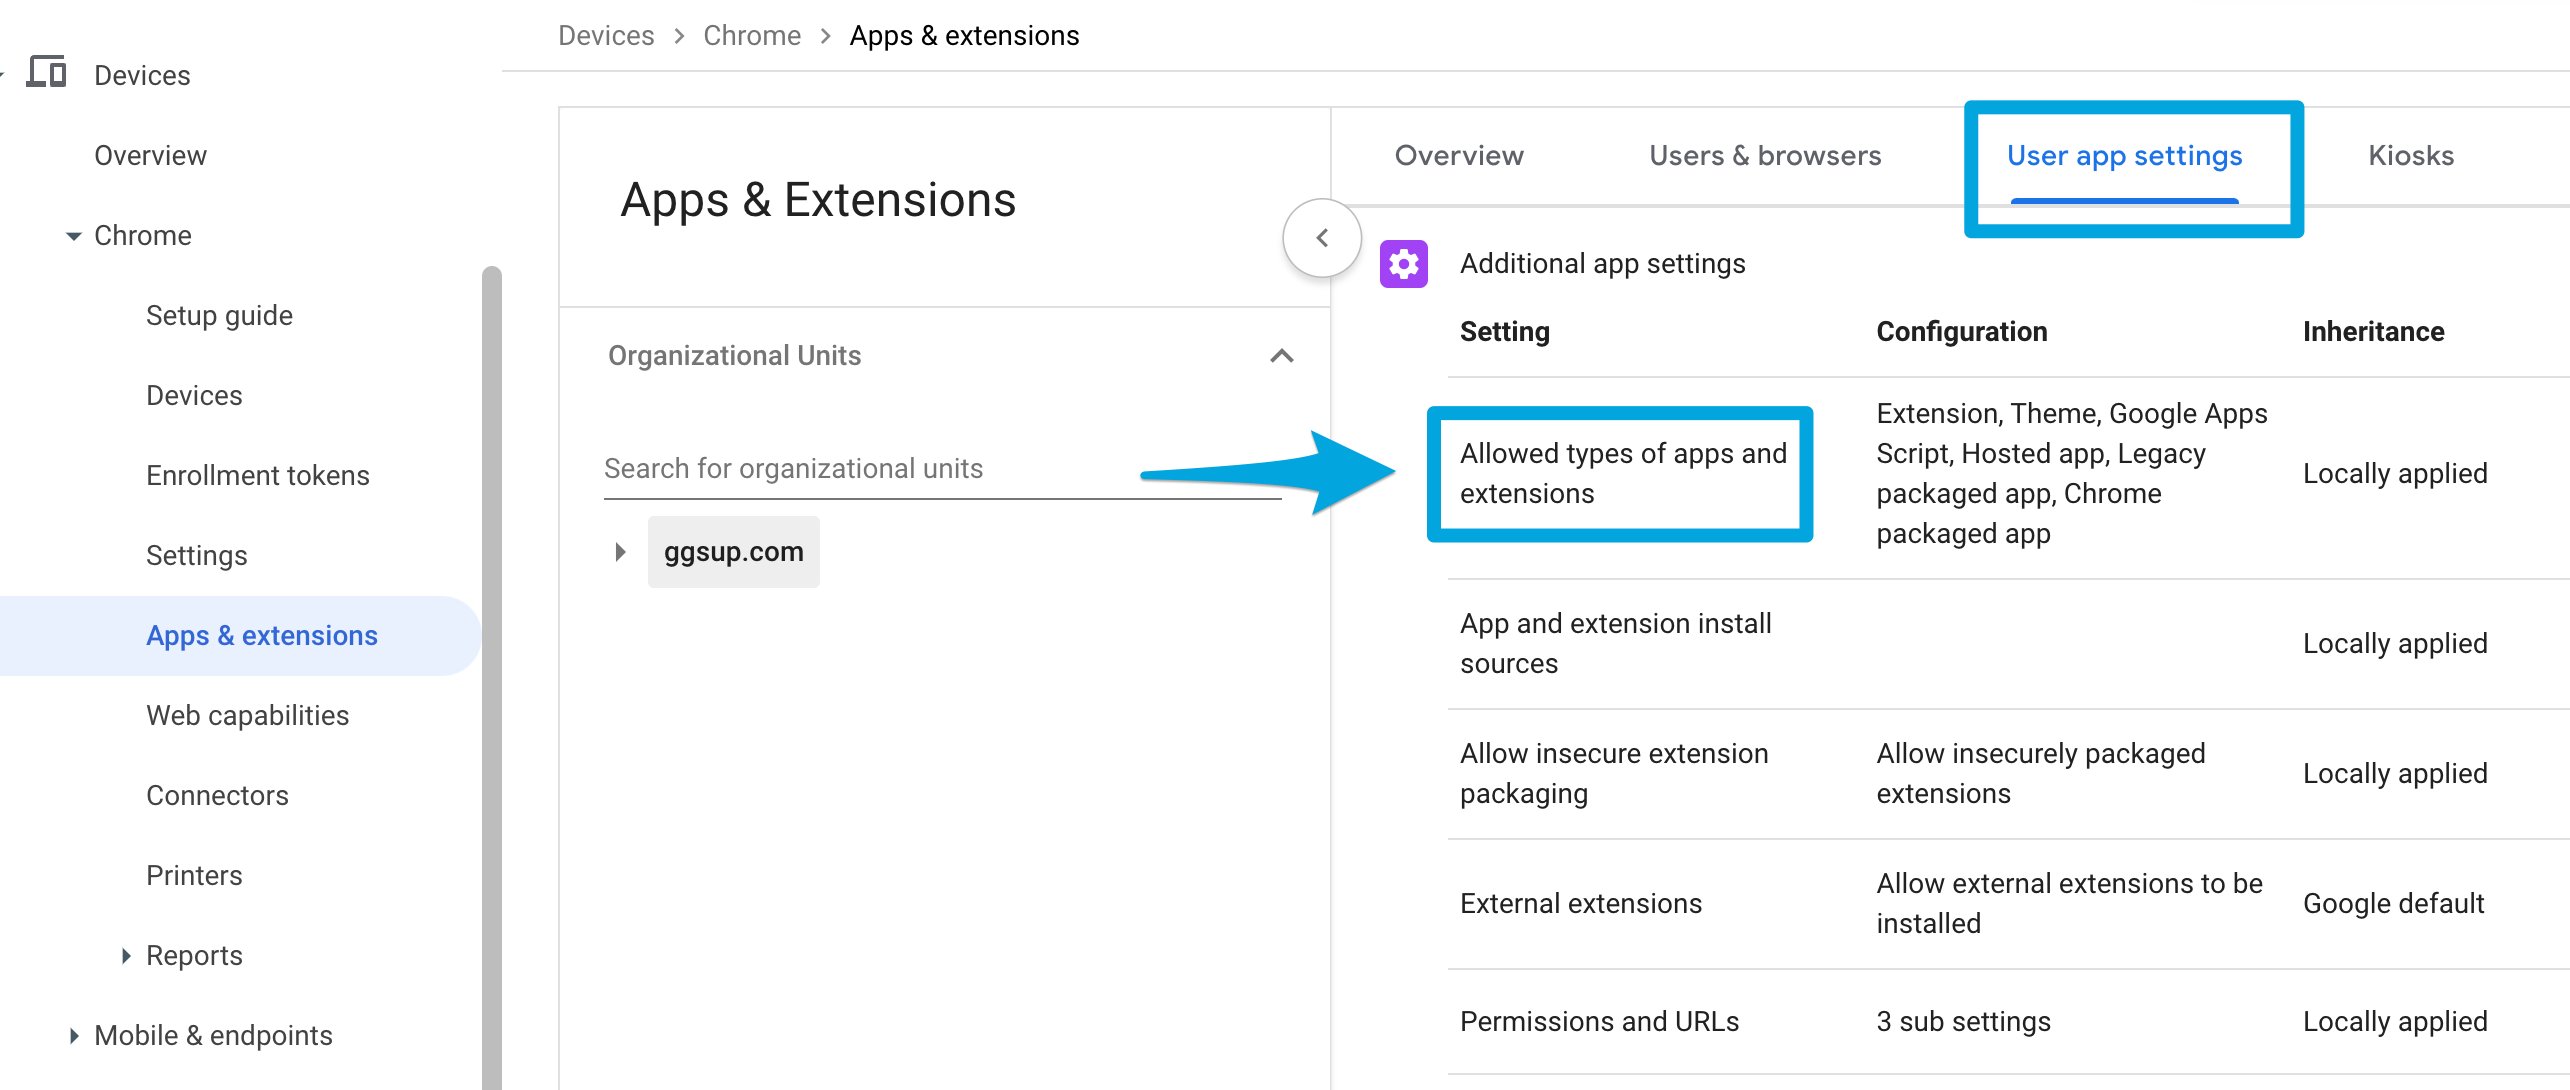
From the Google Admin Console home screen, go to Devices → Chrome → Apps & extensions → User app settings.-
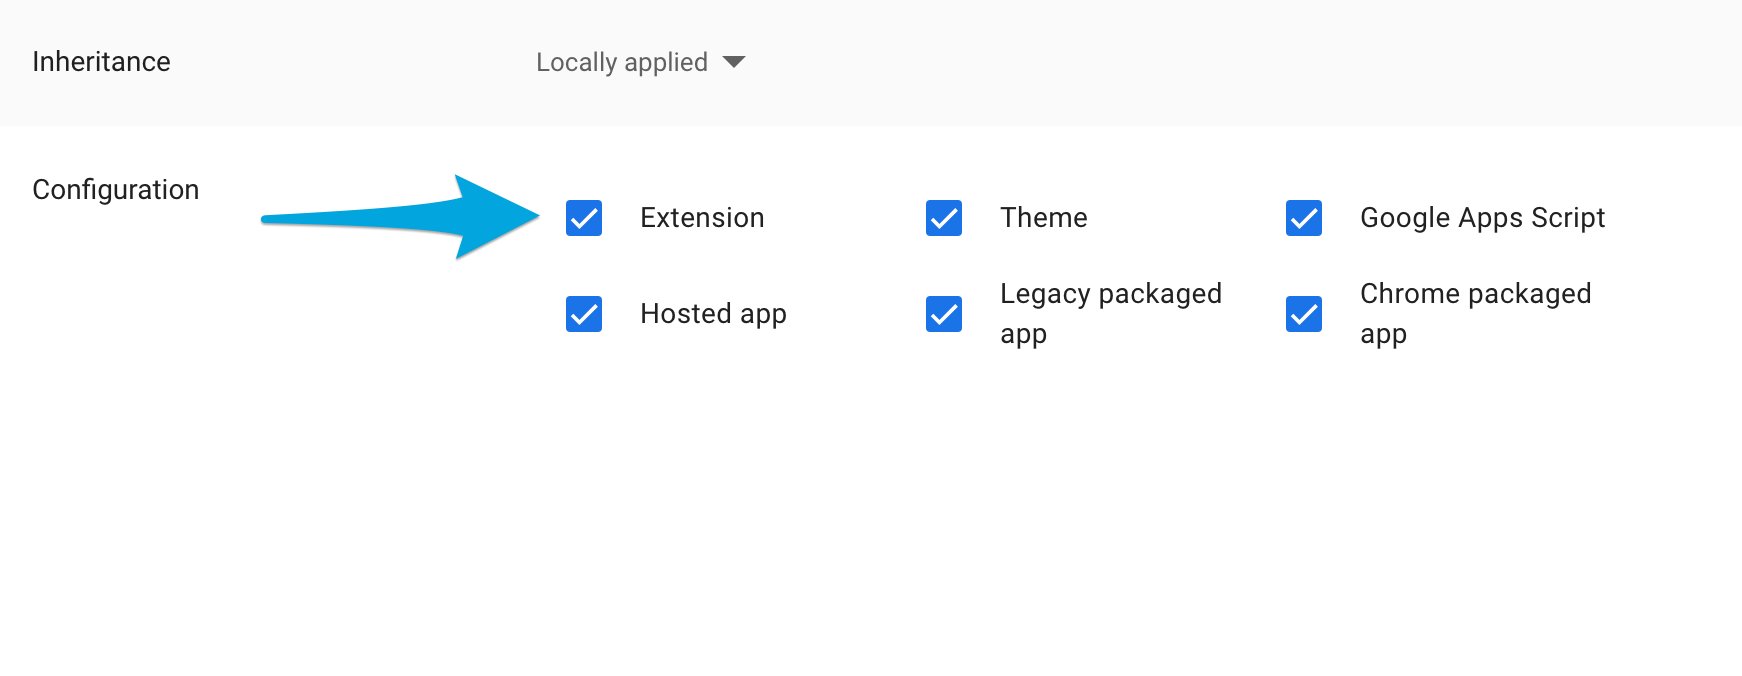
Allowed types of apps and extensions (Required): the Extension type must be checked. Unchecking a type prevents that type from being installed by admins or users.
-
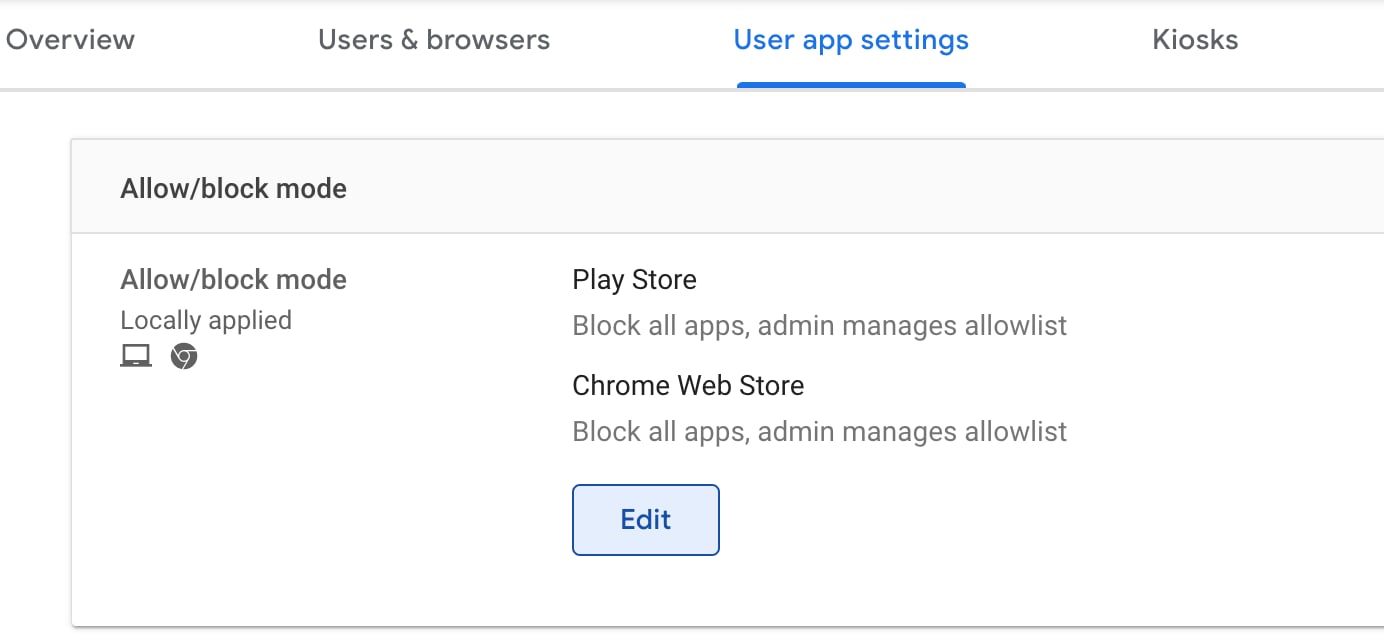
Allow/block mode (Recommended): Block all apps; admin manages allowlist for both the Play Store and Chrome Web Store. Some third-party apps and extensions can bypass GoGuardian if they contain a built-in browser that is not Chrome or Edge, or that does not require sign-in. Block all other apps and extensions and manage an approved list on the Apps & Extensions → Overview page.
-
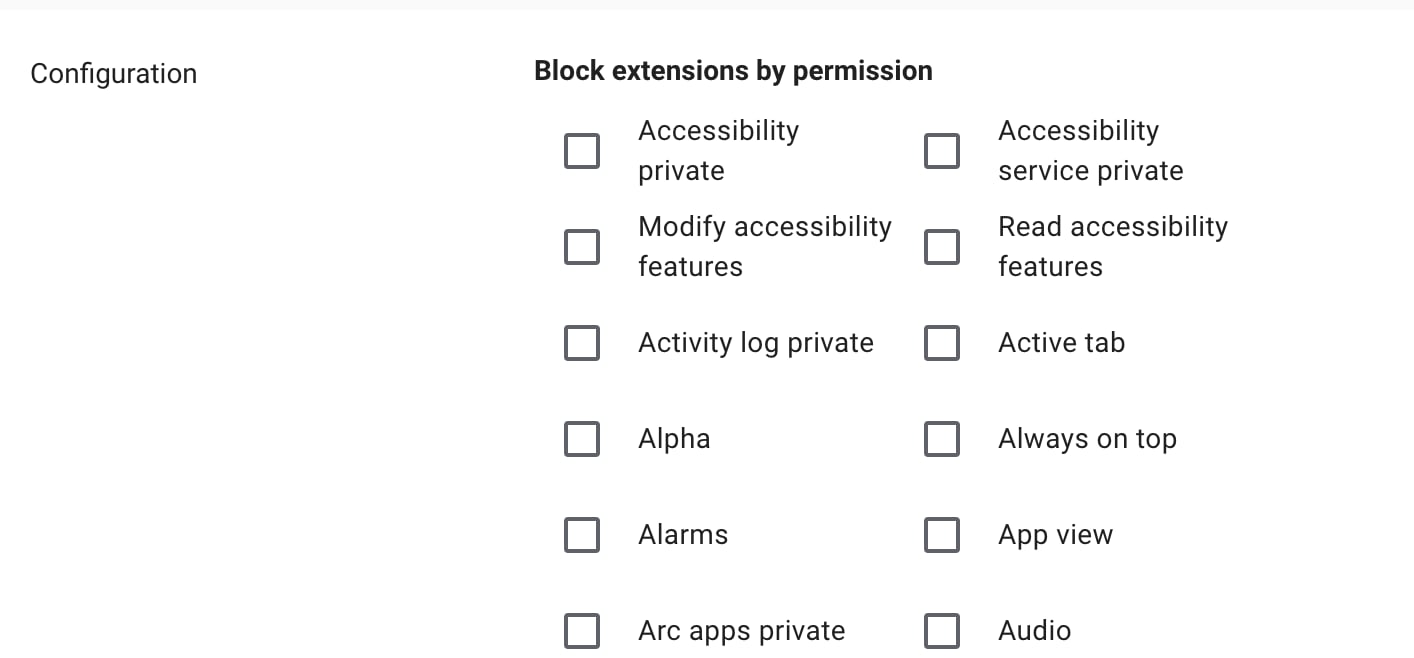
Permissions and URLs (Required): confirm that these permissions are not blocked:
- Alarms
- Detect idle
- Notifications
- Memory metadata
- Identity
- Storage
- Web requests
- Geolocation
- CPU metadata
- Native messaging
- Block web requests
Configure Device Settings
From the Google Admin home screen, click Devices → Chrome → Settings → Device settings, select the OU that contains your Chromebooks, and configure the following.
For Sign-in Restrictions, add your district’s domain and subdomains preceded by a wildcard, separating multiple entries with commas — for example:
*@goguardian.com, *@students.goguardian.com, *@teachers.goguardian.com.
If your campus has a restrictive firewall or additional content filter, you may need to open connections to GoGuardian services. Refer to GoGuardian’s firewall and additional content-filter allowlist guidance.
Import Your OU Structure
Importing organizational units maps students to an assigned OU in GoGuardian. OUs are used for two purposes: Teacher and admin permissions. Super Users can grant all OU access or limit a user’s OU permissions to control which student data that user can access. For GoGuardian Admin, Admin OU access controls which student data an admin can see and which filtering policies an admin can edit. GoGuardian features. For GoGuardian Admin filtering, policies are applied to imported OUs to filter students granularly by org unit. For Smart Alerts, OUs configure Smart Alert Triggers, such as notifying and assigning school admins by the trigger’s OUs. For GoGuardian Beacon, OUs create Beacon Deployments that can be customized with alert settings, school hours, parent notifications, and school counselors.Import or Sync OUs
Set up the initial OU import and OU source on the Data Sources → OU Settings page in Org Management. Only one OU source can be selected at a time: Google Admin Console, Clever, ClassLink, Active Directory, or OneRoster.- Sign in to Org Management.
- Open Data Sources → OU Settings.
- Click Configure next to Google Admin Console (GAC).
- Authorize the sync, select each OU to import (not just new OUs), and complete the import.
- Verify the result: The selected OUs appear in GoGuardian Org Management.
Automatic vs. Force Sync
Once imported, GoGuardian syncs the OU source each night and updates users’ assigned OUs when they move between existing OUs. If new OUs are created, or existing OUs are renamed or reorganized, re-import the OU structure manually to add the new OUs.Verify Extension Deployment
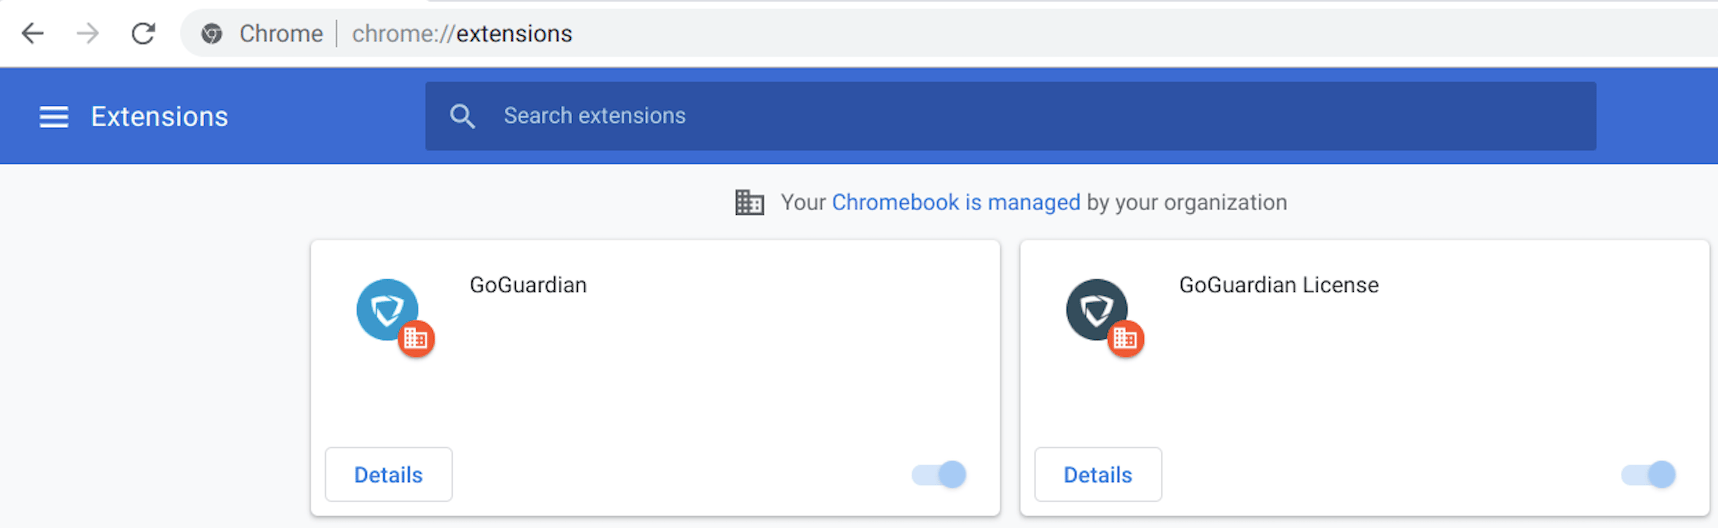
For GoGuardian products to work, both the GoGuardian and GoGuardian License extensions must be installed for each user you intend to filter and review. GoGuardian recommends creating a test account, such asteststudent@schooldistrict.org, in the same OU as your students.
- Sign in to a test or student account that belongs to the OU the extensions were deployed to. If available, you can also check a student’s device.
- In Google Chrome, go to
chrome://extensions. - Verify that both the GoGuardian and GoGuardian License extensions are present and enabled.