

Switch to a Free Plan
Switching to the Free plan cancels your Premium subscription. You keep access to all presentations you have already created, including custom Drawing and Draggable slides. Premium features — such as the Teacher Dashboard, Teacher Feedback, and creating new custom Drawing and Draggable slides — are no longer available after the switch.- Go to app.peardeck.com/home/my-account.
- Select the Billing tab.
- Select the option to switch to the Free plan.
- Verify the result: Your account now shows the Free plan. You retain access to all previously created presentations, but Premium features are no longer available.
If your Premium access is part of a school-wide subscription, contact your subscription manager to be removed from the subscription. You cannot switch to Free independently while enrolled in a group plan.
Transfer Files to a New Account
If you are switching schools or districts, or you want to use Pear Deck with a different Google or Microsoft Office 365 account, you can move your Pear Deck files to the new account. Your account data, including the presentations you make and the responses you collect in sessions, is stored in the Google or Microsoft Office 365 account you use to sign in to Pear Deck.Pear Deck cannot transfer your account data for you, but you can transfer your decks, Vocabulary Lists, Takeaways, and Exported Spreadsheets from one account to another. Sessions data cannot be directly shared or transferred to a new account.
Transfer Files to a New Google Account
To transfer a file such as a deck, share it from one Google Drive account to another, then make a copy of the file in your new account so you own it. The original may be deleted when the first account is closed.- Share each presentation to your new account. Pear Decks made with a Google account are Google Drive files that you can share like any other Drive file:
- Go to Google Drive, Docs, Sheets, or Slides.
- Select the file you want to share.
- Click Share.
- Under People, add the account you want to share the file with. You can even share the file to a personal Google account if you need somewhere to store it between school accounts. You must share to a Google-based account.
- Adjust the sharing permissions if you want, though it is not necessary here because you make a separate copy of the file anyway.
- Make a copy of the presentation in your new account so you have a copy that cannot be deleted from the source account:
- Go to Google Drive, Docs, Sheets, or Slides.
- Right-click the file you want to copy, or click File if the file is open in an editor.
- Click Make a Copy.
Transfer Files to a New Microsoft Office 365 Account
- Download a copy of your PowerPoint presentation:
- Open OneDrive.
- Go to My Files.
- Select your file.
- Click Download.
- Sign in to your new Microsoft Office 365 account and open OneDrive.
- Click + Add New > Files Upload.
- Select the file you want to upload and click Open.
Switch between Google and Microsoft Office 365 Accounts
If you want to switch from a Google account sign-in to a Microsoft Office 365 account sign-in, or the reverse, transfer your files with these steps.- Download a copy of your deck to your computer as a PowerPoint file (.pptx), regardless of account type:
- From Google Slides, select File > Download > Microsoft PowerPoint (.pptx).
- From PowerPoint Online, select File > Save As > Download a Copy.
- Sign in to your new account.
- Upload the copy of the presentation:
- In OneDrive, select + Add New > Files Upload.
- In Google Drive, click New > File upload.
- Open the Pear Deck sidebar.
- Re-add the interactive questions to your slides in the Ask Students a Question section of the Pear Deck sidebar. Interactive Pear Deck components cannot be transferred between Google and PowerPoint, so you need to re-add them when you switch sign-in types. Everything on the main body of the slide stays the same in the transfer.
Transfer Payments to a New Account
If you pay for Pear Deck Premium and want to switch your payments from one Pear Deck account to another, email finance@peardeck.com for help.Disconnect Pear Deck from Google Drive
Disconnecting Pear Deck from Google Drive revokes its access to your Drive files and prevents you from presenting interactive Pear Deck sessions.If your Google administrator installed Pear Deck for your organization, you do not have permission to disconnect it yourself. Contact your Google administrator for help.
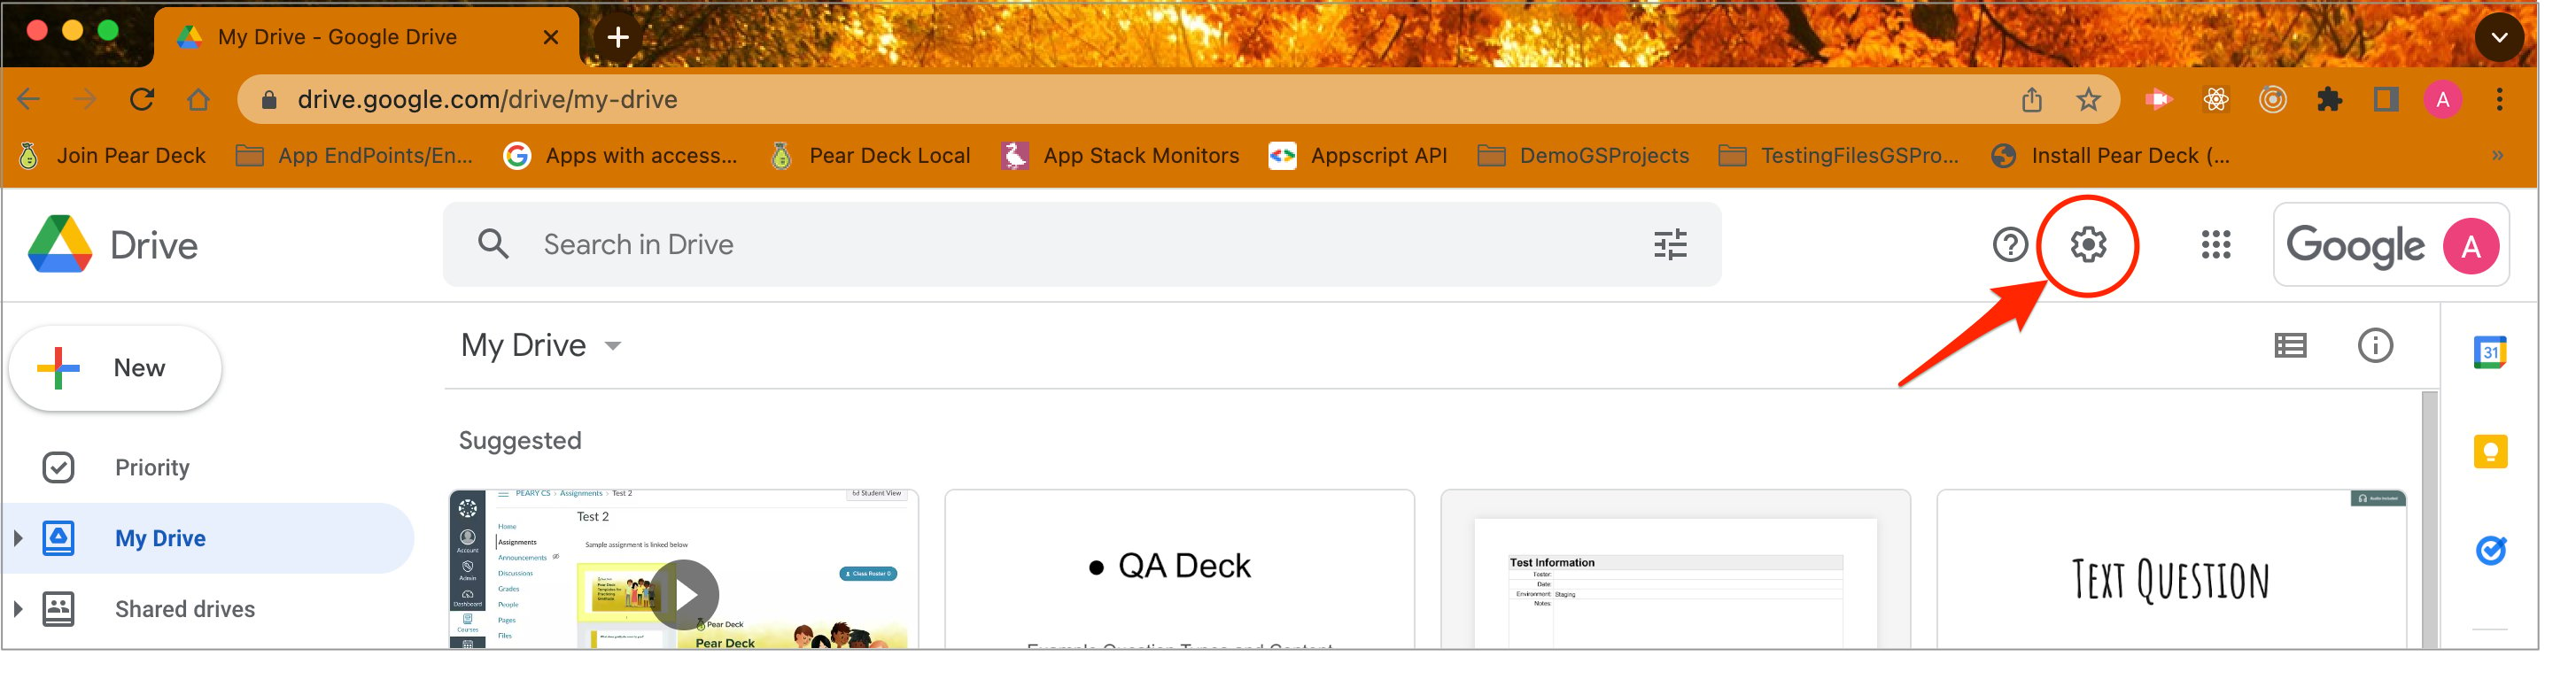
- Open Google Drive and click the Settings gear icon near the top right.
- Select Manage apps.
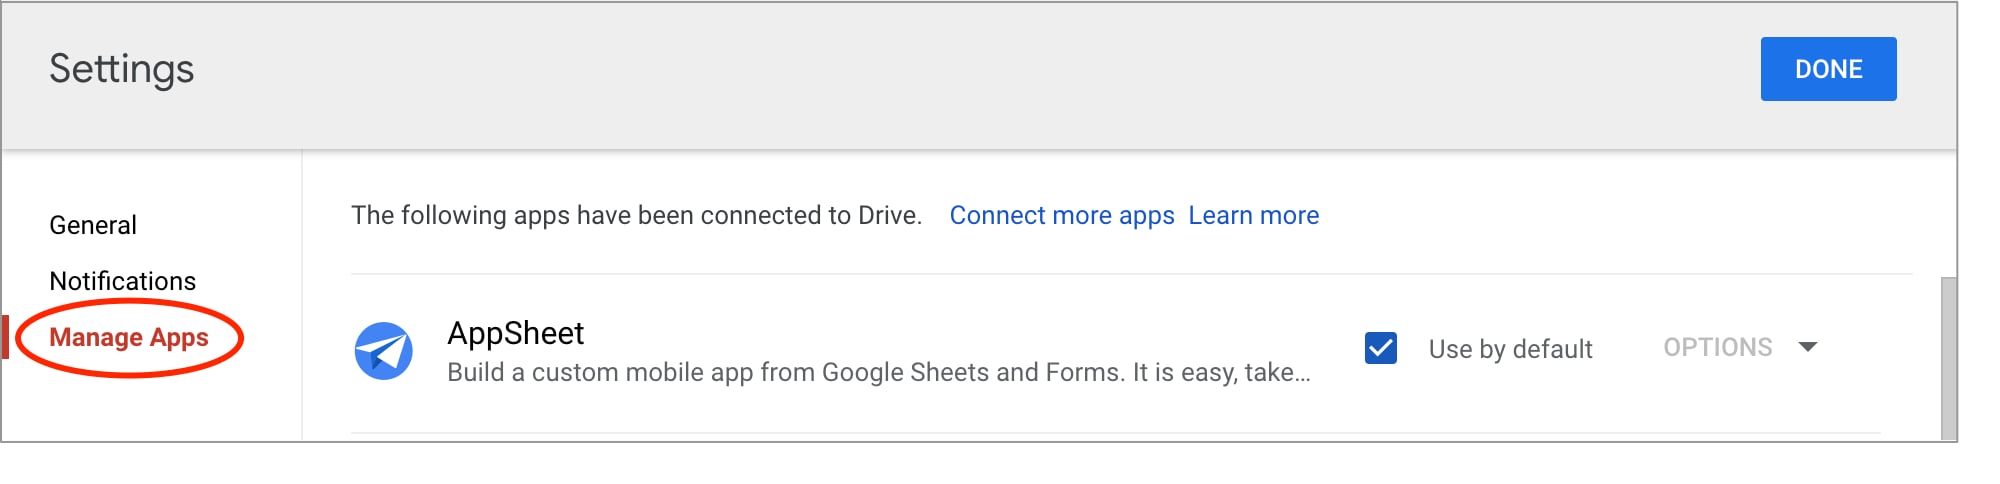
- Scroll to find Pear Deck in the list of connected apps.
- Click Options next to Pear Deck.
- Select Disconnect from Drive.
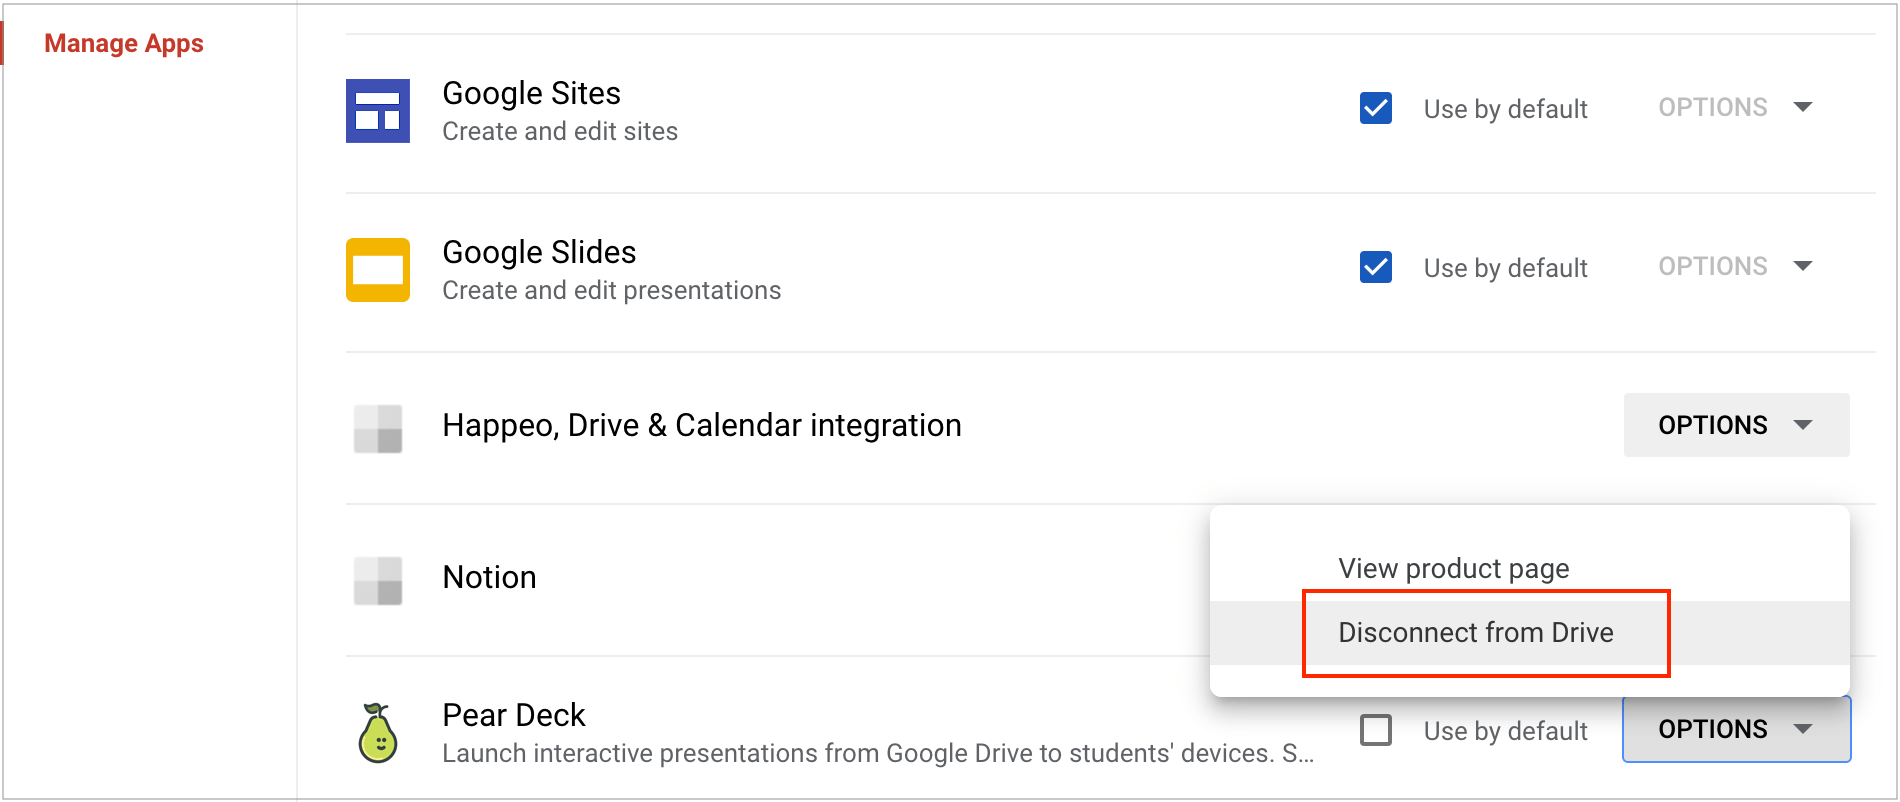
- Verify the result: Pear Deck no longer appears in your connected apps list and cannot access your Google Drive files.
Disconnect Pear Deck from PowerPoint Online
Disconnecting Pear Deck from PowerPoint Online removes the add-in and revokes its access to your PowerPoint files.If your Microsoft Office administrator installed the Pear Deck add-in for your organization, contact that administrator to remove it.
- Open any presentation in PowerPoint Online.
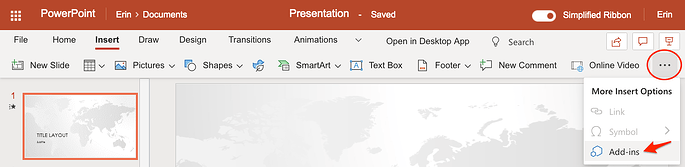
- Click the Insert tab.
- Click the More Options (three-dots) button and select Add-ins.
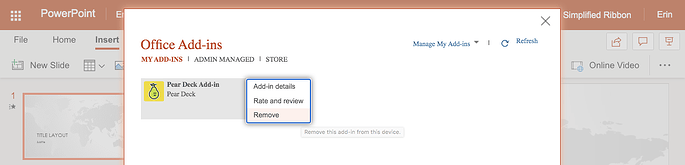
- In the Office Add-ins window, find Pear Deck and click the More Options (three-dots) button next to it.
- Select Remove.
- Verify the result: Pear Deck no longer appears in your PowerPoint Online add-ins and cannot access your files.
Resources
Manage School Subscription
Add, remove, or transfer teachers on a school-wide Pear Deck Premium subscription.
Get Started with Pear Deck Slides
Review account setup, session basics, and how to build your first interactive lesson.